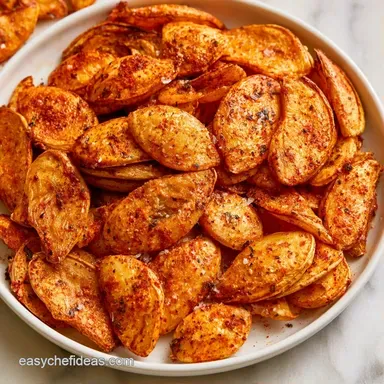
Ultra-Crispy Roasted Winter Squash Seeds

- Time: 5 min active + 20 min roasting + 15 min drying
- Flavor/Texture Hook: Nutty, smoked, and mahogany crisp
- Perfect for: Zero waste snacking and plant based protein
Crispy Roasted Winter Squash Seeds
That smell is the first thing that hits you. It's a deep, toasted nuttiness that fills the kitchen and makes you realize why tossing those seeds was a mistake for so many years. There's nothing quite like the sound of a perfectly roasted seed cracking between your teeth.
Most people end up with a soggy mess that sticks to the roof of your mouth. They just toss the seeds in oil and hope for the best, but they forget that winter squash is basically a sponge for moisture.
This method fixes that. We're going to get these Roasted Winter Squash Seeds completely dry so the oil can actually sear them. You'll get a snack that's plant based, wholesome, and honestly way better than anything you'd buy in a plastic bag at the store.
Why Most Recipes Get This Wrong
Many guides skip the drying phase entirely. When wet seeds hit the oven, they create a cloud of steam that keeps the seed rubbery and prevents that gold brown color.
Surface Moisture: Water blocks oil from adhering, so drying the seeds allows the seasoning to stick and the edges to crisp. Low Heat: 300°F prevents the thin edges of the seeds from burning before the center is toasted through.
Quick Recipe Specs
Since we're aiming for a specific crunch, the timeline is a bit different than a standard roast. You can't rush the drying part, or you'll be back to square one with soggy seeds.
Right then, here is the flow: you spend 5 minutes cleaning and prepping, 15 minutes letting them air dry, and 20 minutes in the oven. Trust me on the drying time. If you see even a hint of dampness on the towel, give them another five minutes.
It's the difference between a snack and a chore.
The Building Blocks
The goal here is a balance of savory and smoky. We want the seeds to taste rich, not just salty.
- Extra Virgin Olive Oil
- This provides the fat needed for the heat to penetrate the seed. You could use avocado oil if you want a more neutral taste.
- Smoked Paprika
- This gives the seeds that deep mahogany color and a hint of wood fire flavor.
- Garlic Powder
- It adds an umami depth that makes the seeds feel like a gourmet snack.
- Sea Salt
- Essential for bringing out the natural sweetness of the squash seed.
Equipment Needed
Standard kitchen tools will do. I typically use a simple colander for rinsing and a medium bowl for tossing.
The most critical item is the baking sheet, which I always line with parchment paper. Without the liner, the paprika can stick to the metal and scorch, creating bitter black spots. I also suggest using a clean kitchen towel for drying, as paper towels can leave small fragments of lint on the seeds.
Key Steps
For a Clean Start
Place the seeds in a colander and rinse under cold water, scrubbing gently to clear away all stringy pulp. Transfer them to a clean kitchen towel and pat dry. Note: Allow them to air dry for at least 15 minutes to ensure all surface moisture has evaporated.
For Maximum Flavor
Using a medium mixing bowl, toss the dried seeds with olive oil until well coated. Stir in the salt, garlic powder, smoked paprika, and black pepper, tossing again to ensure the seasoning is evenly distributed.
For the Perfect Crunch
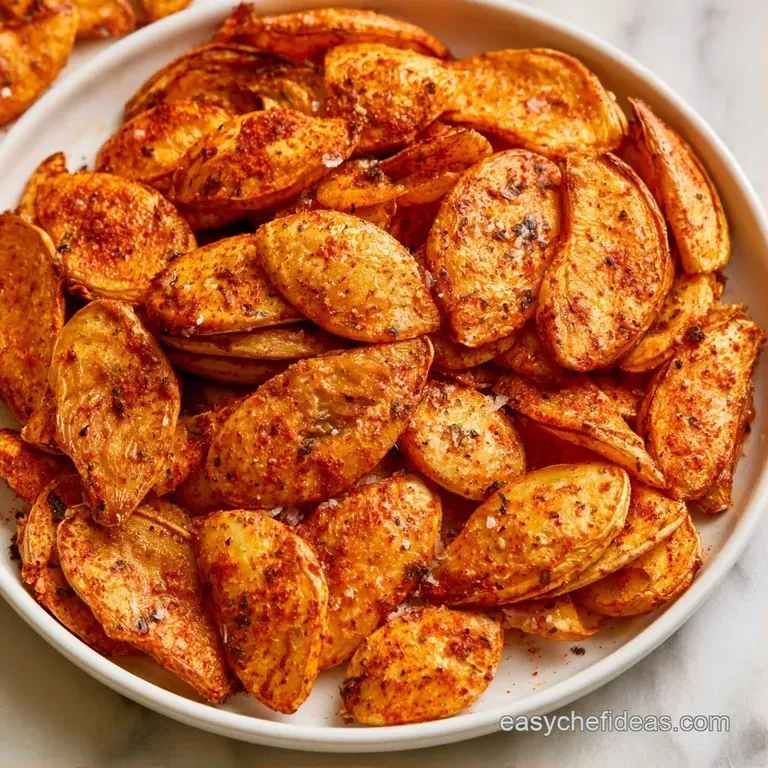
Preheat the oven to 300°F (150°C). Distribute the seeds evenly across a baking sheet lined with parchment. Roast for 20 minutes, stirring once halfway through, until they reach a mahogany color and smell nutty.
Remove from the oven and let them cool entirely on the pan to allow the crust to set.
How to Fix Common Problems
When you first try roasting winter squash seeds, you might encounter a few common issues. Most of the time, the problem is simply that the pan is too crowded.
Seeds Stay Soggy
This occurs when seeds overlap too much. Steam gets trapped in the gaps, which prevents the oil from crisping the outer shell. Spread them further apart on the tray and add 5 minutes to the roasting time.
Burnt Edges
If the tips are charred but the center remains soft, your oven is likely running too hot. Drop the temperature to 275°F (135°C) and roast for a few additional minutes.
Seasoning Clumping
If the spices are sticking in clusters, the seeds weren't sufficiently oiled. This can't be fixed once they are roasting, so ensure every seed is glistening before you stir in the salt and paprika.
| Problem | Fix |
|---|---|
| Rubbery Texture | Dry seeds longer before oiling |
| Burnt Tips | Lower oven temp by 25°F |
| Bland Taste | Toss with a pinch more salt after cooling |
Since you're using a home oven, it's useful to see how this approach compares to other techniques. I've tested both, and here is the breakdown.
| Feature | Oven Method | Stovetop Method |
|---|---|---|
| Texture | Consistent, shattering crunch | Prone to burning, uneven |
| Control | High (set and forget) | Low (constant stirring) |
| Volume | Ideal for large batches | Only works for small amounts |
If you want to customize the final flavor, use these shortcuts.
| Goal | What to change |
|---|---|
| Extra Heat | Add 1/4 tsp cayenne pepper |
| Sweet Salty | Add 1 tsp maple syrup |
| More Umami | Swap salt for soy sauce |
Freezing and Reheating Guide
Keep these in a sealed container or a glass jar. They should remain crunchy at room temperature for roughly a week. If your environment is particularly humid, store them in the refrigerator to maintain their texture.
To preserve them longer, store them in the freezer for as long as 3 months. Ensure they have cooled entirely before freezing; otherwise, condensation will make them soggy. To restore that original crunch, warm a small amount in a skillet over medium heat for 2 minutes.
In the spirit of zero waste, use the leftover squash. The flesh is wonderful when whipped into a Butternut Squash Pasta Sauce for a cozy meal.
Mix It Up
You can change the flavor profile based on what you're serving them. I love a spicy kick for movie nights, but a sweet version is great for salads.
For a sweet salty balance, skip the paprika and garlic. Use cinnamon and a tiny bit of brown sugar instead. These taste like the toppings for a Classic Pumpkin Pie but in snack form.
If you want a vegan friendly umami version, use nutritional yeast instead of salt. It adds a cheesy, nutty layer that pairs beautifully with the naturally earthy taste of the seeds.
Perfect Complements
These Roasted Winter Squash Seeds are basically the ultimate topper. I use them on everything from autumn salads to morning oatmeal.
They're especially good as a texture contrast in soups. If you're making my Roasted Tomato Soup, stir in a handful of these seeds right before serving. The crunch cuts through the richness of the soup and adds a hit of smokiness.
You can also toss them into a veggie filled stir fry or use them to crust a piece of tofu. They add a professional touch to a simple plate without any real effort.
Debunking Seed Myths
Some claim butternut squash seeds are too small to roast, but that's a myth. They simply cook more quickly than pumpkin seeds, so keep a close eye on them at the 15-minute mark.
Another misconception is that high heat is the best way to get a fast crunch. In truth, high heat scorches the thin skin while leaving the inside undercooked. A low and slow method is the only way to reach that uniform mahogany color.
Lastly, you don't actually need to soak seeds in saltwater for hours. While this can help remove pulp, a thorough scrub in a colander and proper air drying are all you need for a great outcome.
Now you're all set. Just remember: rinse, dry, oil, and roast. Your compost bin will be a bit lighter, and your snack game will be much stronger. Enjoy those Roasted Winter Squash Seeds!
Recipe FAQs
Can you roast squash seeds?
Yes, they make a nutritious, crunchy snack. They are an excellent plant based protein and pair beautifully with an autumnal spread, like our spiced pumpkin butter.
How to keep the seeds from getting soggy?
Pat them firmly with a clean kitchen towel. Let them air dry for at least 15 minutes to ensure surface moisture is gone before adding oil.
Is it true that you should soak squash seeds before roasting?
False. Adding extra moisture through soaking prevents the seeds from achieving a shattering snap and mahogany color.
What is the secret to a deep nutty flavor?
Roast at 300°F for 20 minutes. This lower temperature toasts the core of the seed without scorching the delicate outer edges.
Roasted Winter Squash Seeds