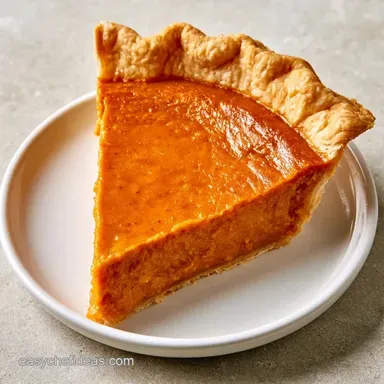
Classic Pumpkin Pie with Evaporated Milk
- Time: 20 min active + 4 hours chilling
- Flavor/Texture Hook: Spiced custard in a shattering, buttery crust
- Perfect for: Holiday dinner parties or autumn gatherings
The smell of cinnamon and nutmeg hitting a hot oven is the universal signal that autumn has arrived. For many of us, this dish isn't just dessert, it's a memory of crowded kitchens and family arguments over who gets the largest slice.
While early settlers likely started with simple pumpkin puddings, the modern version evolved into the custard style treat we recognize today.
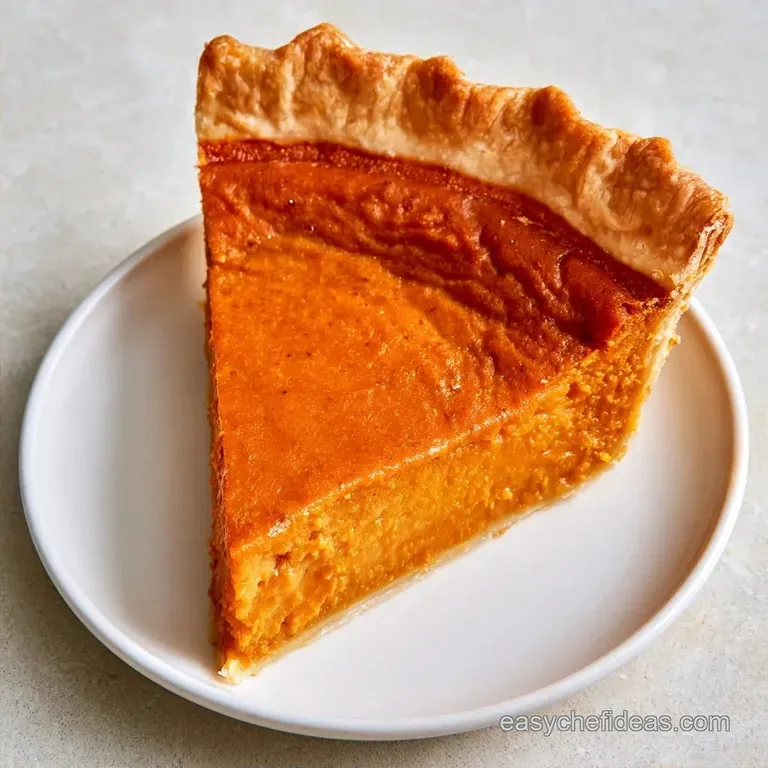
This Classic Pumpkin Pie captures that nostalgic feeling but focuses on a texture that actually holds up on a plate. You'll get a mahogany colored filling that feels dense yet smooth, nestled in a crust that snaps when you bite into it.
We're making a Classic Pumpkin Pie from scratch, meaning we handle the crust and the filling without shortcuts. It takes a bit of patience, especially with the chilling time, but the result is miles ahead of any store-bought version.
Why This Classic Pumpkin Pie Works
- Evaporated Milk: Using this instead of cream provides a tighter structure. It prevents the filling from weeping or separating after you slice it.
- Blind Baking: Pre baking the crust with weights pushes the dough down and dries the base. This stops the dreaded soggy bottom from happening.
- Temperature Shifts: Starting at a high heat sets the edges quickly, while the lower heat finishes the center without overcooking the eggs.
Quick Recipe Details
- 1. Crust Temp
- Bake the blind crust at 375°F (190°C) for exactly 12 minutes with weights.
- 2. Edge Set
- The first blast of filling heat happens at 425°F (218°C) for 15 minutes.
- 3. The Jiggle
- Pull the pie at 350°F (175°C) when the center moves slightly like gelatin.
| Method | Filling Texture | Crust Result |
|---|---|---|
| Stovetop Prep | Liquid and smooth | Unbaked/Soft |
| Oven Bake | Set and dense | Golden and crisp |
The Ingredient Breakdown
I've found that using a food processor for the crust is the only way to keep the butter cold. If the butter melts before it hits the oven, you lose those flaky layers.
| Ingredient | What It Does | Best Swap |
|---|---|---|
| All purpose flour | Provides structure | Pastry flour for more tenderness |
| Unsalted butter | Creates flakiness | Chilled shortening (more crisp, less flavor) |
| Evaporated milk | Stabilizes the custard | Whole milk + 1 tbsp melted butter |
| Pumpkin puree | Base flavor and bulk | Roasted butternut squash puree |
| Brown sugar | Adds molasses depth | Maple syrup (reduce milk by 2 tbsp) |
Tools You'll Need
Having a few key items on hand makes preparing this Classic Pumpkin Pie much simpler. A 9 inch pie plate is the standard size; however, if your dish is deeper, increase the baking time by 5-10 minutes.
I suggest using a food processor for the dough. If you prefer working by hand, a pastry cutter or two forks can be used to incorporate the butter quickly. For the blind bake, ensure you have parchment paper and pie weights (or dried beans). Finally, a large mixing bowl and a whisk are all you need for the filling.
Making Your Classic Pumpkin Pie
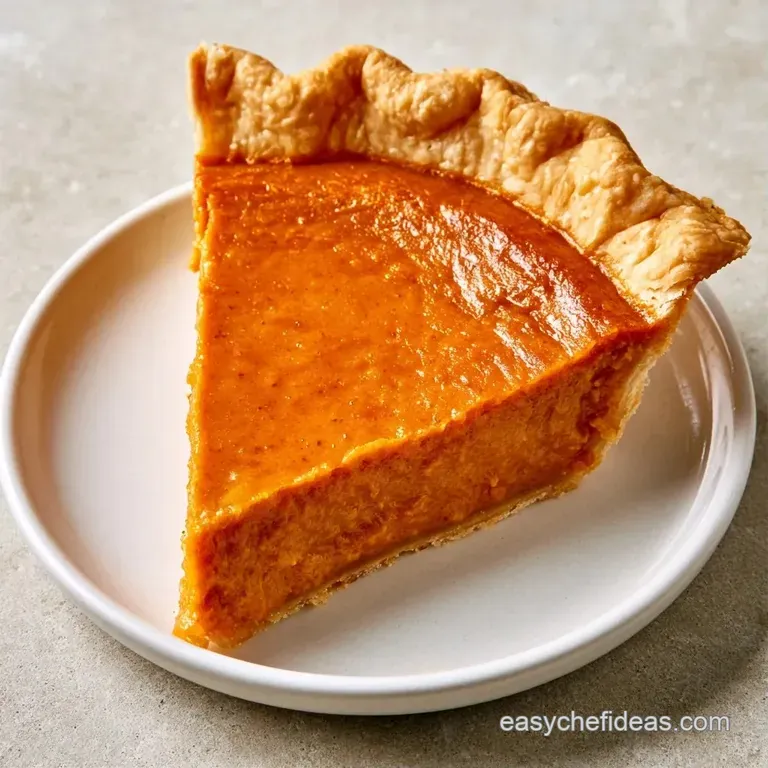
Crafting the Shattering Crust
- In a food processor, pulse 1.25 cups flour, 0.5 tsp salt, and 1 tbsp sugar. Note: Combining these first stops the salt from clumping.
- Incorporate 0.5 cup chilled, cubed butter and pulse until the texture resembles coarse crumbs.
- Slowly add 4 tbsp ice cold water, pulsing just until the dough starts to come together.
- Fit the dough into a 9 inch pie plate, trimming any overhang.
- Place the crust in the freezer for 15 minutes. Note: This step stops the dough from shrinking down the pan walls.
- Line with parchment and pie weights. Bake at 375°F (190°C) for 12 minutes.
- Take out the weights and bake for an additional 5 minutes until the base is matte and dry.
Preparing the Filling
- Use a large bowl to whisk 15 oz pumpkin puree and 0.75 cup brown sugar until completely smooth.
- Beat in 3 large eggs individually, whisking well after each addition. Note: This ensures the fats emulsify for a silkier texture.
- Mix in 1 tsp cinnamon, 0.5 tsp ginger, 0.25 tsp cloves, and 0.5 tsp salt.
- Gradually stir in 12 oz evaporated milk, whisking lightly until the batter is glossy and smooth.
The Final Bake
- Transfer the filling into your pre-baked crust.
- Bake at 425°F (218°C) for 15 minutes to firm up the edges.
- Drop the temperature to 350°F (175°C) and continue baking for 30-35 minutes until the middle has a slight, uniform jiggle.
- Take the pie out of the oven and let it chill for 4 hours so the custard can set.
Chef's Tip: If you spot air bubbles on the filling's surface before baking, give the pie plate a few firm taps on the counter. This releases the air and keeps your final slices from having tiny holes.
Fixing Common Issues
Preventing Surface Cracks
Classic Pumpkin Pie cracks usually happen because of overbaking or over whisking. If you beat too much air into the eggs, the pie rises like a soufflé and then collapses. Keep your whisking gentle once the milk goes in. Also, trust the jiggle test; the pie continues to cook for a while after it leaves the oven.
Solving a Runny Center
If the center is still liquid after the timer goes off, your oven might be running cool. Give it another 5 minutes, but keep a close eye on the edges. If the edges are getting too dark, tent them with foil while the center finishes.
Stopping Crust Shrinkage
When the dough slides down the walls of the pan, it's usually because the gluten was overworked or the dough was too warm. Freezing the crust for 15 minutes before the blind bake is the best way to lock the shape in place.
Fun Flavor Twists
You can easily customize your Classic Pumpkin Pie with a few simple adjustments. Because the base is quite decadent, a touch of acidity or heat helps balance the sweetness.
- Maple Bourbon: Swap 2 tbsp of brown sugar for maple syrup and stir 1 tbsp of bourbon into the milk.
- Spiced Orange: Mix 1 tsp of orange zest into the pumpkin puree for a bright, citrusy pop.
- dairy-free: Substitute evaporated milk with full fat coconut milk. Note: This maintains the creaminess but introduces a subtle coconut flavor.
For those who love these flavors but want a different presentation, a Classic Pumpkin Roll is a wonderful way to use similar spices in a light, cake like treat.
Quick Change Guide: Extra spice? → add 1/4 tsp more cloves. Tangier taste? → add 1 tsp lemon juice. Thicker filling? → decrease milk by 2 tbsp.
Storage and Leftovers
The dense custard helps a Classic Pumpkin Pie stay fresh. Place remaining slices in a sealed container; they will last 3 to 4 days if kept refrigerated. Avoid leaving the pie on the counter, as the eggs and milk can spoil quickly.
If you have leftovers, the pie can be frozen. Wrap the whole pie or separate slices in plastic film, then add a layer of foil. It remains good for about 2 months. To reheat, let a slice thaw in the refrigerator overnight, then heat it at 300°F (150°C) for 5-10 minutes.
Since you're already in the autumn baking mood, these slices pair beautifully with a warm Cinnamon Apple Crisp for a full dessert platter.
Best Ways to Serve
How you present your Classic Pumpkin Pie often depends on the occasion. Since the filling has such a deep, rich hue, a white plate creates a stunning contrast.
| Plating Level | Style | The Tweak |
|---|---|---|
| Simple | Casual Slice | Generous scoop of whipped cream |
| Polished | Centered Slice | Cinnamon dusting + mint leaf |
| Restaurant | Offset Slice | Cream quenelle + toasted pepitas |
For a perfectly clean slice, dip your knife in hot water and wipe it dry between each cut. This keeps the filling from clinging to the blade and smearing onto the crust. To achieve a professional finish, add a few toasted pumpkin seeds (pepitas) on top of the cream for a touch of color and crunch.
Whether served at a formal dinner or enjoyed on a rainy Tuesday, this Classic Pumpkin Pie is the gold standard for autumn. It is a recipe that rewards patience and precision. Just be sure to let it chill completely, and you'll have a dessert that looks as wonderful as it tastes.
Recipe FAQs
What was the original pumpkin pie?
Early versions used winter squash since pumpkins were too stringy for a smooth filling.
Tip: Use canned pumpkin puree for a more consistent texture.
Which is better, cream or evaporated milk?
Evaporated milk provides a lighter and more stable custard than heavy cream.
Tip: Whisk it in gently to avoid creating too many air bubbles.
What is the secret to a perfectly smooth filling?
Whisk eggs one at a time to properly emulsify the fats.
Tip: If you enjoyed mastering this emulsion, see how the same principle works in sweet and sour sauce.
How to prevent the crust from shrinking?
Freeze the pressed dough for 15 minutes before baking.
Tip: Always use chilled butter and ice-cold water for the flakiest results.
Is it true that pumpkin pie must be baked at one constant temperature?
False. Start at 425°F to set the edges, then drop to 350°F for the center.
Tip: Look for a slight, uniform jiggle in the middle before removing from the oven.
Ways to create a stunning autumn dessert table?
Arrange the pie alongside seasonal fruits and warm cider.
Tip: Dust the top with a bit of extra cinnamon for a professional look.
Can I use this as a substitute for an autumnal pudding?
This pie's custard base makes it a rich, pudding like dessert.
Tip: Chill for a full 4 hours to ensure the texture is fully set.
Do honey and apples pair well with this pie?
They make excellent accompaniments when served as a fresh side salad.
Tip: Sauté apple slices in a pan with a drizzle of honey for a warm topping.
Classic Pumpkin Pie