Chocolate Chip Oat Snack: Flourless and Healthy
- Time: 15 min active + 30 min cook/chill
- Flavor/Texture Hook: Chewy oats with a nutty, toasted finish
- Perfect for: Afternoon energy boosts or meal prep snacks
- The Chocolate Chip Oat Snack
- The Real Deal on Bars
- What Each Ingredient Does
- Tools You Will Need
- The Building Blocks
- Bringing the Bars Together
- Troubleshooting Your Batch
- Ways to Change Flavor
- Adjusting the Batch Size
- Common Beliefs
- Storage and Zero Waste
- How to Serve These
- Recipe FAQs
- 📝 Recipe Card
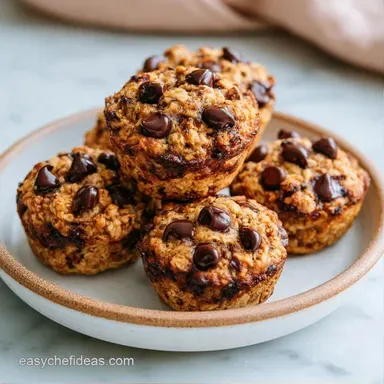
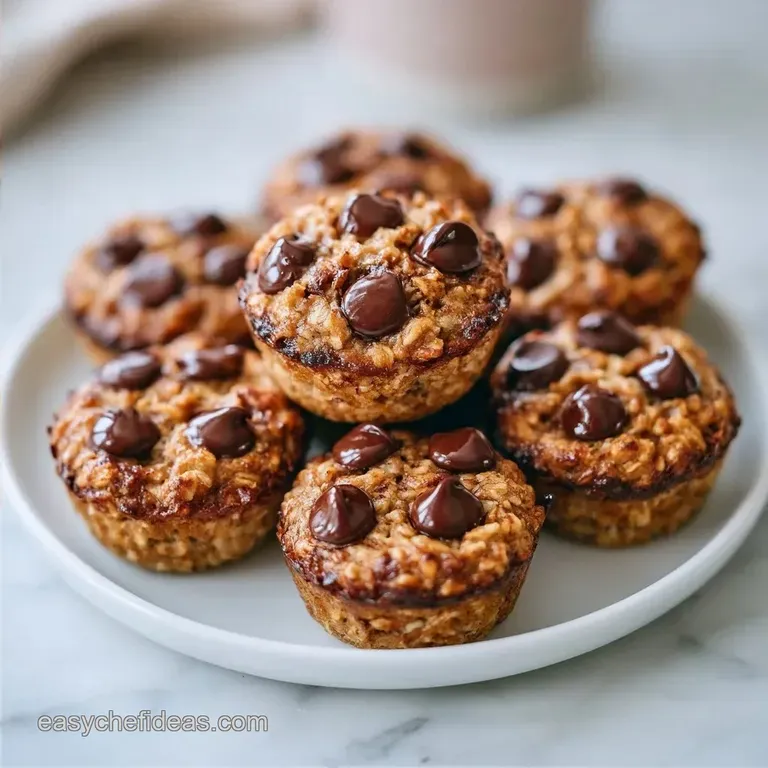
The Chocolate Chip Oat Snack
The smell of toasted oats and melted chocolate hitting a warm oven is enough to make anyone hungry. I remember the first time I tried making these, thinking I could just throw everything in a bowl and hope for the best. It didn't work.
The bars fell apart the moment I touched them because I didn't press the dough firmly enough into the pan.
Once I figured out the pressure needed to hold the oats together, everything changed. This recipe isn't about fancy techniques, but about getting that cohesive, heavy feel in the dough before it hits the pan. It's a reliable way to get something nourishing that actually tastes like a treat.
You can expect a chewy texture that doesn't lean too sweet. Whether you want a Healthy Chocolate Chip Snack with Oats or just something to stop the 3 p.m. cravings, this version hits the spot. It uses almond butter to provide a subtle, nutty backdrop that lets the chocolate really pop.
The Real Deal on Bars
The Binder: The maple syrup and almond butter create a sticky glue that holds the oats. If you use too much syrup, they get gummy; too little, and they crumble.
The Oat Texture: Quick oats are smaller than rolled oats, meaning they absorb the moisture faster. This ensures the snack stays together without needing a long soak.
The Pressure: Pressing the dough hard into the pan removes air pockets. This is why the bars don't split when you slice them.
| Method | Time | Texture | Best For |
|---|---|---|---|
| Raw/Chilled | 30 mins | Fudgy and dense | Quick prep, no oven |
| Toasted | 42 mins | Chewy and fragrant | Deeper flavor, longer shelf life |
What Each Ingredient Does
| Ingredient | What It Does | Best Swap |
|---|---|---|
| Almond Butter | Provides fat and structure | Cashew butter (creamier) |
| Maple Syrup | Sweetens and binds | Honey (thicker, stronger taste) |
| Quick Oats | Adds bulk and fiber | Finely pulsed rolled oats |
| Chia Seeds | Adds grip and omega-3s | Flax seeds (ground) |
Tools You Will Need
You don't need a fancy kitchen for this. A large mixing bowl and a sturdy spatula are the main requirements. I use a silicone spatula because it helps scrape every bit of that glossy almond butter mixture from the sides.
You'll also need an 8x8 inch baking pan. Lining it with parchment paper is a must. If you skip the paper, you'll spend ten minutes scrubbing baked on syrup off your pan, and the bars might tear when you try to lift them out.
The Building Blocks
- 2 cups (180g) quick oats Why this? Better absorption than rolled oats
- ½ cup (125g) creamy almond butter Why this? Richer, less dominant than peanut butter
- ⅓ cup (80ml) pure maple syrup Why this? Liquid sweetener that binds well
- 1 tsp (5ml) vanilla extract Why this? Adds a floral warmth
- ¼ tsp (1.5g) fine sea salt Why this? Cuts through the sweetness
- ½ cup (85g) semi sweet chocolate chips Why this? Holds shape during baking
- 1 tbsp (8g) chia seeds Why this? Helps the structure stay firm
Bringing the Bars Together

- Combine almond butter, maple syrup, and vanilla extract in a large bowl. Stir vigorously until the mixture looks glossy and smooth. Note: This ensures the fats and sugars are fully blended.
- Stir in the fine sea salt.
- Fold in the quick oats and chia seeds. Stir until the dough feels heavy and cohesive and no dry oat patches remain.
- Let the mixture sit for 2 minutes. This lets the chia seeds start to swell.
- Fold in the chocolate chips gently.
- Transfer the dough to a parchment lined 8x8 inch pan. Press firmly with the back of a spatula until the surface is flat and packed.
- For raw snacks, refrigerate for 30 minutes.
- For toasted snacks, bake at 325°F (160°C) for 10-12 minutes until the edges are golden brown.
- Let the pan cool completely. This is the hardest part, but slicing while hot will ruin the edges.
- Cut into 9 equal rectangles.
Troubleshooting Your Batch
Getting the texture right on a Chocolate Chip Oat Snack can be tricky if your ingredients aren't at the right temperature. Most issues come down to the moisture balance or the way the dough was pressed.
Too Crumbly Bars
If your bars fall apart, the binder likely didn't penetrate the oats. This happens if the almond butter is too stiff or the oats weren't mixed in thoroughly.
The Oil Slick
Sometimes oil beads up on top of the bars. This usually happens if the almond butter has separated in the jar and wasn't stirred well before measuring.
Melted Chip Mess
If your chips disappeared into the dough, the oven was likely too hot, or you didn't let the dough settle before adding them.
| Problem | Root Cause | Solution |
|---|---|---|
| Crumbles | Not enough pressure | Press dough harder into the pan |
| Greasy top | Unstirred nut butter | Stir almond butter thoroughly first |
| Too soft | Underbaked or warm | Cool completely before slicing |
Ways to Change Flavor
I love these as they are, but you can easily pivot. If you want something more like a traditional dessert, you can follow the logic of my Chocolate Chip Cookie Recipe by adding a pinch of cinnamon.
For a salty twist, swap the semi sweet chips for dark chocolate with sea salt flakes. If you're making a Chip Snack with Oats for kids, try adding a handful of dried cranberries or raisins for a bit of tartness.
You can also swap the almond butter for sunflower seed butter if you need a nut free version. Just be aware that sunflower butter has a more intense, earthy taste that might overshadow the vanilla.
Adjusting the Batch Size
If you're making a smaller batch, use a loaf pan instead of a square pan to keep the thickness consistent. For a half batch, reduce the bake time by about 20% and check them at 8 minutes.
When doubling the recipe, don't just double the salt. I find that 1.5x the salt is usually enough for a double batch of this Snack with Oats to avoid it tasting too savory. Work in two separate bowls if your mixer can't handle the heavy dough.
If you're baking a double batch in a larger pan, lower the temperature to 300°F (150°C) and extend the time by 5-10 minutes. This prevents the edges from burning before the center sets.
Common Beliefs
Some people think you have to toast the oats in a pan first. While it adds flavor, the baking step at 325°F does this for you. It's an extra step you don't actually need.
Another myth is that chia seeds make the bars taste "seedy." In this Chocolate Chip Oat Snack, the chia seeds act more like a binder. Once they absorb the syrup, they disappear into the texture.
Finally, some believe that using "old fashioned" oats is better. For this specific no bake or quick bake style, rolled oats are often too large and leave the bars feeling chunky rather than cohesive.
Storage and Zero Waste
Keep these bars in an airtight container in the fridge for up to 10 days. If you prefer them raw, the fridge is mandatory to keep them firm. For the toasted version, they stay good on the counter for 3 days, but the fridge extends that to a week.
You can freeze these for up to 3 months. Wrap each bar individually in parchment paper so they don't stick together. To eat, just let them thaw at room temperature for 20 minutes.
Don't toss the leftover almond butter streaks in your bowl. Scrape them out with a bit of warm water or maple syrup and stir them into your morning porridge. It's a waste of good fats to leave them behind.
How to Serve These
These are great on their own, but I like to serve the toasted version slightly warmed with a glass of cold almond milk. The contrast in temperature makes the chocolate chips slightly gooey again.
If you're serving them at a party, stack them in a pyramid on a wooden board. They look great next to some fresh berries or sliced apples. For those who want something even more indulgent, these pair well with Chocolate Covered Cookie Dough Bites for a full dessert spread.
Since this Snack with Oats is quite dense, it's a great addition to a lunchbox. Just be sure to include a napkin, as the almond butter can be a bit sticky on a warm day.
Recipe FAQs
Is it true that adding chocolate to oat snacks makes them unhealthy?
No, this is a common misconception. Using semi sweet chocolate chips alongside oats and almond butter provides a balance of healthy fats and lasting energy.
Can these oat snacks be used as a kid-friendly lunch box treat?
Yes, they are ideal for lunch boxes. They are easy to slice into rectangles and hold up well without needing refrigeration if you choose the toasted version.
How to store these snacks to keep them fresh?
Place them in an airtight container in the fridge for up to 10 days. While toasted bars stay good on the counter for 3 days, refrigeration extends their shelf life significantly.
Can I make these without baking them?
Yes, you can keep them raw. Simply refrigerate the pressed dough for 30 minutes before slicing to ensure the bars stay firm and cohesive.
Why are my bars falling apart?
The dough likely wasn't pressed firmly enough into the pan. Use the back of a spatula to pack the mixture tightly into the parchment lined 8x8 inch baking pan.
How to ensure the bars are firm and cohesive?
Stir the almond butter, maple syrup, and vanilla vigorously until glossy. This creates the necessary binding agent to hold the quick oats and chia seeds together.
What is the best way to serve these as a treat?
Serve them chilled for a denser, fudge like texture. If you enjoy the moisture balance here, you'll love the texture of our spiced pumpkin muffins.
Chocolate Chip Oat Snack