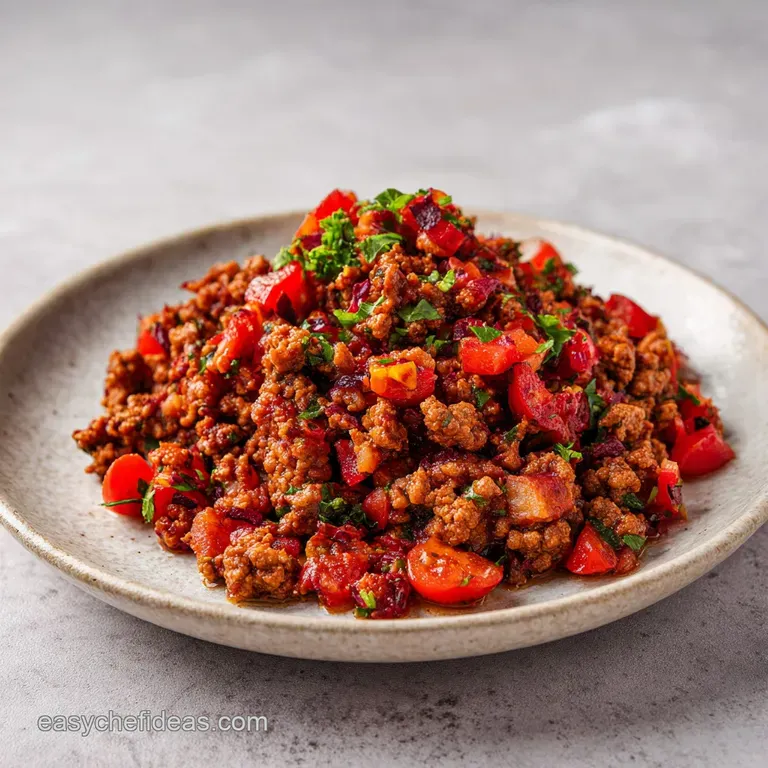
Walking Taco Casserole: Savory and Crunchy
- Time: 10 min active + 20 min cook = Total 30 mins
- Flavor/Texture Hook: Velvety cream cheese topping with a chip shatter crunch
- Perfect for: Easy potluck dinner ideas or a low stress family Tuesday
The Best Walking Taco Casserole
That sharp sizzle of ground beef hitting a hot pan, mixed with the pungent aroma of sautéed onions, is where the magic starts. I remember the first time I tried to turn a "walking taco" into a bake for a game day party.
I just threw everything in a dish and hoped for the best, but I ended up with something that looked more like a taco flavored porridge than a casserole. It was a total disaster, and I spent the rest of the night eating chips straight from the bag while my guests politely poked at the mush.
But here is the thing: you don't need a fancy kitchen or a culinary degree to get this right. Forget the idea that chip based casseroles always end up soggy. The trick is all about the order of operations and the fat content of your layers.
Once I figured out how to shield the chips and balance the moisture in the beef, this Walking Taco Casserole became my go to for every single gathering.
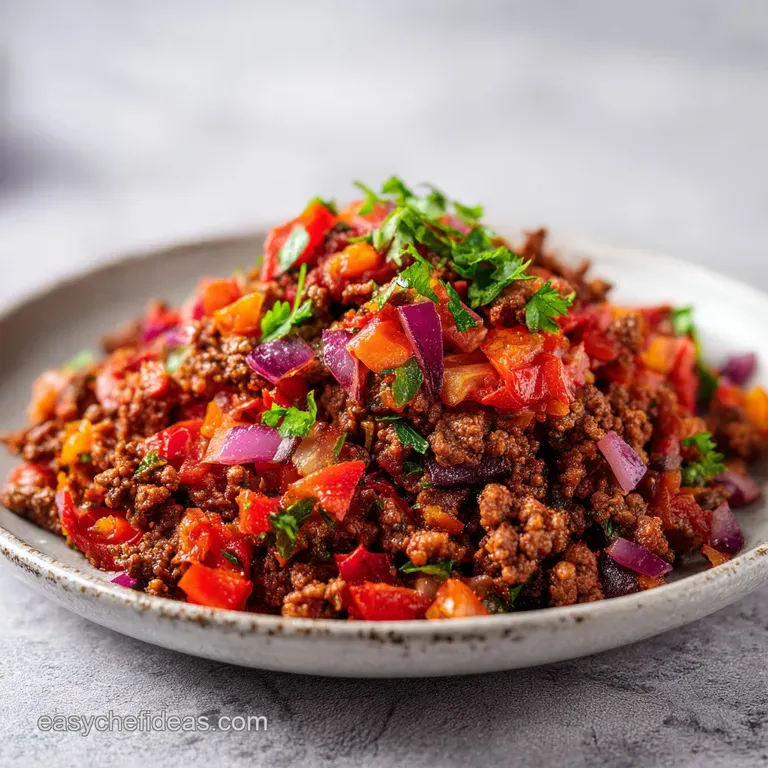
It's a budget friendly beast that feels like a treat. We are talking about vibrant Latin flavors and a texture that actually holds up. You get that velvety creaminess from the yogurt and cream cheese, the punch of lime, and the satisfying crackle of corn chips.
Trust me on this, once you see the cheese bubbling and the edges getting golden, you'll never go back to the bag and spoon method.
The Trick Behind the Texture
I used to think that putting chips at the bottom was a recipe for disaster. But it actually works if you understand how the ingredients interact.
The Fat Barrier: By using lean beef and a concentrated sauce, we limit excess water. The oils in the chips and the thickness of the beef mixture create a shield that keeps the base from soaking up liquid too quickly.
The Moisture Balance: We simmer the salsa and water until it's glossy. This means the liquid is bound to the meat, so it doesn't leak down into the chips.
The Creamy Cap: The mixture of Greek yogurt and cream cheese acts as an insulator. It keeps the beef moist while providing a heavy, rich layer that prevents the top cheese from burning before the middle is hot.
The Double Crunch: We add chips both at the bottom and as a fresh garnish at the end. This ensures that no matter how you scoop it, you get that shatter effect.
| Method | Time | Texture | Best For |
|---|---|---|---|
| Fresh Walking Taco | 5 mins | Maximum Crunch | Solo eating/Fairs |
| Shortcut Casserole | 30 mins | Velvety & Hearty | Family dinner |
| Slow Cooker Base | 4 hours | Very Tender | Meal prep |
It is a bit like making a lasagna, but with corn chips instead of pasta. If you're looking for other ways to use a slow cooker for your main courses, you might enjoy a Slow Cooker Bolognese Sauce which uses a similar layering of rich flavors.
Component Analysis
I've spent way too much time thinking about why some ingredients work better than others here. It's not just about flavor, it's about how they hold together under heat.
| Ingredient | Science Role | Pro Secret |
|---|---|---|
| Lean Ground Beef | Protein Base | 93% lean prevents an "oil slick" on top |
| Cream Cheese | Stabilizer | Prevents the yogurt from curdling in the oven |
| Corn Chips | Structural Base | Slightly crushing them creates more surface area for beef |
| Lime Juice | Acid Balance | Cuts through the heavy fat of the cheese |
When picking your beef, don't be tempted to go for the cheapest, fattiest grind. You'll spend twenty minutes draining grease, and the excess oil will just make your Walking Taco Casserole feel heavy. Stick to the lean stuff for a cleaner, sharper taste.
The Building Blocks
Right then, let's get into what you actually need. I've kept this budget smart, using items you probably already have in the pantry or can grab for a few bucks at the store.
- 1 lb (450g) lean ground beef (93% lean) Why this? Prevents greasy residue in the final bake
- 1 tbsp (15ml) olive oil Why this? High smoke point for searing beef
- 1 medium (110g) yellow onion, diced Why this? Provides a sweet, aromatic base
- 3 cloves (9g) garlic, minced Why this? Essential for deep, savory notes
- 2 tbsp (16g) low sodium taco seasoning Why this? Controls salt while adding cumin and paprika
- 1 cup (240ml) chunky salsa Why this? Adds texture and acidity
- ½ cup (120ml) water Why this? Helps the seasoning coat the meat
- 4 oz (115g) low-fat cream cheese, softened Why this? Creates the velvety binder
- ½ cup (120ml) plain Greek yogurt Why this? Cheaper and tangier than sour cream
- 1 tsp (5ml) lime juice Why this? Brightens the heavy fats
- 3 cups (80g) Fritos or Doritos, slightly crushed Why this? The signature "walking taco" crunch
- 1 ½ cups (170g) shredded sharp cheddar cheese Why this? Strong flavor that doesn't get lost
- ½ cup (60g) sliced black olives Why this? Salty, briny contrast
- 2 scallions (10g), thinly sliced Why this? Fresh, oniony finish
| Original Ingredient | Substitute | Why It Works |
|---|---|---|
| Ground Beef | Ground Turkey | Similar texture. Note: Leaner, so add 1 tsp extra oil |
| Greek Yogurt | Sour Cream | Same creamy texture. Note: Higher fat, less tang |
| Fritos/Doritos | Tortilla Chips | Great crunch. Note: Less bold flavor than seasoned chips |
| Sharp Cheddar | Monterey Jack | Melts smoother. Note: Milder flavor profile |
Honestly, don't even bother with low-fat cheese. It doesn't melt the same and you lose that golden, bubbly crust that makes a Walking Taco Casserole so satisfying.
Equipment Needed
You don't need any fancy gadgets for this. A few basic tools will do the trick.
- A large skillet (cast iron is great for that mahogany sear)
- A 9x13 inch baking dish (glass or ceramic)
- A small mixing bowl for the creamy layer
- A sturdy spatula or wooden spoon
- Measuring cups and spoons
Key Steps
Let's crack on with the actual cooking. Follow these closely, especially the simmering part, or you'll end up with the mushy mess I described earlier.
- Heat olive oil in a skillet over medium high heat. Add the lean ground beef and diced onion, cooking until the meat is mahogany colored and no longer pink. Stir in the minced garlic for 60 seconds until it smells fragrant.
- Reduce heat to medium. Stir in the taco seasoning, salsa, and water. Simmer for 5-7 minutes, stirring occasionally, until the liquid has reduced by half and the mixture is thick and glossy.
- Preheat oven to 375°F (190°C). Spread half of the crushed chips across the bottom of a 9x13 inch baking dish. Note: Don't press them down too hard; leave some air gaps.
- Pour the thickened beef mixture evenly over the chips. Note: Ensure the beef covers all corners to protect the chips.
- In a small bowl, whip together the softened low-fat cream cheese, Greek yogurt, and lime juice. Dollop and spread this mixture evenly over the beef layer.
- Sprinkle the shredded cheddar cheese and sliced black olives over the top.
- Bake for 15-20 minutes until the cheese is bubbling and the edges are slightly golden.
- Remove from the oven and immediately top with the remaining crushed chips and sliced scallions. Note: Adding chips at the end preserves the shatter crisp texture.
Pro Tips & Pitfalls
Making a Walking Taco Casserole is simple, but there are a few places where things can go sideways.
Why Your Base Got Mushy
The most common issue is adding too much water or using a salsa that is too watery. If the beef mixture is like a soup, the chips will absorb it instantly. Always simmer until the sauce is glossy and clings to the meat.
Avoiding the Oil Slick
If you use 80/20 beef instead of lean beef, you'll see a layer of orange oil floating on top of your cheese. This happens because the fat separates during the bake. If you must use fatty beef, drain it thoroughly in a colander before adding the seasoning.
Preventing Cheese Burn
If your oven runs hot, the cheddar can turn into a hard, brown crust before the cream cheese layer is warm. If you notice the top browning too fast, just tent a piece of foil over the dish for the last 5 minutes.
| Problem | Root Cause | Solution |
|---|---|---|
| Mushy Chips | Too much liquid in beef | Simmer beef sauce longer |
| Bland Flavor | Under seasoned meat | Add a pinch of salt/cumin to beef |
| Grainy Cream | Cream cheese was cold | Soften cheese to room temp first |
Common Mistakes Checklist:
- ✓ Did you simmer the beef until the sauce was thick?
- ✓ Is the cream cheese fully softened before mixing?
- ✓ Did you save some chips for the final topping?
- ✓ Is the oven preheated to 375°F (190°C)?
- ✓ Did you use lean beef to avoid excess grease?
Flavor Variations to Try
This recipe is a great canvas. Depending on what you have in the fridge, you can take this in a few different directions.
The Spicy Kick: Use Flamin' Hot Doritos as your base and add a diced jalapeño to the beef mixture. This turns the Walking Taco Casserole into a real firecracker.
The Veggie Twist: Swap the beef for a mix of black beans and corn. Since beans don't release the same fats as beef, you might want to add a tablespoon of butter to the onion sauté to keep things rich.
The Creamy Swap: If you want something even more indulgent, replace the Greek yogurt with mascarpone. It adds a velvety richness that pairs well with a spicy salsa.
If you're in the mood for something a bit more refined after this hearty meal, you might consider a side of my Easy Homemade Crock Pot Applesauce to cleanse the palate.
Decision Shortcut:
- If you want more heat → use spicy chips and add jalapeños.
- If you want it healthier → use ground turkey and extra Greek yogurt.
- If you want maximum flavor → use sharp cheddar and a chunky roasted salsa.
Scaling Guidelines
Adjusting the size of your Walking Taco Casserole is pretty straightforward, but you can't just double everything blindly.
Scaling Down (Half Batch): Use an 8x8 inch square pan. Reduce the baking time by about 20% (check it at 12-15 minutes). Since you'll be using half an egg's worth of some ingredients, just be precise with your measurements.
Scaling Up (Double Batch): Use two 9x13 inch pans rather than one giant deep dish. If the casserole is too deep, the middle won't heat through before the top burns. For spices, only increase the taco seasoning to 1.5x initially, then taste it. Over seasoning in large batches can lead to a salt bomb.
Baking Large Quantities: If you are baking two pans at once, lower the oven temperature to 350°F (175°C) and extend the time by 5-10 minutes. This ensures even heat distribution and prevents the bottom pan from being undercooked.
Taco Night Truths
There are a few things people say about these kinds of bakes that just aren't true.
Myth: You have to use a specific brand of chips. Truth: While Fritos and Doritos are the classics for a Walking Taco Casserole, any sturdy corn chip works. The key is the thickness of the chip; thin potato chips will disintegrate instantly.
Myth: Taco seasoning is just salt. Truth: While some cheap packets are salt heavy, real taco seasoning relies on cumin, paprika, and garlic powder for depth. If you're worried about sodium, make your own mix using those spices.
Myth: Adding yogurt makes it "healthy" enough to be a salad. Truth: Let's be real. This is a comfort food dish. The Greek yogurt adds a nice tang and a bit of protein, but this is still a rich, cheesy bake. Enjoy it for what it is!
Storage Guidelines
You can definitely make this ahead of time, but there's a right way and a wrong way to do it.
Refrigerator Storage: Store leftovers in an airtight container for up to 3 days. The chips will inevitably soften in the fridge, but the flavors actually meld together and taste even better the next day.
Freezing Instructions: I don't recommend freezing the entire Walking Taco Casserole with the chips included. Instead, freeze the cooked beef mixture and the cream cheese blend in separate freezer bags for up to 2 months. Thaw overnight in the fridge, then assemble and bake.
Reheating for Crispness: Avoid the microwave if you can. Reheat portions in a toaster oven or a skillet over medium heat. This helps bring back some of that shatter crisp texture to the chips. If you must use a microwave, put a paper towel over the top to absorb excess steam.
Zero Waste Tips:
- Leftover Scallions: Chop the white parts of the scallions and toss them into your next beef sauté.
- Salsa Scraps: If you have a bit of salsa left in the jar, use a splash of water to rinse it out and add it to your beef simmer.
- Cheese Ends: Those little bits of cheddar left on the block? Grate them into the beef mixture for extra pockets of melted cheese.
Serving Suggestions
To make this a full meal, you need a few fresh elements to cut through the richness.
The Fresh Toppings: I always put out a bowl of shredded iceberg lettuce and diced tomatoes. The cold, watery crunch of the lettuce is the perfect foil to the warm, velvety cheese.
The Side Kicks: This pairs brilliantly with a side of cilantro lime rice or a simple corn salad with red onion and bell peppers. If you want something lighter, a sliced avocado with a squeeze of lime is all you need.
The Drink Pairing: A cold lime sparkling water or a classic margarita works wonders here. The acidity helps reset your taste buds between bites of the savory Walking Taco Casserole.
When you serve it, scoop it out with a wide spatula to ensure you get every layer from the crunchy base to the creamy top. It's a messy, glorious experience that's exactly what a family dinner should be. Trust me, your friends will be asking for the recipe before they've even finished their first plate.
Recipe FAQs
Can I freeze the assembled casserole?
No, avoid freezing the fully assembled dish. The chips will lose their texture and become mushy upon thawing. Freeze the beef mixture and cream cheese blend separately for up to 2 months.
How to keep the chip base from becoming too soggy?
Spread the beef mixture over the chips only right before baking. To further protect the texture, add the final layer of crushed chips immediately after removing the dish from the oven.
Is it true I can just mix the raw beef with other ingredients and bake it all at once?
No, this is a common misconception. The beef and onions must be sautéed until mahogany colored and the sauce simmered to reduce the liquid to prevent a watery casserole.
How to get the beef mixture thick and glossy?
Simmer the beef, seasoning, salsa, and water for 5-7 minutes. Stir occasionally until the liquid has reduced by half, ensuring the sauce clings to the meat.
Can I use a pre-made taco seasoning packet?
Yes, store-bought packets work fine. For a more customized flavor, try using our homemade taco seasoning blend instead.
How to store leftovers safely?
Place them in an airtight container in the refrigerator. They will stay fresh for up to 3 days, though the chips will soften over time.
How to ensure the cream cheese layer spreads easily?
Soften the low-fat cream cheese before whipping. Mix it thoroughly with the Greek yogurt and lime juice to create a smooth, spreadable consistency.
Walking Taco Casserole

