Spider Web Cookies for Spooky Fun
Let’s Get Spooky: Bake Spider Web Cookies for Spooky Fun!
Have you ever accidentally gone a little too wild during halloween festivities? yeah, me too! one year, i whipped up this batch of spider web cookies, and before i knew it, kids and adults alike were clamoring for more.
Seeing their faces light up when they spotted the chocolate drizzles was totally worth the floury mess i made. i mean, who doesn’t want a spooky treat that looks like it just crawled out of a haunted house? so, grab your apron, because you’re about to learn how to bake spider web cookies for spooky fun!
A Little History Goes a Long Way
Now, let’s get into the good stuff! these adorable treats are inspired by classic sugar cookies , which have been gracing our dessert tables for decades.
Originating from europe in the 18th century, sugar cookies have evolved into a favorite in american households. nowadays, these halloween cookie recipes are everywhere, and they’re a perfect match for a spooky dessert table.
Trust me, you want these cookies to steal the show at your next halloween bash!
What about the modern twist, you ask? well, the spider web design takes things up a notch, bringing a bit of flair to the classic recipe.
Plus, the prep time for these cookies is only about 1 hour, and they’re ridiculously easy to make! perfect for beginners, because who got time to fuss around with complex recipes? you can whip up a batch in no time, and the cookie yield is about 24, which is pretty awesome for sharing or devouring yourself.
Why You’ll Love These Cookies
Let’s chat about the perks of making these delightful spooky treats for halloween . first off, these cookies are soft and buttery with just the right amount of sweetness a total crowd pleaser! they’re also loaded with health benefits that might surprise you.
Well, okay, maybe not health benefits in a let’s count the calories way, but they definitely bring people together for some family friendly baking activities.
Another awesome thing? you can turn them into decorative halloween cookies with simple icing skills. kids absolutely love getting involved in the decorating process, making it a fun halloween activity.
Plus, if you host a cookie decorating party, these guys are sure to be a hit. picture this: giggling kids in your kitchen, decorating cookies while you sip on some pumpkin spice coffee.
Pure bliss, right?
Creative Edge
What makes these cookies even better is their versatility. you can include edible spider decorations or try out different chocolate drizzle techniques to get creative with designs.
As someone who’s hosted cookie decorating parties before, let me tell you, it can get pretty competitive, and laughter is mandatory! each cookie can become a masterpiece, displaying their artistic flair (or lack thereof).
Now, if you’ve got a little time to spare, this recipe also allows for variations. want to take a detour into chocolate territory? throw in some cocoa powder! going gluten-free? you can switch out the flour with gluten-free blends.
The world is your cookie!
So, whether you’re hosting an elaborate halloween bash or enjoying a cozy fall afternoon, there’s no better way to celebrate than with these delicious spider web cookies.
They might just make your halloween feel even sweeter than the candy haul!
Now, let’s take a look at what you need to get started on making these spooky delights. Trust me, you don’t want to miss out on the fun of baking these yummy cookies!
Ultimate Guide to Essential Ingredients for Halloween Treats
Hey there, fellow baking ensoiasts! As Halloween creeps closer, it’s time to talk about the essential ingredients that will help you whip up those spooky treats especially if you’re planning to Bake Spider Web Cookies for Spooky Fun!
Picture it now: a kitchen bustling with the aroma of butter and sugar, kids giggling as they decorate, and you? You’re the hero of the Halloween dessert table!
Premium Core Components
Let’s dive straight into those key core ingredients you need:
- All-Purpose Flour: You need about 2 ¾ cups (320g) for those soft and buttery cookies. It's your go-to for cookie recipes.
- Unsalted Butter: 1 cup (227g) ensures that your cookie dough is smooth and creamy. Pro tip: Let it soften at room temperature to mix easily!
- Granulated Sugar: Trust me, 1 cup (200g) makes it sweet and delightful.
- Eggs and Vanilla: Adding that 1 egg and a splash of 1 teaspoon vanilla extract elevates the flavor!
Storage Guidelines: Keep your dry ingredients in a cool, dry place. Unopened, they last about 6-12 months .
Signature Seasoning Blend
Now let's talk flavor . Those Spider Web Cookies aren't complete without a bit of magic!
- Essential Spice Combinations: You don’t need to fuss with a ton of spices for this recipe. Just a pinch of salt brings out the sweetness!
- Herb Selections: Including a hint of cinnamon might vibe well if you wanna mix things up for other recipes.
- Flavor Enhancers: Chocolate drizzle techniques? Yes, please! We’re talking about semi sweet chocolate chips; they melt so beautifully.
Smart Substitutions
What if you run out of something? No stress! Here’s where smart substitutions come into play:
- Common Alternatives: No eggs? Go for either 1/4 cup unsweetened applesauce or 1 tablespoon ground flaxseed mixed with water!
- Emergency Replacements: Don’t have butter? Use equal parts coconut oil —your cookies will still rock!
- Seasonal Options: If you want to switch flavors, try a pumpkin spice dough for a totally fall vibe .
Kitchen Equipment Essentials
You don’t need fancy gadgets to get festive:
- Must Have Tools: A mixing bowl, whisk, and baking sheets are all you need! Consider a piping bag for your chocolate drizzle.
- Preparation Tips: Clean as you go, and keep the workspace clear. It makes it easier to channel your inner baking wizard!
- Storage Solutions: Ziploc bags work wonders for keeping your cookies fresh. Just make sure they’re cool before sealing!
Putting It All Together
Imagine gathering the family for some halloween baking activities , where everyone is rolling, cutting, and decorating those cookies. teaching kids to pipe chocolate shapes allows for bonding time that’s sweet and unforgettable.
Plus, those decorative halloween cookies will definitely shine on the dessert table!
So when you’re ready to jump into the fun of bake spider web cookies for spooky fun! , you’ve got your ingredients, your substitutions, and all the tips in one handy guide.
Next up? i can’t wait to dish out the step-by-step instructions for bringing these delightful cookies to life!
Remember, the most important ingredient is the joy of baking together. Let’s get those ovens prepped and ready for some family friendly, cozy fall treats!
Professional Cooking Method
If you’re like me, you enjoy diving into new recipes, especially during the spooky season. today, let’s focus on the professional cooking methods that take our halloween creations, like bake spider web cookies for spooky fun! , to the next level.
Essential Preparation Steps
Before you tackle any recipe, getting organized is key. this is where mise en place really shines. it’s a fancy french phrase that just means “everything in its place.
” gather all your ingredients and tools first. trust me, it saves a lot of time and stress while you're whipping up those festive sugar cookies .
Time management is another crucial aspect. set a timer for each step. for instance, while your soft and buttery cookies are chilling (about 30 minutes ), you can clean up or get your decorations ready.
You’re effectively multitasking, which every good baker knows is a secret weapon.
Consider your workspace, too. when organizing, keep everything within reach. this not only speeds up your process but reduces the chances of accidents.
And, of course, let's not forget about safety ! remember to handle hot trays with care and keep raw dough away from any surfaces where you will be preparing other food.
We've all had that moment when we realize we’ve been spreading flour everywhere it can get chaotic!
step-by-step Process
Now, onto the fun part: baking those Halloween themed cookies !
Prepare the Dough : First, understand the need for precision. You’ll want your oven at 350° F ( 175° C) for about 10- 12 minutes .
Chilling : The chilling phase impacts texture, so don’t skip the 30-minute fridge sit.
Shape and Bake : Roll out that dough to about ¼ inch thick. Cut out your cookies and set them up on baking sheets lined with parchment paper.
Cooking Checkpoints : Keep an eye on those cookies. Look for lightly golden edges for that perfect bake.
Cool Down : Don’t rush! Let those bad boys cool for a good 5 minutes on the tray, then move them to wire racks to cool completely.
Expert Techniques
Professional bakers often utilize little tricks that make a big difference. one of these is quality checkpoints . during the mixing process, taste your dough.
Adjust if necessary; maybe you want it sweeter or a tad saltier.
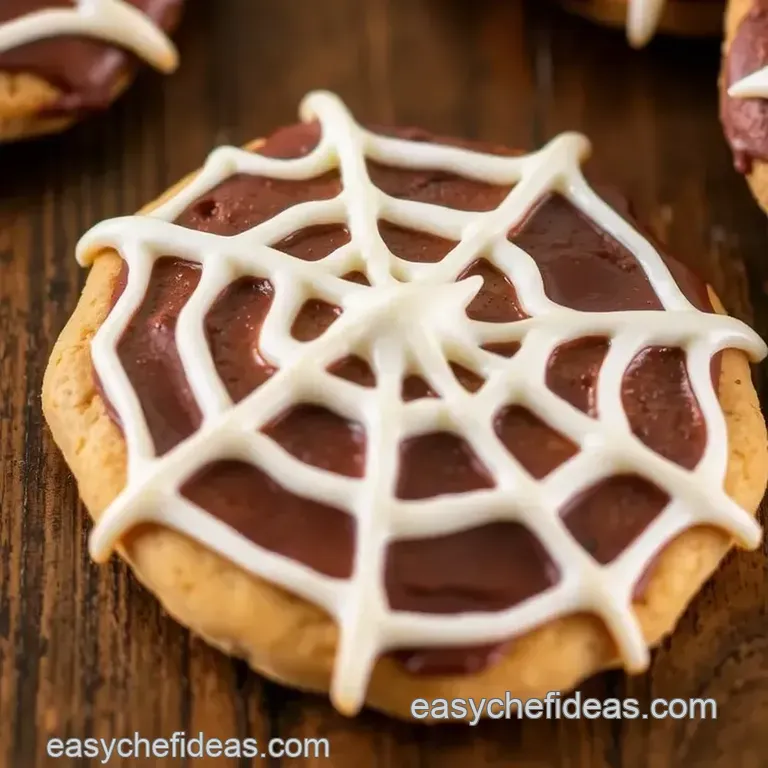
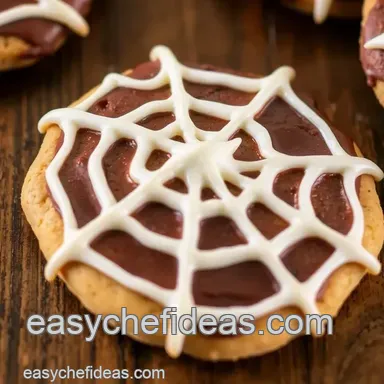
And a biggie chocolate drizzle techniques . Melt your chocolate in 15-second intervals in the microwave to avoid burning. It’s about finding that perfect balance between smooth and drizzly, and trust me, practice makes it perfect!
If you run into issues like the chocolate is too thick just add a smidge of vegetable oil. It'll transform the texture, making it drizzle like a pro.
Success Strategies
We’ve all had those moments where things don’t go as planned. common mistakes include overbaking or not chilling the dough.
Remember, the cookies will harden a bit while cooling, so take them out sooner rather than later.
For quality assurance , involve friends or family. A cookie decorating party is great everyone gets their creativity flowing. Plus, you can help each other troubleshoot.
And don’t forget the make-ahead options ! You can freeze the dough if you want to bake on a different day. Just wrap it tightly and store for up to three months.
Wrapping It Up
At the end of the day, what really matters is enjoying the process and having fun. bake spider web cookies for spooky fun! is one delightful way to bring everyone together this halloween.
And as you decorate with edible spider decorations and chocolate drizzle, don’t sweat the small stuff!
Just remember, cooking is all about experimentation and joy. so, break out those cookie sheets, gather your fam, and dive into these fun halloween baking activities .
Now, let's get into some additional information that will take your spooky treats to the next level!
Bake Spider Web Cookies for Spooky Fun!
So, you've decided to bake spider web cookies for spooky fun! and let me tell ya, you're in for a spooky treat! these soft and buttery cookies are not just delicious; they're also super fun to decorate, especially if you've got kids around.
Honestly, nothing screams halloween like cookies that look like they were spun by a cute (or creepy) little spider!
Pro Tips & Secrets
Let’s talk pro tips . first and foremost, chill that dough! seriously, it’s like magic for keeping cookies from spreading into flat pancakes.
Just whip up your dough, form it into a disk, wrap it up, and let it hang out in the fridge for at least 30 minutes.
While you’re at it, consider the chocolate drizzle techniques. i’ve learned that melting the chocolate slow and steady makes a big difference.
You can do this in a microwave just remember to zap it in 15-second intervals. if your chocolate is weirdly thick, a tablespoon of vegetable oil will save the day, making it easier to drizzle like a pro.
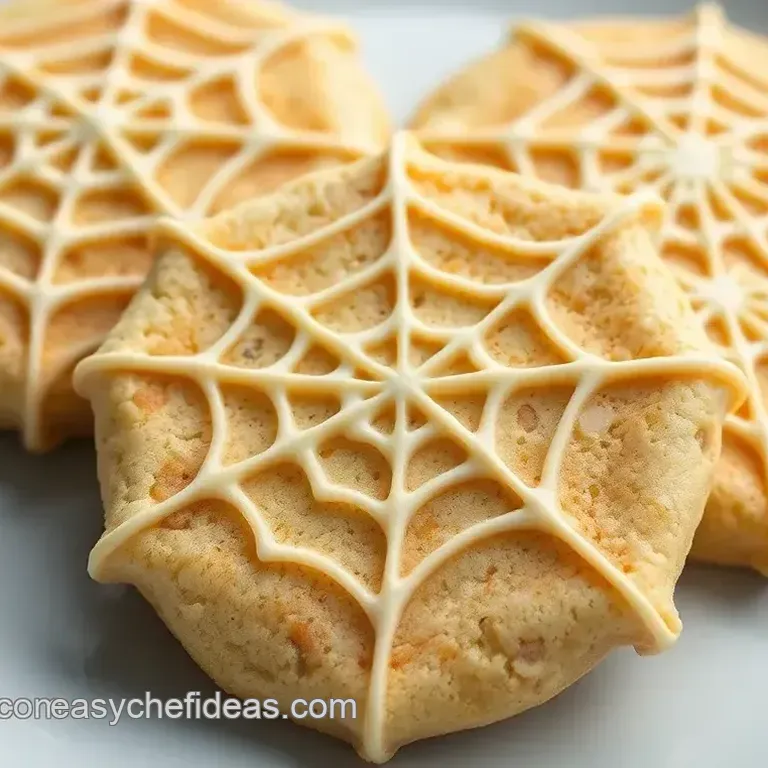
And don’t forget presentation! We eat with our eyes first. A sprinkle of edible candy spiders could take your cookies from sweet to downright spooktacular.
Perfect Presentation
Now let’s get into perfect presentation. when it comes to plating, a halloween themed platter really amps up the fun. think dark and moody colors maybe serve your cookies with some festive sugar cookies shaped like ghosts or pumpkins.
For colors, aim for a combination of blacks and whites. it really makes those web designs pop! and if you can, scatter some edible glitter (just a bit!) over the top.
It totally transforms the cookies from simply delicious to the star of your halloween dessert table.
Storage & make-ahead
Storage & make-ahead is the name of the game if you wanna plan ahead. fear not if you have leftovers though, let’s be real, who usually does? store these cookies in an airtight container at room temperature for up to a week.
But if you want to keep them fresh longer, toss them in the freezer. the dough can even hang out for up to three months before you bake it.
Say what?! just remember to defrost it in the fridge before rolling it out.
Reheating? Pop them in the microwave for about ten seconds if you want to warm them back up. Total game changer when you want a cozy fall treat!
Creative Variations
When it comes to creative variations , the sky’s the limit! if you’re feeling adventurous, switch things up by adding some cocoa power for chocolate spider web cookies.
Or, how about a twist with some seasonal spices like nutmeg or cinnamon to jazz things up a bit more? you could even incorporate some pumpkin puree into your dough for a festive touch.
Don't forget you could also make these gluten-free by using a good gluten-free flour blend. Everyone should be able to join in on the cookie fun at your Halloween cookie decorating party!
Complete Nutritional Guide
Now, on to the complete nutrition guide . each cookie packs about 150 calories. it ain't too shabby if you think about it! high in fun and a little bit of sugar, these treats can still fit into party planning.
Just be sure to share the love cookies can be addictive! if you’re watching your sugar intake, consider using less sugar when decorating or sticking to your chocolate drizzle techniques with healthier options like dark chocolate.
Anyway, cookie monsters unite because these are perfect for parties, school treats, or just a spooky gathering with your crew!
Let's Wrap It Up
So, there you have it everything you need to bake spider web cookies for spooky fun! whether you’re preparing for halloween parties or just craving some soft, buttery cookies, this recipe has you covered.
Get the family involved in the decorating, have a ball, and i promise it'll turn into one of your favorite halloween baking activities.
Happy baking and halloween vibes to ya!
Frequently Asked Questions
How do I bake Spider Web Cookies for Spooky Fun?
To start, follow the recipe to prepare the cookie dough and chill it in the refrigerator. Once chilled, roll out the dough, cut out your desired shapes, and bake them until lightly golden. After baking, let them cool before decorating them with melted chocolate in a spider web pattern.
Can I customize the flavors of my Spider Web Cookies?
Absolutely! You can add ¼ cup of cocoa powder to the dough for chocolate flavored cookies or use different extracts like almond or lemon for a unique twist. Additionally, you can replace the chocolate drizzle with royal icing for a different decorating option.
What's the best way to store my baked Spider Web Cookies?
Store the baked cookies in an airtight container at room temperature for up to one week. If you wish to keep them longer, you can freeze them for up to three months. Just make sure to separate layers with parchment paper to prevent sticking.
Can I make these cookies in advance for a Halloween party?
Yes, you can make the dough ahead of time and freeze it for future baking. You can also bake the cookies, let them cool, and then decorate them the day before your event. This will give you more time to enjoy the festivities!
How do I make Spider Web Cookies healthier?
To make a healthier version, consider substituting half of the granulated sugar with a sugar alternative like maple syrup or coconut sugar. You could also try using whole wheat flour instead of all-purpose flour for added fiber. Keep in mind that these substitutions may alter the texture slightly.
What type of chocolate should I use for the spider web decoration?
Semi sweet chocolate chips are perfect for the classic flavor and easy melting. If you prefer, you can use white chocolate chips for a different look or even colored candy melts for festive alternatives that match your Halloween theme. Just make sure to thin them out if needed for a smooth drizzle!
Bake Spider Web Cookies For Spooky Fun
Ingredients:
Instructions:
Nutrition Facts:
| Calories | 150 |
|---|---|
| Protein | 2g |
| Fat | 7g |
| Carbs | 22g |
| Fiber | 0g |
| Sugar | 10g |
| Sodium | 50mg |
