Strawberry Earthquake Cake Recipe: the Ultimate Decadent Treat to Impress!
- Introduction to the Sweetest Temptation
- What’s in a Name? A Little History
- The Ultimate Guide to Mastering the Sizzling Strawberry Earthquake Cake
- Why This Recipe Will Amaze You
- Health and Nutrition Highlights
- Recipe at a Glance
- Essential Components Guide
- Professional Cooking Guide: Mastering the Art of Baking
- Expert Kitchen Wisdom
- Perfect Presentation
- Storage and Make-Ahead
- Creative Variations
- Complete Nutrition Guide
- Expert FAQ Solutions
- 📝 Recipe Card
Introduction to the Sweetest Temptation
Have you ever found yourself daydreaming about a slice of cake that’s not just a treat, but an experience? Something where chocolate and strawberries dance together in perfect harmony on your taste buds?
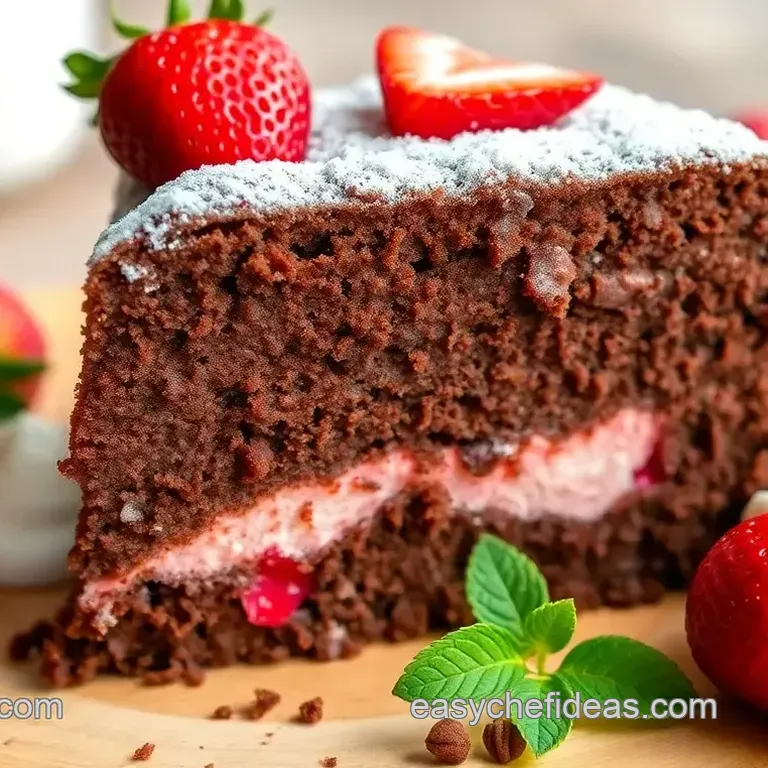
If that sounds like your idea of dessert heaven, buckle up, because we’re diving into the world of a Sizzling Strawberry Earthquake Cake a dessert that’s both visually stunning and utterly delicious!
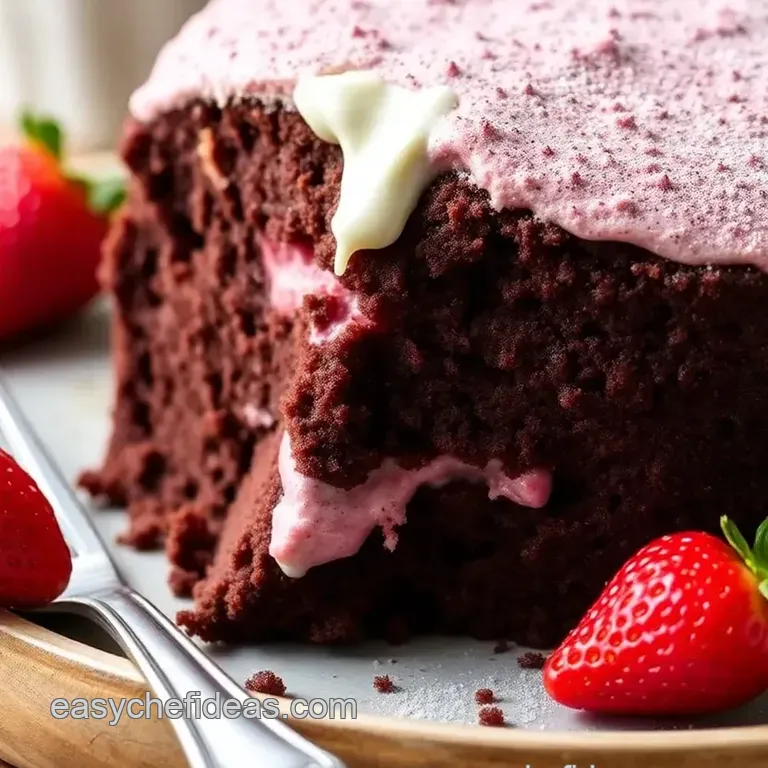
Now, what makes this recipe so special? for starters, it’s a twist on the classic earthquake cake that features a chocolate base married with a luscious cream cheese filling and a glorious strawberry topping.
Sounds mouthwatering, right? and the good news is that this beauty takes about 1 hour and 30 minutes from start to finish and is a medium level of difficulty, making it perfect for home cooks who want to impress without breaking a sweat.
What’s in a Name? A Little History
Let’s take a stroll down memory lane. the earthquake cake concept dates back to the invites heading into family gatherings, where decadent desserts were the stars.
Originally known for their gooey centers and layered textures, these cakes have evolved into versions studded with sweet fruits or creamy fillings.
The sizzling strawberry earthquake cake is a modern homage to that tradition, blending rich chocolate cake with seasonal strawberries. it’s not just a dessert; it’s a celebration of flavors and a nod to communal joy around the dining table.
The unique selling point? this cake effortlessly combines the richness of a moist chocolate cake with the tartness of fresh strawberries, creating a flavor profile that’s as complex as it is approachable.
What’s more, it’s great for gatherings. imagine serving this beauty at a summer barbecue friends will rave about your baking skills!
The Ultimate Guide to Mastering the Sizzling Strawberry Earthquake Cake
Let’s talk inspiration. the rich culinary heritage behind layered cakes lends a lot of emotion to every slice. the combination of cake with fruit toppings has been a part of our food culture for centuries.
I mean, who hasn’t enjoyed a warm slice of fruit filled dessert during the summer months? with its roots buried deep in traditional baking, the sizzling strawberry earthquake cake carries a fascinating origin story that’s just waiting to be shared around the table.
Fast forward to today, and this dessert has skyrocketed in popularity, especially during summer parties and gatherings. it’s an iconic party cake idea, loved by kids and adults alike, and serves as a crowd pleaser, making it one of the best cake recipes for parties.
Why This Recipe Will Amaze You
Now, let’s get into why you will absolutely fall in love with this recipe. the unique flavor combinations of rich chocolate, creamy cheesecake, and fresh strawberries are, honestly, like a symphony for your palate.
And the techniques? they’re foolproof. even if you’re a beginner, as long as you keep an eye on your mixing (don’t overmix!) and get a little help from a toothpick while checking for doneness, you’re golden.
Oh, and here’s a pro tip: let your strawberries macerate for a while. this extra step gives your topping a burst of flavor that will have everyone asking for seconds.
Trust me, this simple cake does wonders in impressing guests, and who doesn’t love a good story behind a dessert?
Health and Nutrition Highlights
Okay, i know we all indulge every now and then, but hear me out this cake has some nutritional benefits too! packed with fresh strawberries, it's a smart way to get your fruit fix, and let’s not forget the protein rich cream cheese filling!
of course, if you're counting calories or have certain dietary needs, there are gluten-free cake options and substitutions you could use, like swapping in greek yogurt for the cream cheese.
This keeps it rich but a touch lighter, easing the guilt of dessert (just a little).
Recipe at a Glance
- Total Preparation Time: 1 hour 30 minutes
- Skill Level Required: Medium
- Serving Size: Yields 10 servings
- Cost Efficiency: Wallet friendly, especially if you snag fresh strawberries at the farmer's market!
As we switch gears into the next section, you might want to grab a notebook or your favorite recipe app to jot down those key ingredients .
Because trust me, this strawberry earthquake cake recipe will have everyone asking for your secret. let’s dive into what you’ll need to whip this heavenly cake up and get the good times rolling!
Essential Components Guide
Let's talk about what makes your baking adventures really shine. I mean, when you’re whipping up that Sizzling Strawberry Earthquake Cake , it’s not just about following a recipe; it’s all about the good stuff behind it, right? So, let’s dive in!
Premium Core Ingredients
When it comes to baking, quality is key . First up, for the cake base of our delicious dessert, you’ll need:
- All-purpose flour : 1 ¾ cups (220 g) - Look for finely milled with no lumps.
- Granulated sugar : 1 ½ cups (300 g) - Get the pure, white stuff it should be crunchy and sparkly.
- Unsweetened cocoa powder : ½ cup (45 g) - Choose Dutch processed for a richer flavor.
- Vegetable oil : ¾ cup (180 ml) - Neutral is best; it’ll keep that moist chocolate cake nice and tender.
- Buttermilk : 1 cup (240 ml) - If you don’t have this on hand, just mix milk with a splash of vinegar or lemon juice.
Now, what about storage? Keep these dry goods in a cool, dark place, and they’ll be good for yonks. Honestly, who wants to use stale flour, right?
Signature Seasoning Blend
Now let’s jazz things up with the filling! The cream cheese in our cake is creamy and dreamy. Here’s what you’ll need:
- Cream cheese : 8 oz (225 g), softened - Look for blocks rather than spread that’s crucial.
- Powdered sugar : 1 ½ cups (180 g) - Super fine, so it blends seamlessly!
- Vanilla extract : 1 teaspoon (5 g) - The real stuff makes a world of difference.
Don’t forget about the fresh strawberries for a topping that sings summer! Toss those hulled, sliced beauties with sugar, and let them rest to get all syrupy and delicious. Mmm!
Smart Substitutions
We all have those moments when an ingredient is mysteriously absent, don’t we? here’s where smart substitutions play a role.
For example, if you’re out of cream cheese, try using greek yogurt for a lighter option that still has a creamy texture.
Also, if you’re hankering for seasonal fruit desserts, feel free to swap in whatever berries you have on hand. Summer just screams for fresh raspberry flavors, and let’s be real, they’re just as sweet!
Kitchen Equipment Essentials
Alright, let’s make sure you’re armed and ready for battle against this cake. You’re gonna need:
- 9x13-inch baking pan : The classic! Grease it well, or use parchment paper for an easy lift.
- Mixing bowls galore : Have a couple ready you’ll want them for different components.
- Electric mixer, thank you very much : If you don’t have one, a sturdy whisk and some muscle will do just fine.
- Rubber spatula : To get every last bit of goodness out of your bowls.
Honestly, everyone has those weird gadgets they just can’t live without. Mine? A zester. Makes life so much easier!
Pro Ingredient Tips
When picking strawberries, go for those vibrant red ones. They should smell like heaven. If you’re grabbing cream cheese, make sure it’s softened – no one wants lumps in their cheesecake layer.
Store your leftover cake in the fridge, and, if you’ve got it, use an airtight container to keep it fresh.
And here’s a money saving tip: buy larger bags of flour and sugar; they’re often cheaper and last a long time!
Before we dive into the juicy part the instructions on how to actually make this cake remember to have fun! it’s all about that mixing, baking, and the sweet aroma that fills your kitchen.
Get ready to impress everyone with this layered cake that’s not just another dessert but an experience!
You're going to love making this Strawberry Earthquake Cake it’s the perfect family dessert recipe for gatherings or a cozy night in. Let’s get baking!
Professional Cooking Guide: Mastering the Art of Baking
Oh my gosh, baking can be such a joyful experience! but every now and then, it can also feel daunting, right? especially when you’re eyeing something as fabulous as a strawberry earthquake cake .
The good news is that i’m here to help you breeze through this process with some professional cooking tips that will make your dessert creation a walk in the park.
Let’s dive into the essential steps for success!
Essential Preparation Steps
Mise en place details: first off, you’ve probably heard “mise en place” before, right? it’s basically the fancy way of saying “get your stuff together.
” before you even think about turning on that oven, gather all your ingredients. for our strawberry earthquake cake, that means having everything from flour to cream cheese ready to go.
It’s like getting your ducks in a row before you dive into a river of chocolatey goodness.
Prep techniques: don’t worry, we’re keeping this simple. when i made this cake for the first time, i sliced my strawberries ahead of time.
Toss them with a bit of sugar to get them nice and juicy. trust me, it’s sooo worth it. also, make sure your cream cheese is softened; nobody wants clumps in their filling!
Time management: bake smarter, not harder. set aside about 15 minutes to prep, and put your strawberries in the fridge while you whip up the batter.
Use that chill time to make the filling it’s all about multitasking!
Organization tips: Keep your workspace tidy, because nothing is worse than battling a chaotic kitchen while trying to bake. I like to clean up after each step, so I can focus entirely on the next part without distractions!
Professional Cooking Method
Now that our setup is perfect, let’s get to the fun part the baking!
step-by-step process: preheat your oven to 350°f (175°c) and grease that 9x13-inch pan (trust me, it’ll save you a lot of trouble later!).
Now, in a large bowl, mix your dry ingredients first: flour, sugar, cocoa powder oh yes, rich chocolate vibes coming alive!
Temperature control: once your batter is mixed, make sure to monitor your oven temp. a consistent 350°f is magical for a fluffy cake texture! those chocolatey layers need love and warmth to come together perfectly.
Timing precision: Bake for about 45-50 minutes, but keep a toothpick handy. Poke it in the middle if it comes out clean, you’re golden! I like to check around the 40-minute mark.
Success indicators: When your cake is baked, let it cool. The top should be set and it should spring back when lightly pressed those are your golden signs of success!
Expert Techniques
Here’s where it gets really fun nailing those little nuances that turn a good cake into a great one.
Professional methods: When concocting the cream cheese filling, beat it thoroughly until creamy; this helps ensure a consistent texture. No one likes a surprise lump!
Critical steps: Gently swirl in the cream cheese mixture with your chocolate batter. You want it to just blend a bit, creating that earthquake effect. Nothing too crazy here!
Precision points: Pay close attention when layering the cake. Even distribution is key to making sure every slice has that perfect balance of moist chocolate cake and creamy filling.
Quality checks: After baking, allow the cake to cool before adding your sweet macerated strawberries on top. It’s like the cherry on the cake, but better!
Success Strategies
And if things aren’t going quite to plan? Here’s my troubleshooting toolkit.
Troubleshooting tips: Too dry? It might have baked just a tad too long; next time, keep a close eye and give it a quick poke.
Quality assurance: Double check your ingredient measurements; baking is a precise art so remember, those ingredients need to be spot on!
Perfect results guide: Always taste as you go. Of course, always make sure to save some for your guests, but sampling is part of the fun of baking, don’t you think?
And there you have it! with these steps, you’re not just baking a cake; you’re truly crafting a masterpiece. this brings us to the next section where i’ll dive deeper into some fun variations and serving suggestions for this incredible strawberry earthquake cake .
Trust me, you won’t want to miss it!
Expert Kitchen Wisdom
Oh my gosh, let me tell you about expert kitchen wisdom ! this is where you uncover the secrets that can take your baking game from “meh” to “wow!” when i first started dabbling in recipes like a strawberry earthquake cake, i was convinced that a moist chocolate cake was all about the ingredients.
Spoiler alert: it’s also about the techniques . don’t you love how a pinch of patience can lead to success?
For starters, using freshly made cake frosting makes a world of difference. trust me! and when it comes to measurements, precision is key.
For easy cake recipes , like our decadent chocolate cream cheese cake, consider leveling your dry ingredients with a knife for accuracy.
That alone can guarantee a fluffier cake texture!
Perfect Presentation
So, think about presentation everyone loves when a dessert looks as good as it tastes, right? Here are some plating techniques that will make your Strawberry Earthquake Cake sing:
- Garnish Ideas: Fresh mint leaves or a dusting of powdered sugar can amp up that visual appeal like no other.
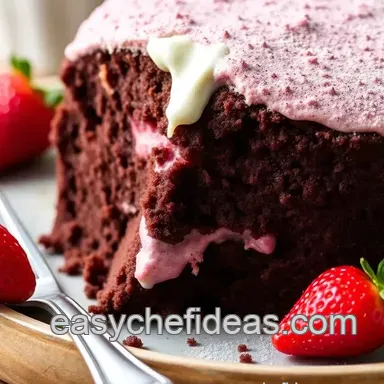
- Serving Suggestions: You don’t have to serve slices the same old way. How about using a cake with fruit topping approach? Lay out pieces on minimalist white plates and top them off with those beautiful sliced strawberries.
- Visual Appeal Tips: Look, I’m telling you, arrange your cake with creativity. Try stacking a few slices, or even layering with sweet dessert recipes like whipped cream. It’s all about that eye candy !
Storage and make-ahead
You know what's great about baking? you can prepare in advance! for my cake with fruit topping, there are some handy storage guidelines .
Wrap your fully cooled cake in plastic wrap and store it in the fridge. it can stay fresh for about 3-4 days!
- Preservation Methods: If you want it to last longer, consider freezing. Just make sure it’s properly wrapped to avoid freezer burn.
- Reheating Instructions: When you're ready to dig in, pop it in the oven on low heat for a few minutes, or use the microwave for a quick reheat. Just don’t forget to check it every 10 seconds nobody wants rubbery cake!
- Freshness Tips: If you plan on fulfilling that sweet tooth craving later, a piece with a drizzle of homemade cake frosting enhances its taste like you wouldn’t believe.
Creative Variations
Baking is art, my friends! Don’t be afraid to get creative. With our Strawberry Earthquake Cake, the possibilities are endless.
- Flavor Adaptations: Swap out strawberries for whatever seasonal fruit you fancy; berries, peaches, you name it!
- Dietary Modifications: Watching carbs? Replace the sugar with a gluten-free cake option or a sugar substitute.
- Seasonal Twists: Use spiced fruit toppings during autumn think apples with cinnamon.
- Regional Variations: Ever had chocolate desserts for gatherings that explore cultural flavors? Try adding cultural spices or liquors. Your guests will love it!
Complete Nutrition Guide
For those of us who pay close attention to our indulgences, here’s the real deal: how does the Strawberry Earthquake Cake fit into our nutrition goals? A detailed breakdown reveals it’s pretty balanced!
- Health Benefits: Dark chocolate can actually be a mood booster! And fresh strawberries? Rich in antioxidants.
- Dietary Information: Each slice is around 350 calories but think of each serving as a delightful reward after a long day.
- Portion Guidance: It yields 10 servings, which makes it perfect for family gatherings or parties. Don’t worry; you deserve that slice (or two!).
Expert FAQ Solutions
“What if my cake doesn’t rise?” is a common concern I hear from beginner bakers. Don’t fret!
- Expert Answers: Make sure your baking powder and baking soda are fresh. Old leavening agents are major party poopers!
- Troubleshooting Guide: If your cake is too dry, consider a moist chocolate cake recipe that adds extras like sour cream or applesauce.
- Success Tips: Always start with room temperature ingredients; it gives you that deliciously luscious, creamy texture you crave.
As we wrap up, remember this: the joy of baking comes not just from the cake itself, like my sizzling strawberry earthquake cake , but also in creating memories! so don your apron, invite some friends, and turn that kitchen into a happy place.
Let's get baking!
Strawberry Earthquake Cake Recipe The Ultimate D
Ingredients:
Instructions:
Nutrition Facts:
| Calories | 350 |
|---|---|
| Protein | 6 g |
| Fat | 16 g |
| Carbs | 50 g |
| Fiber | 2 g |
| Sugar | 28 g |
| Sodium | 280 mg |
