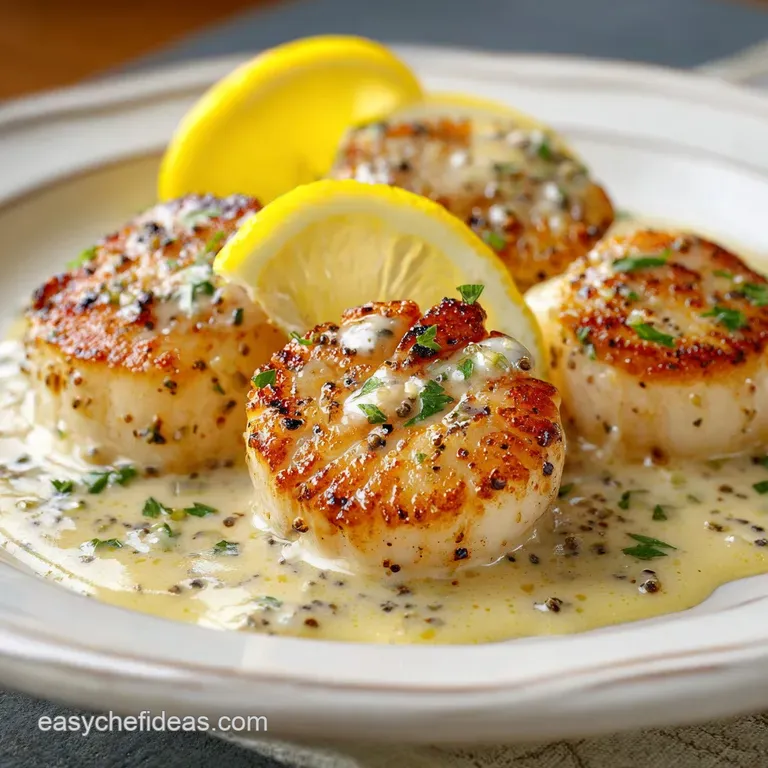
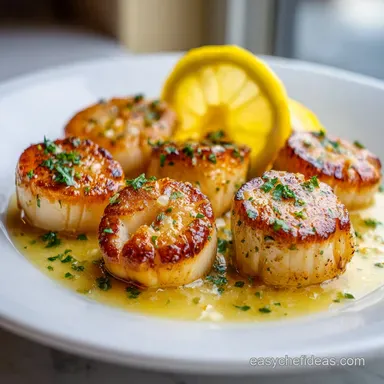
Pan Seared Scallops with Butter Baste
- Time: Active 15 minutes, Passive 5 minutes, Total 20 minutes
- Flavor/Texture Hook: Shatter crisp golden crust with a velvety, succulent center
- Perfect for: Anniversary dinners, impressive date nights, or a luxury protein boost
- The Secrets to Achieving Perfect Pan Seared Scallops
- Understanding the Precision Behind the Sear
- Component Analysis and Ingredient Roles
- The Essential Elements for Success
- Equipment for a Perfect Sear
- Bringing the Scallops to Life
- Troubleshooting and Correcting the Crust
- Scaling for Different Crowds
- Truths About Sourcing and Preparation
- Storage and Sustainable Practices
- Perfect Pairings for the Plate
- High in Sodium
- Recipe FAQs
- 📝 Recipe Card
The Secrets to Achieving Perfect Pan Seared Scallops
The first time I tried to cook these at home, I was so excited. I’d spent a small fortune on a pound of sea scallops, imagining that golden, crusty exterior you see in high end bistros. I dropped them into the pan, expecting a triumphant sizzle. Instead, I got a sad, grey puddle of foam.
Within three minutes, my expensive seafood was swimming in a murky liquid, looking more like boiled rubber than a gourmet meal. I ended up overcooking them just to get some color, and they were as tough as pencil erasers.
That kitchen disaster taught me the single most important lesson: moisture is the absolute enemy of the sear. Most grocery store scallops are soaked in a preservative called sodium tripolyphosphate (STP), which makes them soak up water like a sponge.
When they hit the heat, all that water leaks out, steaming the meat instead of searing it. Once I switched to "dry packed" scallops and learned the paper towel trick, everything changed. Now, when I hear that aggressive hiss as the flesh hits the cast iron, I know I’m about to eat something world class.
Understanding the Precision Behind the Sear
To get that restaurant quality finish, we have to respect the physics of heat transfer and protein structure. It isn't just about a hot pan; it’s about managing the surface area and the thermal mass of your equipment.
The Physics of the Crust: Extreme heat triggers the Maillard reaction, where proteins and sugars rearrange into complex, savory flavor compounds. To achieve this before the delicate interior overcooks, the surface must be bone dry so the energy isn't wasted evaporating water.
Critical Doneness and Timing Guide
| Scallop Thickness | Internal Temp | Rest Time | Visual Cue |
|---|---|---|---|
| 1 inch (Standard) | 125°F - 130°F | 2 minutes | Opaque sides, golden crust |
| 1.5 inch (Jumbo) | 130°F | 3 minutes | Firm to touch, slight spring |
| 0.5 inch (Bay) | 120°F | 1 minute | Flash sear only, translucent |
When you are looking for that specific "shatter" on the crust, the choice of oil makes a massive difference. You need something that won't smoke out your kitchen before the scallop is done. Using a high smoke point fat like avocado oil allows us to push the temperature high enough to brown the exterior in under two minutes. If you’ve ever mastered the technique in my Cod Fish recipe, you’ll know that the final butter baste is where the real flavor layering happens.
Component Analysis and Ingredient Roles
The beauty of this dish lies in its simplicity, but each element has a specific job to do. We aren't just adding fat for the sake of it; we are building a bridge between the sea salt brine of the mollusk and the earthy aromatics of the herbs.
| Ingredient | Science Role | Pro Secret |
|---|---|---|
| Sea Scallops | Lean Protein | Must be "Dry Packed" to avoid steaming |
| Avocado Oil | Heat Conductor | High 500°F smoke point prevents bitter char |
| Chilled Butter | Emulsification | Cold butter foams slowly, coating the meat |
| Fresh Thyme | Volatile Aromatics | Bruise the sprig before adding to release oils |
While the scallops are the star, the supporting cast ensures they don't taste one dimensional. The acidity from the lemon juice at the end doesn't just add flavor; it actually cuts through the richness of the butter, brightening the entire palate and making the natural sweetness of the seafood pop.
The Essential Elements for Success
Gather these items before you turn on the stove. This recipe moves incredibly fast once the first scallop hits the pan, you won't have time to go looking for a spoon or a plate.
- 1 lb Large Sea Scallops: Look for U10 or U12 size. Why this? Larger scallops provide more surface area for a dramatic, crispy crust. (Substitute: Colossal shrimp, though the texture is firmer and less sweet).
- 1.5 tbsp Avocado oil: Chosen for its neutral flavor and high heat tolerance. Why this? It won't burn or break down at searing temperatures. (Substitute: Ghee or Clarified Butter).
- 0.5 tsp Fine Sea Salt: Dissolves faster than kosher salt for even seasoning. (Substitute: Kosher salt, use 1 tsp).
- 0.25 tsp Freshly cracked black pepper: Adds a subtle floral heat. (Substitute: White pepper for a cleaner look).
- 3 tbsp Unsalted butter: Keep this cubed and chilled in the fridge until the very last second. Why this? Chilled butter allows for a longer basting time before it browns. (Substitute: Vegan butter sticks).
- 2 cloves Garlic: Smashed to release the oils without burning. (Substitute: 1 shallot, halved).
- 1 sprig Fresh thyme: Provides an earthy contrast to the sweet seafood. (Substitute: Fresh rosemary or sage).
- 1 tbsp Fresh lemon juice: To balance the fats. (Substitute: Dry white wine).
- 1 tsp Fresh parsley: Finely chopped for a hit of freshness. (Substitute: Chives).
Chef's Tip: Freeze your butter cubes for 10 minutes before you start. This delay in melting gives the garlic and thyme more time to infuse the oil without the milk solids in the butter burning too quickly.
Equipment for a Perfect Sear
You really need a pan that can hold onto its heat. When you drop cold (or even room temperature) scallops into a thin, cheap pan, the temperature drops instantly, and you lose your chance at a good crust.
A heavy bottomed cast iron skillet or a high-quality stainless steel pan (like a Tri Ply) is non negotiable here. I prefer cast iron because it creates a more even, dark mahogany crust. You’ll also need a pair of fish tweezers or thin tongs.
Avoiding bulky tongs helps you flip the scallops without tearing the delicate, caramelized surface. Finally, have a large metal spoon ready for the "Arrosé" technique the fancy French word for spooning that hot, bubbly butter over the food.
Bringing the Scallops to Life

This process is about timing and sensory cues. You are looking for the transition from translucent to opaque and the sound of the fat as it bubbles around the edges.
- Dry the scallops thoroughly. Use several layers of paper towels to pat the scallops on all sides until they feel tacky. Note: Surface moisture creates steam, which prevents browning.
- Remove the side muscle. Feel for a small, tough rectangular tag on the side of each scallop and peel it away. Note: This "foot" becomes very rubbery when cooked.
- Season immediately before cooking. Sprinkle the salt and pepper over the scallops just as the pan finishes heating. Wait for the salt to hit the meat right before the pan.
- Heat the oil. Place the avocado oil in the skillet over medium high heat until it shimmers and wisps of smoke appear.
- Place the scallops. Work in a clockwise pattern, starting at the 12 o'clock position. Listen for a loud, aggressive sizzle.
- Sear undisturbed. Let them cook for 2 minutes without moving them. Wait until a visible golden ring forms at the base.
- Flip carefully. Use your tongs to turn them over. The seared side should be a deep, even brown.
- Add the aromatics. Drop in the chilled butter, smashed garlic, and thyme sprig. Watch for the butter to foam and turn nutty.
- Baste the tops. Tilt the pan slightly and use a spoon to pour the foaming butter over the scallops for 1 minute. Hear the butter crackle as it hits the crust.
- Finish and rest. Remove from heat, squeeze the lemon juice over the top, and sprinkle with parsley. Rest for 2 minutes before serving.
If you enjoy the technique of building a pan sauce while searing, you'll find the method very similar to my Pork Chops with recipe, where we use the fond (those brown bits) to create depth.
Troubleshooting and Correcting the Crust
Even with the best intentions, things can go sideways. The most common issue is the "stuck" scallop. If you try to flip it and it resists, it's telling you it isn't ready. The proteins haven't fully denatured and released from the pan surface yet.
Resolving Texture and Surface Issues
| Problem | Root Cause | Solution |
|---|---|---|
| Scallops are sticking | Pan wasn't hot enough or moved too early | Wait 30 more seconds for natural release |
| Rubbery, tough texture | Overcooked or internal temp exceeded 140°F | Pull at 125°F; carryover heat finishes them |
| Pale, grey exterior | Excess surface moisture or "wet" scallops | Pat drier next time; avoid STP treated meat |
Common Mistakes Checklist ✓ Never crowd the pan; leave at least an inch between each scallop to allow steam to escape. ✓ Don't use olive oil; it will smoke and become bitter at these high temperatures.
✓ Avoid salting the scallops too early, as salt draws out moisture to the surface. ✓ Ensure the butter is added only after the flip to prevent the milk solids from burning. ✓ Use a timer; 30 seconds can be the difference between velvety and bouncy.
Scaling for Different Crowds
When you're cooking for more than two people, the biggest challenge is pan space. If you try to cram 2 lbs of scallops into one 12 inch skillet, the temperature will plummet, and you'll end up poaching them in their own juices.
Cooking for a Group (4-6 people): Work in batches. Sear half the scallops, remove them to a warm plate, wipe the pan clean, and start again with fresh oil. For the final butter baste, you can add all the scallops back into the pan for 30 seconds once the butter is foaming.
Cooking for One: Halve the butter and oil, but keep the aromatics the same. A single sprig of thyme and one garlic clove are still necessary to provide enough flavor for the basting liquid. If you find yourself with a smaller appetite, you might enjoy the delicate flavors in my PanSeared Scallops with recipe which pairs a smaller portion with a filling risotto.
Truths About Sourcing and Preparation
There is a lot of misinformation about what makes a scallop "good." You'll often hear that you should soak them in milk to "sweeten" them or that you must use a non stick pan to prevent sticking.
The "Wet" vs. "Dry" Myth: Some believe "wet" scallops are fresher because they look plump. In reality, that plumpness is just chemical laden water weight. "Dry packed" scallops are superior in flavor and searing ability every single time.
The Non Stick Trap: Many home cooks reach for non stick pans out of fear. However, non stick coatings actually inhibit the Maillard reaction. You won't get that iconic, shatter crisp crust without the high energy contact provided by stainless steel or cast iron.
Internal Temperature: Many people think seafood must be cooked until it is "well done" or "firm" all the way through. Scallops are best served medium rare to medium.
If the center is still slightly translucent, it will have a silky, melt in-the mouth quality that disappears the moment they turn solid white.
Storage and Sustainable Practices
Fresh scallops are highly perishable and should ideally be cooked the day you buy them. If you must store them, place them in a single layer on a plate, cover them with a damp paper towel, and put them in the coldest part of your fridge for no more than 24 hours.
Freezing and Reheating: You can freeze raw scallops by wrapping them individually in plastic wrap and placing them in a freezer bag for up to 3 months. To thaw, leave them in the fridge overnight never use the microwave.
For leftovers (though they are rare!), I don't recommend reheating them in the microwave, as they turn to rubber. Instead, slice them thin and serve them cold over a salad or gently warm them in a pan with a splash of water and a lid for 60 seconds.
Zero Waste Tip: If your scallops come with the orange "coral" or roe attached, don't throw it away! While some find the texture soft, it is packed with intense seaside flavor. You can sear it right alongside the white adductor muscle or blend it into a compound butter for future seafood dishes.
Perfect Pairings for the Plate
Because these are so rich and buttery, they crave something bright or earthy on the side. A simple bed of wilted spinach or a zesty arugula salad works wonders. If you want something more substantial, a creamy pea purée or a lemon herb couscous provides a beautiful contrast to the crispy exterior of the seafood.
If you want a classic pairing, go with a dry white wine like a Sauvignon Blanc or a crisp Sancerre. The acidity in the wine mimics the lemon juice, cleansing the palate between bites of the succulent meat.
For a more rustic approach, serve them over a cauliflower mash with plenty of cracked black pepper to highlight the caramelized notes of the sear. Regardless of the side, remember that the scallops are the lead actors keep the accompaniments simple so the natural sweetness of the sea can shine through.

High in Sodium
946 mg of sodium per serving (41% of daily value)
The American Heart Association recommends limiting sodium intake to about 2,300mg per day for overall health.
Tips to Reduce Sodium in Your Seared Scallops:
-
Reduce Added Salt-25%
Eliminating the 0.5 tsp of fine sea salt will significantly reduce the sodium content. Consider omitting it entirely, as the natural flavor of the scallops can shine through. You can always add a tiny pinch at the end if needed.
-
Rinse Scallops-10%
Thoroughly rinse the scallops before cooking. While they are dry-packed, rinsing can still remove any residual brine or salt absorbed during processing. This small step contributes to a slight reduction in sodium.
-
Enhance with Lemon-5%
Increase the amount of fresh lemon juice from 1 tbsp to 2 tbsp to enhance the dish's acidity and brightness. This can help compensate for the lack of salt and make the flavors more vibrant without adding sodium.
-
Boost Herbs
Experiment with other fresh herbs like chives or tarragon in addition to (or instead of) thyme and parsley. Fresh herbs add complexity and flavor without adding any sodium.
Recipe FAQs
How to cook the best pan seared scallops?
Dry the scallops thoroughly, season immediately, and sear on a very hot, dry pan. Moisture is the enemy; pat them completely dry with paper towels before seasoning. Use a high smoke point oil like avocado oil, and do not move them until a dark crust forms, about 2 minutes per side.
Should scallops be seared in oil or butter?
Use oil first, finish with butter. Start searing in a high smoke point oil like avocado oil to achieve the necessary high heat for the crust. Add the butter, aromatics, and baste only during the last minute of cooking to infuse flavor without burning the milk solids.
What's the secret to searing scallops perfectly?
The secret is ensuring the scallops are completely moisture free and the pan is ripping hot. If they are "wet packed," the water leaches out, steaming the meat instead of browning it. If you enjoyed mastering the temperature control for a perfect sear here, apply that same precision when you learn How to Cook recipe Tuna Ahi.
How does Gordon Ramsay sear scallops?
He emphasizes extreme dryness, a screaming hot pan, and finishing with a butter baste. Ramsay frequently advocates for patting the scallops bone dry and using stainless steel or cast iron to maximize heat transfer for a deep sear, often basting with herbs toward the end.
Why are my scallops sticking to the pan?
No, they shouldn't stick if the pan is hot enough. Scallops stick when they are introduced to a pan that is not hot enough, causing them to steam instead of sear. Wait until you hear an aggressive sizzle; if they resist flipping after two minutes, they need another 30 seconds on that side to release naturally.
Is it true that I must use dry-packed scallops for a good sear?
Yes, dry-packed scallops are essential for the best crust. Wet scallops are treated with sodium tripolyphosphate (STP), which causes them to retain excess water, guaranteeing a steamy, pale result. If you are looking to practice similar high heat searing on leaner protein, review the principles in our Grilled Mediterranean Seafood Recipes.
What internal temperature should pan-seared scallops reach?
Aim for 125°F to 130°F for medium doneness. At this temperature, the opaque edges will be firm while the center remains slightly translucent and silky. Always remove them from the heat slightly early, as they will continue cooking for a few minutes while resting.
Perfect Pan Seared Scallops
Ingredients:
Instructions:
Nutrition Facts:
| Calories | 396 kcal |
|---|---|
| Protein | 27 g |
| Fat | 28 g |
| Carbs | 5.4 g |
| Fiber | 0.2 g |
| Sugar | 0.1 g |
| Sodium | 946 mg |
