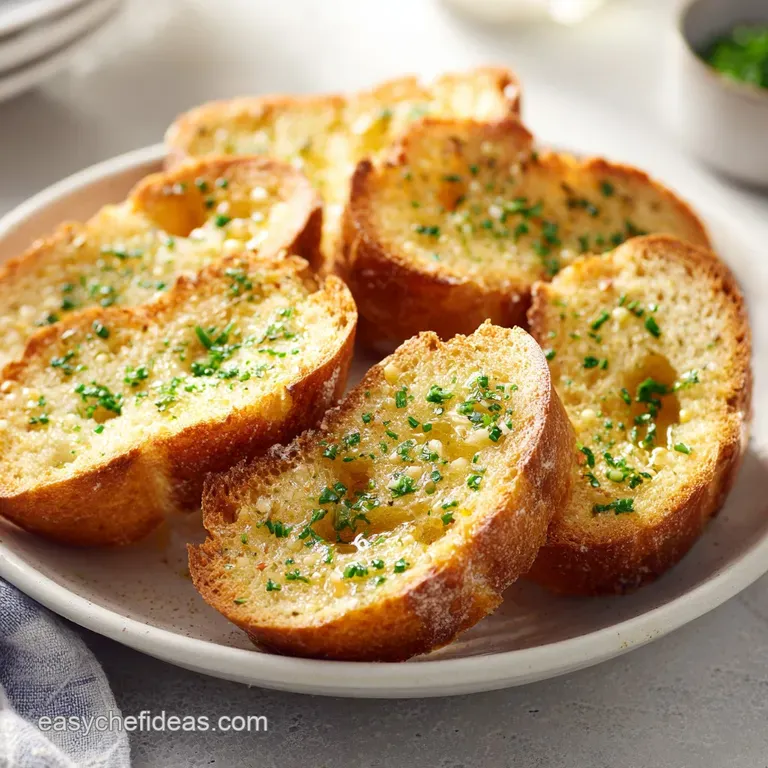
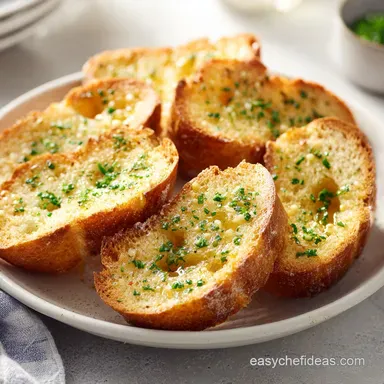
Homemade Garlic Bread: Golden and Crispy

- Time: Active 10 minutes, Passive 15 minutes, Total 25 minutes
- Flavor/Texture Hook: A shatter crisp exterior with a velvety, garlic soaked crumb.
- Perfect for: budget-friendly family dinners, casual game nights, or as a cozy side for plant based pasta dishes.
- Discovering the Cultural Roots of How to Make Garlic Bread
- Essential Specs for the Ultimate Homemade Loaf
- High Impact Ingredients for a Wholesome Golden Crust
- Simple Tools Needed for Professional Results at Home
- Step by Step Guide to Making Garlic Bread
- Solving Common Problems and Avoiding Kitchen Disasters
- Troubleshooting Common Issues
- Plant Based Swaps and Creative Flavor Variations
- Keeping Your Bread Fresh and Reheating for Crunch
- Perfect Pairings for Your Finished Garlic Bread
- Recipe FAQs
- 📝 Recipe Card
Discovering the Cultural Roots of How to Make Garlic Bread
There is a specific, intoxicating aroma that defines the classic Italian American kitchen, and it almost always starts with garlic hitting warm fat. Growing up, the smell of a loaf warming in the oven meant everything was going to be okay.
It's funny because if you go to Italy and ask for this specific style of bread, you might get a confused look. Authentic Italian "garlic bread" is actually bruschetta, which is simply grilled bread rubbed with a raw clove and drizzled with olive oil.
The buttery, cheesy, decadent version we love today really found its soul in the mid-20th century in the United States. It was a way to take a simple French baguette or Italian loaf and turn it into something substantial, wholesome, and incredibly comforting for a growing family on a budget.
When I first started cooking, I used to think the best way was to just melt some butter and pour it over. I was so wrong. I ended up with a greasy, soggy mess that had no structural integrity.
After years of experimenting with different fats and temperatures, I realized that garlic bread is less about the bread itself and more about the "aromatic emulsion" we create before it ever touches the heat.
It’s about that beautiful transition from a sharp, pungent garlic bite to a mellow, sweet, and nutty finish. This recipe is a nod to those crowded Sunday dinners where the bread basket was the first thing to go empty, but with a few smart tweaks to make it more consistent and professional.
We are going to focus on a "hassleback" style cut that keeps the loaf together while allowing the garlic butter to seep into every nook and cranny. This method is brilliant because it prevents the bread from drying out into a giant crouton.
Instead, you get these layers of texture: the top that’s been exposed to the air gets that satisfying crunch, while the interior stays steamed and soft. It’s a transformation that turns a simple store-bought baguette into a centerpiece that everyone will be fighting over.
Trust me, once you see how the oils and fats marry with the starch of the bread, you’ll never go back to the frozen stuff again.
Essential Specs for the Ultimate Homemade Loaf
Before we get our hands messy, let's talk about the logistics. This recipe is designed to be efficient, using a 14 inch baguette which is usually the most affordable and accessible option at any local bakery or grocery store.
We are looking at a total time of 25 minutes, with only 10 minutes of hands on work. That is faster than ordering a pizza! The goal here is a wholesome transformation of basic ingredients into something that feels like a luxury.
| Method | Time | Texture | Best For |
|---|---|---|---|
| Oven Bake (Foil) | 15 minutes | Soft interior, crisp top | Large families, dinner parties |
| Stovetop Pan Fry | 8 minutes | Very crunchy, buttery | Single servings, quick snacks |
| Air Fryer | 10 minutes | Maximum "shatter" crust | Small batches, energy saving |
Choosing your method depends on how much you’re making. For this specific recipe, we are using the oven because it allows for that beautiful thermal pocket effect. If you're only making two slices for yourself, the stovetop is a great way to get a quick fix, but you lose that soft, steamed center that only a whole loaf can provide.
The oven provides a more even heat distribution, which is crucial when you have cheese involved. We want that mozzarella to be stretchy and the Parmigiano Reggiano to be slightly toasted, not burnt.
When we look at the time investment, those 15 minutes in the oven are the most important. We aren't just heating the bread; we are allowing the raw garlic to essentially "confit" inside the butter. If you pull it out too early, the garlic will still have that sharp, spicy "burn" that can be a bit much.
If you leave it too long without the foil, you'll end up with a rock. Precision in the timing ensures the garlic mellows into a savory, sweet paste that coats the tongue.
High Impact Ingredients for a Wholesome Golden Crust
The "Why" behind our ingredient choices is what separates a mediocre snack from a legendary side dish. We are looking for components that provide both flavor and structural support.
- Emulsion Stability
- Combining olive oil with butter prevents the fat from separating too quickly, ensuring the bread absorbs the flavor instead of just getting greasy.
- Thermal Shielding
- The use of aluminum foil creates a miniature steam chamber, which hydrates the starches in the bread so they don't turn into hard glass in the dry heat of the oven.
- Aromatic Infusion
- Using both fresh minced garlic and garlic powder provides a "layered" flavor profile, giving you both the fresh punch and the deep, savory "umami" base.
- Moisture Control
- Parmigiano Reggiano acts as a seasoning agent that also absorbs excess moisture from the butter, preventing the bottom of the bread from becoming "wet."
| Component | Science Role | Pro Secret |
|---|---|---|
| Fresh Garlic | Provides the volatile oils and "punchy" sulfur compounds. | Mince it into a paste to avoid biting into raw chunks. |
| Extra Virgin Olive Oil | Lowers the smoke point and adds a fruity, wholesome depth. | Use a high-quality oil for a more complex finish. |
| Low moisture Mozzarella | Creates the "pull" and fat rich mouthfeel. | Shred it yourself to avoid anti caking starches. |
One mistake I made for years was using only butter. Butter is about 15% water, and when that water evaporates in the oven, it can sometimes leave the bread feeling a bit dry or "hollow." By adding those two tablespoons of Extra Virgin Olive Oil, we are introducing a fat that stays liquid at a wider range of temperatures.
This is a smart, budget friendly way to get a much richer mouthfeel without needing to buy expensive, high fat European butters. It’s all about working with what you have to create the best possible result.
For another way to use these flavors, I often find that a Garlic Parmesan Sauce can be a great dip if you want to take things even further. The science of fat and garlic is consistent across these recipes, and once you master the balance here, you'll see it everywhere in your cooking.
Simple Tools Needed for Professional Results at Home
You don't need a high end kitchen to learn how to make garlic bread like a pro. In fact, some of the best bread I've ever made was in a tiny apartment with one baking sheet. However, there are three specific items that will make your life significantly easier and the result much more "wholesome" and consistent.
- Serrated Knife: This is non negotiable. Using a straight edge chef’s knife will squish the airy crumb of your baguette. A serrated knife "saws" through the crust without deforming the shape.
- Small Glass Mixing Bowl: You want to see the consistency of your garlic paste as you mix it. A spatula is better than a spoon here because it allows you to "mash" the garlic into the butter.
- Heavy Duty Aluminum Foil: Don't go for the cheap, thin stuff. We need a foil that can hold its shape to create that "thermal pocket" we talked about. This is what keeps the steam inside.
Having a clean cutting board is also vital. You want enough space to slice the 14 inch loaf without it hanging off the edge. If your cutting board is too small, your slices will be uneven, and the bread won't bake at the same rate. I also like to have a small microplane or fine grater handy for the Parmigiano Reggiano.
Pre grated cheese often has potato starch added to it to keep it from clumping, but that starch can prevent the cheese from melting into that silky, velvety texture we’re after.
If you are feeling adventurous and want to try a different base, I've had great success using this same garlic butter spread on a Sourdough Discard bread. The tang of the sourdough adds a whole new dimension to the savory garlic.
step-by-step Guide to Making Garlic Bread
Now, let's get into the actual process. Follow these steps closely, and pay attention to the sensory cues. Cooking is as much about listening and smelling as it is about following a timer.
- Prepare the spread: In a small mixing bowl, combine 0.5 cup of softened butter, 2 tablespoons of olive oil, 5 cloves of minced garlic, 0.5 teaspoon of garlic powder, 0.25 teaspoon of sea salt, and 2 tablespoons of chopped parsley. Use a spatula to fold everything together until it forms a uniform, pale green paste. Note: Softening the butter to room temp is crucial; if it's too cold, it won't emulsify with the oil.
- Prep the loaf: Place your French baguette on the board. Using the serrated knife, cut 1 inch thick slices. Stop about 1/4 inch from the bottom. The loaf should look like an accordion but stay connected.
- Apply the base: Generously slather that garlic butter spread between every single slice. Don't be shy; use it all. Make sure to get some on the very top of the loaf as well.
- Add the cheese: If you are going for the cheesy version, tuck the 1 cup of mozzarella and 0.5 cup of Parmigiano Reggiano deep into the crevices between the slices.
- Create the pocket: Wrap the entire loaf snugly in aluminum foil. This is our "thermal pocket" that locks in the moisture.
- First Bake: Place the wrapped loaf in a preheated oven at 375°F (190°C). Bake for 10 minutes. You should start to smell the garlic becoming sweet and fragrant.
- The Reveal: Carefully open the top of the foil, exposing the top of the bread. Be careful of the steam!
- The Crisp: Bake for another 5 minutes uncovered. Watch for the cheese to bubble and the edges of the bread to turn golden brown.
- Rest: Let the bread sit for 2 minutes before pulling the slices apart. This allows the cheese to "set" slightly so it doesn't all slide off.
- Serve: Pull the slices apart and serve immediately while the center is still steaming and velvety.
The real magic happens in that transition between step 6 and step 8. The first ten minutes are for "cooking" the inside and melting everything together. The last five minutes are for the "Maillard reaction" on the surface, which gives us that complex, toasted flavor.
If you skip the second bake, the bread will be soft but lack that "shatter" that makes garlic bread so addictive.
Solving Common Problems and Avoiding Kitchen Disasters
Even a simple recipe can go sideways if you aren't careful. I can't tell you how many times I've accidentally turned a beautiful loaf into a charred stick of carbon because I got distracted. The most common issue people face when learning how to make garlic bread is a lack of balance between "crispy" and "burnt."
Troubleshooting Common Issues
| Issue | Solution |
|---|---|
| Why Your Garlic Bread Tastes Bitter | If your bread has a sharp, acrid, or bitter taste, it's almost always the garlic. This happens for two reasons: either the garlic was burnt during the uncovered baking phase, or you used old garlic th |
| Why Your Loaf Is Soggy in the Middle | Sogginess is usually a result of too much fat or not enough "reveal" time. If you use a very "wet" butter or too much oil, the bread will act like a sponge. Make sure you are following the 10 minute c |
| Why the Crust is Too Hard to Bite | This usually happens if the bread was stale to begin with or if it stayed in the oven too long without the foil. If you are using a bread that is already a few days old, give it a very light mist of w |
Plant Based Swaps and Creative Flavor Variations
As someone who loves a plant based, wholesome approach to comfort food, I often find myself making "smart swaps" for the dairy in this recipe. The great thing about garlic bread is that the garlic is the star, and you can achieve incredible results with vegan alternatives.
If you want to keep it dairy-free, replace the 0.5 cup of butter with a high-quality plant based butter stick (look for one with an oil base like avocado or olive). For the cheese, you can make a "wholesome" parmesan substitute by pulsing 0.5 cup of raw cashews with 2 tablespoons of nutritional yeast and a pinch of salt.
This provides that "cheesy" umami flavor without the dairy. The olive oil in the recipe already does a lot of the heavy lifting, so you won't even miss the traditional butter.
If you want a Spicy Kick, do this:
- Add 1 teaspoon of red pepper flakes to the butter mixture.
- Swap the mozzarella for a dairy-free pepper jack style shred.
- Add a drizzle of hot honey or maple syrup after baking for a "sweet heat" finish.
If you want a Mediterranean Vibe, do this:
- Replace the parsley with fresh oregano and basil.
- Add 2 tablespoons of finely chopped sun dried tomatoes to the spread.
- Use only olive oil (increase to 0.5 cup) and omit the butter entirely.
For those who are feeding a crowd on a budget, you can use "day old" bread from the discount bin. In fact, slightly stale bread is often better for this recipe because it is more absorbent and holds its structure better under the weight of the butter and cheese.
It’s a great way to practice "zero waste" in your kitchen.
Keeping Your Bread Fresh and Reheating for Crunch
Garlic bread is definitely best eaten right out of the oven, but life happens. If you find yourself with leftovers, don't just throw them in the microwave. Microwaves turn bread into rubber.
- Fridge
- Store in an airtight container or wrap tightly in foil for up to 3 days.
- Freezer
- You can freeze the unbaked but prepared loaf for up to 2 months. Just wrap it in a double layer of foil. Bake it directly from frozen at 350°F (180°C) for 25 minutes, then 5 minutes uncovered.
- Zero Waste Tip
- If you have leftover pieces that have gone hard, pulse them in a food processor. These "garlic bread crumbs" are incredible for topping pasta, salads, or roasted vegetables.
To reheat, the air fryer is your best friend. Set it to 350°F (180°C) for about 3-4 minutes. It will bring back that "shatter" crust and melt the cheese perfectly.
If you don't have an air fryer, the oven at the same temperature for 10 minutes (wrapped in foil for the first 5) will do the trick.
Perfect Pairings for Your Finished Garlic Bread
This bread is a heavy hitter, so it needs a main dish that can stand up to its bold flavors. Traditionally, you can't go wrong with a big bowl of spaghetti pomodoro or a veggie filled lasagna. The acidity in a tomato sauce helps "cut" through the richness of the garlic butter spread.
If you are looking for something a bit lighter, this bread is a fantastic companion to a hearty kale Caesar salad. The crunch of the bread mimics a giant crouton, while the garlic flavors harmonize with the dressing. For a completely plant based feast, I love serving this alongside a creamy mushroom risotto.
The "velvety" texture of the rice matches the soft interior of the bread, making for the ultimate comfort meal.
Ultimately, learning how to make garlic bread is about more than just a side dish. It's about taking simple, budget friendly pantry staples flour, water, garlic, and fat and turning them into a sensory experience that brings people together.
Whether you follow the traditional dairy heavy route or go for a wholesome plant based version, the result is the same: a warm, fragrant loaf that makes your house feel like a home. So, preheat that oven, get your garlic ready, and let's get baking!

Recipe FAQs
How to make garlic bread at home step-by-step?
Combine softened butter, olive oil, minced garlic, garlic powder, salt, and parsley into a uniform paste. Cut 1 inch slices into a baguette without cutting all the way through, slather the mixture between slices and on top, wrap in foil, and bake at 375°F for 10 minutes before opening the foil for
a final 5-minute crisping.
Is it better to use garlic salt or garlic powder for garlic bread?
Use both for maximum flavor. The fresh garlic provides depth, while the garlic powder ensures a consistent, savory punch in every bite that fresh cloves alone sometimes miss.
How to make garlic bread with normal bread?
Spread the prepared butter mixture generously over individual slices instead of a full loaf. Place them on a baking sheet and toast at 375°F until the edges are golden and the butter is bubbling, which usually takes less time than a whole baguette.
Should I cook garlic before adding to bread?
No, keep it raw in the butter mixture. The garlic will roast perfectly inside the foil pocket during the 15-minute total bake time, avoiding the harsh bitterness that comes from pre-cooking.
Why is my garlic bread bitter?
Bitter flavors usually stem from burnt garlic during the final uncovered baking stage. If you enjoyed mastering the heat control techniques required to prevent burning here, you can apply that same vigilance to any roasted vegetable dish.
Can I make this ahead of time?
Yes, assemble the loaf fully and keep it wrapped in foil in the refrigerator. When ready to serve, simply pull it out and place it directly into the oven, adding a minute or two to the initial 10-minute bake to compensate for the chilled ingredients.
How do I stop the bread from getting soggy?
Ensure the butter is thoroughly softened before mixing to avoid over applying fat. Using the foil "thermal pocket" method helps, but always ensure you open the foil for the final 5 minutes so steam can escape and the crust can crisp up properly.
How To Make Garlic Bread
Ingredients:
Instructions:
Nutrition Facts:
| Calories | 301 kcal |
|---|---|
| Protein | 8.5 g |
| Fat | 20.1 g |
| Carbs | 19.8 g |
| Fiber | 0.9 g |
| Sugar | 1.2 g |
| Sodium | 456 mg |
