Garlic Butter Chicken: Pan-Seared Perfection
- Time: Active 10 minutes, Passive 10 minutes, Total 20 minutes
- Flavor/Texture Hook: Shatter crisp edges with a velvety, zesty sauce
- Perfect for: Busy weeknights where you need a nourishing, high protein meal
- Easy Garlic Butter Chicken Recipe
- The Science of Why it Works
- Quick Decision Prep Guide
- Choosing the Right Flavor Layers
- Tools for a Flawless Sear
- Step-By-Step Cooking Method
- Fixing Common Cooking Pitfalls
- Variations for Every Palate
- Guidelines for Storage and Reheat
- Best Pairings for a Meal
- Recipe FAQs
- 📝 Recipe Card
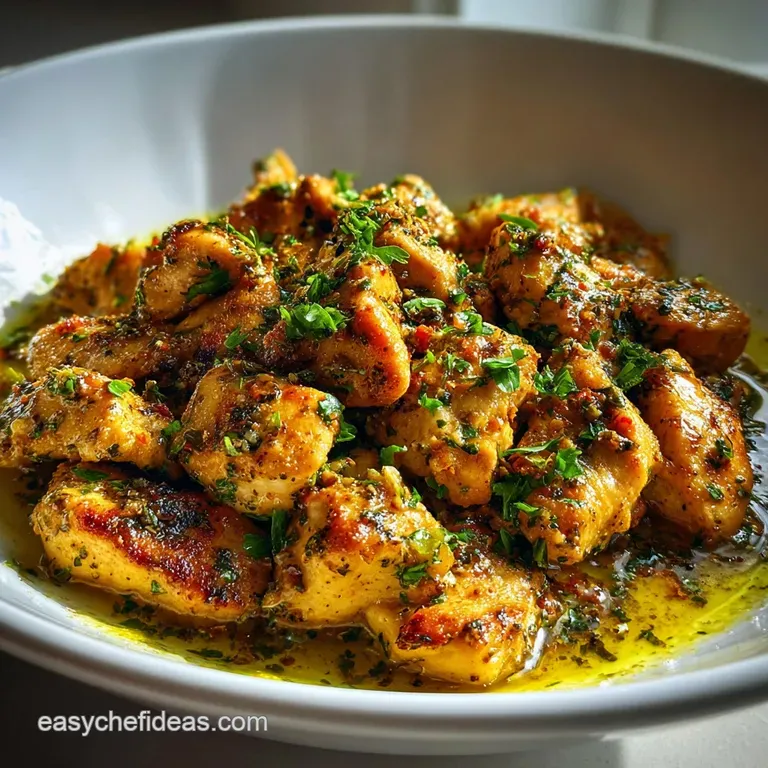
Easy Garlic Butter Chicken Recipe
Ever wonder why that skillet dish you ordered at the local bistro tastes so much better than the one you make on a Tuesday night? I used to struggle with this too, usually ending up with chicken that was either rubbery or swimming in a greasy, broken sauce.
The secret isn't some expensive gadget or a culinary degree, it's actually about how you handle the heat and when you introduce the fat.
This version of Garlic Butter Chicken is a staple in my house because it nourishes the soul without requiring hours at the stove. We're building flavor in stages, starting with a hard sear and finishing with a cold butter emulsion that coats every piece of protein in a silky, garlic heavy glaze.
It's the kind of meal that brings everyone to the table the moment the aroma of toasted garlic hits the air.
We are going to focus on quality over complexity here. By using 1.5 lbs of chicken breast cut into uniform cubes, we ensure every bite cooks at the same rate. This isn't just a quick fix, it's a lesson in how to build a sauce from the bottom of the pan up.
Trust me, once you see those golden brown bits turn into a glossy sauce, you'll never go back to bottled marinades again.
The Science of Why it Works
Maillard Reaction: High heat triggers a chemical reaction between amino acids and reducing sugars, creating hundreds of different flavor compounds and that signature brown crust. This is why we pat the chicken dry, as moisture is the enemy of browning and leads to steaming instead.
Fat Emulsification: By whisking chilled, cubed butter into the warm pan at the very end, the milk solids and fats suspend in the lemon juice. This creates a velvety "beurre blanc" style sauce that clings to the meat rather than just sliding off as liquid oil.
Protein Denaturation: Searing the exterior quickly while keeping the cubes small allows the heat to reach the center just as the outside reaches peak crispness. This prevents the proteins from tightening too much, which is what causes that "rubbery" texture we all want to avoid.
| Thickness | Internal Temp | Rest Time | Visual Cue |
|---|---|---|---|
| 1 inch cubes | 165°F | 3 minutes | Opaque center, clear juices |
| 1/2 inch strips | 165°F | 2 minutes | Firm to touch, golden edges |
| Full breast | 165°F | 5 minutes | No pink near the thickest part |
Managing your heat levels is the most important part of this process. If the pan isn't hot enough when the 1.5 lbs chicken breast hits the surface, you won't get that "shatter" texture on the edges. I always tell my friends to wait until the oil is shimmering before even thinking about adding the meat.
Quick Decision Prep Guide
When you're standing in the kitchen after a long day, you want to know exactly what you're getting into. This dish is designed for speed, but the results taste like you've been hovering over a copper pot for an hour. It's a great companion to The Garlic Butter recipe if you want a full on comfort meal.
| Component | Analysis | Pro Secret |
|---|---|---|
| Chicken Breast | Lean protein source | Cube while slightly frozen for cleaner cuts |
| Fresh Garlic | Allicin rich aromatic | Use a microplane for a more intense flavor |
| Unsalted Butter | Fat based flavor carrier | Use chilled cubes to control the sauce speed |
The combination of avocado oil and butter serves two different purposes. The oil handles the over high heat sear without smoking, while the butter provides the richness and "mouthfeel" that makes the dish feel indulgent.
This layering of fats is a classic technique used in professional kitchens to get the best of both worlds.
Choosing the Right Flavor Layers
Creating a great Garlic Butter Chicken requires a few specific items that balance each other out. We need the salt to enhance, the acid to brighten, and the fat to carry the aromatics. Here is exactly what you need to pull from your pantry and fridge.
- 1.5 lbs chicken breast: Cut these into 1 inch uniform cubes. Why this? Uniform sizes ensure even cooking and maximum surface area for browning.
- 1 tsp kosher salt: Use this to draw out moisture and season deeply.
- 1/2 tsp freshly cracked black pepper: The coarse grind adds a subtle heat.
- 1 tbsp avocado oil: This has a high smoke point, perfect for searing. Why this? It won't burn at the temps needed for the Maillard reaction.
- 4 tbsp unsalted butter: Keep this chilled and cubed until the very end.
- 6 cloves fresh garlic: Mince these finely right before cooking.
- 1/2 tsp red pepper flakes: Adds a gentle hum of heat to the finish.
- 1 tbsp fresh lemon juice: The acid cuts through the richness of the butter.
- 2 tbsp fresh Italian parsley: Adds a hit of chlorophyll driven freshness.
If you don't have everything on hand, don't panic. Cooking is about diversity and adaptation. You can easily swap out the acid or the herbs depending on what's growing in your garden or sitting in your crisper drawer.
| Original Ingredient | Substitute | Why It Works |
|---|---|---|
| Avocado Oil | Ghee (Clarified Butter) | High smoke point with a naturally nutty flavor. |
| Lemon Juice | Dry White Wine | Adds acidity and complexity. Note: Alters the flavor to be more savory. |
| Italian Parsley | Fresh Cilantro | Provides a bright, citrusy finish. Note: Changes the cultural profile to be more lime forward. |
If you find yourself wanting a more "saucy" version of a similar profile, you might enjoy the technique used in the Chicken Francese Recipe, which uses a light flour coating to thicken the pan juices.
Tools for a Flawless Sear

You don't need a kitchen full of gadgets, but a few specific pieces of equipment will make your life much easier. I always reach for my cast iron skillet (like a 12 inch Lodge) because it retains heat better than thin stainless steel.
When you drop cold chicken into a hot pan, you want a pan that doesn't lose its temperature immediately.
A sturdy set of tongs is also essential. You need to be able to flip the cubes individually to ensure every side gets that golden brown treatment. If you use a spatula, you'll end up "crowding" the meat and steaming it instead of searing it.
Finally, a sharp chef's knife is your best friend during the prep phase to get those 1 inch cubes perfectly uniform.
One thing I've learned the hard way: don't use a non stick pan if you want a real crust. Non stick surfaces are designed to prevent things from sticking, but we actually want a little bit of sticking to create the "fond" (those brown bits on the bottom). That fond is the foundation of your garlic butter sauce.
step-by-step Cooking Method
Phase 1: The over High heat Sear
Pat the 1.5 lbs chicken breast completely dry with paper towels. Sprinkle with 1 tsp kosher salt and 1/2 tsp black pepper. Heat 1 tbsp avocado oil in a large skillet over medium high heat until the oil shimmers and barely begins to smoke.
Add the chicken in a single layer, making sure the pieces don't touch. Note: Crowding the pan drops the temperature and causes the meat to boil in its own juices.
Phase 2: The Browning Process
Cook the chicken for 3 to 4 minutes without moving it. You want to see a deep golden crust form on the bottom. Flip the cubes and cook for another 2 to 3 minutes until the exterior is crispy and the chicken is nearly cooked through.
Remove the chicken from the pan and set it aside on a plate, leaving the remaining oil and brown bits in the pan.
Phase 3: The Garlic Infusion
Reduce the heat to medium. Add 1 tbsp of the unsalted butter to the pan. Once melted, add the 6 cloves of minced garlic and 1/2 tsp red pepper flakes. Sauté for about 30 to 60 seconds until the garlic is fragrant and pale gold.
Note: Do not let the garlic turn dark brown or black, as it will become bitter and ruin the sauce.
Phase 4: The Glossy Emulsion
Pour in the 1 tbsp lemon juice and use a wooden spoon to scrape up all those delicious brown bits from the bottom. This is called deglazing. Add the remaining 3 tbsp of chilled, cubed butter one piece at a time, whisking or stirring constantly until the sauce is thick, glossy, and fully combined.
Phase 5: The Final Toss
Return the seared chicken and any accumulated juices to the pan. Toss everything together for 1 minute until the chicken is coated in the velvety sauce. Remove from the heat immediately to prevent the sauce from "breaking" or becoming oily.
Phase 6: The Finishing Touch
Garnish with the 2 tbsp of finely chopped Italian parsley. The residual heat will soften the herbs just enough to release their oils without losing their bright green color. Serve immediately while the sauce is at its peak silkiness.
Fixing Common Cooking Pitfalls
Even with the best intentions, things can go sideways in the kitchen. I've burnt more garlic than I'd like to admit, and I've certainly served my fair share of "boiled" skillet chicken before I figured out the moisture trick. The key is knowing how to pivot when things don't look right.
Why Your Chicken is Sinking
If you notice a lot of liquid in the pan and the chicken looks grey instead of brown, your pan wasn't hot enough or you overcrowded it. This is a common mistake when we're in a hurry. The liquid is the internal moisture of the meat escaping before the outside can sear shut.
Why Your Sauce is Greasy
If the sauce looks like yellow oil rather than a creamy glaze, it has "broken." This usually happens if the heat is too high when you add the butter or if you add all the butter at once. The fat has separated from the milk solids and the lemon juice.
| Problem | Root Cause | Solution |
|---|---|---|
| Burnt Garlic | Heat too high or cooked too long | Remove pan from heat immediately; add a splash of water or broth to cool it down. |
| Tough Chicken | Overcooked past 165°F | Reduce cook time by 1 minute next time; use a meat thermometer. |
| Bland Flavor | Not enough salt or acid | Add an extra squeeze of lemon or a pinch of salt right before serving. |
Common Mistakes Checklist
- ✓ Skipping the "pat dry" step: Always use paper towels to remove surface moisture from the protein.
- ✓ Using a cold pan: Wait for the oil to shimmer before adding any ingredients.
- ✓ Over stirring: Let the chicken sit undisturbed for the first 3 minutes to develop a crust.
- ✓ Adding garlic too early: Garlic burns much faster than chicken; always add it toward the end.
- ✓ Using room temp butter: Chilled butter creates a more stable emulsion for the sauce.
Variations for Every Palate
One of the beautiful things about this Garlic Butter Chicken is how well it adapts to different cultures and dietary needs. If you want to take this in a Mediterranean direction, you could add some sun dried tomatoes and kalamata olives during the garlic phase.
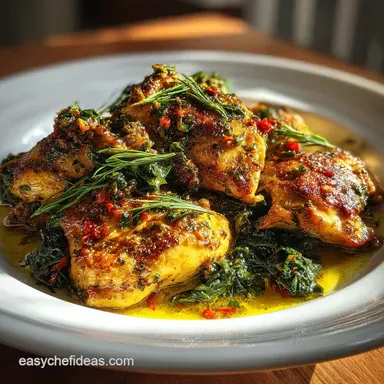
For something with a bit more of a "pub" feel, try using the same technique on Garlic Butter Chicken Wings (though you'll need to adjust the cook time for the bone in meat).
If you are looking for a lower carb option, this dish is naturally keto friendly. You can serve it over zoodles (zucchini noodles) or a bed of sautéed spinach. The fat from the butter and avocado oil provides plenty of satiety, making it a nourishing choice for those focusing on healthy fats.
For a more "classic" feel, tossing this with some al dente pasta makes an incredible Garlic Butter Chicken Pasta that kids and adults alike will devour.
Chef's Note: To give this a deeper, earthier flavor, try browning the butter (beurre noisette) before adding the garlic. It adds a toasted nut aroma that pairs beautifully with the lemon.
Guidelines for Storage and Reheat
If you're lucky enough to have leftovers, they make an amazing lunch the next day. However, reheating chicken breast can be tricky because it tends to dry out the second time around. I recommend storing the chicken and sauce in an airtight glass container.
- Fridge: Store for up to 3 to 4 days.
- Freezer: You can freeze this for up to 2 months, but be aware that the butter sauce may separate slightly when thawed.
- Zero Waste: Don't throw away the parsley stems! Finely mince them and add them to the pan at the same time as the garlic for extra flavor. If you have leftover sauce in the pan, wipe it up with a piece of crusty bread it's liquid gold.
When reheating, do it gently. Use a small skillet over low heat and add a teaspoon of water or chicken broth. Cover the pan to trap the steam, which helps moisten the meat. Avoid the microwave if possible, as it tends to make the chicken rubbery and the butter oily.
Best Pairings for a Meal
To make this a complete, nourishing meal for your community, think about textures. Since the chicken is rich and savory, it pairs beautifully with something light and crisp. A simple arugula salad with a balsamic vinaigrette provides a nice peppery contrast to the butter.
If you want something heartier, roasted fingerling potatoes or a fluffy mash will soak up every drop of that garlic butter sauce. For a more diverse spread, try serving this alongside some charred broccolini or roasted asparagus. The green vegetables provide a visual and nutritional balance to the golden chicken.
- Grain options: Basmati rice, quinoa, or even some toasted farro.
- Bread: A warm baguette is essential for dipping into the remaining sauce.
- Wine: A crisp Sauvignon Blanc or a light Pinot Grigio cuts through the fat perfectly.
| Method | Time | Texture | Best For |
|---|---|---|---|
| Stovetop Skillet | 10 minutes | Maximum crispiness | Quick weeknight dinners |
| Air Fryer | 12 minutes | Even browning | Hands off cooking |
| oven-roasted | 15 minutes | Tender and juicy | Large batch meal prep |
Kitchen Myths Debunked
Myth: Searing meat "seals in" the juices. This is one of the oldest myths in the book. Searing actually creates a flavor crust through the Maillard reaction, but it doesn't create a waterproof barrier.
Moisture loss still happens; the key to juiciness is simply not overcooking the internal temperature.
Myth: You should wash your chicken before cubing it. Please don't do this! Washing raw chicken under the tap splashes bacteria all over your sink and counters. The heat of the pan is what kills any bacteria, and the most important prep step is actually drying the surface with a paper towel so it can sear properly.
Myth: Fresh garlic and jarred garlic are the same. While jarred garlic is convenient, it often has a metallic or sour aftertaste due to the preservatives. For a dish where garlic is the star, taking the extra 2 minutes to peel and mince 6 fresh cloves makes a world of difference in the final flavor profile.

Recipe FAQs
Can I use chicken thighs instead of breast?
Yes, chicken thighs work wonderfully. They are more forgiving and stay moist, which is great if you tend to overcook. Just trim any excess fat and cut them into uniform cubes similar to the breast.
Why is my garlic butter sauce oily and not creamy?
The heat was likely too high when you added the butter. For a stable emulsion, add chilled, cubed butter off the heat and whisk constantly. If it breaks, try whisking in a tablespoon of hot water off the heat to bring it back together.
How can I make this dish spicier?
Increase the red pepper flakes, or add a pinch of cayenne pepper. You could also finely mince a small fresh chili pepper, like a jalapeño, and sauté it along with the garlic in Phase 3.
Is it okay to use pre-minced garlic from a jar?
No, fresh garlic is significantly better here. Jarred garlic often has a metallic taste and lacks the bright, pungent flavor that fresh cloves provide, which is crucial for this recipe's star ingredient.
Can I make the sauce ahead of time?
It's best to make the sauce just before serving. The emulsion is delicate and can break if left sitting. However, you can prep all your ingredients, like mincing garlic and cubing chicken, up to 24 hours in advance.
How do I prevent the chicken from becoming rubbery?
Don't overcook the chicken and ensure your pan is hot enough for the initial sear. Searing the cubes quickly over medium high heat creates a crust that helps lock in moisture, and cooking them just until they reach an internal temperature of 165°F is key.
Can I add vegetables to this dish?
Yes, adding vegetables is a great way to enhance the meal. Consider sautéing mushrooms or asparagus in the pan after searing the chicken, before adding the butter and garlic, similar to the techniques used in our Chicken and Mushrooms in White Wine Sauce RestaurantQuality Creamy Recipe.
Garlic Butter Chicken
Ingredients:
Instructions:
Nutrition Facts:
| Calories | 432 calories |
|---|---|
| Protein | 52.6 g |
| Fat | 23.4 g |
| Carbs | 1.8 g |
| Fiber | 0.2 g |
| Sugar | 0.4 g |
| Sodium | 592 mg |
