Cheesecake Brownies: Failure-Proof and Fudgy
- Time:15 minutes active + 30 minutes cook + 2 hours chilling = Total 2 hours 45 mins
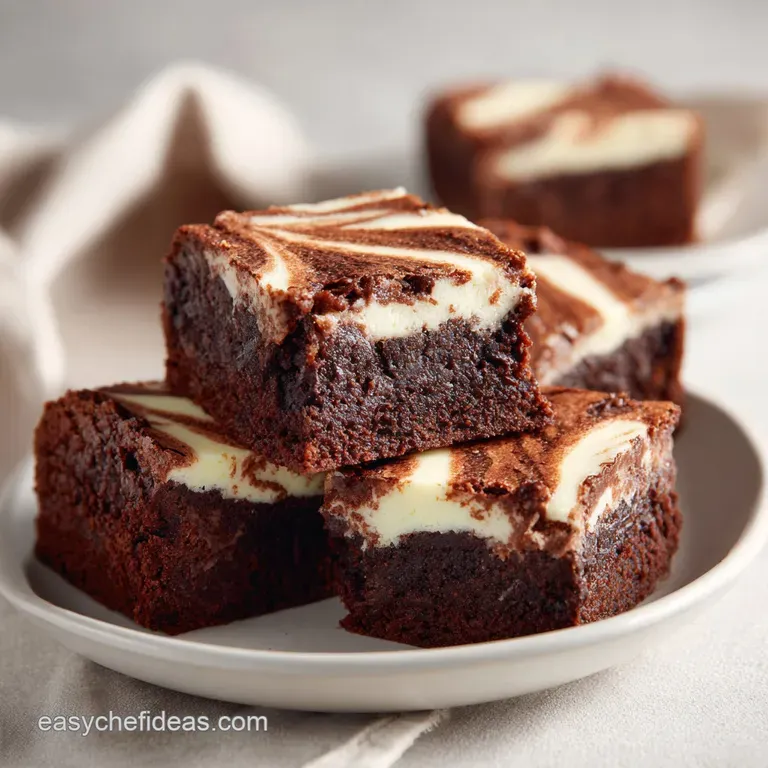
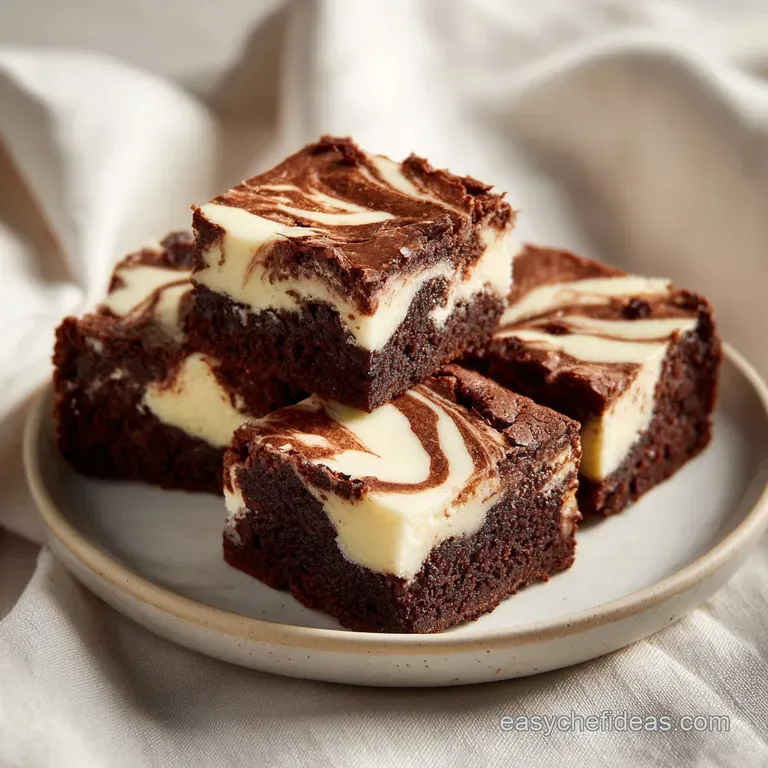
- Flavor/Texture Hook: Velvety cream cheese swirls meeting a dense, cocoa rich fudgy base
- Perfect for: Dinner party desserts or an impressive weekend treat
Fudgy Marbled Cheesecake Brownies
That heavy, intoxicating scent of melted butter and cocoa hits you the second the pan slides into the oven. It's a smell that fills the whole house, promising something dense and rich.
I remember the first time I tried these, I was convinced that the "professional" look of those marbled bars required a water bath or some fancy pastry torch. I thought the clean lines were some industry secret kept from us home cooks.
Forget the idea that you need a professional pastry kitchen to get a clean slice. The biggest myth about this dessert is that it's ready the moment it leaves the oven. I once made the mistake of cutting into them while they were still warm, and it was a disaster.
The cheesecake layer was too soft, the brownie base was still settling, and it looked like a chocolate mudslide on a plate.
Trust me on this: the magic happens in the fridge. When you let these chill, the fats stabilize, and the textures separate into a velvety topping and a chewy base. It's a simple wait, but it's the difference between a home style treat and something that looks like it came from a high end bakery.
Recipe Quick Look
Before we get into the mixing, let's look at the logistics. This is a "special occasion" style bake, meaning we prioritize the visual appeal and the richness of the ingredients over a 10 minute prep time.
But since I know some of you are hosting a crowd, I've put together a quick guide on how to adjust the amounts. Whether you're feeding a small group or a whole office, the ratios stay the same, but the pan size is where people usually trip up.
| Servings | Ingredient Adjustments | Pan Size | Cook Time |
|---|---|---|---|
| 16 people | As written (1x) | 8x8 inch | 30 minutes |
| 32 people | Double ingredients (2x) | 9x13 inch | 35-40 minutes |
| 8 people | Half ingredients (0.5x) | 8x4 inch loaf | 25 minutes |
Right then, let's talk about the method. You have a choice between a "Fast" version (using a box mix) and this "Classic" scratch version. The scratch version takes a bit more whisking, but the depth of flavor is incomparable.
| Feature | Fast (Box Mix) | Classic (Scratch) |
|---|---|---|
| Prep Time | 5 minutes | 15 minutes |
| Texture | Cakey/Airy | Dense/Fudgy |
| Flavor | Sweet/Generic | Rich Cocoa/Tangy |
Secret to Velvety Layers
I've always wondered why some marbled desserts look like a blur while others have those sharp, distinct swirls. It comes down to the density of the batter. Because the cream cheese mixture is heavier than the brownie batter, it wants to sink.
Fat Stabilization: The high fat content in the cream cheese creates a structural wall that prevents the cocoa from bleeding into the white swirls. This is similar to how a classic New York cheesecake maintains its density through precise temperature control.
Air Incorporation: Beating the eggs and sugar vigorously for the brownie base creates a thin, crackly top. This "skin" acts as a barrier, keeping the cheesecake topping from absorbing too much moisture from the bottom layer.
Temperature Set: The 2 hour chill is not optional. It allows the proteins in the cream cheese to firm up, meaning your knife will shatter through the top crust rather than dragging the cheesecake down into the brownie.
Essential Pantry Components
For this recipe, the quality of your cocoa and the temperature of your cheese are the two things that will make or break the result. I use unsalted butter so I can control the salt levels, which is key for balancing the sweetness of the sugar.
| Ingredient | Science Role | Pro Secret |
|---|---|---|
| Cream Cheese | Structure & Tang | Must be truly room temp to avoid lumps |
| Cocoa Powder | Flavor & Color | Sift it to prevent "cocoa pockets" |
| Unsalted Butter | Moisture & Richness | Melt it slowly to avoid burning the fats |
The Full List
- 1/2 cup (115g) unsalted butter, melted Why this? Adds richness and a velvety mouthfeel (Substitute: Coconut oil for dairy-free)
- 1 cup (200g) granulated sugar Why this? Creates the crackly top crust (Substitute: Light brown sugar for more chew)
- 2 large eggs Why this? Provides lift and binding (Substitute: Flax egg, but texture will be denser)
- 1 tsp (5ml) vanilla extract Why this? Rounds out the bitterness of cocoa (Substitute: Almond extract)
- 1/3 cup (30g) unsweetened cocoa powder Why this? Deep chocolate base (Substitute: Dutch processed for darker color)
- 1/2 cup (65g) all purpose flour Why this? Gives the brownie its structure (Substitute: Almond flour, note: denser crumb)
- 1/4 tsp (1.5g) salt Why this? Enhances the chocolate flavor (Substitute: Sea salt flakes)
- 8 oz (225g) cream cheese, softened Why this? The creamy, tangy contrast (Substitute: Mascarpone for a sweeter, richer taste)
- 1/4 cup (50g) granulated sugar Why this? Sweetens the cheese layer (Substitute: Maple syrup, note: alters consistency)
- 1 large egg Why this? Sets the cheesecake layer (Substitute: 1/4 cup applesauce)
- 1/2 tsp (2.5ml) vanilla extract Why this? Fragrance for the topping (Substitute: Lemon zest)
Necessary Baking Tools
You don't need a professional arsenal, but a few specific items make this way easier. I always use parchment paper with an overhang. If you try to grease the pan with just butter, you'll end up fighting the pan to get the brownies out, and you'll lose those clean edges.
A silicone spatula is a must for the folding process. If you use a whisk for the flour, you'll overwork the gluten, and your brownies will turn into cake. We want fudgy, not fluffy.
Chef Note: For the most precise marble pattern, use a thin metal skewer or a toothpick. A butter knife is often too thick and pushes the batter around rather than swirling it.
Step-by-step Baking Process
Let's crack on. This is where the visual magic happens. Pay attention to the "glossy" stage in step 2, as that's where the texture is decided.
Phase 1: Preparing the Chocolate Foundation
- Preheat oven to 350°F (175°C) and line an 8x8 inch baking pan with parchment paper, leaving an overhang on the sides.
- Whisk melted butter and 1 cup granulated sugar together. Add 2 eggs and 1 tsp vanilla extract, beating vigorously until the mixture is glossy and pale.
- Sift in cocoa powder, flour, and salt. Fold gently with a spatula until just combined, ensuring no flour streaks remain. Note: Overmixing here leads to a cakey texture.
- Spread the brownie batter evenly into the prepared baking pan, smoothing the top with a spatula.
Phase 2: Whipping the Velvet Topping
- In a separate bowl, beat softened cream cheese and 1/4 cup granulated sugar until completely smooth and devoid of lumps.
- Add 1 egg and 1/2 tsp vanilla extract to the cream cheese mixture, mixing on low speed until silky and unified. Note: High speed introduces too much air, which can cause cracks.
Phase 3: The Art of the Swirl
- Spoon the cheesecake mixture in dollops over the brownie batter.
- Using a knife or skewer, drag the tool through the cheesecake dollops in a figure eight motion to create a marbled pattern.
Phase 4: The Cooling Ritual
- Bake for 25-30 minutes until the edges are set but the center has a slight wobble.
- Allow the brownies to cool completely and then chill in the refrigerator for 2 hours to ensure clean cuts.
Fixing Common Texture Issues
Even for experienced bakers, a few things can go sideways. Usually, it's a matter of temperature or timing. If your cheesecake layer looks more like a puddle than a swirl, it's usually because the cream cheese was too warm or overbeaten.
Why Your Topping Cracked
If the top of the cheesecake layer has split, you likely overbeat the egg into the cheese, incorporating too much air. This causes the layer to rise and then collapse quickly in the oven.
Why the Base is Too Cakey
This happens when you mix the flour in too aggressively. The more you stir, the more gluten develops, changing the "fudgy" snap into a "spongy" bread like texture.
| Problem | Root Cause | Solution |
|---|---|---|
| Cheesecake Sinking | Overmixing the topping | Mix on low speed until just combined |
| Gooey Center | Underbaked / Not chilled | Chill for a full 2 hours before cutting |
| Greasy Top | Butter melted too hot | Let melted butter cool slightly before adding sugar |
Common Mistakes Checklist
- ✓ Pat the pan edges with parchment for an easy lift
- ✓ Ensure cream cheese is truly room temperature (no lumps)
- ✓ Sift cocoa powder to avoid bitter clumps
- ✓ Stop baking the moment the center wobble slows down
- ✓ Use a sharp, warm knife for the final cuts
Creative Flavor Twists
Once you've nailed the classic, you can start playing with colors and flavors. Since this is a visually driven dessert, I love adding color accents. To make these pop in photos, I suggest adding a raspberry coulis drizzle (Deep Red), a sprinkle of crushed pistachios (Bright Green), or a few zest curls of orange (Vibrant Orange).
If you're feeling adventurous, try a red velvet base. You can swap the cocoa for a small amount of cocoa powder and red food coloring, then keep the cheesecake swirl exactly the same. For something even more indulgent, these pair well with the rich flavors of Deviled Brownies.
For those who want a fruitier profile, fold 1/4 cup of fresh raspberry puree into the cream cheese mixture before swirling. This adds a tartness that cuts through the richness of the chocolate. Use high-quality chocolate chips if you want to add a crunch, which makes a BIG difference in the final bite.
Storage and Scraps
These brownies actually taste better the next day because the flavors have more time to meld. Keep them in an airtight container in the fridge for up to 5 days.
For the freezer, I recommend freezing them in individual squares wrapped in parchment paper. They'll stay fresh for up to 3 months. To eat, just let them thaw in the fridge for a few hours or pop them in the microwave for 10 seconds if you prefer them slightly gooey.
Don't throw away the "edge bits" that get crushed during cutting. I toss these scraps into a blender with a splash of milk and a frozen banana for a cheesecake brownie smoothie. It's a brilliant way to ensure zero waste.
The Best Pairings
Because these are so rich, you need something to cut through the fat. A tart raspberry sorbet or a sharp espresso is the way to go. The bitterness of the coffee complements the cocoa, while the acidity of the fruit balances the cream cheese.
If you're serving these at a party, place each square on a small white plate and garnish with a single fresh mint leaf. The green against the dark chocolate and white swirl looks stunning and makes the dessert feel much more professional.
Recipe FAQs
Can I use cold cream cheese for the topping?
No, use softened cream cheese. Cold cheese creates stubborn lumps that won't disappear during mixing, preventing a silky texture.
How to create the marbled swirl effect?
Spoon the cheesecake mixture in dollops over the brownie batter. Use a knife or skewer to drag the tool through the dollops in a figure eight motion.
Should I cut the brownies immediately after baking?
No, let them cool completely and chill for 2 hours. Refrigerating the pan ensures the cheesecake layer sets firmly for clean, professional cuts.
Is it true that overmixing the brownie batter makes them too cakey?
No, this is a common misconception. The key is to fold gently with a spatula after adding flour and cocoa powder to avoid incorporating too much air.
How to store these brownies to keep them fresh?
Place them in an airtight container in the refrigerator. They stay fresh for up to 5 days. If you enjoyed mastering the fudgy brownie base here, see how the same principle works in our brownie cupcakes.
Can I bake these for 40 minutes to make sure the center is set?
No, stick to 25-30 minutes. Stop baking the moment the center wobble slows down to prevent the brownies from becoming dry.
How to avoid bitter clumps of cocoa powder in the batter?
Sift the cocoa powder, flour, and salt together. This ensures a smooth consistency and prevents pockets of dry cocoa from remaining in the final bake.
Creamy Cheesecake Brownies

