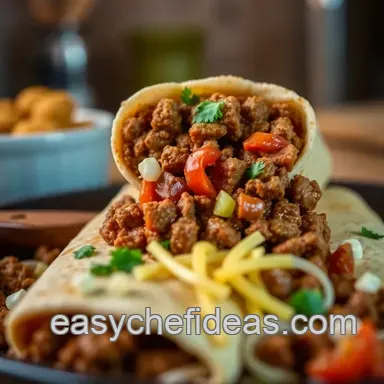
Better-Than-Takeout Beef Burritos

- Time: 10 min active + 15 min cooking
- Flavor & Texture: Smoky, savory beef with a crisp, chestnut brown exterior
- Perfect for: Weeknight dinner or high-protein meal prep
Burritos are more than just a meal, they're a staple of Mexican-American culture. Born from the need for a portable, hearty lunch for field workers, they evolved into these massive, foil-wrapped parcels of comfort.
Whether you grew up with them or just love a good wrap, the goal is always the same: a balance of savory meat, creamy fats, and a sturdy tortilla.
You can expect a meal that hits every note. We're talking smoky ground beef, melted cheese, and the freshness of avocado. This version focuses on a tight roll and a quick toast, so you don't end up with a soggy mess.
Making these beef burritos at home lets you control the quality. You can load up on the fresh salsa or go heavy on the beans. It's a straightforward process that doesn't require fancy equipment, just a large skillet and a bit of patience while the meat browns.
Beef Burritos
Dry Heat Searing: Toasting the tortilla in a dry pan creates a crisp shell that helps keep the wrap from feeling gummy.
Reduction Method: Simmering the beef in broth and tomato paste creates a thick glaze, so the meat stays juicy without making the tortilla soggy.
Tortilla Warmth: Microwaving the wraps for a few seconds relaxes the gluten, which means they stretch instead of tearing when you fold them.
| Final Finish | Time | Texture | Best For |
|---|---|---|---|
| Dry Skillet | 4 mins | Crispy & Toasted | Immediate eating |
| Oven Bake | 15 mins | Uniformly Warm | Large batches |
Recipe Specs
This recipe yields 5 portions. It's designed for a fast turnaround, taking about 25 minutes from the moment you chop the onion to the first bite.
The flavor profile is deeply savory with a hint of smokiness from the paprika. Because we use lean beef and drain the beans, the filling is hearty but doesn't feel overly greasy.
Gathering Your Essentials
| Ingredient | What It Does | Best Swap |
|---|---|---|
| Lean Ground Beef | Main protein and savory base | Ground turkey (leaner, milder flavor) |
| Tomato Paste | Thickens sauce and adds acidity | Tomato sauce (use more, simmer longer) |
| Cumin | Provides earthy, traditional aroma | Ground coriander (lighter, citrusy notes) |
| Monterey Jack | Melts smoothly for a creamy bind | Pepper Jack (for a spicy kick) |
The Full List:
- 1 lb lean ground beef
- 1 tbsp olive oil
- 1/2 medium onion, finely diced
- 3 cloves garlic, minced
- 2 tbsp tomato paste
- 1 tsp ground cumin
- 1 tsp smoked paprika
- 1/2 tsp salt
- 1/4 tsp black pepper
- 1/4 cup beef broth
- 5 large (10-inch) flour tortillas
- 2 cups cooked white rice
- 1 can (15 oz) black beans, drained and rinsed
- 1½ cups shredded Monterey Jack cheese
- 1 cup shredded iceberg lettuce
- 1/2 cup sour cream
- 1 large avocado, sliced
- 1/4 cup fresh salsa
Chef: For the rice, use a day-old batch. Freshly cooked rice is often too moist and can make the wrap mushy.
Tools for the Job
Just a few simple tools are required. A spacious skillet is key to browning the beef properly without overcrowding the pan; a 12-inch cast iron or stainless steel version works best.
Additionally, have a microwave ready for the tortillas and a strong spatula to press the burritos while toasting them at the end.
From Prep to Plate
Phase 1: Searing the Beef Filling
Sizzle some olive oil in a large skillet on medium-high heat. Toss in the ground beef and cook until browned and the beef reaches 160°F (71°C) internally, crumbling the meat with your spoon.
Stir in the diced onion and garlic, sautéing until the onion becomes translucent and aromatic. Mix in the tomato paste, cumin, paprika, salt, and pepper, cooking for 2 minutes.
Pour in the beef broth. Allow it to bubble for 3-5 minutes until the sauce has thickened enough to coat the meat.

Phase 2: Assembling the Wraps
Microwave the tortillas for 15 seconds to make them flexible so they don't crack.
In the center of each tortilla, layer 1/3 cup of cooked rice and 2 tbsp of black beans. Top these with a portion of the seasoned beef, a handful of shredded cheese, a pinch of lettuce, a dollop of sour cream, and an avocado slice.
Fold the sides of the tortilla inward and roll up tightly from the bottom.

Phase 3: The Final Crisp
Set the burrito seam-side down in a dry skillet over medium heat. Press down gently with a spatula. Cook for 1-2 minutes per side until the tortilla is toasted and dark golden.
| Meat Cut | Flavor Profile | Prep Effort | Result |
|---|---|---|---|
| Ground Beef | Classic & Savory | Low | Consistent bite |
| Steak Strips | Bold & Beefy | High | More texture |

Pro Tips & Pitfalls
When the wrap rips
Tearing often occurs if the tortilla is too cold or if there's too much filling. Ensure you leave a 2-inch margin of empty space around the perimeter. If it continues to tear, a tiny amount of water or a bit of flour paste on the seam can act as glue before you sear it.
Fixing watery filling
Continue simmering if the beef resembles a stew instead of a glaze. Let the liquid evaporate until the meat achieves a glossy appearance. When substituting with something like tomato sauce, you may require an additional 3 minutes of cooking time to reach the desired thickness.
Preventing a falling burrito
The trick is starting "seam-down." Always set the burrito in the skillet with the fold side touching the heat. This uses the melting cheese inside to effectively weld the tortilla closed.
Dietary Adaptations
To lower the carbs, try substituting flour tortillas with large collard green leaves or low-carb wraps. Note that these options don't crisp up as effectively in a pan, so you may miss that rich brown crunch.
Make-ahead and Leftover Tips
This is a great candidate for meal prep. Keep the cooked beef and rice in separate sealed containers in the fridge for up to 4 days. Assemble them fresh for the best experience.
If you want to freeze them, wrap assembled (but untoasted) burritos tightly in foil and slide them into a freezer bag. To eat, remove the foil and bake in a 350°F (175°C) oven for 20 minutes, until the filling reaches 165°F (74°C) inside.
You can also air fry them at 350°F (175°C) for 10-12 minutes, until the filling reaches 165°F (74°C) inside.
Avoid the microwave for reheating if you can. It turns the tortilla chewy. A quick toss in a skillet or toaster oven brings back the original crunch, heating until the filling reaches 165°F (74°C) inside.
Pairing Ideas

These are filling on their own, but a side of pickled jalapeños or a simple corn salad adds a nice acidic contrast. I like serving mine with a side of lime wedges to squeeze over the top right before eating.
If you have leftover beef filling, it works great as a base for a quick taco bowl the next day. For another hearty meal, you could serve these with a side of brown gravy if you're leaning into a fusion comfort-food vibe.
Good to Know
How do I prepare the beef filling?
Brown ground beef in olive oil until it reaches 160°F. Sauté onion and garlic, stir in spices and tomato paste, then simmer with beef broth until glazed.
What makes these burritos authentic?
They balance savory seasoned beef with traditional staples like black beans and avocado. This combination reflects the hearty, portable nature of original Mexican-American burritos.
Can this be made quickly for dinner?
Yes, the entire process takes only 25 minutes from start to finish. Most of the time is spent browning the beef and searing the wraps.
Do these include black beans?
Yes, each tortilla is layered with 2 tablespoons of black beans. They add protein and texture alongside the rice and beef.
Is it possible to bake them?
Yes, you can bake the assembled burritos for 15 minutes, until the filling reaches 165°F (74°C) inside. This method provides a uniformly warm result rather than the toasted crunch of a skillet.
Why is the burrito seared in a pan?
Searing in a dry skillet creates a crisp shell that prevents the wrap from feeling gummy. It also locks the roll shut for easier eating.
Beef Burritos in 25 Minutes