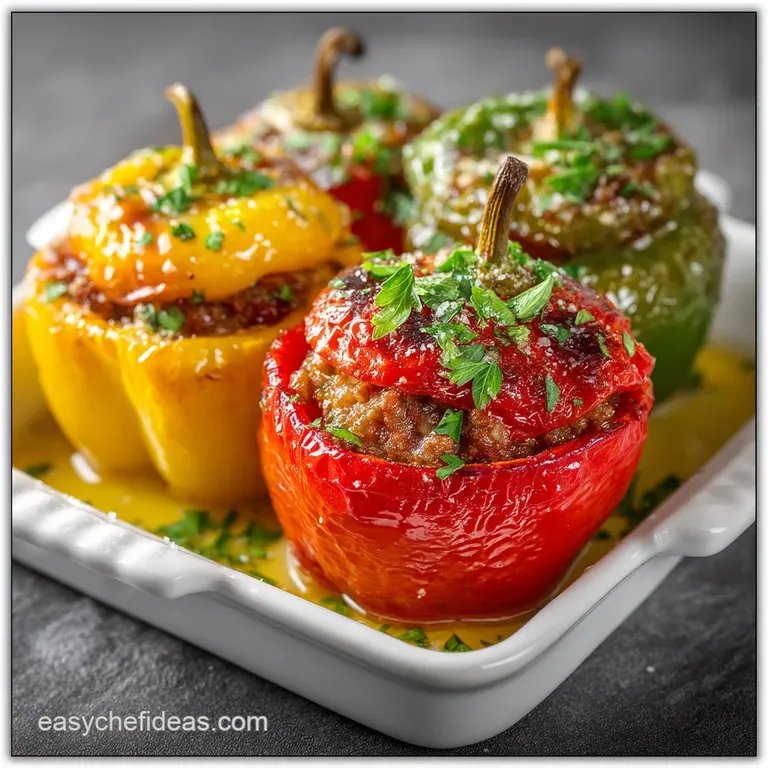
Stuffed Peppers: Ultimate Baked Mediterranean Style
- The Ultimate Guide to Perfectly Baked Stuffed Peppers
- Mastering the Flavor and Texture: Why This Filling Stands Up
- Essential Ingredients for Gloriously Stuffed Bell Peppers
- The Method: A Detailed Guide to Assembling and Baking
- Troubleshooting and Expert Tips for Flawless Results
- Preparation, Storage, and Freezing Guide
- Pairing Perfection: What to Serve Alongside Bell Peppers
- Recipe FAQs
- 📝 Recipe Card
The Ultimate Guide to Perfectly Baked Stuffed Peppers
That smell. Seriously, is there anything better than that deeply savoury, herby aroma wafting from the oven when you’re baking a classic like Stuffed Peppers ? It hits you right in the memories, promising comfort and warmth, the kind of meal that instantly makes the day better.
These aren't those weird, dry, bland stuffed things you might remember from a school cafeteria; these are juicy, rich, and utterly glorious, truly the best Stuffed Peppers you will ever make.
I started making Stuffed Peppers years ago when I realized they were the ultimate pantry lifesaver cheap, easy, and infinitely customizable, which is brilliant for those chaotic Tuesday nights.
You can stretch a small amount of meat and rice into a hearty meal that feeds a crowd without breaking the bank, and the presentation makes you look like a domestic god or goddess, which is always a bonus.
I’ve made every mistake possible with this dish, trust me: watery filling, collapsing peppers, undercooked rice the works. But after years of tweaking, I’ve locked down a method that ensures the pepper is tender, the filling is robust, and the tomato sauce is perfectly balanced.
Let’s crack on and talk about how to make truly spectacular Stuffed Peppers that your family will ask for again and again.
Mastering the Flavor and Texture: Why This Filling Stands Up
The secret to amazing Stuffed Peppers isn't just the ingredients; it’s how we prepare them, focusing entirely on texture control. Most people just mix raw meat and rice, shovel it in, and pray, but that's a recipe for sad, watery results.
We are aiming for a filling that is savoury, slightly crumbly, and cohesive, not a wet mess, which is why we pre-sear the meat and pre-cook the rice.
What Makes This Recipe Truly Mediterranean
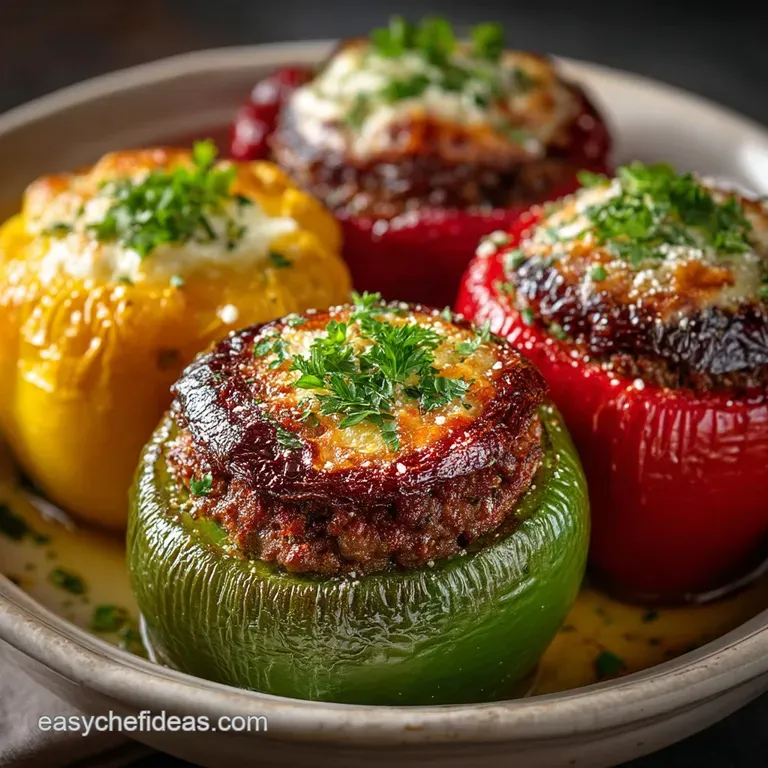
My absolute favourite way to eat Stuffed Peppers is when they lean into those bright, sunny Mediterranean flavours. We use a combination of ground beef and ground pork for maximum depth, but the flavour profile is entirely lifted by oregano, fresh parsley, and a cheeky handful of feta cheese.
That little salty, tangy feta melts perfectly into the seasoned meat and rice, providing a beautiful contrast to the sweet bell pepper. It’s what transforms simple meat and rice into something worthy of a seaside taverna, turning these humble Stuffed Peppers into a feast.
The Science of the Perfect Filling-to-Pepper Ratio
This ratio is critical, my friends. If your filling is too wet, the peppers will steam internally and collapse; too dry, and you’ll end up with dense, hard meatloaf inside a crunchy pepper shell.
We use the egg as a binder and the pre-cooked rice to absorb the meat juices, but the mixture should still feel slightly firm before baking. A great rule of thumb for successful Stuffed Peppers is ensuring the filling mounds nicely without falling apart when scooped; if it's soupy, you need more rice or breadcrumbs.
Essential Equipment Needed Before You Begin
You don't need fancy gadgets to make great Stuffed Peppers , but a few items make life infinitely easier. You must have a really good, sharp knife for prepping the vegetables, because dicing that onion finely is key to the filling texture.
A sturdy 9x13 inch baking dish is mandatory because it’s the right size to allow the peppers to sit snugly upright and be partially submerged in that crucial tomato sauce.
Achieving the Ideal Tender Pepper Texture
The biggest failure when making Stuffed Peppers is having a tough, undercooked pepper. The solution is dual stage baking. We brush the pepper halves with oil and salt, and critically, we start the bake covered tightly with foil.
This traps the steam, effectively steaming the pepper flesh so it gets gorgeously tender without becoming mushy. The second, uncovered bake is just to set the filling and melt that lovely cheese topping. You’ll find this method results in perfect Stuffed Peppers every time.
The Crucial Step: Searing the Ground Beef for Depth
Don’t skip searing the meat! This isn't just about cooking the meat; it’s about creating flavour depth via the Maillard reaction. We brown the ground beef and pork mixture until it’s beautifully caramelized, then— this is non-negotiable —we drain off every bit of excess fat.
If you leave the fat, it will weep into your filling, make the rice greasy, and dilute your beautiful tomato sauce. This step elevates your Stuffed Peppers from good to brilliant.
Balancing Acidity and Savory Notes
The rich, fatty meat needs something bright to cut through it, and that’s where the tomato sauce comes in. Crushed tomatoes provide the base, but they can be aggressively acidic, which clashes with the sweetness of the peppers. We add a small amount of sugar (just half a teaspoon!) and dried basil to the sauce.
This sweetening mellows the harsh acidity of the tomatoes, creating a deep, velvety sauce that perfectly complements the hearty Stuffed Peppers . It’s a minor detail that makes a massive difference to the overall flavour harmony.
Essential Ingredients for Gloriously Stuffed Bell Peppers
Selecting the Best Bell Peppers (Color and Size Guide)
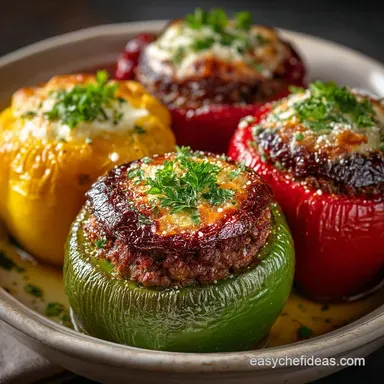
Always choose peppers that are firm, brightly coloured, and look proportionate to your filling goals. Red, yellow, and orange peppers are generally sweeter than green ones, which means they pair better with the savoury, meaty filling.
Green peppers are fine if you like a sharper, more vegetal flavour, but I find the inherent sweetness of the red pepper makes for the most divine Stuffed Peppers . Look for peppers with relatively flat bottom surfaces so they sit upright easily in the baking dish without tipping over.
Detailed Grocery List: Meat, Grains, and Aromatics
We are sticking strictly to the basics here, maximizing flavour from quality simple ingredients.
- Peppers: 4 large bell peppers (red and yellow are ideal).
- Meat: 12 oz (340g) Ground Beef (85% lean) and 4 oz (115g) Ground Pork (or Italian Sausage, casing removed). The mix ensures juiciness.
- Grains: ¾ cup Pre-cooked, cooled White Rice (medium grain works best).
- Aromatics: 1 Yellow Onion, 2 cloves Garlic.
- Binder/Moisture: 1 large Egg, Feta Cheese.
- Sauce: 1 can Crushed Tomatoes, ½ cup Stock (beef or vegetable), Dried Basil, Sugar.
- Herbs: Fresh Parsley, Dried Oregano, Salt, Pepper.
Smart Ingredient Swaps and Adaptations (Rice Type and Herbs)
Sometimes the store is out of your key ingredient, or perhaps you're catering to dietary restrictions. No problem! This Stuffed Peppers recipe is highly adaptable.
| Ingredient | Viable Substitution | Why It Works |
|---|---|---|
| Ground Pork | Turkey Sausage, or just use all Beef (100% Lean). | Adds fat and juiciness; if using 100% lean meat, add 1 tbsp extra olive oil to the filling. |
| White Rice | Cooked Brown Rice, Quinoa, or Orzo. | All absorb moisture well. Just ensure whatever grain you use is pre-cooked and cooled . |
| Feta Cheese | Grated Parmesan or sharp Provolone. | Provides a necessary salty, tangy flavour counterpoint to the rich meat in these classic Stuffed Peppers . |
| Fresh Parsley | 1 tsp Dried Parsley, or Fresh Dill (for a stronger Greek twist). | Adds freshness and color. Dried herbs should be used sparingly, though. |
| Beef Stock | Water, Red Wine, or Chicken Stock. | Adds richness to the tomato base; red wine provides extra depth and acidity. |
Preparing Your Base: Chopping and Pre-Measuring
Preparation, or mise en place , is not just a fancy French term; it’s how busy home cooks keep things stress free. Dice the onion very finely we don't want massive chunks in the filling. Mince the garlic and chop the parsley.
Make sure your rice is already cooked and fully cooled, otherwise, it will be gloopy when you mix it in. Getting all your ingredients lined up prevents panic and ensures your filling comes together quickly while the stove is hot.
This focused preparation is crucial before you start assembling your glorious Stuffed Peppers .
The Method: A Detailed Guide to Assembling and Baking
Prepping the Peppers: Halving vs. Cap Removal
Traditionally, Stuffed Peppers are made by removing the cap, resulting in a tall, freestanding vessel. I prefer halving them lengthwise. Why? Halving provides maximum surface area for the filling to bake and brown beautifully, and it guarantees better portion control plus, they are much easier to eat!
Slice the peppers from stem to tip and use a small spoon to scrape out all the white membrane and seeds. They should look clean and ready to fill.
Chef's Note: Don’t wash the prepared pepper halves with water just before baking. Any remaining moisture will prevent the olive oil from adhering and interfere with the softening process. Pat them dry with paper towels if needed.
Building the Filling: Achieving Maximum Savory Flavor
- Sauté the Aromatics: Heat 1 tbsp of olive oil in your skillet. Add the finely diced onion and cook, stirring occasionally, until soft and translucent about 5 minutes. Add the minced garlic and cook for just 60 seconds until you smell that beautiful, nutty aroma. Remove the mixture to your large mixing bowl.
- Brown the Meat: Turn the heat up to medium high and add your ground beef and pork mixture. Break it up finely and cook until thoroughly browned, leaving no pink spots.
- The Drainage Step: Now, tilt the pan carefully and spoon out or pour off all the rendered grease. This is essential for non-greasy Stuffed Peppers.
- Mixing Time: Transfer the drained meat to the bowl with the aromatics. Add the pre-cooked rice, crumbled feta, beaten egg, fresh parsley, oregano, salt, and pepper. Use your hands! Mix everything until just combined. Don’t overwork the mixture or it will turn dense. The filling is now ready to transform into beautiful Stuffed Peppers .
Loading and Topping: Preventing Spillage and Overflow
Pour your seasoned tomato sauce (crushed tomatoes, stock, basil, and sugar, gently simmered) directly into the bottom of the baking dish. It should coat the base and come about a quarter inch up the sides of the peppers. Now, generously spoon the filling into each pepper half.
You should slightly mound the filling over the top it will contract a little during baking. Press down gently but firmly to pack the filling. The goal is gorgeous, fully loaded Stuffed Peppers .
Precise Baking Times and Temperature Checks
- Initial Covered Bake (Softening): Arrange the stuffed peppers in the baking dish, ensuring they are snug. Cover the dish tightly with aluminum foil. Bake at 375°F (190°C) for 30 minutes. This steam bath is crucial for softening the thick pepper walls.
- Uncovered Finish (Browning): Carefully remove the foil. Sprinkle the grated mozzarella or Parmesan over the exposed filling. Return the dish to the oven, uncovered, for another 10 to 15 minutes. The Stuffed Peppers are done when the internal temperature of the filling reaches 165°F (74°C) and the cheese is melted and lightly golden.
- Rest: Let them rest for 5 minutes when they come out. The filling needs a moment to set, otherwise, it might crumble when you try to lift them out.
Troubleshooting and Expert Tips for Flawless Results
Making perfect Stuffed Peppers involves avoiding a few common pitfalls that can ruin the texture and flavour. I learned these the hard way, usually involving filling sliding off the plate.
Preventing Underbaked Peppers (The Pre-Bake Trick)
If your peppers are particularly large or thick walled, the filling might cook before the shell softens. The fix? Give the empty pepper halves a quick pre-bake.
Before adding any filling, brush them with oil, place them cut-side down in the baking dish with about half an inch of water, and cover with foil. Bake for 10 minutes at 375°F. Drain the water, pat them dry, and then fill them.
This ensures the pepper is already halfway to tender before the filling even touches it, guaranteeing tender Stuffed Peppers .
Fixing a Loose or Dry Filling
If, after mixing, your filling looks too wet (maybe you didn't drain the meat well, or your rice was damp), simply stir in a tablespoon or two of plain breadcrumbs until the filling tightens up.
Conversely, if the filling seems too dry and crumbly, add a splash of stock or a little more tomato sauce base to the mixture to introduce some necessary moisture. The goal is a filling that adheres together but isn't dense. Dry filling leads to crumbly, disappointing Stuffed Peppers .
Managing Moisture and Runoff During Baking
While we drain the meat, the peppers themselves release moisture as they cook. If you see a large amount of excess liquid gathering in the dish during the uncovered bake, don't panic.
You can very carefully spoon some of the excess liquid out of the baking dish just be gentle so you don't disturb your beautifully loaded Stuffed Peppers .
However, usually, if you follow the pre-searing and draining steps, the resulting sauce level should be perfect and deeply flavourful.
Preparation, Storage, and Freezing Guide
These Stuffed Peppers are fantastic for meal prepping, whether you make them completely ahead of time or just prep the filling.
Can You Prepare the Filling Ahead of Time?
Absolutely, and I highly recommend it! You can prepare the entire filling mixture (meat, rice, aromatics, herbs) up to 2 days in advance. Store it in an airtight container in the fridge. This makes assembling the Stuffed Peppers on a busy weeknight a 15 minute job. If you decide to go the ultra easy route sometimes, you could even throw this filling into a slow cooker recipe, much like my popular Crockpot Stuffed Peppers: The Easy Cheesy Slow Cooker Recipe . Just remember to let the filling come to room temperature for about 20 minutes before stuffing the cold peppers.
Reheating Baked Peppers Safely
Leftover baked Stuffed Peppers store brilliantly. To reheat, you want to maintain moisture and avoid drying out the filling.
- Microwave: Place the peppers on a plate, add a splash of water to the plate, and cover loosely with a paper towel. Heat on medium power until warm through (about 2- 3 minutes).
- Oven: This is the best method for texture. Place the leftovers back in a baking dish, add a tablespoon of water to the bottom, cover tightly with foil, and bake at 350°F (175°C) for about 15- 20 minutes until piping hot.
Freezing Unbaked vs. Cooked Peppers
Both methods work, but freezing unbaked is superior for texture.
- To Freeze Unbaked Stuffed Peppers: Assemble the peppers completely (with the raw filling) but do not add the tomato sauce or cheese topping yet. Place them on a parchment lined tray and freeze until solid. Once frozen, transfer them to a freezer safe bag or container. They last 3 months. When ready to cook, place them directly into a baking dish, add the sauce around them, cover, and bake from frozen. Add about 20- 30 minutes to the covered cooking time.
- To Freeze Cooked Stuffed Peppers: Allow the fully baked peppers to cool completely. Wrap each pepper individually in plastic wrap, then foil. They are great for quick lunches. Thaw overnight in the fridge and reheat as described above. These reheated Stuffed Peppers might be slightly softer than the freshly baked ones, but still delicious.
Pairing Perfection: What to Serve Alongside Bell Peppers
These hearty Stuffed Peppers are a complete meal in themselves, featuring meat, grains, and vegetables. However, a little something on the side can complete the dining experience.
I love serving them with something crisp and acidic to cut through the richness of the ground meat filling and the deep tomato sauce. A simple Arugula Salad tossed with a bright lemon vinaigrette and shaved Parmesan is perfect. It provides that much needed freshness.
If you need more substance, crusty bread is mandatory for soaking up the remaining sauce at the bottom of the dish. Seriously, don't let that glorious, herb infused tomato liquid go to waste!
For something completely different, sometimes I serve these Stuffed Peppers with a side of creamy polenta or mashed potatoes, which is wonderfully comforting on a cold evening.
When you’re looking for a low-carb alternative to these meaty classics, I sometimes pivot to something like Santa Fe Turkey Stuffed Peppers: Healthy, Low Carb Weeknight Recipe . But for true, classic comfort, nothing beats this baked version.
These are simply the best Stuffed Peppers . Enjoy!

Recipe FAQs
Why are my stuffed peppers still crunchy after baking?
This is usually a result of not softening the peppers enough before or during the bake. For a tender pepper, blanch the hollowed halves in boiling water for 3-5 minutes before filling, or ensure they are tightly covered with foil while baking to steam them effectively.
My filling came out dry and crumbly. How can I prevent this?
The key to a moist filling is adequate liquid content, especially since the rice absorbs moisture during the bake. Ensure the rice is fully coated in broth or tomato sauce before stuffing. If the filling mixture looks dry before it goes into the oven, add an extra splash of sauce to keep it hydrated.
Can I use a different type of meat, or make this vegetarian/vegan?
Absolutely. You can substitute ground beef with ground turkey, Italian sausage, or a hearty mixture of lentils, chickpeas, and sautéed mushrooms for a vegetarian option. If making the recipe vegan, ensure you substitute any beef broth used in the rice preparation with vegetable broth.
How should I store and reheat leftover stuffed peppers, and can I freeze them?
Store leftovers in an airtight container in the refrigerator for up to 3 days, reheating gently in the oven or microwave. Stuffed peppers freeze excellently both cooked and uncooked; wrap them individually in foil, place them in a freezer bag, and consume them within 3 months for the best quality.
Can I prepare the stuffed peppers ahead of time?
Yes, you can assemble the peppers completely up to 24 hours in advance. Cover them tightly with plastic wrap and refrigerate immediately after assembly. When ready to bake, add about 15-20 minutes to the total baking time to compensate for starting with chilled ingredients.
Does the type of rice matter? Can I use brown rice?
Long grain white rice or medium grain rice is generally recommended as it finishes cooking perfectly within the pepper's baking window. If you opt for brown rice, it is highly recommended to cook it almost completely beforehand, as its density requires a much longer cooking time than the recipe standard.
Does the color of the bell pepper affect the flavour of the dish?
Yes, the colour slightly affects the overall flavour profile. Green peppers are less sweet and provide a more traditional, slightly bitter contrast to the filling. Red, yellow, and orange peppers are much sweeter and fruitier, resulting in a milder, more approachable final dish.
Baked Mediterranean Stuffed Peppers
Ingredients:
Instructions:
Nutrition Facts:
| Calories | 494 kcal |
|---|---|
| Protein | 33.8 g |
| Fat | 26.0 g |
| Carbs | 20.0 g |
