Freezer Breakfast Burritos: the Ultimate Batch-Cook Meal Prep
- The Ultimate Grab and Go: Freezer Breakfast Burritos Overview
- Batch and Cook Brilliance: Why These Freezer Burritos Succeed Where Others Fail
- Essential Building Blocks: Ingredients for Your "Morning Glory" Burritos
- Rolling Towards Perfection: Step and by-Step Instructions for the Best Freezer Breakfast Burritos
- Mastering the Wrap: Chef's Tips, Tricks, and Common Prep Pitfalls
- Maximize Longevity: Freezing and Reheating Strategies
- Beyond the Foil: Perfect Pairings and Topping Ideas
- Recipe FAQs
- 📝 Recipe Card
The Ultimate Grab and Go: Freezer Breakfast Burritos Overview
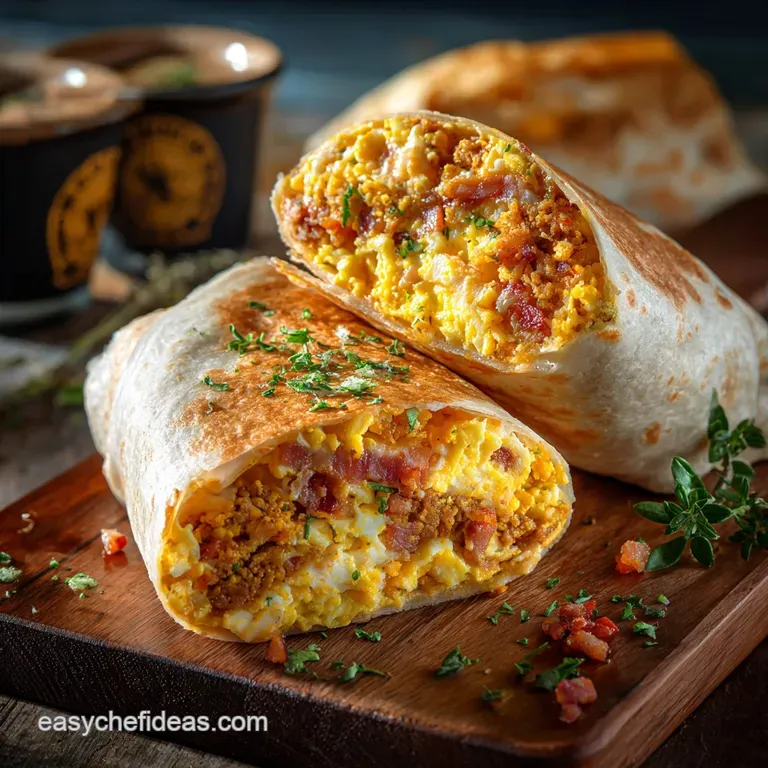
Imagine waking up to that beautiful, savoury scent of seasoned sausage, sweet peppers, and sharp cheddar, all warmed and ready in under three minutes. It’s the ultimate comfort food rush, waiting patiently in your freezer.
The feeling of biting into a perfectly seasoned, slightly crispy tortilla is seriously unmatched, providing instant satisfaction right when you need it most.
Forget spending 20 minutes scrambling eggs while you’re half and asleep, desperately needing coffee. These homemade Freezer Breakfast Burritos are your ultimate meal prep superhero, saving your money and most importantly, your sanity.
They are genuinely the easiest, fastest high and protein option available for busy mornings, proving that healthy and quick don't have to be mutually exclusive.
I've spent years perfecting the technique to completely avoid that horrible freezer and burn sogginess. Today, I’m handing over the exact steps, including my secret for the fluffiest, non and rubbery frozen eggs, so your batch lasts and tastes fantastic. If you’ve loved my Omelet Tortilla Breakfast Wrap: The 25 Minute Smoked Cheddar Recipe but need something truly grab and go, this is your next project. Let's crack on and build a legendary batch of Freezer Breakfast Burritos !
Batch and Cook Brilliance: Why These Freezer Burritos Succeed Where Others Fail
The True Cost of a Rushed Morning (And How to Fix It)
We all know the misery of hitting the drive and thru when we’re starving because the fridge is empty. That quick stop costs you five times what a homemade breakfast does, plus you start the day feeling sluggish.
Batch cooking Freezer Breakfast Burritos eliminates decision fatigue and keeps your budget happy. This is less about cooking and more about intelligent food preparation; you're essentially building a high and protein, perfectly balanced meal kit ready for the week.
Texture Science: Designing a Burrito That Defies Freezer Burn
The enemy of a good frozen meal is moisture, hands down. Condensation forms when warm ingredients are wrapped or when the moisture inside expands during freezing, leading to a nasty, soggy tortilla when thawed.
This recipe works because we drain the sausage fat completely and chill the filling mixture to room temperature before assembly. We also cook the eggs past the point of being fluffy, ensuring they don't leak water later.
Difficulty Assessment and Prep Timeline
The techniques for cooking the components are straightforward, but achieving the correct moisture balance for optimal freezing is crucial. Don't rush the cooling step it’s mandatory!
Plan for about an hour of active cooking and assembly time, followed by a non and negotiable 45 minutes of chilling the filling.
| Stage | Time Estimate | Notes |
|---|---|---|
| Active Prep & Cook | 55 minutes | Sautéing, scrambling, and chopping. |
| Cooling Time | 45 minutes | The most important step for non and soggy burritos. |
| Assembly & Wrap | 20 minutes | Roll tightly, then double and wrap. |
The Key to Fluffy, Non and Rubbery Eggs
Standard scrambled eggs are lovely and soft, cooked just until barely set. That softness, however, is moisture waiting to ruin your Freezer Breakfast Burritos . For meal prep, we need to cook the eggs until they are significantly firmer than usual.
They should look almost dry in the pan, a bit like dry cottage cheese curds. This deliberate dryness prevents water release upon thawing and they actually soften perfectly when reheated in the microwave.
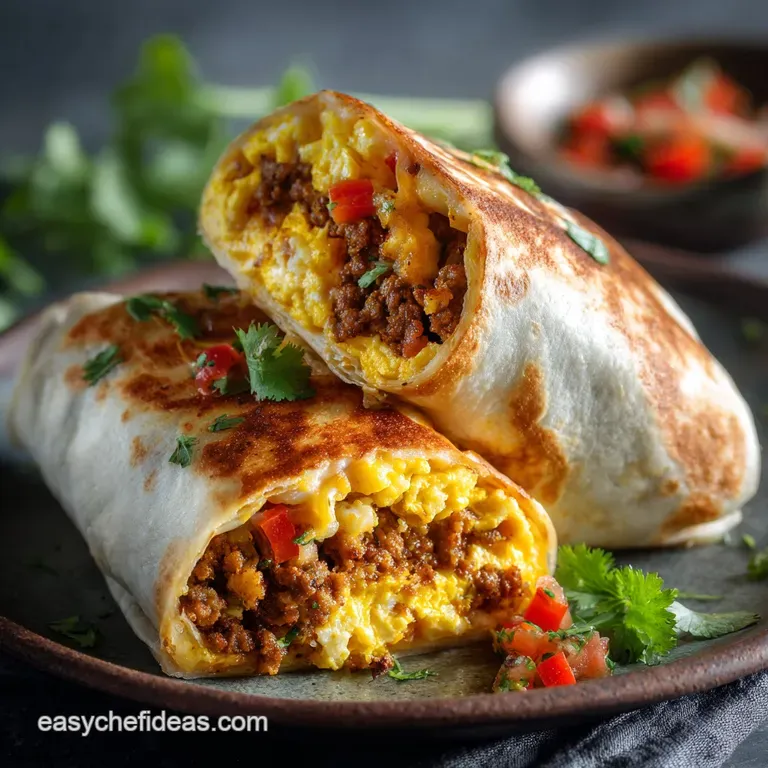
Sausage and Pepper Sauté: Building the Flavor Foundation
Using ground breakfast sausage is essential here because of its flavour profile it’s already seasoned perfectly with sage and pepper. You’ll sauté the onion and red bell pepper in the residual fat (after draining the excess, obviously) until they are soft and slightly sweet.
This concentration of flavour means your resulting Breakfast Burritos Frozen will be anything but bland.
Choosing Sharp Cheddar for Maximum Melty Impact
Don’t buy pre and shredded cheese; it contains starches (anti and caking agents) that can inhibit smooth melting and sometimes impact the flavour. Sharp cheddar or Monterey Jack, freshly grated, provides the best creamy, sharp flavour binding everything together.
The cheese also acts as a natural moisture barrier against the tortilla, protecting it from the slightly wetter ingredients.
Essential Building Blocks: Ingredients for Your "Morning Glory" Burritos
We’re keeping the ingredients list simple and robust, focusing on maximum flavour and minimal moisture. These Freezer Breakfast Burritos High Protein will keep you full until lunchtime!
Choosing the Right Tortilla Size and Type
I insist on using 10 inch (25 cm) large flour tortillas. They offer enough surface area to roll a solid, professional and looking burrito without the filling spilling out the sides. Trying to use smaller tortillas just leads to frustration and splitting when you roll them.
Avoid ultra and thin or corn tortillas, as they tend to crack when frozen and thawed.
Ingredient Deep Dive: Optimal Seasoning for the Sausage Mix
We rely heavily on the inherent seasoning of the breakfast sausage, but a little extra salt and pepper in the eggs is mandatory. If you want to push the flavour profile, toss in a teaspoon of smoked paprika or a pinch of cumin with the vegetables.
Fresh coriander (cilantro) is non and negotiable; it adds a bright, fresh lift that really stands out after reheating.
Tested Swaps and Simple Recipe Adjustments (Ingredient Flexibility)
You don’t have to stick rigidly to my recipe, but remember the goal is low and moisture ingredients. Here are my favorite swaps for making these Freezer Breakfast Burritos Healthy and adaptable:
| Ingredient | Viable Substitute | Notes on Usage |
|---|---|---|
| Ground Sausage | Crumbled, fully cooked turkey sausage or lean ground turkey seasoned with sage. | Ensure it is fully cooked and drained of all liquid. |
| Cheddar/Jack Cheese | Pepper Jack for spice, or crumbled Cotija cheese (it holds up well). | For dairy and free, use a quality plant and based cheddar or nutritional yeast. |
| Red Bell Pepper | Diced, fully sautéed sweet potato or zucchini (ensure excess water is cooked out). | Vegetarian option: Mix in black beans (well and drained and rinsed). |
| Milk in Eggs | Water, or simply skip it if you worry about moisture. | If you’re truly in a rush, you could also make a big batch of eggs using my Mug Omelet The Speedy SixMinute Microwave Breakfast Recipe method, just ensure they are cooked extra firm. |
Rolling Towards Perfection: Step and by-Step Instructions for the Best Freezer Breakfast Burritos
Stage One: Prepping the Protein and Vegetables
- Brown and Drain the Sausage: Heat your large skillet over medium and high heat. Brown the pound of sausage, breaking it up until thoroughly cooked and no pink remains. CRITICAL STEP: Transfer the sausage to a paper towel and lined plate and press down to drain every bit of excess grease. This drainage is the first defense against sogginess.
- Sauté the Aromatics: Discard the sausage fat, leaving maybe a teaspoon of oil in the pan. Add the diced onion and red bell pepper. Cook for 6- 8 minutes until the vegetables are very soft and smell wonderfully sweet. Set aside.
Stage Two: The Perfect Scramble Technique (Low and Slow)
- Prepare the Eggs: Whisk your 10 large eggs with salt and pepper until they look light and slightly foamy. Use a non and stick skillet over medium and low heat; we are aiming for control.
- Cook Them Dry: Pour in the egg mixture. Cook slowly, pushing the cooked eggs from the edges to the center as they set. The goal is to cook the eggs until they are significantly drier and firmer than you would typically serve them. They must hold their shape well, almost like small, dry curds.
- The Golden Rule of Cooling: Combine the cooked sausage, sautéed vegetables, firm scrambled eggs, and fresh coriander in a large bowl. Spread the entire mixture thinly onto a clean baking sheet. Place this sheet in the refrigerator for at least 45 minutes until the filling is completely chilled to room temperature. Do not skip this!
Chef's Note: Assembling with even slightly warm ingredients traps heat, which turns into steam, then condensation, immediately making your tortillas rubbery before they even hit the freezer. Be patient!
Stage Three: Assembly, Layering, and Tight Sealing
- Prep the Tortilla: Briefly warm the tortillas if desired a quick 30 seconds in the microwave makes them much more pliable and tear and resistant. Lay one flat.
- Lay the Cheese Barrier: Sprinkle a generous line of shredded cheese down the center of the tortilla first. This fatty layer acts as a fantastic shield between the moist eggs/veg and the delicate flour wrap.
- Load and Layer: Spoon one and eighth of the chilled filling mixture onto the centre, making sure to leave 1.5 inches clear on the sides and bottom.
- The Tight Roll: Fold the sides of the tortilla inward over the filling. Then, tightly fold the bottom edge up and over the ingredients, pulling the wrap back towards you to ensure a snug fit. Roll away from you until you have a compact, tight cylinder.
- Double Wrap for Protection: Immediately wrap the rolled burrito first in a piece of parchment or waxed paper, then wrap it securely in aluminium foil. Label clearly before freezing.
Mastering the Wrap: Chef's Tips, Tricks, and Common Prep Pitfalls
Why Overfilling is the Enemy of a Good Seam
I know you want a giant, chonky burrito, but resisting the urge to overfill is crucial for longevity. If you put too much filling, the tortilla will tear when you roll it, creating a seam where air and freezer burn can attack. Use exactly one and eighth of the filling per 10 inch tortilla.
A tight, uniform shape is far better than a loose, massive one.
The Importance of Cooling Ingredients Before Assembly
This sounds like a broken record, but it’s the number one mistake I used to make. I'd combine slightly warm filling with cheese, and within a week in the freezer, the tortillas were ice and crusted and soggy. Cold ingredients mean zero internal condensation.
This is the secret sauce for making truly professional Freezer Breakfast Burritos Meal Prep .
Pro Tip: The Cheese Barrier Method
Always put the cheese down first on the tortilla. Because cheese is fat and based and melted cheese seals things, sprinkling it directly onto the wrap provides a much and needed protective barrier. You could also spread a thin layer of refried beans here for extra protein and moisture deflection.
Maximize Longevity: Freezing and Reheating Strategies
Double and Wrapping: Protecting Against Freezer Odor
You must wrap twice if you want these to last beyond a month. First, the parchment paper helps prevent the foil from sticking to the tortilla, and it helps contain minor moisture released during reheating.
Second, the aluminium foil provides an air and tight seal, protecting the burrito from absorbing strange freezer odors (like that frozen fish stick smell). Place all double and wrapped burritos in a heavy and duty freezer bag or airtight container.
Reheating from Frozen: Microwave vs. Oven vs. Air Fryer Times
Do not thaw them first; they reheat best straight from frozen.
| Method | Time | Technique |
|---|---|---|
| Microwave (Quickest) | 2– 3 minutes total | Remove foil! Keep parchment on. Microwave on high for 90 seconds, flip, then microwave for another 60 90 seconds. |
| Oven (Crispiest Finish) | 35– 40 minutes | Preheat oven to 350°F (175°C). Unwrap foil, but keep parchment on. Bake on a sheet pan until heated through. |
| Air Fryer (Best Texture) | 18– 20 minutes | Preheat Air Fryer to 375°F (190°C). Remove foil and parchment. Cook until the center is hot and the tortilla is golden brown and crispy. |
Shelf Life: How Long is Too Long for a Freezer Burrito?
If they are wrapped properly (double and wrapped and placed in a sealed bag), these Breakfast Burritos Frozen are perfectly safe and taste fantastic for up to 3 months. After that, quality begins to decline, and you risk freezer burn.
In the fridge, the fully cooked components will last about 4 days, but why wouldn't you just freeze them immediately?
Beyond the Foil: Perfect Pairings and Topping Ideas
These Freezer Breakfast Burritos are amazing on their own, but a little something extra on the side never hurts.
We love serving them piping hot with a huge dollop of sour cream and some high and quality salsa verde the tangy acidity cuts beautifully through the rich sausage and cheese. For a lighter, fresher contrast, pair your burrito with a simple side of sliced avocado, or maybe even try something completely different, like a small serving of Breakfast Toast: The Healthy, Quick Ricotta Roasted Tomato Recipe . Just make sure you have extra hot sauce on hand. A quick splash of chipotle Tabasco on the filling before you roll makes all the difference!

Recipe FAQs
How do I reheat the burritos after freezing?
For best results, unwrap the foil/plastic, wrap the burrito loosely in a slightly damp paper towel, and microwave on medium heat for 2-3 minutes, flipping halfway through. Alternatively, for a crisp exterior, unwrap and bake in a preheated oven at 350°F (175°C) for 20-25 minutes, though this works best if thawed overnight first.
Why do my burritos taste soggy after reheating?
Sogginess is usually caused by ingredients with high water content, like fresh tomatoes or wet spinach, or by trapped steam from wrapping warm filling. Ensure all fillings are cooked until completely dry before assembling, especially draining any excess grease from the sausage.
Furthermore, always let the fillings cool completely before wrapping, as steam trapped inside guarantees a soggy tortilla.
What ingredients should I avoid putting in freezer burritos?
Avoid highly perishable or texture sensitive ingredients that do not freeze well, such as lettuce, sour cream, fresh avocado, and sauces containing mayonnaise or vinegar. These ingredients tend to separate or become waterlogged and mushy upon thawing and reheating.
If you desire fresh toppings like salsa or sour cream, always reserve them for dipping immediately before serving.
Can I make a vegetarian or vegan version of this recipe?
Absolutely. Substitute the sausage with seasoned black beans, crumbled firm tofu (pressed and pan-fried until dry), or plant based chorizo. For vegan preparation, replace the cheddar cheese with a quality meltable vegan cheese alternative and ensure the tortillas do not contain lard.
My scrambled eggs turned rubbery upon reheating. How can I keep them tender?
The key to tender eggs is slightly undercooking them before assembly, as they finish cooking during the reheating process. When scrambling, remove the eggs from the heat while they are still visibly moist, almost wet.
Additionally, incorporating a tablespoon of heavy cream or cream cheese into the mixture helps significantly with moisture retention during the freeze thaw cycle.
What is the best way to wrap the burritos for long term freezing?
A two-step wrapping process is essential for preventing freezer burn and maximizing freshness. First, wrap each cooled burrito tightly in parchment paper or plastic wrap to create a tight moisture barrier against the filling.
Second, wrap the protected burrito again in heavy duty aluminum foil before storing them all in a labeled, airtight freezer bag.
How long can I safely store these burritos in the freezer?
When properly wrapped using the double layer method, these breakfast burritos maintain peak quality for up to three months. While they remain safe indefinitely past that point, the quality of the filling and the texture of the tortilla may begin to degrade due to slight freezer burn or flavor loss.
Always thaw and reheat them until an internal temperature of 165°F (74°C) is reached.
Ultimate Freezer Breakfast Burritos
Ingredients:
Instructions:
Nutrition Facts:
| Calories | 1085 kcal |
|---|---|
| Protein | 69.4 g |
| Fat | 86.2 g |
| Carbs | 18.6 g |
