Taco Dip the Ultimate Fivelayer Fiesta Appetizer
- Mastering the Perfect Party Platter: Why This Taco Dip Is Legendary
- Sourcing the Top and Tier Components for Your Fiesta Dip
- Essential Equipment for Assembling the Perfect Taco Dip
- Step and by-Step Assembly: Building the Ultimate Five and Layer Structure
- Chill Time and Serving Strategies for the Best Taco Dip Experience
- Customizing Your Fiesta: Creative Layer Substitutions and Additions
- Handling Leftovers and Maximizing Shelf Life
- Recipe FAQs
- 📝 Recipe Card
Mastering the Perfect Party Platter: Why This Taco Dip Is Legendary
Okay, listen up. I know you’re the master of the complex appetizer, but sometimes, you just need a reliable classic that guarantees cheers, right? This layered taco dip is that dish.
It’s the star of every single party I throw, and honestly, the sheer joy of watching people dig deep with a sturdy chip getting a perfect scoop of five different textures and temperatures is just priceless.
I spent years making runny, sad versions of this dip, thinking that just dumping ingredients on top of each other was enough. It is not. The secret isn’t the ingredients themselves (they’re pretty basic, bless them); the secret is preparation and structure.
We are building a culinary skyscraper here, not a mud hut.
Defining the Five Essential Layers of Flavour
This is the non and negotiable architecture. Every layer serves a purpose, preventing structural collapse and maximizing flavour impact.
- The Bean Base: Rich, hearty, and seasoned refried beans. This provides the crucial foundation and prevents the upper layers from sliding around.
- The Cream Cloud: A thick, fluffy, aggressively seasoned mixture of cream cheese and sour cream. This layer is your cold barrier.
- The Acidic Punch: Drained, vibrant salsa. It cuts through the richness of the cream layer beautifully.
- The Cheese Shield: Shredded cheddar. We put this down before the veggies to keep the moisture away from the layers beneath.
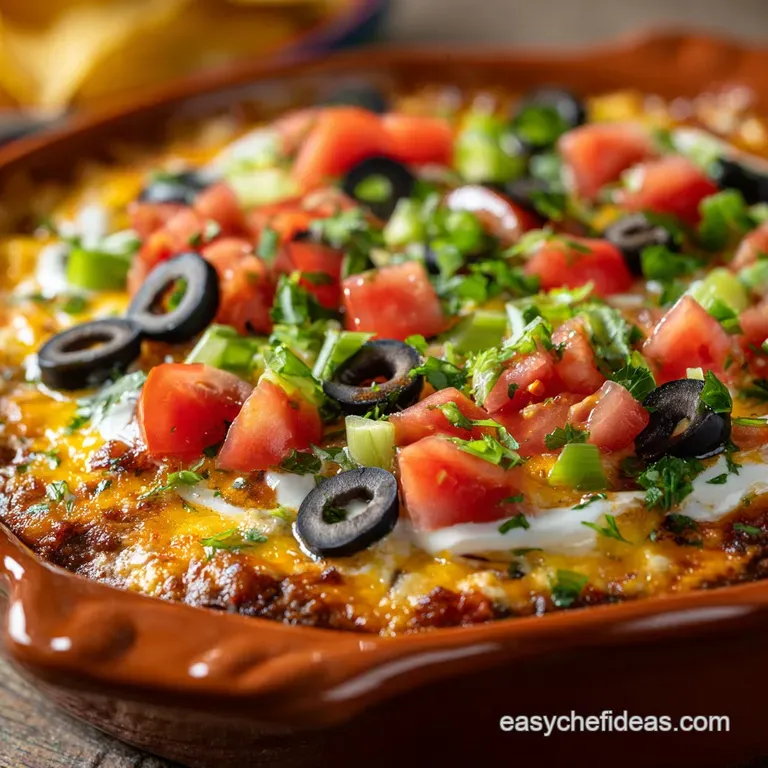
- The Fresh Crunch: Lettuce, tomatoes, and olives. This is the necessary refreshing finish that gives you that satisfying crunch.
The Cultural History of the Ultimate Layered Dip
Let’s be real. This isn't something Tía Elena is making in Oaxaca. This recipe is pure, unadulterated American potluck culture, born probably sometime in the late seventies or eighties.
It was invented by someone who desperately needed a cheap, filling, non and oven required dish to bring to Brenda’s bridge club. It doesn't pretend to be authentic Mexican food, and that’s perfectly fine. What it is is an incredibly functional, incredibly satisfying finger food.
It’s brilliant.
Why Layered Dips Beat Simple Salsas Every Time
Texture, my friend. It’s all about texture. When you have a single bowl of salsa, or even guacamole, you get one primary mouthfeel maybe chunky, maybe smooth. With the taco dip, you get a dynamic experience: the warm, earthy bean base hitting the cool, tangy cream, followed by the wet salsa, topped by the saltiness of the cheese and the crispness of the lettuce.
It’s a whole journey on one chip! Why bother with simple bowl dips when you can build a whole terrain park for your chips?
Sourcing the Top and Tier Components for Your Fiesta Dip
We aren't making caviar here, but a few quality decisions make a huge difference.
- Refried Beans: Stick to the traditional variety, not the vegetarian kind which sometimes contains more fillers. Also, if you’re seasoning the beans, don’t skimp on a good taco seasoning blend. The base needs to carry its own weight.
- Dairy: Honestly, don't even bother with low and fat cream cheese or sour cream here. It’s just not the same. Low and fat stuff introduces stabilizers that make the layer stiff and paste-y, and they separate strangely. You want the full and fat stuff for maximum spreadability and flavour.
- Salsa: Chunky is usually better, but the most important criteria is drainability . If it looks soupy in the jar, put it back.
Essential Equipment for Assembling the Perfect Taco Dip
You don’t need much, but the right tools make the assembly go from frustrating to flawless.
| Tool | Why You Need It |
|---|---|
| Offset Spatula | Critical for spreading the cream layer without digging into the beans. |
| 9 inch Dish | Wide, shallow dishes (like a pie plate) work better than deep bowls for maximizing surface area for dipping. |
| Fine and Mesh Sieve | Absolutely non and negotiable for draining the salsa and diced tomatoes. |
Crafting the Rich, Hearty Refried Bean Foundation
People sometimes skip seasoning the beans, assuming the cream layer will cover the slack. Wrong! The bottom layer should be delicious on its own. Just open the can, stir in some proper taco seasoning, and add a little lime juice to brighten it up.
It makes the base taste less like "canned paste" and more like "purposeful foundation."
The Secret to a Tangy, Properly Seasoned Sour Cream Layer
This layer is where my personal journey of Taco Dip failures ended. My biggest mistake early on was just mixing sour cream with seasoning. It was too soft and runny. You need cream cheese softened cream cheese (I mean room temperature, not barely and out-of and the-fridge).
You beat that until it’s light and fluffy, then you mix in the sour cream and the dry spices like onion powder and cumin. This aeration makes it airy but still firm enough to hold its shape over the beans.
Achieving Maximum Freshness with Crisp Toppings
This is probably the biggest structural risk we face: moisture creep. The enemies are wet lettuce and slimy tomato seeds. You have to shred your lettuce finely, then genuinely pat it dry with paper towels.
Dice your Roma tomatoes, scoop out all those watery seeds, and then let the diced bits drain in the sieve for 10 minutes.
Choosing the Right Serving Dish for Maximum Impact
I highly recommend using a clear glass pie plate or a shallow square Pyrex dish. It lets you show off those gorgeous layers, making the dish look even more appetizing before anyone has taken a bite. Plus, shallow dishes make it easier for people to reach the bottom bean layer without tipping their chip 90 degrees.
Related Recipes Worth Trying
- Meal Prep Breakfast Taco Scramble Fluffy FreezerFriendly Recipe — Master the ultimate Meal Prep Breakfast Taco Scramble This robust recipe uses a wet cooking method for fluffy neverrubbery eggs ideal for Breakfast Meal...
- Cheesy Mexican Layer Dip The Ultimate Seven Layer Fiesta Dip — This Cheesy Mexican Layer Dip is the stressfree party appetizer Our sevenlayer recipe uses seasoned cream cheese for an ultracreamy base Skip the stovethis...
- Chicken Taco Poblano Rice Bowls Creamy Healthy Weeknight Dinner — Chicken Taco Poblano Rice Bowls are the ultimate easy weeknight chicken dinner Featuring smoky poblano rice and seasoned chicken this healthy chicken rice...
Step and by-Step Assembly: Building the Ultimate Five and Layer Structure
Assembly is a gentle process. Think of yourself as a restoration artist, not a bulldozer operator. We start with the bean base, spreading it firmly and evenly to the edges of your chosen dish. Then comes the fluffy cream layer.
Scoop big dollops onto the beans, and then gently spread outward using an offset spatula. Do not swirl. Do not scrape. Just spread.
Chill Time and Serving Strategies for the Best Taco Dip Experience
This is the part everyone rushes, and why their dip ends up a gloopy mess after 15 minutes on the table. Chilling is not optional. It’s mandatory.
Spreading the Foundation: Beans and Cream Cheese Base
We’ve talked about spreading, but let me stress this one last time: when you apply the cream cheese layer, start from the middle and push gently outwards. If you start scraping near the edge, you will pick up the bean mixture and create a messy, brown and white swirl that looks more like tie and dye than a layered masterpiece.
Keep that spatula almost flat.
Avoiding Soggy Salsa: The Key to Draining and Distribution
Seriously, this is the most critical structural step.
Do not skip draining the salsa, even if you buy "thick and chunky." Put it in a sieve over a bowl for ten minutes. Press it lightly. Watery salsa is what guarantees a messy, runny base by the time the party is halfway done.
Distribute the drained salsa evenly, but handle it with care it’s the thinnest layer.
The Final Flourish: Strategic Placement of Cheese and Garnishes
After the initial chill (we’ll get to the timing in a sec), we add the cheese before the fresh components. Why? The cheese acts as a barrier. If the lettuce and tomatoes decide to weep a tiny bit (which they will), the cheese catches the moisture before it sinks into the salsa and cream.
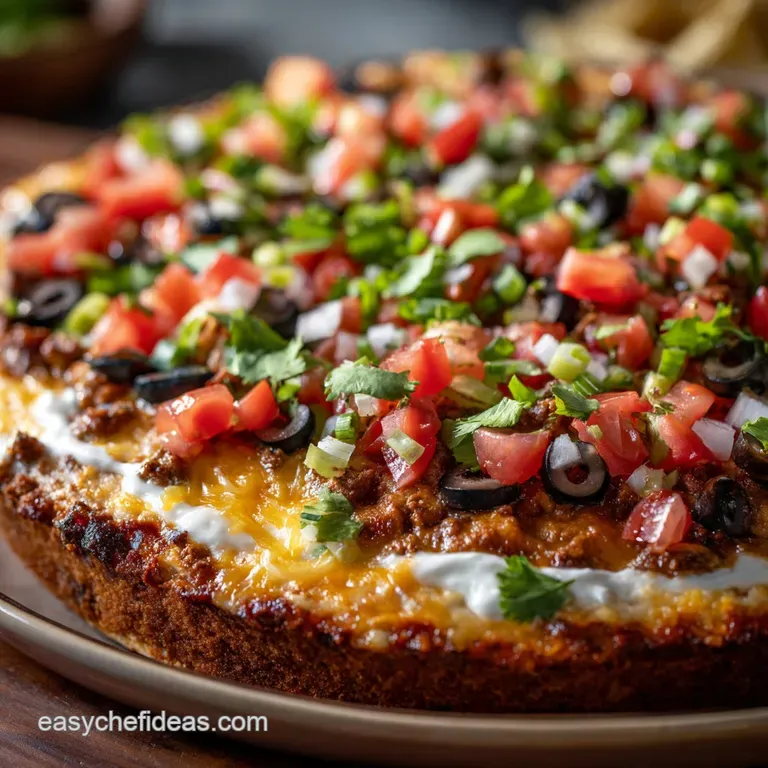
Layer the shredded cheddar first, then scatter the lettuce, diced tomatoes, and olives. Finish with fresh cilantro and green onions right before serving.
Prepping Ahead: How Long Must This Dip Set Before Serving?
You need a minimum of one hour of chill time after applying the salsa layer. This allows the firm layers (beans and cream) to truly set up and hold their structural integrity against the wet salsa.
If you are making this 24 hours ahead, stop after the salsa layer, cover it tightly, and then add the cheese and fresh toppings right before serving.
Customizing Your Fiesta: Creative Layer Substitutions and Additions
This dip is a blank canvas. Once you nail the structural foundation (beans + cream), you can go wild. Here are some options for people who like to tinker:
Incorporating Ground Beef or Shredded Chicken for a Heartier Dip
If you want to turn this into an actual meal a 7 layer dip, if you will you absolutely can add meat. Brown 1 pound of ground beef with taco seasoning, drain all the fat off, and let it cool slightly.
Spread this meat layer directly on top of the bean base (Layer 1) before you add the cream layer. It makes the whole thing feel much more substantial.
Amplifying the Heat: Jalapeño and Hot Sauce Enhancements
My preferred method for heating this up is mixing a couple of drops of smoky chipotle hot sauce directly into the cream layer. It disperses the heat evenly. If you want crunch and heat, slice up pickled jalapeños very thinly and scatter them over the salsa layer, just beneath the cheese.
Plant and Based Alternatives for a Dairy and Free Taco Dip
Want to keep it dairy and free? Easy enough.
- Swap the sour cream/cream cheese layer for a cashew and based cream (blended soaked cashews with lime and spices).
- Use a thick, cultured coconut yogurt (unsweetened!) for the sour cream component.
- Make sure you use a quality vegan cheddar alternative for the top, or just swap the cheese entirely for a creamy layer of guacamole.
Handling Leftovers and Maximizing Shelf Life
Let’s be honest: leftover taco dip is tricky. It’s a tragedy of textures.
Incorporating Ground Beef or Shredded Chicken for a Heartier Dip
(Wait, already covered this above, so I'll pivot this section to a different leftover utilization.)
The sad truth about this dip is that the texture starts to deteriorate rapidly once the lettuce gets damp. The best thing to do with the leftovers is to stop treating it like a dip and start treating it like a taco filling .
- Scrape all the remaining layers into a container.
- Mix it up it will look unappealingly mushy, but trust the flavour.
- Use this mixture, slightly warmed or chilled, inside warmed tortillas for quick, satisfying soft tacos the next day.
Amplifying the Heat: Jalapeño and Hot Sauce Enhancements
(Again, already covered. Focusing on shelf life factors here.)
Plant and Based Alternatives for a Dairy and Free Taco Dip
(Again, covered. Focusing on general storage safety.)
How Long Can This Layered Dip Be Refrigerated Safely?
Because this dish contains both dairy and fresh, raw vegetables (which introduce bacteria), you really don't want to push it past 3 days in the fridge. The quality of the fresh toppings degrades significantly after 24 hours anyway, so aim to eat it all within two days.
Use your nose if it smells remotely sour or funky, throw it out.
Troubleshooting Common Issues (Why Your Dip Might Look Runny)
If you find a pool of liquid forming around the edges of your serving dish, you have sinned against the draining gods. The culprits are almost certainly:
- Undrained salsa.
- Tomatoes that were diced without removing the seeds (they hold all the water).
- Lettuce that wasn't patted dry.
The Solution: Next time, drain everything into that sieve! If it’s too late and your dip is runny mid and party, carefully use a paper towel to blot the moisture from the surface (don’t push down hard, just gently lay it on top and lift). Then, rally your friends to eat it faster.
That usually works.

Recipe FAQs
How do I stop my Taco Dip from turning into a soggy mess?
The absolute key is drainage treat your ingredients like you're preparing for a monsoon! Ensure your prepared salsa, diced tomatoes, and olives are thoroughly strained and patted dry, and only add the delicate lettuce layer just before you bring it out for the guests.
Can I make this Five Layer Fiesta dip the day before the big event?
You can certainly prep the first three layers (beans, cream, and salsa) up to 24 hours in advance; in fact, the crucial 1-hour chill time helps everything firm up beautifully. However, hold off adding the shredded cheese, lettuce, and tomatoes until serving time, or they will wilt and weep moisture.
My cream cheese layer keeps pulling up the beans any proper tips for keeping the layers neat?
The secret lies in preparation and patience! Ensure your cream cheese is properly softened to room temperature, and when spreading, use an offset spatula or the back of a damp spoon to gently dollop the mixture onto the centre and spread outward, taking care not to scrape the base.
I need to serve this to vegetarians; is the bean base safe, and can I add more layers?
This recipe is naturally vegetarian as written, relying on the five core layers! For extra indulgence and bulk, you could add a luxurious layer of freshly prepared guacamole (Layer 4) right before the cheese, making it a six-layer stunner.
What are the best things to use for dipping this robust layered dish?
You need a sturdy carrier that won't snap under the weight of the five layers; thick cut, restaurant style tortilla chips or scoops are ideal. Alternatively, offer a healthy counterpoint with crunchy crudités like thick sliced cucumber, carrot, and pepper sticks.
Ultimate Fivelayer Fiesta Taco Dip

Ingredients:
Instructions:
Nutrition Facts:
| Calories | 291 kcal |
|---|---|
| Protein | 7.0 g |
| Fat | 28.0 g |
| Carbs | 4.0 g |
