Roasted Pumpkin Seeds: Get the Ultimate Crunch with Our Simple Recipe
- The Ultimate Crunch: Why Roast Your Own Pumpkin Seeds?
- The Science of the Perfect Crunch: How We Achieve Maximum Flavor
- Essential Components for Next-Level Roasted Pumpkin Seeds
- Achieving Perfection: Step-by-Step Guide to Roasted Pumpkin Seeds
- Troubleshooting Your Roast: Essential Tips for Crispy Results
- Keeping the Crunch: Storage Methods for Longevity
- Pairing the Seeds: Creative Ways to Enjoy Your Snack
- Recipe FAQs
- 📝 Recipe Card
The Ultimate Crunch: Why Roast Your Own Pumpkin Seeds?
That incredibly warm, nutty aroma wafting from the oven signals the start of the season. Earthy, slightly sweet, salty, and entirely comforting, honestly, I crave that smell the minute the pumpkin guts hit the bowl. It makes the whole house feel cozy, doesn’t it?
This isn't just another boring recipe; this is zero waste, kitchen magic gold. You were absolutely going to toss those seeds anyway, which is such a shame! Now, you get a ridiculously fast, cheap, and deeply addictive homemade snack that’s way better than anything store-bought.
We are leaving the chewy, under roasted, slightly burnt disasters of past attempts behind. I’m sharing every single hard won trick I've learned, especially the one critical step you absolutely cannot rush. Let's get these roasted pumpkin seeds perfectly crunchy.
The Science of the Perfect Crunch: How We Achieve Maximum Flavor
Transforming Kitchen Waste into Gourmet Snacking
Seriously, why are you buying those expensive packaged seeds at the grocery store? You just carved a big pumpkin for your spooky front porch display, right? Those seeds are free, packed with healthy nutrients, and taste infinitely fresher and better when prepared at home.
The Crucial Difference: Why Drying Technique Matters
This is the single most important step in achieving truly crunchy seeds. Moisture is the ultimate enemy of the satisfying snap . If the seeds are still damp when they hit the hot oil and the oven, they will simply steam, yielding a sad, rubbery result.
You need them bone dry, like desert sand, before they ever get near the oil.
Nutritional Snapshot: Seeds That Pack a Punch
These little roasted pumpkin seeds aren't just delicious; they are genuinely good for you. They’re super high in magnesium and zinc, which is fantastic for your immune system, especially heading into cold and flu season. Who knew saving kitchen scraps was such a healthy choice?
The Maillard Reaction and Seed Browning
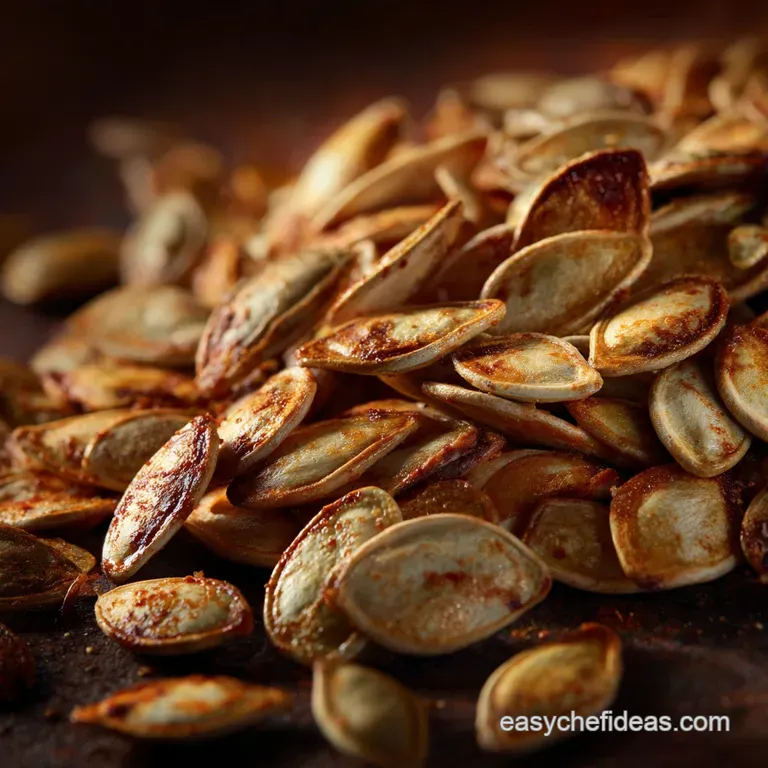
We use a slightly lower oven temperature here 325°F (160°C) and this is on purpose. The moderate heat allows the Maillard reaction (that magical browning process) to happen slowly and evenly. This gentle process develops deep, nutty flavors throughout the seed without burning the edges.
Temperature Control: Roasting vs. Burning
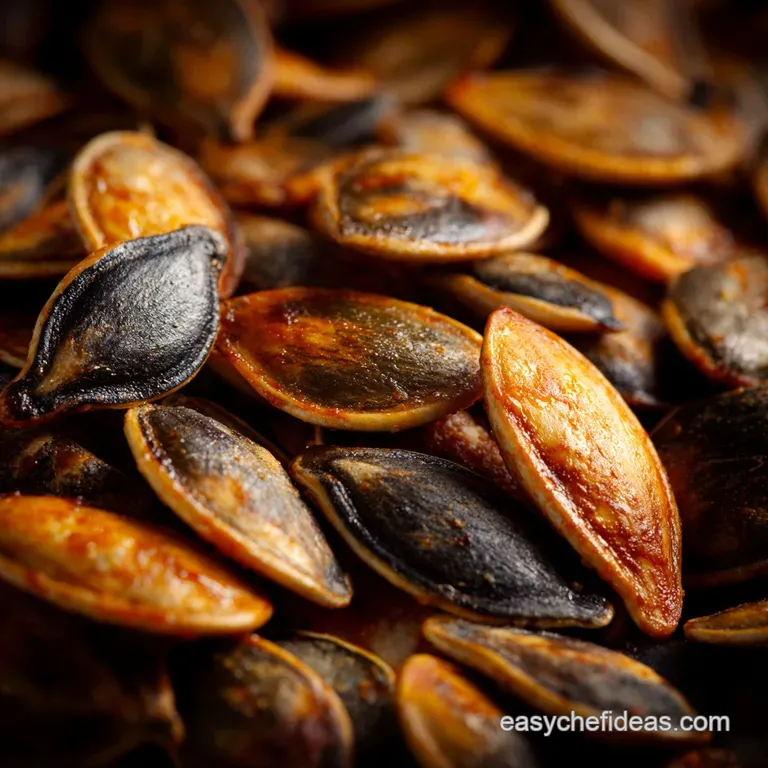
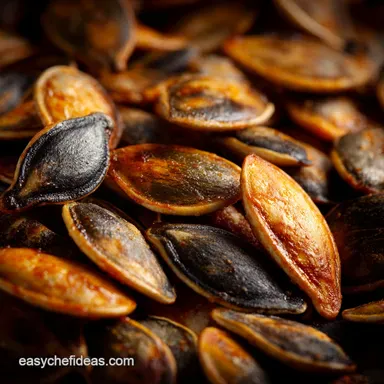
High heat equals inevitable disaster and tiny little black specks of scorched seed hull. We are aiming for golden, puffed-up, airy seeds, definitely not charcoal briquettes. The lower roasted pumpkin seeds temperature ensures the interior fully dehydrates and gets that satisfying, brittle snap before the exterior has a chance to scorch.
Salt Brining: Infusing Flavor Deep Into the Shell
While we aren't soaking these in saltwater, the basic flavor logic is the same: apply the salt early. By tossing the clean, dry seeds with oil and salt before roasting, the flavor adheres and penetrates the shell as the oil heats up.
This results in perfectly seasoned seeds all the way through, not just on the surface.
Essential Components for Next Level Roasted Pumpkin Seeds
Detailed Ingredient List and Ratios
We are keeping this simple today because the amazing natural flavor of the pumpkin seeds should be the star. Grab your oil, a great quality flaky sea salt, and a little smoked paprika for depth.
| Ingredient | Amount | Substitution |
|---|---|---|
| Pumpkin Seeds (Clean, Dry) | 1 cup (150g) | Acorn or Butternut Squash Seeds |
| Extra Virgin Olive Oil | 1 Tbsp | Melted unsalted butter or avocado oil |
| Fine Sea Salt | ½ tsp | Kosher salt (use ¾ tsp) |
| Smoked Paprika | ½ tsp | Chili powder, or just a little bit of onion powder for savory depth |
Sourcing the Best Seeds (and Prepping Them)
The freshest seeds always come straight from the pumpkin you just carved, naturally! When carving, use a strong metal spoon to scrape out all the guts. For the best finished flavor, try to use a high-quality, cold pressed olive oil, or maybe even a neutral oil like canola if you want the seasoning to stand out more.
Salt, Oil, and Seasoning Variations
If savory isn't really your jam, you have to try the sweet version! I sometimes toss them with a little brown sugar and cinnamon sugar —they are absolutely amazing mixed into a bowl of yogurt or sprinkled on top of a latte.
You could also easily try the Hot & Sticky variation (honey, chili flakes) for a completely different vibe.
Achieving Perfection: step-by-step Guide to Roasted Pumpkin Seeds
Phase 1: Cleaning and Rinsing the Pulp Away
Dump all the stringy pumpkin guts into a large colander. Run very cold water over everything and use your fingers to vigorously massage the seeds away from the strings and membranes. You must get every single sticky bit off ; residual pulp burns quickly in the oven and tastes bitter.
Rinse until the seeds are completely separated and slick.
Phase 2: The Critical Drying Stage for Optimum Airiness
Pat the clean seeds down hard with a double layer of kitchen paper or a thick tea towel. Now, spread them out in a thin, single layer on a clean tray or baking sheet. Walk away for 45 minutes to an hour. Seriously, go check your emails or something.
If they look or feel damp or sticky, they aren't ready to roast yet.
Phase 3: Seasoning, Spreading, and Oven Time
Preheat your oven to 325°F (160°C). Toss the bone dry seeds with your oil until lightly coated, and then add your salt, pepper, and smoked paprika . Spread them out onto a parchment lined baking sheet, ensuring they are not overlapping excessively. Overcrowding equals steaming, remember?
Phase 4: Knowing When They Are Perfectly Done
Listen closely for the pop . Around the 15 minute mark, you should start hearing subtle crackles and pops coming from the oven. This means the last bit of moisture is escaping and they are reaching peak crispness.
They should be puffy, light golden brown, and smell incredibly nutty, almost like fresh popcorn.
Troubleshooting Your Roast: Essential Tips for Crispy Results
Preventing Chewy Seeds: How to Spot Remaining Moisture
If the seeds feel soft or slightly rubbery when you bite them, they definitely weren't dry enough initially, or they need just five more minutes in the oven. The easiest fix? Put them back in the oven at a slightly reduced temperature (300°F) until they feel brittle and break easily.
Achieving Even Roasting on the Tray
Make sure you slide that pan out and give it a good shake halfway through the cooking process (around the 8 minute mark). If the seeds are piling up on the edges, the ones in the middle will never get properly toasted. Always use a large, high-quality sheet pan so they can sit in a true single layer.
Expert Tip: The Importance of the Cooling Rack
I made this mistake so many times early on in my cooking journey. If you let the seeds cool completely right on the hot tray, residual heat creates condensation underneath, making the bottom layer sweaty and soft.
Instead, immediately transfer them to a wire rack after removing them from the oven for ultimate, all-around crispness.
Keeping the Crunch: Storage Methods for Longevity
Shelf Life and Optimal Airtight Containers
Once your roasted pumpkin seeds are completely cool, store them in a sealed, airtight container, like a heavy duty Mason jar. Kept in a cool, dry place (the pantry is perfect), they will last happily for 3 4 weeks.
Seriously, do not put them in the fridge; that only introduces unnecessary moisture and ruins the crunch.
Refreshing Stale Seeds (The Oven Trick)
Did your perfectly crispy seeds lose their snap after sitting out for a week in a bowl? No worries, we can absolutely fix that! Spread them out on a baking sheet and simply warm them up in a 300°F (150°C) oven for about 5 to 7 minutes.
Let them cool completely again on a rack, and they’ll be crunchy as the day you made them.
Pairing the Seeds: Creative Ways to Enjoy Your Snack
Culinary Applications: Incorporating Seeds into Salads and Bakes
- Pumpkin Butterscotch Bars
- Velvety Custard, Crumbly Shortbread Crust
- Pumpkin Pie Dip
- Easy No-Bake Whipped Recipe (15 Mins Prep)
- Roasted Sweet Potato Black Bean Bowls
- Easy Chipotle Lime Recipe

Recipe FAQs
Why are my roasted seeds chewy instead of crunchy?
This is usually due to insufficient drying time before roasting. Ensure the cleaned seeds are completely dry pat them thoroughly with a kitchen towel and let them air dry for at least an hour if possible. A lower oven temperature and longer cook time can also help extract moisture without burning the exterior.
Is it necessary to boil or soak the seeds before roasting?
While not strictly necessary, a brief 10-minute soak or boil in salted water is highly recommended. This process helps season the seeds thoroughly, even penetrating the hard shell, and can result in a slightly lighter, more evenly crispy texture once roasted.
What are some alternative seasoning variations beyond salt and pepper?
For a savory kick, try a mix of smoked paprika, cumin, and a dash of cayenne for a smoky chili profile. Alternatively, a sweet preparation works wonderfully using cinnamon, a pinch of nutmeg, and a tablespoon of brown sugar mixed with the oil before baking.
How long can I store the roasted pumpkin seeds, and how should I keep them fresh?
Properly roasted and completely cooled seeds can be stored in an airtight container at room temperature for up to two weeks. To maintain optimal crunchiness, ensure they are cooled completely before sealing, as residual heat can create condensation and lead to premature staleness.
Can I use seeds from other squash varieties, like butternut or acorn squash?
Absolutely, the basic roasting technique remains the same, although you may need to adjust the roasting time slightly. Butternut squash seeds tend to be smaller and thinner, requiring 5-10 minutes less time to prevent scorching, so watch them closely during the final stage.
What is the ideal oven temperature for maximum crunch?
A lower, slow roast is key to drying them out completely without burning the surface oils. We recommend sticking to a moderate temperature around 300°F (150°C). This allows the internal moisture to dissipate gradually and ensures an even, golden finish.
Can I skip the oil if I am trying to reduce fat content?
You can skip the oil, but the seeds may not brown as evenly or hold the seasonings as well. If omitting oil, toss the seeds in a light mist of water or a whisked egg white just before adding the spices; this helps the flavors adhere and promotes a crisp texture.
Ultimate Crunchy Roasted Pumpkin Seeds
Ingredients:
Instructions:
Nutrition Facts:
| Calories | 46 kcal |
|---|---|
| Protein | 0.5 g |
| Fat | 3.7 g |
| Carbs | 3.4 g |
