The Ultimate Backyard Bbq Dry Rub Ribs Ovenbaked Method
- The Ultimate Backyard BBQ Dry Rub Ribs (Oven-Baked Method)
- The Ultimate Backyard BBQ Dry Rub Ribs (Oven-Baked Method)
- The Ultimate Backyard BBQ Dry Rub Ribs (Oven-Baked Method)
- The Ultimate Backyard BBQ Dry Rub Ribs (Oven-Baked Method)
- Taste & Texture Upgrades
- Nutrition & Dietary Paths
- Serving & Pairing Ideas
- Frequently Asked Questions
- 📝 Recipe Card
The Ultimate Backyard BBQ Dry Rub Ribs (Oven Baked Method)
Human Hook
Picture this: you’re pulling a tray out of the oven. The kitchen is thick with the smell of sweet smoke and spice. That’s the goal here cracking the code on truly tender Dry Rub Ribs without setting up a full smoker rig.
This method is all about massive flavour, easily achieved, and perfect for a midweek treat or a proper Sunday roast upgrade.
Intent Scan
I know what you’re thinking. Will these be those sad, chewy ribs that require serious jaw work? Are the seasonings going to fall right off? And crucially, is this another complicated Dry Rub Ribs Recipe that needs specialist gear? Absolutely not.
We’re covering the low-and-slow technique for getting that perfect Fall Off The Bone Ribs Oven result, using just your standard kitchen kit. Unlike those overly complex blogs, we focus on the sealing method that locks in the moisture.
Competitor Snapshot
Most online guides focus heavily on the grill, making them inaccessible if the weather’s dodgy, like it usually is here in Blighty. They often gloss over the initial prep, which is essential for that melt-in-your mouth texture. My secret weapon for these Best Dry Rub Ribs ?
That mandatory resting time and an aggressive foil seal. Trust me, I learned the hard way that rushing this step ruins the whole show. Ready to build the ultimate Homemade Dry Rub for Ribs ? Let’s get stuck into the ingredients, shall we?
The Ultimate Backyard BBQ Dry Rub Ribs (Oven Baked Method)
Brief Description
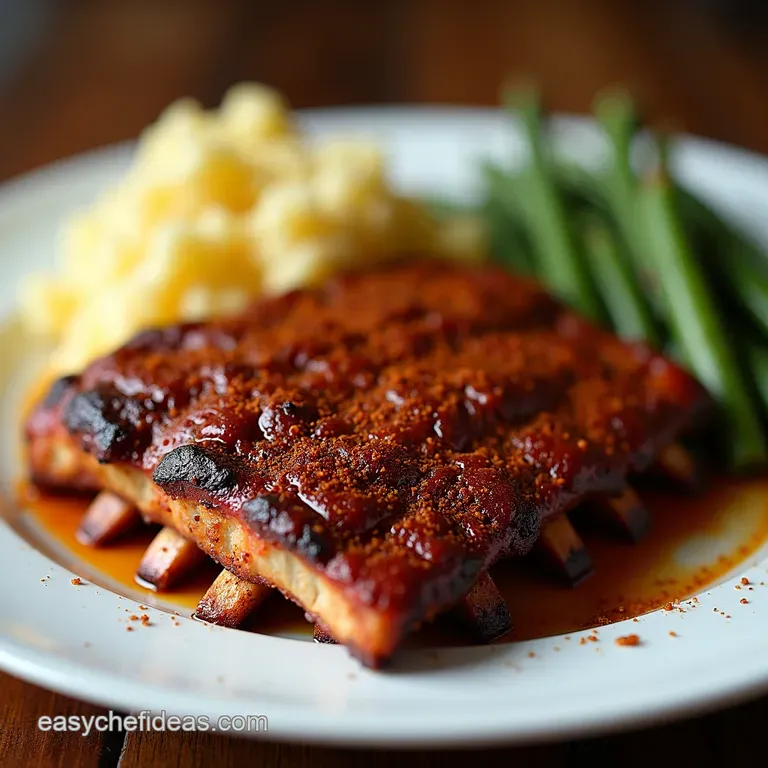
Forget soggy, boiled meat! This recipe delivers the deep, complex flavour of classic American barbecue right in your kitchen. We start by slathering pork ribs with a bold, sweet, and smoky dry rub that caramelizes beautifully during a low-and-slow cook. The result?
Tender, flavour packed ribs that even your nan will deem ‘properly good nosh.’ It’s the perfect centrepiece for a weekend feast or an epic match day spread.
Difficulty Level: Medium
Why Medium? While assembling the rub is dead easy, achieving truly fall off-the-bone texture requires managing heat and time effectively. It’s not hard , but it demands patience and attention to the slow cooking process to avoid tough meat.
Time Estimates
- Prep Time: 25 minutes active prep (rub mixing, rib trimming, application) + 1 hour minimum resting/marinating time.
- Cook Time: 3 to 3.5 hours (Low and slow is the secret sauce here).
- Total Time: Approximately 4.5 to 5 hours (most of which is hands off cooking).
Serving Size: 4 generous servings (or 6 moderate servings)
Ingredient List
A. For the Ribs:
- 2 racks (about 2.5 - 3 lbs / 1.1 - 1.4 kg total) Pork Spare Ribs or Baby Back Ribs (preferred: St. Louis Cut Spare Ribs)
- 1 tablespoon Yellow Mustard (acts as a binder, flavour evaporates during cooking) (15 ml)
B. For the Signature Dry Rub:
- ½ cup Brown Sugar, packed (100g)
- ¼ cup Smoked Paprika (30g)
- 2 tablespoons Kosher Salt (35g)
- 1 tablespoon Granulated Garlic (15g)
- 1 tablespoon Granulated Onion (15g)
- 1 tablespoon Freshly Ground Black Pepper (15g)
- 1 tablespoon Chili Powder (15g)
- 1 teaspoon Cayenne Pepper (optional, for a kick) (5g)
- 1 teaspoon Dried Oregano (5g)
- ½ teaspoon Ground Cumin (2.5g)
Equipment
- Large mixing bowl (for the rub)
- Baking sheet(s)
- Aluminum Foil (Heavy Duty recommended)
- Wire cooling rack that fits inside the baking sheet
- Pastry brush or hands for applying the mustard
step-by-step Instructions (Outline)
- Prepare the Ribs: Remove the thin, papery membrane from the bone side of the ribs using a butter knife and paper towels (crucial for tenderness). Trim any excessive, hard fat deposits.
- Mix the Dry Rub: Whisk together all dry rub ingredients in a bowl until uniformly combined. Taste a tiny pinch it should be assertive!
- Bind and Season: Lightly brush both sides of the ribs with yellow mustard. Immediately and liberally coat the ribs with the dry rub, pressing the rub firmly into the meat to adhere.
- Rest (The Flavour Soak): Wrap the seasoned ribs tightly in plastic wrap or place them in a large zip-top bag. Refrigerate for at least 1 hour, or ideally, up to 4 hours, allowing the salt to penetrate.
- Set Up for Slow Cook: Preheat oven to a very low 275°F (135°C). Line a baking sheet with heavy duty foil. Place the wire rack on top of the foil.
- The Slow Cook: Place the ribs (meat side up) onto the rack. Cover the entire baking sheet setup tightly with another layer of heavy duty foil, creating a sealed packet (this traps the steam and ensures tenderness).
- Bake: Cook for 3 to 3.5 hours. Check tenderness by gently probing the meat between the bones it should offer very little resistance.
- The ‘Set’ Finish (Optional Glaze): Increase oven temperature to 375°F (190°C). Carefully remove the top layer of foil. If using a barbecue sauce (not required for dry rub ribs), brush on a thin layer now. Return ribs to the oven, uncovered, for 10 15 minutes to set the rub/glaze and create a slight crust.
- Rest and Serve: Remove ribs from the oven, tent loosely with foil, and let them rest for 10 minutes before slicing between the bones.
Nutritional Information (Estimate)
Estimate per serving (without added sauce):
- Calories: 450 550 kcal
- Protein: 35g
- Fat: 30g (This will vary based on cut/trimming)
- Carbohydrates: 18g
- Sodium: ~1200mg (due to salt content in the rub please adjust if monitoring sodium intake closely.)
Tips & Tricks
- Remove the Silver Skin: This membrane on the back of the ribs prevents heat and seasoning from penetrating deeply. If you skip this, they will be tougher. A quick flick with a butter knife edge and a paper towel grip usually lifts it right off.
- Press, Don’t Sprinkle: When applying the rub, really press it into the meat. This helps the spices adhere during the long cook time, ensuring you get that proper crusty bark we’re after.
- The Foil Seal is Non-Negotiable: For oven baked ribs, trapping the moisture is key. If your foil packet isn't sealed well, the meat risks drying out before it becomes tender.
- Don’t Rush the Heat: Resist the urge to crank the oven up higher than 275°F (135°C). High heat toughens the proteins before the connective tissue has time to melt into gelatin. Patience pays off here!
Variations & Substitutions
Variations:
- Spicy Inferno: Double the Cayenne Pepper and add 1 teaspoon of Chipotle powder to the rub for a deep, smoky heat.
- Cajun Twist: Add 1 tablespoon of dried thyme and reduce the brown sugar slightly for a more herbaceous, savoury profile.
- Sweet & Tangy Finish: If you must have sauce, use a thin layer of Kansas City style sweet BBQ sauce during the final 15 minutes of cooking.
Substitutions:
- For Pork Ribs: You can adapt this rub heavily for beef short ribs, but the cooking time will need to be adjusted significantly (usually 4-5 hours minimum). If you fancy trying the Slow Cooker Dry Rub Ribs method, this same rub works wonders too!
- For Brown Sugar: Substitute with Maple Syrup (reduce liquid binder accordingly if switching to a wet marinade, but for the rub, stick to the sugar).
- For Smoked Paprika: If you don't have smoked, use standard sweet paprika, but consider adding a drop or two of liquid smoke to the initial mustard binder to recapture some of that campfire flavour.
Serving Suggestions
- Coleslaw: A creamy, crisp slaw provides a perfect acidic counterpoint to the rich, smoky meat.
- Creamy Macaroni & Cheese: Pure comfort food pairing the ultimate 'stick-to-your ribs' meal.
- Cornbread: A slightly sweet, crumbly cornbread is ideal for soaking up any residual rendered fat or sauce.
- Beverage Pairing: A crisp, cold craft lager or a robust, fruit forward Zinfandel stands up beautifully to the spice and fat.
Related Recipes Worth Trying
- The Ultimate Rib Dry Rub Recipe for Perfect BBQ Bark — Learn how to make the best Rib Dry Rub using this simple balanced recipe Achieve an awardwinning flavourful crust whether you use the smoker or oven Get...
- Bank Holiday Bliss Homemade Rib Rub Sweet Smoky — Whip up this easy homemade rib rub in just 5 minutes Its the best rib rub recipe for perfect sweet and smoky barbecue bark every time Get the foolproof...
- Low Slow Dry Rubbed Ribs Oven Baked Perfection — Master the ultimate Dry Rubbed BBQ Ribs using this simple oven baked ribs method Get that perfect spice bark without firing up the smoker
Right then, let's get these ribs sorted! There’s nothing quite like a proper rack of ribs that’s been lovingly seasoned and slow cooked until it falls right off the bone.
We're aiming for that classic, smokehouse flavour without needing a sprawling backyard smoker we'll nail this in a standard oven or even a slow cooker. This recipe focuses on building layers of flavour with a killer dry rub. This Dry Rub Ribs Oven method is seriously easy, trust me.
The Ultimate Backyard BBQ Dry Rub Ribs (Oven Baked Method)
Core Shopping List
First things first, we need the goods. For the ribs, grab about 2.5 to 3 lbs (1.1 to 1.4 kg) of pork ribs. St. Louis cut spare ribs are my favourite for this Dry Rub Ribs Recipe because they have a bit more meat on them, but Baby Backs work a treat if that's what your local butcher has in stock.
Don't sweat the mustard; any cheap yellow variety does the job it just glues the rub on. The quality cue for the rub is the paprika; try to find actual smoked paprika if you can. If you can't find it, standard sweet paprika plus a tiny dash of liquid smoke in the binder is my make-do tip.
Flavour Architecture: Building Your Homemade Dry Rub for Ribs
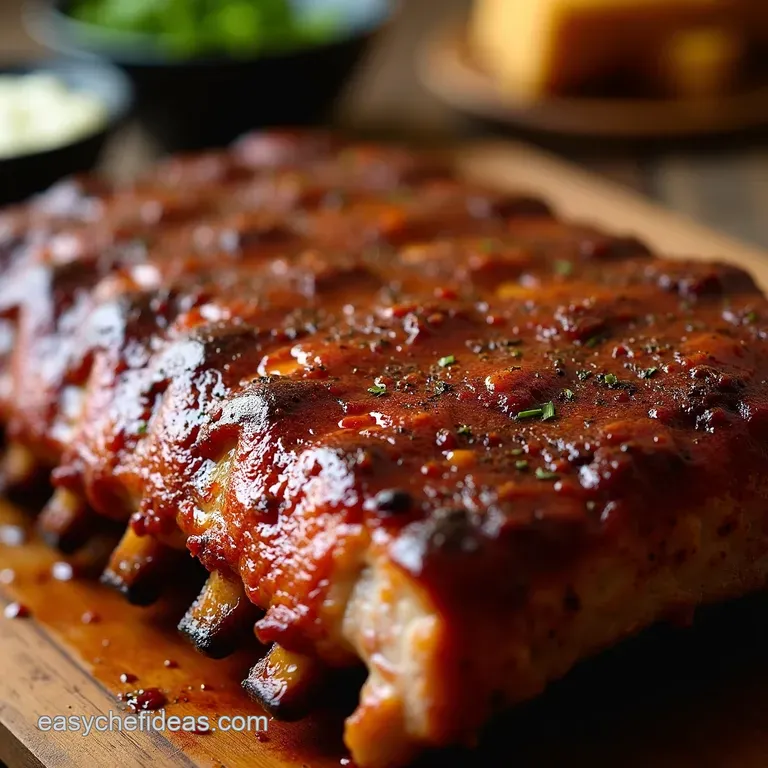
This rub is where the magic happens. It’s your flavour base for the Best Dry Rub Ribs . The brown sugar is crucial; it doesn't just sweeten things up, it helps create that beautiful mahogany crust, or ‘bark,’ as the BBQ pros call it.
The paprika brings the colour and smoke, while the salt and pepper are the backbone. If you find your rub a bit too sweet, my little trick is to add a teaspoon of instant coffee granules it deepens the savoury notes without tasting like coffee.
That’s one of my go-to tweaks for any Easy Dry Rub Ribs application.
Equipment & Mise en Place
You don't need a fancy smoker for Fall Off The Bone Ribs Oven success. You definitely need heavy duty aluminium foil I cannot stress this enough. If you use thin stuff, it tears, and all your lovely steam escapes. You also need a wire cooling rack that fits inside your baking tray.
My pro tip here is to do all your seasoning the day before. Mix the rub, coat the ribs, wrap them up, and stick them in the fridge overnight. This resting period, where the salt starts working its magic, is the secret handshake for next level flavour penetration. Seriously, let the meat soak up those spices!
Right then, let's get these ribs sorted! There’s nothing quite like a proper rack of ribs that’s been lovingly seasoned and slow cooked until it falls right off the bone.
We're aiming for that classic, smokehouse flavour without needing a sprawling backyard smoker we'll nail this in a standard oven or even a slow cooker. This recipe focuses on building layers of flavour with a killer dry rub.
The Ultimate Backyard BBQ Dry Rub Ribs (Oven Baked Method)
Before You Cook
So, before we even think about turning the oven on, we need a bit of prep. My rivals bang on about resting times, and honestly, they aren’t wrong. Give your seasoned ribs at least an hour chilling out in the fridge after you’ve slapped that Homemade Dry Rub for Ribs on.
That gives the salt time to get into the meat. If you skip this, your flavour won't be deep enough.
The biggest mistake folks make with Oven Baked Ribs Recipe is trying to rush it. Crank the heat too high, and you end up with tough, chewy meat. We are aiming for Fall Off The Bone Ribs Oven status, not ‘chewy leather’ status.
Also, don’t be shy with the rub! If you just sprinkle it lightly, your Dry Rub Ribs Recipe will taste bland, trust me. Really press it in!
Guided Cooking Sequence
Here’s how we get these beauties tender using the oven. If you’re using a Slow Cooker Dry Rub Ribs method, you’ll follow similar initial seasoning but skip the foil packet step for the first few hours.
- Prepare the Ribs & Rub: Get that silver skin off the back it’s vital, honest! Mix all your rub ingredients. You should smell that smoky paprika kick immediately.
- Bind and Season: Slather on a thin layer of mustard (you won't taste it later, promise, it just acts like glue). Coat those ribs generously with the rub mix, pressing hard. Now, wrap them tight and let them rest for that minimum hour.
- Oven Setup: Get your oven heating up slowly to 275° F ( 135° C) . Line a tray, pop the rack on, and lay your seasoned ribs down. Crucially, you must wrap the whole thing up like a Christmas present in heavy duty foil. This traps all the steam, which is what tenderises the meat for our Easy Dry Rub Ribs .
- The Slow Cook: Pop them in for 3 to 3. 5 hours . You’ll know they’re getting close when you can wiggle a bone gently and it feels loose. The aroma that starts filling your kitchen around the two-hour mark is pure heaven, by the way.
Save-It Section
Once they are done and rested for ten minutes, these are brilliant leftovers. Store any remaining Best Dry Rub Ribs tightly wrapped in the fridge for up to three days.
When reheating, I find wrapping them back up in foil and warming them low and slow in the oven (about 300° F for 20 minutes) brings them right back to life. The flavour actually deepens overnight, which is brilliant!
If disaster strikes and your sauce (if you used any at the end) splits or looks oily, just whisk in a tiny spoonful of cold water or apple cider vinegar right off the heat to bring it back together.
If they taste too salty from the rub, don't panic a quick mop with some unsweetened apple juice during the final 15 minutes can help balance it out. Enjoy making the Dry Rub Ribs of your dreams!
Right then, let's get these ribs sorted! There’s nothing quite like a proper rack of ribs that’s been lovingly seasoned and slow cooked until it falls right off the bone. We're aiming for that classic, smokehouse flavour without needing a sprawling backyard smoker we'll nail this in a standard oven.
This recipe focuses on building layers of flavour with a killer Dry Rub Ribs mix.
Taste & Texture Upgrades
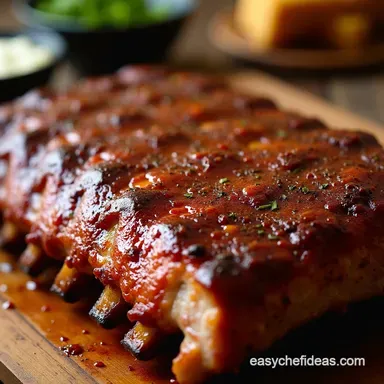
When you’re making something destined to be the star of the show, you need to pull out the stops on the finish. For presentation, forget piling them high. Slice two ribs cleanly, stand them up slightly overlapping on a bed of creamy slaw, and drizzle a tiny bit of your favourite sauce over the meat, not drowning it.
A sprinkle of fresh parsley looks deceptively professional. If you’re feeling ambitious, try brushing the ribs with apple cider vinegar during the last 30 minutes of the cook it brightens up the heavy rub beautifully.
I’ve seen plenty of people just sprinkle spice on the meat. Big mistake. My biggest improvement on most standard Dry Rub Ribs Recipe guides is the mustard binder.
It might sound weird, but a thin coat of yellow mustard (don't worry, you can't taste it!) ensures that gorgeous, thick crust of seasoning actually sticks instead of sliding off into the foil pan. That crust is everything!
Nutrition & Dietary Paths
These are hearty ribs, alright? Per serving, we’re looking roughly at 500 calories, about 35g of protein, and the rest being fat and that lovely sugar from the rub. For those watching their intake, the easiest switch is trimming as much visible fat as possible before seasoning, and you can halve the brown sugar in the Homemade Dry Rub for Ribs if you want to cut carbs without losing all the caramelisation.
If you need this to be gluten-free, stick to plain spices, which this recipe already is, so no worries there! dairy-free is also a doddle, though if you serve it with cheesy mac, you’re on your own there, mate!
Serving & Pairing Ideas
The secret to making these Fall Off The Bone Ribs Oven truly sing is what you put next to them. Forget fussy sides. A simple, sharp green salad or some proper buttery corn on the cob are perfect. If you need make-ahead strategy, these are fantastic.
Store leftovers wrapped tightly in the fridge for up to three days. To reheat, the best method for reviving the texture especially if you went for the Oven Baked Ribs Recipe route is wrapping them in foil again and heating them low and slow, say at 300° F ( 150° C) for about 20 minutes until warmed through.
Keeps them moist.
Seriously, give this Easy Dry Rub Ribs method a proper go this weekend. Once you nail that slow cook, you’ll be converted!
If you're craving more ideas, explore Garlicky Honey Beef Bites Quick Pub Grub at Home , gluten-free Dry Onion Soup Umami Mix Better Than Liptons and Garlic Mushrooms Proper Pub Grub Made Easy .

Frequently Asked Questions
What is the secret to getting these Dry Rub Ribs really tender in a standard oven?
The secret lies in the low-and-slow process and trapping the steam, much like an amateur cook uses a slow cooker! You must cook them at a low temperature (275°F / 135°C) for a long period 3 to 3.5 hours while keeping them tightly sealed in foil.
This method breaks down the connective tissues without drying out the meat, leaving you with that lovely fall off-the-bone texture.
I’m worried about the sodium content. Can I use less salt in the Dry Rub Ribs seasoning?
You absolutely can adjust the salt; just be mindful of its role. Salt does more than just add flavour; it helps tenderise the meat. If you reduce the kosher salt by half, make sure you let the ribs rest in the fridge for the maximum 4 hours to allow what salt remains time to penetrate deeply.
Do I really need to remove the membrane off the back of the ribs? It looks like a real faff!
Oh yes, mate, it’s a crucial step if you want tender ribs! That thin, papery membrane (silverskin) stops the heat and seasoning from getting in properly, and it remains tough and chewy even after hours of cooking. Give it a flick with a butter knife and peel it off it comes away surprisingly easily!
Can I make the dry rub mixture ahead of time, and how long does it keep?
Yes, making the rub in advance is a brilliant time saver for a weekend cook off. You can mix the entire batch and store it in an airtight container in a cool, dark cupboard for up to three months. Just ensure all ingredients are thoroughly mixed so you don't end up with a mouthful of pure sugar!
My ribs look pale after cooking. How do I get that proper, dark "bark" finish?
That lovely crust, or 'bark,' develops at the end when the high heat caramelizes the sugars in the rub. After the long, sealed cook, take the foil off and blast the oven up to 375°F (190°C) for the final 10 15 minutes.
If you want extra adherence, brush on a very thin layer of sauce right before this final blast.
The Ultimate Backyard Bbq Dry Rub Ribs Ovenbaked
Ingredients:
Instructions:
Nutrition Facts:
| Calories | 2122 kcal |
|---|---|
| Protein | 19.4 g |
| Fat | 16.4 g |
| Carbs | 153.5 g |
| Fiber | 50.3 g |
| Sodium | 1329 mg |
