Sticky Chicken Tenders: Caramelized and Crispy
- Time:15 minutes active + 20 minutes cooking = 35 minutes total
- Flavor/Texture Hook: Shatter crisp exterior with a velvety, tacky glaze
- Perfect for: High protein weeknight dinners or a crowd-pleasing appetizer
- Perfect Sticky Chicken Tenders
- Why the Glaze Sticks
- Choosing Your Best Method
- Essential Component Analysis
- Ingredients and Smart Swaps
- Tools for Better Frying
- Simple Step-by-Step Guide
- Solving Common Texture Issues
- Adjusting the Recipe Size
- Exciting Regional Flavor Twists
- Debunking Common Kitchen Myths
- Storage and Waste Tips
- Best Serving Ideas
- Very High in Sodium
- Recipe FAQs
- 📝 Recipe Card
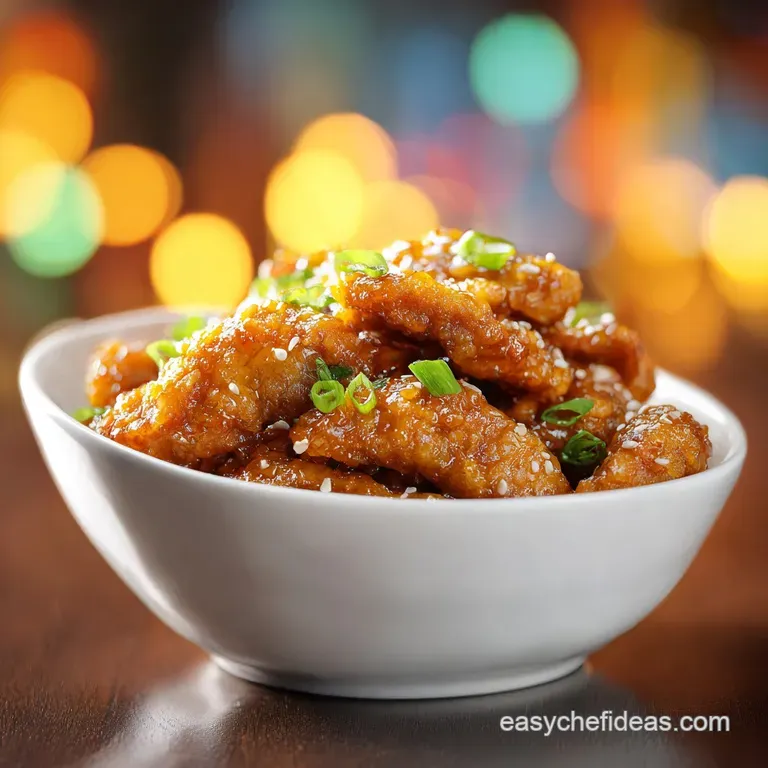
Perfect Sticky Chicken Tenders
Imagine the sound of a fork scraping against a chicken strip that’s been lacquered in a mahogany hued sauce. There’s a distinct "tack" as the honey rich glaze grips the plate, and when you take that first bite, the coating doesn't slide off.
It stays put, offering a sharp crunch followed by the warmth of ginger and the slow burn creep of sriracha. This is the sensory experience I’ve spent months chasing in my own kitchen after too many "sticky" recipes turned out either watery or gummy.
We’ve all had those tenders that look great in the pan but turn into a sad, mushy mess the moment the sauce hits the plate. The secret isn't just in the ingredients; it’s in how we manage the moisture.
By using a specific starch heavy dredge and a flash reduction for the glaze, we’re essentially shrink wrapping the flavor onto each piece of meat. It’s a technique that nourishes the soul while celebrating the vibrant, sweet and savory profile common in global "lacquered" poultry traditions.
This dish is a staple in my house when we want something that feels like a treat but provides real nourishment through lean protein. It brings people together, much like the shared platters of street food you’d find in bustling night markets.
Whether you're feeding a family of four or just yourself, the contrast between the hot, spicy glaze and the juicy chicken creates a harmony that’s hard to beat.
Why the Glaze Sticks
Starch Carbonization: Cornstarch creates a thin, brittle shell that contains microscopic ridges, providing a larger surface area for the sauce to grip onto compared to wheat flour.
Sugar Viscosity: As the water evaporates from the honey and soy mixture during the simmer, the sugar molecules move closer together, creating a "tacky" bond that adheres to the dry starch layer.
Moisture Barrier: Searing the chicken bone dry prevents steam from escaping, which ensures the crust stays attached to the meat rather than puffing away and getting soggy.
Choosing Your Best Method
| Method | Time | Texture | Best For |
|---|---|---|---|
| Stovetop | 20 minutes | Maximum crunch with charred edges | The authentic "lacquered" look |
| Oven Bake | 25 minutes | Uniformly crispy but less "char" | Large batches and hands off cooking |
| Air Fryer | 15 minutes | Extremely dry and brittle crust | Health conscious, low oil preference |
While the stovetop method is my go to for that specific sizzle and caramelized depth, you can certainly adapt. If you’re looking for a foundation on the base chicken before you add the sauce, my Crispy Chicken Tenders recipe offers a great deep dive into achieving that initial crunch. However, for this specific "sticky" outcome, the skillet is king because it allows the sauce to reduce directly against the chicken’s heat.
Essential Component Analysis
| Ingredient | Science Role | Pro Secret |
|---|---|---|
| Cornstarch | High amylose content creates a crisp, clear shield | Always shake off the excess to prevent "gummy" spots |
| Honey | Acts as the primary humectant and thickener | Use wildflower honey for a deeper, more floral undertone |
| Rice Vinegar | Acid cuts through the heavy sugars, balancing the palate | Don't skip it; the acidity brightens the entire flavor profile |
The interaction between the soy sauce and the honey is where the magic happens. The soy provides the salt and the amino acids necessary for a deep color, while the honey provides the body. If you’re curious about how this compares to other glazes, I often look at my Sticky Sweet Honey Garlic Sauce for Chicken as a reference for that perfect "pull" and shine.
Ingredients and Smart Swaps
- 1.5 lbs chicken tenderloins: The gold standard for juicy, quick cooking meat. Why this? They cook evenly and remain tender under high heat.
- Substitute: Chicken thighs cut into strips (higher fat, more flavor).
- 0.5 cup cornstarch: Creates the brittle, non gluten crust. Why this? It stays crispier under sauce than all purpose flour.
- Substitute: Arrowroot powder (yields a similar shine and crunch).
- 0.5 cup honey: The base of our sticky lacquer. Why this? It thickens naturally without needing a flour roux.
- Substitute: Maple syrup (adds a woody sweetness but is thinner).
- 0.25 cup low sodium soy sauce: Provides the savory "umami" base. Why this? Keeps the salt levels manageable so the honey shines.
- Substitute: Tamari (perfect for keeping the dish gluten-free).
- 3 cloves garlic, minced: Essential for that aromatic punch.
- Substitute: 1 tsp garlic powder (if you're out of fresh).
- 1 tbsp sriracha: Adds a gentle, fermented heat.
- Substitute: Gochujang (for a deeper, funkier red pepper taste).
- 1 tsp fresh ginger, grated: Provides a bright, zesty top note.
- Substitute: 0.5 tsp ground ginger (use less as it’s more concentrated).
- 1 tsp rice vinegar: The essential "reset" for your taste buds.
- Substitute: Apple cider vinegar (similar acidity but slightly fruitier).
- 1 tsp toasted sesame seeds: For a nutty crunch and visual contrast.
- 2 green onions, sliced: Adds freshness and color.
Chef's Note: If you really want to maximize the crunch, let your cornstarch dredged chicken sit on a wire rack for 5 minutes before frying. This allows the starch to hydrate slightly and stick better to the meat, preventing it from falling off in the pan.
Tools for Better Frying
To get the results you see in the photos, you don't need fancy gadgets, but the right pan makes a world of difference. I highly recommend a large cast iron skillet (like a Lodge) or a heavy bottomed stainless steel pan.
These materials hold heat better than thin aluminum, meaning your chicken will sear rather than steam when it hits the oil.
You’ll also want a microplane or a fine grater for the ginger and garlic. Garlic that is pressed or grated into a paste integrates into the sauce much better than large chunks, which can burn in the high heat of the skillet.
A pair of silicone tipped tongs is also vital; they allow you to flip the chicken delicately without tearing that beautiful cornstarch crust you worked so hard to build.
Simple step-by-step Guide

- Prep the meat. Pat the 1.5 lbs chicken tenderloins bone dry with paper towels. Note: Excess moisture is the enemy of a crispy crust; moisture creates steam, which leads to sogginess.
- Apply the dredge. In a large bowl or gallon sized bag, combine 0.5 cup cornstarch, 1 tsp garlic powder, 0.5 tsp smoked paprika, 0.5 tsp salt, and 0.5 tsp black pepper. Toss the chicken until fully coated, until every crevice is white and dusty.
- Heat the pan. Add 2 tbsp neutral oil to your skillet over medium high heat. Wait until the oil shimmers and begins to swirl before adding the meat.
- Sear the chicken. Place tenders in a single layer. Sear for 3-4 minutes per side until the edges are golden and shatter crisp. Do not overcrowd; work in batches if necessary.
- Whisk the sauce. In a small saucepan, combine 0.5 cup honey, 0.25 cup soy sauce, 3 cloves minced garlic, 1 tbsp sriracha, 1 tsp ginger, and 1 tsp rice vinegar.
- Simmer the glaze. Bring the sauce to a simmer over medium heat until it thickens enough to coat the back of a spoon. This should take about 3-5 minutes.
- The final lacquer. Pour the bubbling sauce over the chicken in the skillet. Toss rapidly for 1-2 minutes until the sauce transforms into a thick, glass like glaze.
- Garnish and serve. Immediately remove from heat and sprinkle with 1 tsp toasted sesame seeds and 2 sliced green onions.
Solving Common Texture Issues
Why Your Chicken Is Gummy
If your coating feels rubbery rather than crispy, it’s usually a temperature issue. If the oil isn't hot enough, the cornstarch absorbs the oil rather than frying in it. Also, if you don't shake off the excess starch, it clumps together with the moisture from the chicken to form a paste.
Why Your Sauce Is Runny
A runny sauce usually means the honey wasn't reduced long enough or you didn't allow the chicken to finish cooking in the sauce. The chicken itself releases a small amount of heat that helps the sugars in the honey "set" into a glaze.
| Problem | Root Cause | Solution |
|---|---|---|
| Soggy Coating | Overcrowding the skillet | Fry in two batches to allow steam to escape |
| Burned Sauce | Heat too high during glaze step | Lower the heat to medium once the sauce hits the pan |
| Bland Flavor | Using old ginger/garlic | Always grate fresh aromatics right before cooking |
Common Mistakes Checklist:
- ✓ Pat chicken completely dry (crucial for the starch to adhere).
- ✓ Ensure oil is shimmering hot before adding meat.
- ✓ Shake off every bit of excess cornstarch before frying.
- ✓ Don't skip the rice vinegar; it balances the heavy honey.
- ✓ Let the sauce simmer on its own before adding it to the chicken.
Adjusting the Recipe Size
When you're cooking for a party and need to double this (up to 3 lbs of chicken), don't just double everything blindly. For the spices and salt, I recommend only going to 1.5x the original amount. Salt can become overwhelming very quickly in concentrated glazes.
You’ll also need to work in at least three batches for the frying phase to maintain that high heat.
If you’re scaling down for a solo dinner (0.75 lbs of chicken), the sauce will reduce much faster because there is less volume. Keep a close eye on the skillet; you might only need 30 seconds of tossing to reach that "lacquered" state.
For the egg free dredge used here, scaling down is simple just halve the starch and spices.
Exciting Regional Flavor Twists
Kickin' Korean Twist
Substitute the sriracha for 1.5 tbsp of Gochujang (Korean chili paste). Add a teaspoon of toasted sesame oil to the sauce at the very end. The fermented depth of the Gochujang pairs beautifully with the honey and creates a darker, redder glaze that is incredibly popular in Seoul style fried chicken.
Tropical Pineapple Ginger Version
Replace half of the honey with 0.25 cup of pineapple juice. Increase the fresh ginger to 2 tsp. The enzymes in the pineapple juice help tenderize the chicken even further, and the fruitiness adds a bright, island inspired dimension that feels like summer on a plate.
Hot Honey BBQ Fusion
If you love a more Americanized profile, swap the soy sauce for 2 tbsp of your favorite smoky BBQ sauce. Keep the honey and sriracha. This creates a "Hot Honey" vibe that is velvety and rich, perfect for serving alongside a cool ranch dipping sauce.
Debunking Common Kitchen Myths
Myth: You need an egg wash for the coating to stay on. Actually, for this "sticky" style, the moisture from the chicken tenderloins is enough to hydrate the cornstarch into a thin film. Adding egg often creates a "puffy" batter that separates from the meat when hit with a heavy sauce.
Myth: You should wash your chicken before cooking. Please don't! Washing chicken just splashes bacteria around your sink. Patting it dry with paper towels is the only "cleaning" you need, and it’s the most important step for achieving that shatter crisp texture.
Storage and Waste Tips
Storage: These tenders are best served fresh, but you can keep them in the fridge for up to 3 days. To reheat, avoid the microwave it will turn the glaze into a sticky puddle.
Instead, use an air fryer at 350°F (180°C) for 4-5 minutes or a toaster oven. This helps the sugar re crystallize and the crust regain some of its bite.
Zero Waste: If you have leftover sauce in the pan, don't toss it! Add a splash of water or chicken broth to the hot skillet to loosen the glaze, then toss in some steamed broccoli or snap peas. It makes a fantastic, instant side dish.
Any leftover green onion ends can be placed in a jar of water on your windowsill to regrow!
Best Serving Ideas
To nourish a hungry crowd, serve these tenders over a bed of fluffy jasmine rice or coconut rice. The rice acts as a sponge for any stray glaze, ensuring not a single drop of that honey soy goodness goes to waste.
If you're looking for a lower carb option, these are fantastic inside large butter lettuce cups with a few extra slices of fresh chili and a squeeze of lime.
For a true feast, pair them with a crunchy slaw made of shredded cabbage, carrots, and a light sesame oil dressing. The cold, acidic crunch of the slaw provides a necessary "reset" between bites of the rich, sweet chicken.
It's about creating a plate that celebrates diversity in texture and flavor, turning a simple meal into a community style celebration of good food.

Very High in Sodium
945 mg 945 mg (41% 41% of daily value)
The American Heart Association recommends limiting sodium intake to no more than 2,300mg per day, with an ideal limit of under 1,500mg for most adults.
Tips to Reduce Sodium
-
Opt for Low-Sodium Soy Sauce-20%
Switching to low-sodium soy sauce is a significant step. Many recipes rely heavily on soy sauce for saltiness and umami, making this a high impact change.
-
Reduce Added Salt-15%
The recipe calls for 0.5 tsp of salt. Try halving this amount to 0.25 tsp or even omitting it entirely, as the soy sauce provides considerable saltiness.
-
Control Sriracha and Vinegar-5%
While sriracha and rice vinegar contribute flavor, they also contain sodium. Consider using a reduced sodium sriracha option or slightly less of both if available.
-
Embrace Aromatics and Spices
Boost flavor without sodium by increasing the use of fresh garlic, ginger, and other spices. Consider adding chili flakes for heat or fresh herbs like cilantro or parsley.
Recipe FAQs
How to make sticky chicken strips?
Coat the chicken in a seasoned cornstarch mixture and sear until golden. After cooking the meat through, toss it in a simmered sauce made of honey, soy sauce, garlic, sriracha, ginger, and rice vinegar until the glaze clings to the crust.
Can a diabetic eat baked chicken?
Yes, in moderation, though this specific recipe is designed for a skillet seared glaze rather than baking. You should monitor portion sizes due to the honey content in the sticky sauce and consider pairing the dish with fiber rich vegetables like those found in our grilled chicken preparation.
How to make good sticky chicken?
Pat the chicken bone dry before coating to ensure a crisp base that won't turn soggy. Achieving a thick, lacquered finish requires rapidly tossing the chicken in the reduced sauce for 1-2 minutes until it adheres perfectly to the tenders.
How do the Chinese get chicken so tender?
Slice meat thinly and sear at the correct temperature to lock in natural moisture. By using a cornstarch coating to create a protective barrier, you prevent the chicken from drying out during the high heat cooking process.
Why is my chicken coating falling off?
Moisture is usually the culprit for poor crust adhesion. Ensure you thoroughly pat the chicken dry before tossing it in the cornstarch, and avoid overcrowding the skillet so the chicken sears rather than steams.
Is it necessary to use a deep fryer for this recipe?
No, this is a common misconception. You can achieve a professional quality crust by searing the chicken in a large skillet over medium high heat with just two tablespoons of neutral oil.
How do I reheat these without losing the sticky texture?
Use an air fryer at 350°F for 4-5 minutes instead of a microwave. Reheating with dry, circulating heat helps the sugars in the glaze re-crystallize and restores the crispness of the coating.
Sticky Chicken Tenders Recipe
Ingredients:
Instructions:
Nutrition Facts:
| Calories | 467 calories |
|---|---|
| Protein | 39.6 g |
| Fat | 9.5 g |
| Carbs | 53.3 g |
| Fiber | 1.2 g |
| Sugar | 35.8 g |
| Sodium | 945 mg |
