The Emergency Loaf Truly Speedy Onehour Rustic Bread
- Bypassing the Proof: The Magic of Instant Dough
- Curbing Those Carb Cravings in Sixty Minutes
- Essential Components for Rapid Rising
- Tool Checklist for Speedy Dough Management
- The Assembly Line: Mixing and Initial Shaping Phase
- Oven Pre-Heat Dynamics and Bake Execution
- Achieving Perfection: From Hot Tin to Cooling Rack
- Troubleshooting Common Speed Baking Snags
- Recipe FAQs
- 📝 Recipe Card
Bypassing the Proof: The Magic of Instant Dough
The sheer joy of pulling a steaming loaf of homemade bread from the oven is often tempered by the clock. Traditional methods demand hours sometimes days of patient waiting for yeast to work its slow, wonderful magic. But what if that craving hits hard at 5 PM and you need bread by dinner?
Enter the concept of One Hour Bread , a brilliant method designed to deliver that satisfying, chewy texture and rustic aroma without the commitment of traditional proofing times.
This approach manipulates temperature and ingredient ratios to essentially turbo charge the fermentation process, allowing us to create a viable One Hour Bread Loaf in a fraction of the standard timeline.
Curbing Those Carb Cravings in Sixty Minutes
There’s a distinct satisfaction in baking from scratch, even when time is of the essence. This One Hour Bread Recipe harnesses the power of warm water and a little bit of sugar to aggressively wake up the yeast, creating a quick rising powerhouse.
This isn't simply a quick bread made with baking soda; this is genuine Yeast Bread in One Hour , meaning we achieve the rise and structure only possible with yeast, but we dramatically condense the waiting period.
Why This One Hour Bread Defies Standard Baking Timelines
Standard bread recipes often rely on time, not temperature, for structure development. By opting for a slightly hotter water temperature (around 110° F) and using readily available active dry yeast, we are encouraging immediate and vigorous gas production.
This aggressive initial boost means the dough achieves the necessary volume in minutes rather than hours, effectively creating a Quick Bread Recipe No Proofing needed in the traditional sense. We substitute time with active temperature management.
Setting the Stage: What Makes This Loaf 'Emergency Ready'?
This loaf is designed for immediacy. It relies on minimal kneading just enough to bring the ingredients together and a very brief, high hydration rest period. We use 1 ½ cups of warm water to about 3 ½ cups of flour, resulting in a slightly wetter, shaggier dough.
This hydration level is key to creating a fast rise and a soft interior crumb, making it the ultimate Fast Homemade Bread solution when surprise guests arrive or dinner requires a serious carb companion.
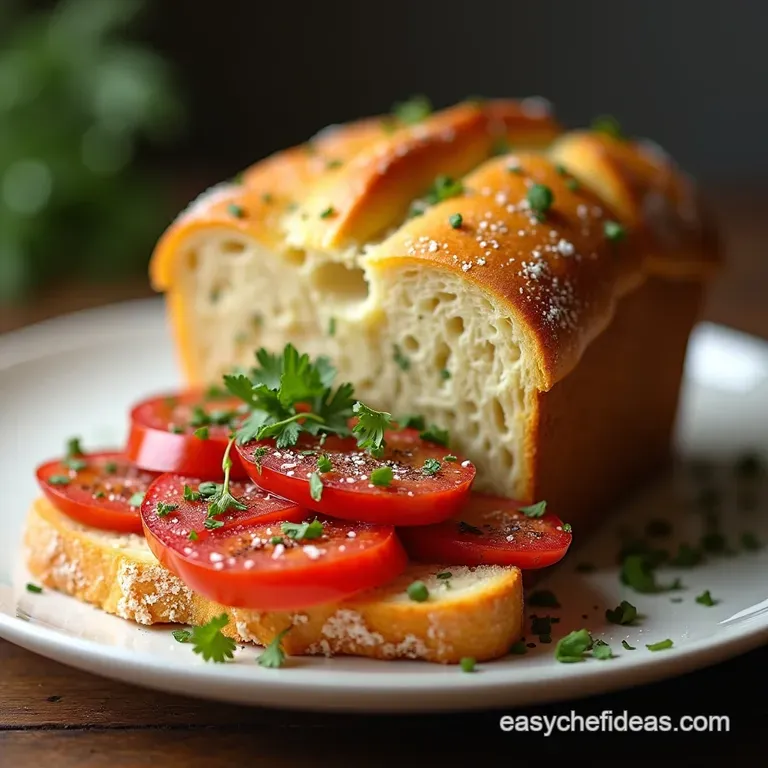
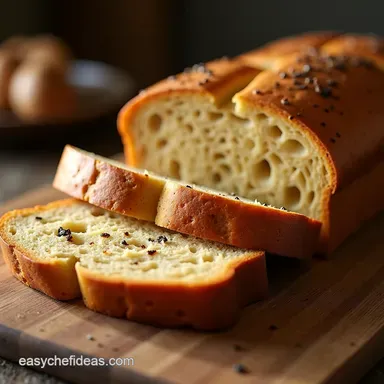
Your First Taste: A Quick Look at the Final Rustic Crumb
When you finally slice into this creation, you shouldn't expect the airy, perfect structure of a 24-hour sourdough. Instead, anticipate a delightfully rustic interior. The crumb will be slightly denser than a slow proofed loaf but wonderfully moist and chewy.
It possesses a satisfying tang that comes from the rapid, concentrated fermentation. It’s the perfect texture for soaking up rich sauces or handling a generous slathering of butter, making this a versatile One Hour Bread .
Essential Components for Rapid Rising
Success in speed baking hinges entirely on the quality and preparation of your core ingredients. For this One Hour Bread Dough Recipe , precision in the liquids is more important than intense manipulation of the solids.
The foundation starts with the yeast activation. We combine the active dry yeast with 1 teaspoon of granulated sugar and 1 ½ cups of water warmed precisely between 105– 115° F. This sweet, warm bath is essential for rapid yeast awakening.
Following this bloom, the dry ingredients 3 ½ cups of all-purpose flour and 1 ½ teaspoons of fine sea salt are whisked together. The salt, while crucial for flavor, also helps control the speed of the yeast, ensuring it rises quickly but doesn't completely exhaust itself before hitting the oven.
Finally, 2 tablespoons of olive oil are added to enrich the dough slightly, improving extensibility for that rapid oven spring.
Tool Checklist for Speedy Dough Management

Because we are moving fast, efficiency with your equipment is paramount. You want everything measured and ready to go before you even think about activating the yeast.
Precision Portions: Measuring Flour and Water for Success
When speed is the goal, accuracy prevents rework. Measure your flour by the 'spoon and level' method rather than scooping directly from the bag; too much flour will instantly turn your wet dough into a stiff, slow rising mass.
Crucially, the water temperature must be confirmed with a thermometer; guessing risks failure in this fast paced bake.
The Yeast Activation Secret: Ensuring Maximum Rise Velocity
The yeast activation phase is not optional. After mixing the yeast, sugar, and warm water, stand back for a full 5 minutes. If it becomes foamy and bubbly, your yeast is primed and ready to perform miracles.
If it remains flat, discard and start over it is the engine of this One Hour Bread Recipe with Yeast .
Selecting Your Salt and Sugar Boosters
The teaspoon of sugar acts purely as fuel for the yeast, offering immediate energy for that first explosive rise. The salt, however, is vital for flavor and structure. Do not reduce the 1 ½ teaspoons of fine sea salt, as it tempers the yeast slightly, allowing the dough to develop a better structure during the short rest period rather than collapsing under its own rapid expansion.
Related Recipes Worth Trying
- The Bakers Best Country Loaf Artisan Bread Recipe Easy — Master this home-made artisan bread recipe using a Dutch oven for a shatteringly crisp crust Minimal kneading maximum flavour
- Authentic Concha Pan Recipe Making Soft Mexican Sweet Bread — Finally master the classic Concha Pan This foolproof recipe delivers beautifully soft Mexican sweet breads topped with that signature buttery streusel crown...
- The CloudLike Concha Authentic Mexican Sweet Bread Recipe — Bake truly fluffy Mexican Conchas at home These sweet bread rolls feature a signature crumbly topping Perfect for your Mexican breakfast ideas Get the recipe
The Assembly Line: Mixing and Initial Shaping Phase
This stage requires speed and minimal fuss. We aim for a shaggy dough, not a silky smooth one.
The Quick Mix Method: Minimal Kneading, Maximum Flavor
Combine the foamy yeast mixture with the olive oil, then gradually incorporate the dry flour and salt mixture. Mix vigorously either by hand with a sturdy spoon or using a stand mixer on the lowest speed until a cohesive, though admittedly sticky, dough forms.
This mixing should take no more than 3 to 4 minutes. We are intentionally skipping the long knead associated with conventional loaves.
The Short Rest: Preparing Dough for Immediate Oven Entry
Once mixed, cover the bowl with a clean tea towel. The dough must rest for precisely 15 minutes . This short interval is critical; it allows the flour to fully hydrate with the available moisture, making the dough tacky but manageable, and gives the yeast a crucial, unimpeded boost before the harsh oven environment hits it.
Scoring Techniques for the Perfect Crust Burst
After the 15-minute rest, gently turn the dough onto a lightly floured surface. Shape it quickly into a round or oval handle it tenderly, pushing out as little air as possible. Place this shaped mass onto a sheet of parchment paper.
Before it enters the heat, use a very sharp knife or lame to score the top, usually one or two deep slashes. This scoring directs the steam release, ensuring the One Hour Bread Loaf bursts artistically rather than tearing randomly.
Oven Pre-Heat Dynamics and Bake Execution
The success of this extremely fast bread relies heavily on massive, immediate heat transfer. Think of it as shocking the dough into rising.
The oven must be screaming hot. Preheat your oven to 450° F ( 230° C) . If you are using a Dutch oven (highly recommended for trapping steam), place it inside the oven while it preheats and let it sit for at least 15 minutes after the oven signals it has reached temperature.
This ensures the bottom of the loaf gets instant, intense heat.
Scoring Techniques for the Perfect Crust Burst
As detailed above, scoring is essential for controlling the oven spring. A simple, decisive slash across the top allows the rapidly expanding gases to escape in a controlled manner, creating that beautiful artisanal crack along the score line.
Achieving Perfection: From Hot Tin to Cooling Rack
The baking process is divided into two stages: steamy and dry.
The first phase, lasting 20 minutes, requires the dough to be sealed, either by using the lid of your Dutch oven or by tenting a large metal bowl over the loaf if using a standard baking sheet.
This trapped steam keeps the crust soft initially, allowing the dough to expand to its maximum volume this is the main mechanism replacing the long proofing time. After 20 minutes, remove the lid. If you opted for a shinier crust, brush lightly now with an egg white wash or milk.
Bake uncovered for another 15 to 20 minutes until deeply golden brown.
Troubleshooting Common Speed Baking Snags
Even with a streamlined process, things can go awry. The most common issue is a flat loaf. This is almost always due to one of two things: water that was too cool for the yeast, or handling the dough too much after the 15-minute rest.
If your dough feels slack and uncooperative during shaping, resist the urge to add more flour; instead, embrace the stickiness and shape gently.
Handling Stickiness: Advanced Tips for Dough That Refuses to Cooperate
If the dough is simply too sticky to manage even after the 15-minute rest, wet your hands slightly with water instead of adding more flour. Briefly run your wet hands over the dough to gather it into a ball. Water works better than flour here, as it incorporates without adding density.
Flavor Twists: Incorporating Herbs and Seeds into Your One Hour Bread
To elevate your standard One Hour Bread Rolls or loaf, consider additions during the final minute of mixing. For an aromatic twist, fold in 1 tablespoon of dried rosemary or caraway seeds along with the last bit of flour.
These inclusions generally do not disrupt the rapid rise mechanism significantly.
Keeping the Texture Alive: Storing Your Rapidly Baked Loaf
Because this is a fast bake, the crust can firm up more quickly than a slow fermented loaf. For the best texture, store the completely cooled loaf in a paper bag at room temperature for 1 2 days. Avoid plastic bags, which trap moisture and will steam the crust, making it soft and rubbery.
Reader Interactions and Community Baking Success Stories
We love hearing about your quick bakes! Did you successfully turn this into One Hour Bread Rolls for a last minute dinner party? Share your temperature tricks and scoring successes in the comments below!
Knowing how this One Hour Bread Recipe fits into your busy week inspires us to keep testing the boundaries of fast, fresh baking.

Recipe FAQs
Why does this One Hour Bread recipe skip the long kneading and proofing?
That's the beauty of this "Emergency Loaf"! We rely on a very hot oven and a short, intense initial hydration rest (15 minutes) to kickstart the yeast activity. This method achieves a decent oven spring without the traditional hour or two of rising time, perfect when you fancy fresh bread right now.
My dough felt very sticky after mixing; should I add more flour to make it easier to handle?
Resist the urge to add too much flour! For a fast rising loaf, a slightly wetter, shaggier dough is actually better for achieving an open, rustic crumb. Just dust your hands lightly when shaping, but remember that the 15-minute rest period will help it firm up enough to manage.
Can I bake this bread without a Dutch oven? My oven isn't quite up to scratch.
Absolutely, you can! The Dutch oven traps steam, which keeps the crust soft initially for maximum rise. If you don't have one, place the dough on a baking sheet lined with parchment paper, and set an empty metal pan on the rack beneath it.
Pour a cup of boiling water into that hot pan just as you slide the bread in to create that crucial steam.
How should I store this One Hour Bread if I have leftovers?
Because this bread is made quickly and lacks preservatives, it’s best eaten the day it’s baked. If you must store it, keep it in a paper bag at room temperature for up to two days avoid plastic bags, as they trap moisture and make the crust soggy.
It’s fantastic sliced thin and toasted the next morning for French toast!
I used instant yeast instead of active dry; do I still need to bloom it?
If you are using Instant Yeast (sometimes labelled Rapid Rise), you can skip the initial 5-minute blooming step where you mix it with sugar and water. Just mix the instant yeast directly with your dry flour ingredients, and the dough will still rise beautifully within that tight one-hour timeframe.
Speedy One Hour Bread
Instructions:
Nutrition Facts:
| Calories | 190 kcal |
|---|---|
| Fat | 2g |
| Fiber | 1.5g |
