Skinny Nobake Peanut Butter Pie: the Guilt-Free Peanut Butter Dream Pie
- Introducing the Guilt-Free Peanut Butter Dream: Your Skinny NoBake Peanut Butter Pie Fix
- The Science of Skinny: Achieving Perfect Mousse Texture with High Protein
- Essential Components for Your Skinny NoBake Peanut Butter Pie
- Effortless Assembly: Making Your Peanut Butter Pie Filling and Crust
- Troubleshooting and Pro Tips for the Perfect Peanut Butter Slice
- Practical Guide: How to Store and Extend the Life of Your Skinny NoBake Peanut Butter Pie
- Recipe FAQs
- 📝 Recipe Card
Introducing the Guilt Free Peanut Butter Dream: Your Skinny NoBake Peanut Butter Pie Fix
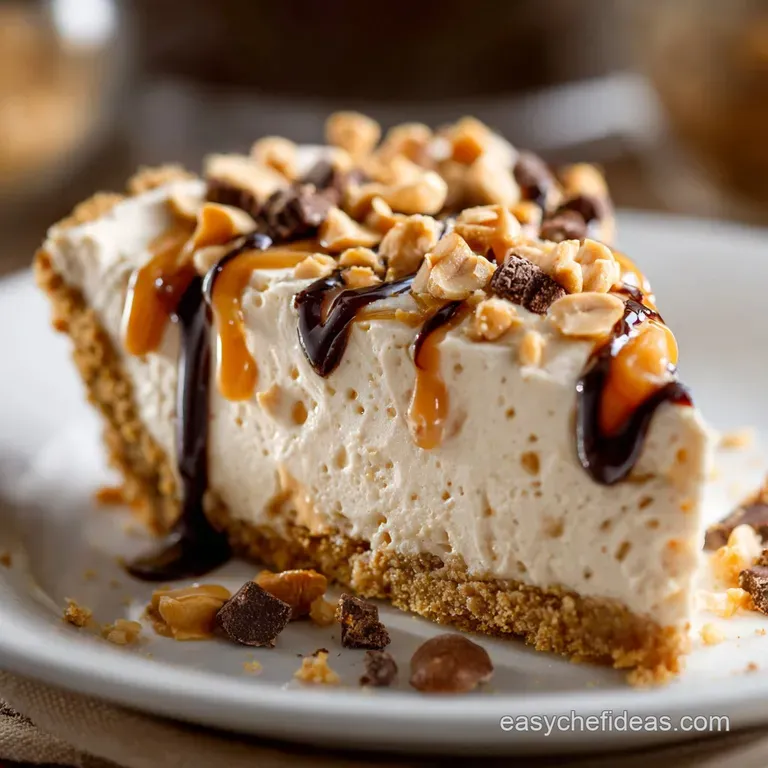
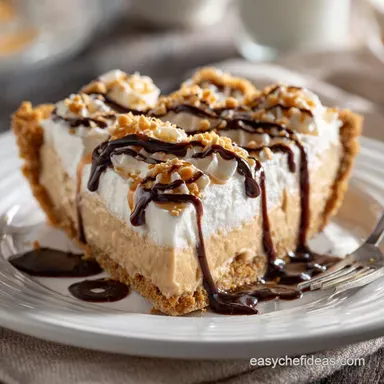
When that intense craving hits you know the one, deep, salty, and totally peanut butter obsessed you need immediate, creamy relief. This Skinny No-Bake Peanut Butter Pie delivers that glorious texture: airy, fudgy filling resting on a crisp, buttery base.
The aroma alone, a blend of nutty richness and cool vanilla, makes me want to dive in face first.
Forget turning on the oven, seriously. This Skinny No-Bake Peanut Butter Pie comes together in 15 minutes flat, using simple ingredients you probably already have lurking in the pantry. It’s cheap, incredibly easy, and somehow manages to feel utterly decadent without the usual guilt trip. This recipe is the hero we need for summer gatherings or when you just need a perfect, quick finish to a hearty meal like my fantastic Butternut Squash with Bacon and Parmesan: Ultra Crispy Roasted Side Dish .
I’ve spent years trying to figure out how to lighten up classic desserts without sacrificing texture, and this is the winning formula. We are ditching the heavy cream and the full blocks of cream cheese in favor of some high protein magic.
Grab your mixer and let’s make a truly Healthy Peanut Butter Pie that everyone will rave about.
The Science of Skinny: Achieving Perfect Mousse Texture with High Protein
Ditching the Oven: The Appeal of No-Bake Desserts
The beauty of no-bake desserts is truly unparalleled, especially during the sweltering months. Avoiding oven heat saves energy, but more importantly, it allows the structure of the pie to come from natural setting agents, like cold fat and high protein content, rather than binders activated by heat.
We rely on the chill time for stability, which results in a smoother, mousse like consistency instead of a baked custard texture.
How We Lightened Up the Classic Peanut Butter Filling
The classic peanut butter pie is usually a caloric bomb, built on heavy cream, powdered sugar, and large amounts of full fat cream cheese. We’ve maintained the volume and richness by strategically substituting the heavy dairy. By choosing plain Greek yogurt, we introduce a massive protein boost and enough natural tartness to balance the sweetness, helping it set beautifully without gelatin. This approach is similar to how I approach other lightened favorites, like my Lightened Up French Onion Soup Skinny, Low Calorie WW Recipe .
Nutritional Snapshot: Decadence Without the Downfall
While I’m not a professional nutritionist, the simple switch from traditional dairy staples to Greek yogurt and light whipped topping instantly slashes the saturated fat content. This means you get a much higher protein-to-fat ratio per slice.
The result is a satisfying dessert that supports the feeling of fullness.
The Role of Greek Yogurt in Pie Stabilization
Greek yogurt is the superstar of this No-Bake Peanut Butter Pie Recipe. Its thick texture comes from the removal of whey, concentrating the proteins and creating a natural binder. When mixed with the fat in the peanut butter and then folded with the airiness of the whipped topping, it acts as a perfect stabilizer, giving us that firm, yet fluffy structure we crave.
Make sure your yogurt is cold and thick avoid watery brands!
Why Light Whipped Topping is Superior to Heavy Cream in This Recipe
Heavy cream requires whipping to incorporate air, but it contains a high percentage of milk fat, making the final product dense. Light whipped topping, already stabilized and containing far less fat, introduces volume immediately without weighing down the mixture.
This is essential for achieving the light, airy mousse that defines a true Skinny No Bake Peanut Butter Pie.
Balancing Sweetness and Salt for Maximum Peanut Flavor
Peanut butter absolutely needs salt to sing. Without a good pinch of salt in the filling, the pie would taste flat, almost cloying. Using a low-calorie sweetener allows the deep, roasted flavor of the peanut butter to shine, while the salt provides the necessary contrast.
This salt sugar dynamic is key to unlocking the pure Peanut Butter Pie Lightened Up experience.
Essential Components for Your Skinny NoBake Peanut Butter Pie

Selecting the Right Crust (Pre-Made vs. Homemade Lightened Options)
A simple graham cracker or digestive biscuit crust is traditional, but we’re using slightly less butter than usual to keep it lean. I recommend making it yourself it takes three minutes so you can control the fat and sugar content.
If you must use a store-bought crust, choose the reduced fat variety to align with the "skinny" goal.
The Peanut Butter Powerhouses: Standard vs. Powdered PB Options
I prefer natural, creamy peanut butter because the oil content (even if natural) helps the pie set beautifully. However, if you are really focused on cutting fat, you can substitute up to half of the creamy PB with reconstituted peanut butter powder (like PB2). Just make sure you mix the powder with a little less water than directed, so the paste remains thick. If you’re a peanut butter fanatic like me, you’ll love it in desserts, but it also works wonders in savory dishes, too seriously, check out my recipe for Peanut Noodles With Chicken: Easy, Creamy 35 Minute Weeknight Hero .
Dairy & Sweetener Swaps: Making it Vegan or Keto Friendly
Need to adjust for different dietary needs? No sweat, this recipe is flexible.
| Ingredient | Substitute Suggestion | Notes |
|---|---|---|
| Greek Yogurt | Thick, Chilled Coconut Cream or Cashew Cream | Be sure to scrape only the thick, solid part of the coconut cream can. |
| Light Whipped Topping | dairy-free Whipped Topping (Almond or Coconut Based) | Follow the instructions exactly, substituting 1:1. |
| Crust (Graham) | Crushed Almonds and Coconut Flour/Sugar | Mix with coconut oil instead of butter for a low-carb/keto base. |
| Sweetener (Low-Calorie) | Maple Syrup or Agave (for natural sugar) or Monk Fruit/Erythritol (for Keto) | Taste as you go, as liquid sweeteners can impact set time slightly. |
Effortless Assembly: Making Your Peanut Butter Pie Filling and Crust
This is where the magic happens, and thankfully, it’s lightning fast.
Preparing the Crust Foundation (Pressing or Setting)
The biggest mistake here is pressing the crumbs too softly. We need a solid base. After mixing your crushed cookies, melted butter, and sugar, press the mixture firmly into the pie plate up the sides is non-negotiable for structure.
Once pressed, get that crust into the freezer for 15 minutes . This shock chilling helps the butter solidify quickly, which is your first defense against the dreaded Soggy Crust Problem.
Whipping the Filling to Airy Perfection
Start by beating the cold Greek yogurt, peanut butter, sweetener, vanilla, and salt until it’s perfectly smooth. This step takes about two minutes using a hand mixer. You want it thoroughly incorporated and velvety. Once that base is ready, the real skill comes in.
Chef's Note: Remember, the whipped topping is already airy. If you beat it vigorously into the peanut butter base, you destroy the air bubbles, and your pie will taste like cold peanut butter instead of light, fluffy mousse.
Now, take your thawed light whipped topping and gently fold it into the peanut butter mixture using a large rubber spatula. Go slow! Cut down the middle and sweep the mixture up and over, turning the bowl slowly. Stop immediately when no white streaks remain.
This ensures your Low-Calorie Peanut Butter Pie retains all that crucial airiness.
Chill Time Management: The Non-Negotiable Step
This pie needs commitment, not heat. Spoon the delicate filling into the chilled crust and smooth the top. Cover it loosely don’t let the plastic wrap touch the filling! and place it in the coldest part of your fridge.
Four hours is the bare minimum, but for a guaranteed clean slice and the absolute best texture, I recommend letting it set overnight.
Troubleshooting and Pro Tips for the Perfect Peanut Butter Slice
Solving the Soggy Crust Problem
The culprit is usually moisture migrating from the wet filling into the crust during the long chill. The Fix: Before filling the crust, if you have time, brush the fully pressed crust with a thin layer of melted white chocolate or a tablespoon of melted peanut butter.
Let that set for five minutes. This creates a waterproof barrier between the base and the filling.
Achieving Clean Slices Every Time (The Hot Knife Trick)
If you just yank a knife through cold filling, you’ll end up with crumbles and drag marks a disaster. To achieve that professional, photo worthy slice, run a very sharp knife under hot tap water. Dry it instantly with a cloth and slice quickly.
Wipe the knife clean and repeat the hot water bath before every single cut. Trust me, this tiny step changes everything.
When the Filling Won't Set: Stabilization Fixes
If your filling remains too loose after an overnight chill, you likely over mixed the whipped topping or used yogurt that was too thin. The quick fix: Place the whole pie in the freezer for about 45 minutes before serving. This will firm it up enough for slicing.
For future batches, strain your Greek yogurt for 30 minutes before mixing.
Practical Guide: How to Store and Extend the Life of Your Skinny NoBake Peanut Butter Pie
Refrigeration vs. Freezer Storage Guidelines
This Healthy Peanut Butter Pie stores brilliantly. In the refrigerator, covered tightly, it will last 4 to 5 days without any noticeable loss of texture or flavor. Because of the stability provided by the Greek yogurt, it holds up better than traditional cream cheese based pies.
Thawing and Serving Instructions
But does it freeze well? You bet.
To freeze, place the un-garnished pie in the freezer until firm (about 2 hours). Then, wrap it tightly in two layers of plastic wrap followed by a layer of foil. It will last in the freezer for up to 3 months. To serve, thaw it overnight in the refrigerator.
Do not thaw it at room temperature , as this will introduce condensation and potentially separate the filling.
Low-Calorie Garnish Ideas (Cacao Nibs and Shavings)
Don't ruin your Skinny Taste Dessert effort with a mountain of sugary toppings! Simple garnishes enhance the look without adding excessive calories. My favorites include a light drizzle of melted dark chocolate (70% cocoa or higher) or a sprinkle of finely chopped dry-roasted peanuts.
A dusting of cacao powder or a few cacao nibs also provide a wonderful, bitter contrast to the sweet pie.

Recipe FAQs
How long does the No-Bake Peanut Butter Pie truly need to set?
While the pie will feel firm enough to slice after about 4 hours, a full 6 hours or, ideally, an overnight rest in the refrigerator is necessary for optimal structural integrity. This extended chilling time ensures the Greek yogurt base completely sets and the mousse holds its airy shape perfectly when sliced.
My filling seems runny or soft. What went wrong with the mousse texture?
The most common cause for a loose filling is residual moisture in the yogurt; ensure you are using very thick, plain Greek yogurt, or strain off any excess liquid before mixing. Additionally, avoid over folding the light whipped topping, as collapsing the air pockets will immediately thin the mousse.
Can I make this pie vegan or dairy-free?
Absolutely; you can successfully replace the Greek yogurt with a thick, plain coconut or cashew based yogurt alternative. Be sure to use a vegan whipped topping (often found frozen or made from chilled coconut cream) and verify that the crust ingredients are also dairy-free.
I prefer not to use Graham crackers. What are some alternative crust ideas?
For a gluten-free or low-carb alternative, you can create a satisfying crust using finely ground almonds mixed with coconut oil and a touch of sweetener. Alternatively, crushed Oreo thins or even pulverized pretzels (if you enjoy a sweet and salty profile) also make excellent no-bake bases.
How should I store leftover pie, and how long will it keep?
Store any leftover pie tightly covered in the refrigerator for up to 4 days. While the flavor remains excellent, please note that the mousse texture might slightly soften after the second day due to the high moisture content of the yogurt base.
Can I freeze this Skinny No-Bake Peanut Butter Pie?
Yes, this pie freezes beautifully! Wrap the entire pie tightly in plastic wrap, then an additional layer of aluminum foil, and store for up to three months. When ready to serve, thaw it slowly in the refrigerator overnight to maintain the best texture.
What can I use instead of artificial sweeteners in this "Skinny" recipe?
If you prefer using natural sugar, replace the artificial sweetener with an equivalent amount of powdered sugar, maple syrup, or honey in the filling. Note that using liquid sweeteners like maple syrup might slightly thin the filling, so reduce the amount slightly or ensure your yogurt is extra thick.
Skinny No Bake Peanut Butter Pie Recipe
Ingredients:
Instructions:
Nutrition Facts:
| Calories | 215 kcal |
|---|---|
| Protein | 2.5 g |
| Fat | 10.0 g |
| Carbs | 30.0 g |
