The Pilgrims Pouch Perfect Simple Unleavened Flatbread
- The Pilgrim's Pouch: Perfect, Simple Unleavened Flatbread
- Why This Ancient Bread Format Still Rules The Kitchen
- Gathering the Sacred Trio: What You Absolutely Need
- Essential Utensils for Crafting Your Unleavened Flatbread
- The Alchemy of Mixing and Resting the Dough
- Achieving Perfection: From Dough Ball to Crispy Sheet
- Troubleshooting and Storage Secrets for Longevity
- Recipe FAQs
- 📝 Recipe Card
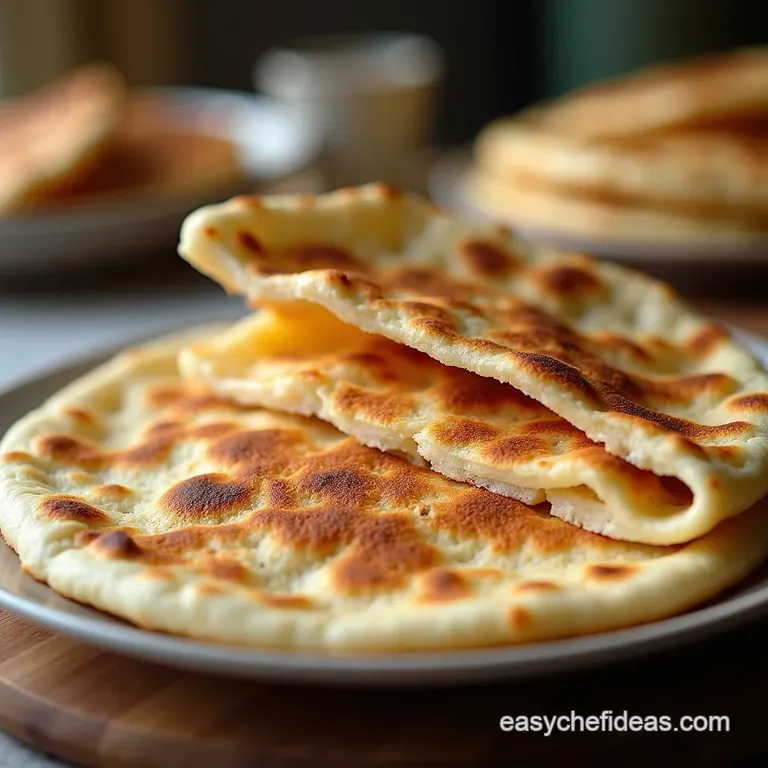
The Pilgrim's Pouch: Perfect, Simple Unleavened Flatbread
Forget those overly processed cardboard crackers! This recipe delivers a truly satisfying, rustic unleavened flatbread —the kind that travels well, crisps up beautifully, or puffs satisfyingly on the stovetop.
Drawing on ancient techniques, this bread relies purely on the interaction between flour, water, and heat. It’s gloriously simple, vegan friendly, and perfect for dipping, scooping, or simply enjoying with a smear of good quality butter (or olive oil, if you prefer!).
As an expert chef, I absolutely adore the simplicity and versatility of this fundamental food item.
Difficulty Level: Easy. Why is it so approachable? There is no yeast or rising time involved the main challenge is simply mixing, rolling, and cooking the dough evenly. If you can roll out pastry for a Victoria Sponge, you can master this.
Time Estimates: You’ll need about 15 minutes of active prep (mixing and dividing), plus a crucial 30 minutes resting time. Cooking is fast just 2– 3 minutes per flatbread.
The total time commitment is approximately 50 minutes. This batch yields 8 medium sized flatbreads.
Why This Ancient Bread Format Still Rules The Kitchen
The beauty of a bread made without leavening agents is its purity. It tells a story with every chew, echoing the earliest forms of baking known to humankind.
The Essential Nature of Matzah Style Baking
When we strip bread down to its core components flour, water, and salt we are left with something elemental. This style of baking is often referred to when discussing Biblical Bread Recipe traditions, most famously associated with the Passover Feast Bread (Matzah).
The goal here is quick creation and immediate cooking, preventing the yeast (or any rising agent) from taking hold. The resultant texture is wonderfully pliable when warm and achieves a delicate crispness when cooled, making it a perfect vehicle for other flavours.
A Foundation Recipe: Simplicity as Its Own Reward
Many modern recipes muddy the waters with oil, sugar, or specialized flours, but the true Unleavened Bread Recipe needs none of that complexity. We are aiming for the purest result, allowing the quality of the grain to shine through.
This simplicity means it works wonderfully whether you are aiming for a sturdy, scoopable Indian Unleavened Flatbread style or a thin, crisp cracker suitable for travel.
Historical Echoes in Every Crisp Bite
This technique is part of a universal Flatbread History Recipe . From the Roman panis focacius to the Middle Eastern khobz , the ability to quickly create sustenance on a hot stone or griddle was vital.
Preparing this Whole Grain Flatbread Recipe variant, even using standard white flour, connects us directly to those ancient cooks who relied solely on their hands and fire. It truly is an Easy Unleavened Bread to master.
Gathering the Sacred Trio: What You Absolutely Need
To create these foundational breads, you only need the most basic pantry staples. For our standard batch yielding 8 breads, we begin with 2 cups (240g) of all-purpose flour, sifted, spooned, and leveled for accuracy. Essential for flavour is 1 teaspoon (6g) of fine sea salt.
The only other core ingredient is 3/4 cup (180ml) of warm water and optionally, 1 tablespoon (15ml) of olive oil, which adds a touch of tenderness but can be omitted for strict adherence to the simplest format.
Related Recipes Worth Trying
- Simple Crispy Homemade Unleavened Bread Recipe 35 Mins — Need a quick flatbread recipe This easy unleavened bread recipe is proof you dont need yeast for delicious results Ready in 35 minutesperfect for dipping
- Easy & Delicious Naan Flatbread Pizza Recipes: A Family Favorite Twist — Craving tantalizing naan flatbread pizza recipes? Try my simple yet flavorful take! Perfect for quick dinners or gatherings. Check it out!
Essential Utensils for Crafting Your Unleavened Flatbread
While the ingredient list is short, the right tools ensure an effortless process, especially when dealing with low-hydration doughs.
Flour, Water, Salt: Precision in Purity
Accuracy in measurement is paramount here. Because we have no rising agent to forgive miscalculations, an accurate scale for the flour is ideal, though spooning and leveling the flour into your measuring cup works well for home cooks.
The warmth of the water is important; it helps the flour hydrate evenly without "cooking" the starch, which would inhibit structure development.
Measuring Mastery: Avoiding Excess Moisture
Remember, this is an Easy Unleavened Bread recipe, but the margin for error is small. If your dough is too wet, it will stick terribly during rolling and become pasty during cooking.
Measure the water carefully; you are looking for a shaggy dough that just barely comes together, not a sticky mess.
The Right Tools for Rolling and Poking Holes
A heavy, sturdy rolling pin is your best friend here, as you need consistent downward pressure to achieve the requisite thinness. While not strictly necessary for every traditional style, having a fork handy for occasionally docking (poking holes) can prevent giant, uneven bubbles if your pan heat isn't perfectly calibrated.
The Alchemy of Mixing and Resting the Dough
Now we move into bringing our simple elements together. Start by whisking the flour and salt together in a large bowl to distribute that salt evenly. Create a shallow well in the centre. Gradually incorporate the warm water and the optional olive oil.
Initially, use a fork to bring the mixture toward the centre, forming a shaggy mass.
Mixing Just Until Combined (No Kneading Required)
Once the mass is formed, turn it out onto a lightly floured surface. Here is where many beginners overthink things: gently knead the dough for only about 3 to 5 minutes.
The goal is not to build a strong gluten network (like you would for yeasted bread) but simply to smooth out the dough until it forms a cohesive, pliable ball. Overworking it will result in tough bread.
The Crucial Ten-Minute Wait for Hydration
This next step is non-negotiable for ease of rolling. Place the smooth dough ball back into the bowl, cover it with a damp kitchen towel or plastic wrap, and let it rest at room temperature for a full 30 minutes.
This period allows the water to fully hydrate the flour particles and relaxes the gluten strands, transforming a stiff mass into dough that yields beautifully under the rolling pin.
Achieving Perfection: From Dough Ball to Crispy Sheet
With the dough rested and relaxed, it's time to transform it into those iconic thin discs. Divide the dough into 8 equal portions and roll each one into a smooth little ball, ensuring the others remain covered to prevent surface drying.
Thinness is Key: Rolling Out Your Dough Discs
Take one ball and begin rolling. You must aim for uniformity and extreme thinness think about 1/8 inch (3mm) thickness. While attempting a perfect circle is pleasing to the eye, maintaining consistent thickness across the entire disc is far more important for even cooking.
High Heat Flash: How to Achieve Optimal Puff (or Lack Thereof)
Heat a cast iron griddle or heavy flat pan over medium high heat until it is quite hot a drop of water should sizzle and evaporate instantly. Do not add oil to the pan for this basic preparation. Lay one rolled flatbread onto the scorching surface.
Cook for about 60 to 90 seconds until initial bubbles appear and the underside shows small, toasted brown spots.
Flip the bread. On the second side, cooking for another 30 to 60 seconds, the trapped steam should cause the bread to puff up dramatically. If it puffs perfectly, you have achieved an ideal texture. Remove immediately once cooked through and slightly blistered.
Wrap the finished bread loosely in a clean tea towel to trap the steam, keeping the remaining breads pliable while you cook the rest.
Troubleshooting and Storage Secrets for Longevity
Even with an Easy Unleavened Bread Recipe , things can occasionally go awry.
What If It's Too Stiff or Too Sticky?
If your dough was very stiff after resting, it likely means your initial water measurement was slightly low, or your flour was particularly thirsty. To correct this before rolling, moisten your hands slightly and work the dough for another minute.
If the dough is too sticky, dust your surface more generously with flour during the rolling stage. Remember the 30-minute rest is your primary tool against stiffness!
Keeping Your Unleavened Creations Fresh (or Crisp)
The way you store them determines the final texture. For soft, pliable flatbreads, stack them immediately after cooking and wrap the entire stack tightly in a clean, dry kitchen towel, then place them in an airtight container at room temperature.
If you prefer a crisp cracker, allow them to cool completely on a wire rack before storing them in an airtight container they will crisp up further as they cool.
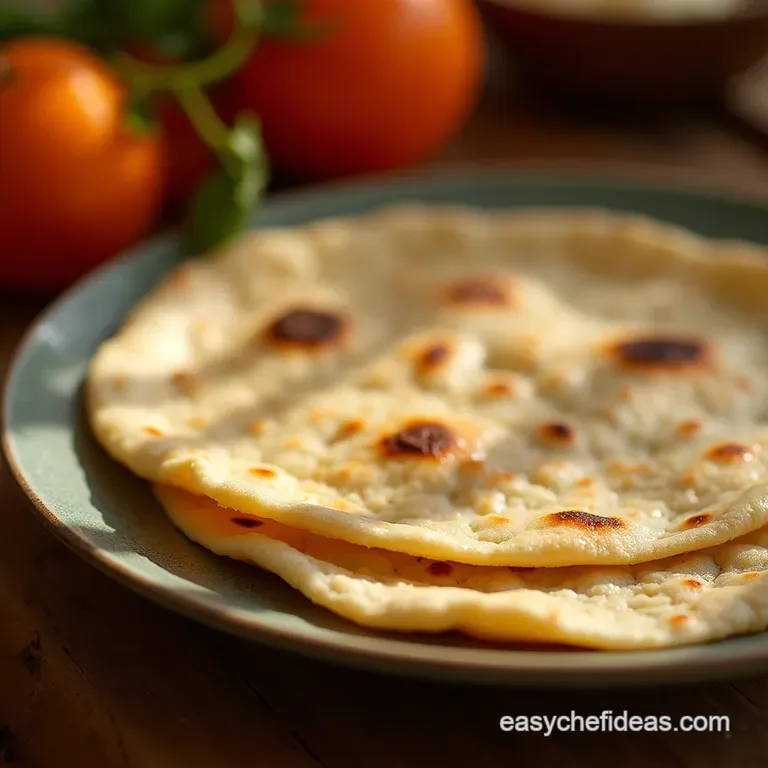
Serving Suggestions That Honor the Simple Base
These breads are phenomenal vehicles for flavour. They are excellent for dipping into robust dishes like chili or stew, or simply served alongside a creamy dip like baba ghanoush. They stand in perfectly for pita or crackers in nearly any context.
Beyond the Basic Circle: Flavor Twists for Your Flatbread
While the purest form is excellent, experimentation is fun! For a simple Whole Grain Flatbread Recipe variation, swap out half the white flour for finely milled whole wheat or spelt.
For instant flavour, brush the rolled out dough lightly with olive oil and sprinkle generously with dried herbs like rosemary, oregano, or a mix like Za’atar before cooking. This instantly elevates them from simple bread to a flavourful accompaniment.

Recipe FAQs
How do I stop my Unleavened Flatbread from being too hard or cracker like?
The trick is all in the finish! Make sure your cooking surface (a cast iron skillet is brilliant for this) is seriously hot; this allows the bread to puff quickly and steam itself internally.
Also, wrap the cooked flatbreads immediately in a clean tea towel this traps the steam and keeps them delightfully pliable.
Can I make the dough ahead of time, or does it need cooking straight away?
While it doesn't need yeast to rise, the dough benefits hugely from a 30-minute rest after mixing. This relaxes the gluten, making it much easier to roll thinly without fighting back. However, you shouldn't leave it much longer than an hour, or it might start to dry out on the edges.
What’s the secret to getting those lovely brown spots and maybe even a puff?
It all comes down to heat! You need a dry, medium high to high heat pan think 'sizzle when the water hits it' hot. The high temperature instantly sets the outside, trapping the small amount of moisture inside that turns to steam and causes that satisfying, glorious puff.
I don't have a rolling pin; can I shape this Unleavened Flatbread some other way?
If you're in a pinch, you can try using a straight sided, clean wine bottle, or even the bottom of a sturdy mug, but be gentle! The most important thing is to keep the thickness consistent across the whole disc, aiming for about 1/8th of an inch, otherwise, thin spots will burn.
How should I store leftover flatbreads, and how do I refresh them?
For short term storage (a couple of days), keep them in a zip-top bag at room temperature; they should remain fairly soft. To bring them back to life, just pop them back into a dry, hot skillet for about 20 seconds per side until they are warmed through and slightly pliable again.
Is there a way to add a bit more flavour without adding yeast or leavening agents?
Absolutely! You can easily infuse flavour during the rolling stage. Before you roll out the dough portions, brush the surface with a tiny bit of melted butter or olive oil and sprinkle on some herbs like dried oregano, rosemary, or even a touch of smoked paprika for a bit of oomph.
Simple Unleavened Flatbread Recipe
Ingredients:
Instructions:
Nutrition Facts:
| Calories | 20 kcal |
|---|---|
| Protein | 2.1 g |
| Fat | 1.1 g |
| Carbs | 0.5 g |
| Fiber | 0.2 g |
| Sodium | 5102 mg |
