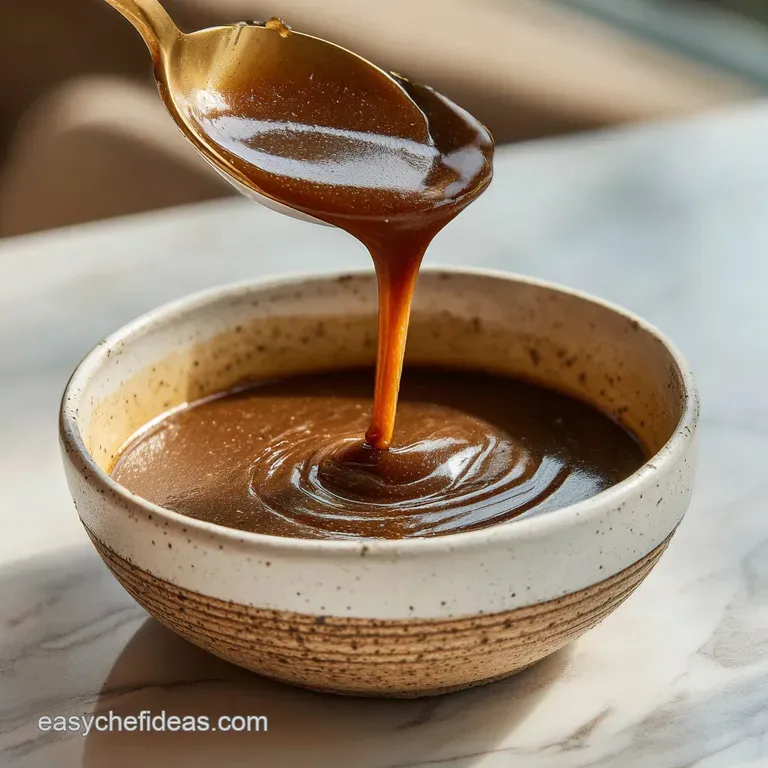
Brown Gravy Recipe: Velvety Smooth Sauce
- Time: Active 10 minutes, Passive 5 minutes, Total 15 minutes
- Flavor/Texture Hook: Savory, mahogany hued, and velvety smooth
- Perfect for: Weeknight mashed potatoes, poutine, or Sunday roasts
- Why You'll Love This Reliable Brown Gravy Recipe
- The Chemistry of Toasted Starch
- A Component Analysis for Success
- Gathering Your Essential Elements
- Tools for a Smooth Finish
- Bringing the Sauce Together
- Mastering Texture and Flavor
- Adjusting for Different Groups
- Debunking Common Kitchen Tales
- Creative Ways to Personalize
- Storage Guidelines and Zero Waste
- Excellent Pairing Suggestions
- Recipe FAQs
- 📝 Recipe Card
Why You'll Love This Reliable Brown Gravy Recipe
I still remember the first time I tried to make gravy for a friend's "Friendsgiving" back in college. I thought I could just whisk flour into boiling broth, and the result was a lumpy, pale, glue like disaster that tasted mostly of raw flour.
We ended up eating dry turkey, and I spent the rest of the night obsessing over how I’d failed such a "simple" task. That mistake set me on a path to understand that great gravy isn't about luck - it's about the dance between fat and heat.
Now, whenever I smell butter melting in a heavy skillet, I feel a sense of calm. There’s a specific moment when the butter foam subsides and the flour starts to smell like toasted hazelnuts; that's when you know you’ve hit the sweet spot.
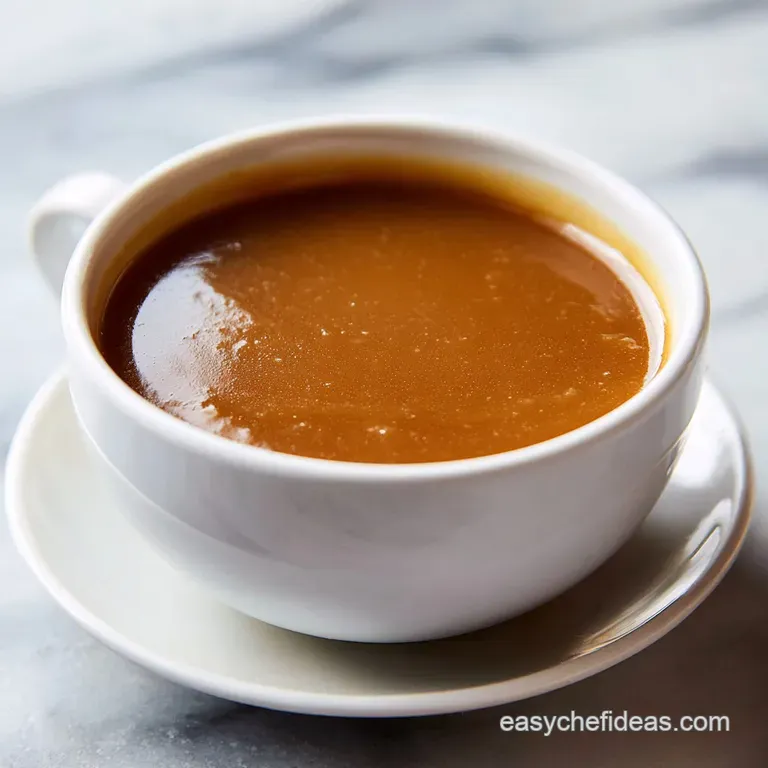
This brown gravy recipe is my go to because it doesn't require pan drippings, meaning you can whip it up on a Tuesday night for bangers and mash just as easily as you can for a holiday feast. It’s thick enough to coat a spoon but fluid enough to pool beautifully in a crater of fluffy potatoes.
We've all been there with the store-bought packets that taste like pure salt, but trust me, once you see how easy it is to build flavor from scratch, you'll never go back. We are going to focus on building a deep, mahogany color and a silky texture that feels luxurious on the tongue.
It's about nourishing your friends and family with something made by hand, using just a few minutes of whisking and a lot of heart.
The Chemistry of Toasted Starch
Maillard Reaction: Toasting the flour in butter browns the proteins and sugars, creating hundreds of new flavor compounds that provide a nutty, savory base.
Starch Gelatinization: As the broth heats, the starch granules in the flour swell and burst, thickening the liquid into a stable, velvety emulsion.
Emulsion Stability: The fat in the butter coats the flour particles, preventing them from clumping together when the liquid is introduced.
| Cooking Method | Total Time | Final Texture | Best Used For |
|---|---|---|---|
| Stovetop | 15 minutes | Silky and glossy | Quick meals and precise control |
| Oven Finish | 25 minutes | Thick and concentrated | Casseroles or large batch roasts |
The stovetop method is generally superior for this specific brown gravy recipe because it allows you to feel the resistance of the whisk, ensuring you catch any lumps before they set. If you are looking for a deeper earthiness, you might want to try a Silky Smooth Homemade recipe which uses similar techniques but adds a layer of fungi driven umami.
A Component Analysis for Success
| Ingredient | Science Role | Pro Secret |
|---|---|---|
| Unsalted Butter | Fat base for roux | Use high-quality butter for a cleaner, creamier mouthfeel. |
| All Purpose Flour | Primary thickening agent | Toast it until it smells like popcorn to remove the "raw" taste. |
| Beef Broth | Liquid body and flavor | Choose low sodium to control the final seasoning levels perfectly. |
| Worcestershire Sauce | Umami and acidity | This provides the fermented "funk" that mimics hours of simmering. |
To get that deep pigment, you really have to be brave with your roux. Most people stop when the mixture looks like wet sand, but for a true brown gravy, you want to push it until it looks like peanut butter or even a light copper penny.
Gathering Your Essential Elements
- 4 tablespoons unsalted butter: Why this? Provides the fat needed to suspend flour particles and adds rich flavor.
- 1/4 cup all purpose flour: Why this? The gold standard for thickening sauces while maintaining a smooth finish.
- 2 cups low sodium beef broth: Why this? Acts as the savory liquid base; low sodium prevents over salting.
- 1 teaspoon Worcestershire sauce: Why this? Adds essential acidity and depth to the beefy profile.
- 1/2 teaspoon onion powder: Why this? Provides a subtle, savory background note without the texture of fresh onions.
- 1/4 teaspoon fine sea salt: Why this? Enhances all other flavors; adjust based on your broth's saltiness.
- 1/2 teaspoon freshly cracked black pepper: Why this? Adds a necessary bite to cut through the richness of the butter.
Substituting for Dietary Needs
| Original Ingredient | Substitute | Why It Works |
|---|---|---|
| Unsalted Butter | Beef Drippings | Adds intense meat flavor. Note: Filter through a fine mesh sieve first. |
| All Purpose Flour | Cornstarch Slurry | gluten-free option. Note: Thins out more quickly when reheated. |
| Beef Broth | Vegetable Broth | Makes the dish vegetarian. Note: Add a drop of soy sauce for color. |
When swapping butter for beef drippings, remember that drippings often contain salt already. If you go this route, hold off on adding the extra sea salt until the very end after a taste test.
Tools for a Smooth Finish
You don't need a kitchen full of gadgets, but a heavy bottomed saucepan is non negotiable here. Thin pans have hot spots that will scorch your flour before it has a chance to brown evenly. I also swear by a silicone coated whisk; it gets into the corners of the pan where flour loves to hide and turn into burnt lumps.
If you find yourself making gravy often, a flat "roux whisk" is a game changer for keeping the mixture moving across the flat surface of the pan.
Bringing the Sauce Together
- Melt the butter. Place your 4 tablespoons of unsalted butter in a medium saucepan over medium heat until it sizzles and the foam subsides.
- Whisk in the flour. Add the 1/4 cup of all purpose flour all at once, whisking constantly until a smooth paste forms. Note: This is your roux base.
- Toast the roux. Continue cooking the paste for 3 to 5 minutes, whisking frequently until it turns a medium brown, nutty smelling mahogany.
- Add liquid slowly. Pour in about 1/4 cup of the beef broth while whisking vigorously until a thick, heavy paste forms. Note: Adding liquid slowly prevents lumps.
- Incorporate remaining broth. Gradually stream in the rest of the 2 cups of beef broth, whisking constantly until the mixture is uniform and liquid.
- Season the base. Stir in the 1 teaspoon of Worcestershire sauce, 1/2 teaspoon onion powder, 1/4 teaspoon sea salt, and 1/2 teaspoon black pepper.
- Simmer and thicken. Bring the mixture to a gentle boil, then reduce heat to low until the sauce coats the back of a spoon.
- Final taste check. Dip a clean spoon in and taste; adjust salt or pepper until the savory notes pop.
- Rest the gravy. Remove from heat and let sit for 2 minutes until a slight skin forms, then whisk one last time for a glossy finish.
- Serve immediately. Pour into a warmed gravy boat to keep the temperature high for the table.
Chef's Tip: If you want a restaurant style shine, whisk in one cold tablespoon of butter right before serving. This technique, called monter au beurre, adds a velvety sheen and a final hit of richness.
Mastering Texture and Flavor
Sometimes things go sideways in the kitchen, and that's okay. The most common issue with a brown gravy recipe is the dreaded lump. Lumps usually happen because the liquid was added too fast or the roux was too cold compared to the broth. If this happens, don't panic and don't throw it out!
You can usually fix it with a vigorous whisking or, in extreme cases, a quick trip through a fine mesh strainer.
Why Your Gravy Is Too Thin
If your gravy looks more like soup than a sauce, it likely hasn't simmered long enough. The starch needs to reach a specific temperature (usually around 200°F or 93°C) to fully hydrate and thicken. Give it another two minutes at a low boil.
If it's still thin, you can mix a teaspoon of softened butter with a teaspoon of flour (called beurre manié) and whisk it in.
Why Your Gravy Tastes Like Flour
This usually happens because the roux wasn't cooked long enough at the start. The "raw" flour taste is stubborn. If you've already added the liquid, the only fix is to let it simmer for a longer period on very low heat, which helps cook out that cereal like flavor, though it may thicken the sauce significantly.
| Problem | Root Cause | Solution |
|---|---|---|
| Lumpy Texture | Broth added too quickly | Whisk vigorously or pour through a fine mesh sieve. |
| Too Salty | Broth was too concentrated | Add a splash of water or a pinch of brown sugar to balance. |
| Pale Color | Roux was undercooked | Add a few drops of Kitchen Bouquet or dark soy sauce. |
Common Mistakes Checklist
- ✓ Never use cold broth with a hot roux; room temperature or warm broth incorporates much smoother.
- ✓ Don't walk away while browning the flour; it can go from toasted to burnt in thirty seconds.
- ✓ Use a whisk, not a spoon, to ensure the flour and fat are fully emulsified.
- ✓ Always taste before adding the final salt, as beef broth varies wildly in sodium content.
- ✓ Ensure the gravy reaches a simmer; it won't reach its full thickness until it bubbles.
Adjusting for Different Groups
When you are cooking for a crowd, scaling this recipe is relatively straightforward. For doubling the recipe, use a larger pot to allow for more surface area, which helps the liquid incorporate without splashing.
If you are scaling down for a solo dinner, be extra careful with the heat, as a small amount of roux can burn almost instantly.
- Scaling Up (2x or 4x): Use the full amount of butter and flour, but increase spices like onion powder and pepper to only 1.5x the original amount at first. You can always add more later, but spices can become overwhelming in large volumes.
- Scaling Down (½): Reduce all ingredients by half. Use a small butter melter or a tiny saucepan to ensure the whisk can actually reach the ingredients.
- The "Half Egg" Rule: Since this recipe doesn't use eggs, scaling is much easier than baking! Just keep your ratios of 2 tablespoons of fat to 2 tablespoons of flour per 1 cup of liquid.
If you are looking for a more advanced version that uses meat drippings for a holiday, you might find the techniques in this How to Make Gravy recipe useful for incorporating those caramelized bits from the bottom of a roasting pan.
Debunking Common Kitchen Tales
One myth I hear constantly is that you must use cornstarch for a truly clear, glossy gravy. While cornstarch does provide a high shine finish, it creates a "gloopy" texture that lacks the depth of flavor found in a flour based roux.
A properly cooked flour roux will still have a beautiful, satin like sheen if you don't overcook the proteins.
Another misconception is that you need to spend hours making bone broth for a good brown gravy recipe. While homemade stock is lovely, a high-quality store-bought low sodium broth is perfectly fine. The real flavor comes from the browning of the flour and the addition of umami boosters like Worcestershire sauce.
It’s the technique, not just the ingredients, that makes the magic happen.
Creative Ways to Personalize
The Southern Style Twist
For a Southern inspired variation, use bacon grease instead of butter. This adds a smoky, salty dimension that pairs incredibly well with biscuits or fried chicken. You can also add a splash of heavy cream at the very end to turn it into a "brown cream gravy" which is a staple in many Texas kitchens.
A Richer Umami Profile
If you want to take the "beefiness" to the next level, whisk in a teaspoon of tomato paste once the roux is browned but before you add the liquid. Cook the paste for one minute until it turns a dark rust color.
This adds a subtle acidity and a massive boost of glutamates, making the gravy taste like it’s been reducing for twelve hours.
| Feature | Classic Version | Gourmet Version | Kid Friendly |
|---|---|---|---|
| Fat Type | Butter | Duck Fat | Butter |
| Extra Kick | Black Pepper | Fresh Thyme | Extra Onion Powder |
| Secret Finish | Worcestershire | Sherry Vinegar | Touch of Honey |
Storage Guidelines and Zero Waste
You can keep this gravy in an airtight container in the fridge for up to 4 days. When it cools, it will turn into a thick jelly this is normal! It’s just the gelatin and starches setting. To reheat, place it in a saucepan over low heat with a splash of water or broth to loosen it back up.
Whisk it constantly as it warms to bring the emulsion back together.
For long term storage, this gravy freezes surprisingly well. Pour it into a freezer safe bag or even an ice cube tray for small portions. It will stay fresh for up to 3 months. If it looks a little "broken" or grainy after thawing, just give it a quick whisk while it simmers, and it should smooth right back out.
To reduce waste, if you have just a small amount of leftover gravy, stir it into a beef stew, use it as a base for a shepherd’s pie, or mix it into ground beef for a richer Salisbury steak.
Excellent Pairing Suggestions
This gravy is a natural partner for anything starchy. I personally love it over a mountain of garlic mashed potatoes, but it’s also the essential finishing touch for a classic meatloaf. If you’re looking for a side dish that can handle a rich sauce, try serving it alongside this Brussels Sprouts Gratin recipe; the creamy cheese and the savory brown gravy create a fantastic contrast.
If you want to go the comfort food route, pour it over thick cut fries and cheese curds for a homemade poutine. The key to a great pairing is balance since the gravy is rich and salty, it works best with foods that have a bit of texture or a mild flavor profile that allows the sauce to shine.
Whatever you choose, make sure to serve it hot; nothing ruins the experience faster than lukewarm gravy!

Recipe FAQs
How to make a nice brown gravy?
Toast the flour in butter until it achieves a deep, nutty mahogany color. This dark roux provides the rich flavor base; then, slowly whisk in warm beef broth until smooth, simmering until the sauce thickly coats the back of a spoon.
What is the 3-2-1 rule for gravy?
No, there is no standard 3-2-1 rule for brown gravy creation. That rule typically applies to smoked ribs, not roux based sauces; for gravy, rely on the standard ratio of 1 part flour to 1 part fat (like butter) for every 2 parts liquid broth.
What is the secret to a rich brown gravy?
The secret is pushing the roux far past pale blonde to a deep brown color. This deep toasting develops intense savory flavors through the Maillard reaction, which you can complement by adding a dash of Worcestershire sauce for depth.
What can I use if I don't have brown gravy mix?
Use a simple roux made from butter and flour, followed by beef broth. This homemade base will taste infinitely better than any packet; master the technique of toasting the flour for color, similar to how you build flavor in our The Homemade Teriyaki recipe.
How do I fix gravy that is too thin?
Simmer the gravy longer to allow the starch to fully hydrate. If that fails, mix one part flour to one part softened butter (a beurre manié) into a smooth ball and whisk small pieces into the simmering sauce until desired thickness is achieved.
Is it true I must use drippings from a roast for real flavor?
No, this is a common misconception. You can achieve excellent, deep flavor using high-quality low-sodium beef broth and umami boosters like Worcestershire sauce. This method is faster and works perfectly when you haven't roasted meat.
How long should I cook the flour and butter paste (roux)?
Cook the roux for 3 to 5 minutes until it smells nutty and reaches a medium brown hue. You must whisk constantly to prevent scorching, as the difference between perfectly browned flour and burnt flour is mere seconds.
Rich Brown Gravy Recipe

Ingredients:
Instructions:
Nutrition Facts:
| Calories | 69 kcal |
|---|---|
| Protein | 0.9 g |
| Fat | 5.8 g |
| Carbs | 3.4 g |
| Fiber | 0.1 g |
| Sugar | 0.4 g |
| Sodium | 133 mg |
