Cheesy Jalapeño Popper Baked Stuffed Chicken: the Ultimate Main Dish Mash-Up
- The Ultimate Upgrade: Transforming Jalapeño Poppers into a Main Course Feast
- Deconstructing the Perfect Bite: Why This Recipe Works
- Essential Components for Cheesy Jalapeño Popper Baked Stuffed Chicken
- The Method: Step-by-Step Guide to Baked Stuffed Chicken Perfection
- Troubleshooting & Advanced Techniques for Home Chefs
- Perfect Pairings: What to Serve Alongside the Stuffed Chicken
- Recipe FAQs
- 📝 Recipe Card
The Ultimate Upgrade: Transforming Jalapeño Poppers into a Main Course Feast
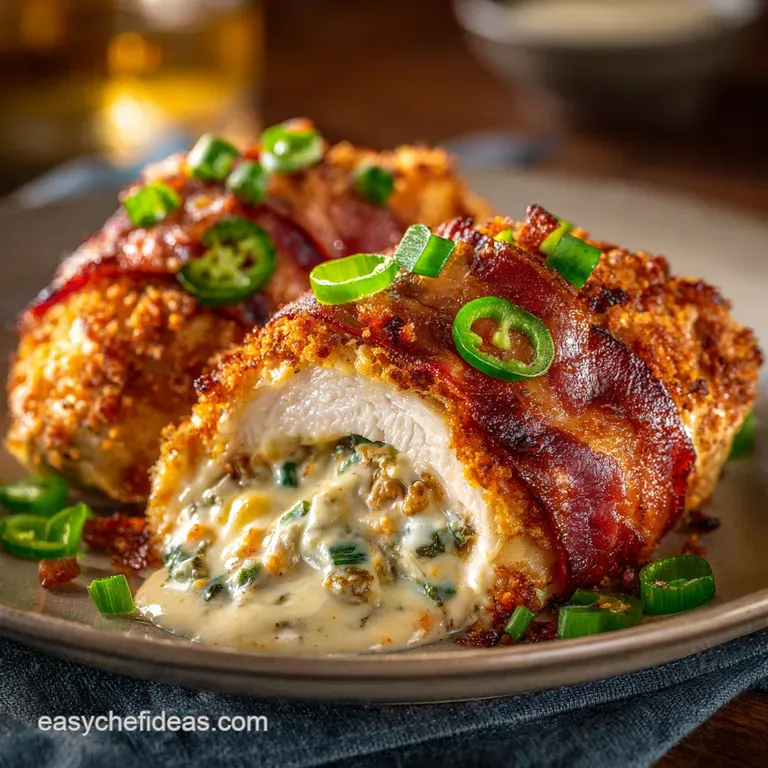
The moment that golden Panko hits the heat, your kitchen is going to smell ridiculous in the best way possible. That sharp, smoky scent of bacon dances perfectly with the rich cream cheese and the subtle, tangy spice of jalapeño.
We are taking the crunchiest, cheesiest, most decadent appetizer and turning it into a weeknight warrior dinner.
I used to deep fry everything, which was delicious but messy, complicated, and let's be honest, terrible for my oil budget. This baked version of Cheesy Jalapeño Popper Stuffed Chicken gives you all the flavour the creamy core, the sharp kick, the smoky bacon but with zero frying fuss.
It’s a total game changer for busy nights when you need something hearty fast.
So grab your mixing bowl and your sharpest knife, because we are about to crack the code on how to make this baked stuffed chicken dish look impressive while demanding minimal effort. Trust me, once you master the perfect pocket, this recipe is going straight into your permanent rotation. Let’s do this thing!
Deconstructing the Perfect Bite: Why This Recipe Works
What Makes the Creamy Jalapeño Popper Filling So Addictive?
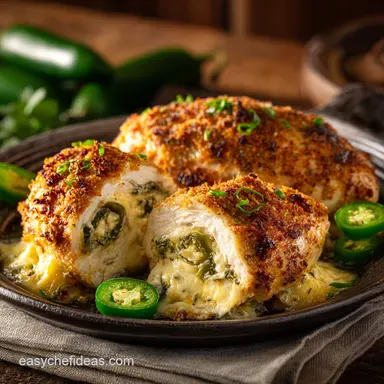
The magic happens with the dairy blend. We use softened cream cheese as the essential foundation; it provides the structure and that incredible tang we crave. Mixing in grated cheddar and Monterey Jack ensures that the filling melts beautifully without becoming liquidy, giving us that satisfying "pull" when we slice into the finished product.
A crucial tip here: always use full fat cream cheese for the best texture and flavor.
Why Baking Delivers Superior Juicy Results
Unlike pan-searing or frying, baking allows the stuffed chicken breast to cook gently and evenly. The cheese filling essentially steam baths the interior of the chicken, ensuring it remains incredibly moist.
Plus, you don't have to worry about flipping a heavy, stuffed piece of meat and potentially losing all that glorious cheese filling in the oil. Less mess, more juiciness, what’s not to love?
Difficulty Snapshot and Prep Time Breakdown
While this Cheesy Jalapeño Popper Baked Stuffed Chicken looks fancy, the technical difficulty is surprisingly manageable. The most challenging part is simply learning how to cut the perfect pocket without slicing right through the sides. If you can mix ingredients in a bowl, you can absolutely nail the filling.
Total prep time is just 20 minutes before it hits the oven.
The Creamy vs. Crunchy Texture Contrast
This dish succeeds because we perfectly balance the textures. The inside is velvety and smooth due to the melting cream cheese and cheese blend. The outside? We achieve next level crunch using buttered Panko breadcrumbs pressed firmly onto the exterior.
This isn’t the time for regular breadcrumbs; the structure of Panko is everything for this recipe.
Balancing the Heat: Managing Capsaicin Levels
Jalapeños vary wildly, right? Sometimes they are harmless, and sometimes they feel like pure fire. The trick to keeping the heat manageable and consistent is meticulous seed and membrane removal. The majority of the heat (capsaicin) lives in the white pith, not the seeds themselves.
If you scrape every bit of white out, you retain the pepper’s earthy flavor without the aggressive burn.
Achieving the Golden, Panko Crusted Exterior
We aren't just sprinkling Panko on top; we are cementing it there with melted butter. Tossing the Panko breadcrumbs in melted unsalted butter ensures every single crumb gets coated, leading to deep, golden brown results.
The fat acts as a crisping agent, creating a shield that protects the juicy chicken below while simultaneously developing a fantastic flavour and crunch.
Essential Components for Cheesy Jalapeño Popper Baked Stuffed Chicken

Choosing the Best Dairy Base for the Creamy Filling
The cream cheese needs to be fully softened to incorporate smoothly with the other ingredients. If it’s too cold, you’ll end up with lumps, and nobody wants chunky filling. For the grated cheese, I usually use a sharp cheddar mixed with Monterey Jack for maximum melty factor and bite.
| Ingredient | My Recommendation | Viable Substitute |
|---|---|---|
| Cream Cheese | Full fat, softened | Neufchâtel (if watching fat content) |
| Grated Cheese Blend | Sharp Cheddar/Monterey Jack | Pepper Jack (for extra heat) or Gouda |
| Bacon | Streaky bacon, finely crumbled | Prosciutto or smoked ham, finely diced |
| Jalapeños | Fresh, de-seeded | Mild Anaheim peppers or canned chopped green chilis |
| Panko Breadcrumbs | Panko | Crushed Ritz crackers (adds richness) |
| Smoked Paprika | Spanish smoked paprika | A touch of chili powder or adobo sauce (like in my Loaded Vegetarian Baked Sweet Potato: Smoky Chipotle Black Bean Meal ) |
Jalapeño Preparation: Fresh vs. Pickled Peppers
I always prefer fresh jalapeños in this specific recipe; they offer a brighter, grassier flavor that balances the richness of the cheese. Pickled jalapeños, while delicious, tend to leak too much moisture into the filling during baking, potentially making the texture soupy.
Stick to fresh, unless you really love that vinegary tang.
Ingredient Swaps: Making This Dish Lower Carb or gluten-free
Making this a low-carb Jalapeño Popper Chicken dish is super easy. Simply omit the Panko breadcrumbs entirely. Instead, you can press a mix of finely grated Parmesan cheese and almond flour onto the exterior for a nice crust five minutes before the cooking time is up.
For gluten-free, look for specific gluten-free Panko or use almond meal mixed with the melted butter.
Panko vs. Standard Breadcrumbs: The Texture Difference
Standard breadcrumbs are finely milled and absorb fat quickly, often resulting in a softer, mushier coating. Panko, however, is made from crustless bread and has a unique flake structure.
When coated in butter and baked, Panko puffs up and delivers a shatteringly crisp texture that regular breadcrumbs simply cannot achieve. Do not skip the Panko unless you're intentionally keeping it low-carb!
The Method: step-by-step Guide to Baked Stuffed Chicken Perfection
Preparing the Perfect Pocket: Slicing and Pounding the Breast
Preheat your oven to a reliable 400°F (200° C) and lightly grease your baking dish.
- Prep the Meat: Lay the breast flat. Hold your knife parallel to the cutting board, starting at the thickest side. Cut a deep pocket horizontally into the center, stopping about half an inch from the edges. Do not slice all the way through!
- Pound It Out: Place the opened breast between two sheets of plastic wrap. Use a meat mallet or even a sturdy rolling pin to gently pound the thickest part until the breast is of roughly uniform thickness (about 1/2 inch). This helps it cook evenly and makes stuffing easier.
Mixing and Sealing: Ensuring No Filling Escape
- The Filling Assembly: In a bowl, combine the softened cream cheese, grated cheese, crumbled bacon, finely diced jalapeños, and all the seasonings (garlic powder, smoked paprika, salt, pepper). Mix until it’s perfectly uniform, fluffy, and looks like heaven.
- Stuffing Time: Spoon about a quarter of the filling into the center of each pocket. Don't be greedy; overstuffing is the main cause of leakage.
- Secure the Goods: Fold the chicken over the filling and use 2 3 wooden toothpicks to tightly close the edges. Alternatively, tie it closed using butcher’s twine. This step is non-negotiable for success. Lightly brush the outside of the sealed chicken with olive oil and a pinch of salt.
The Panko Crust Adhesion Technique
- Butter Up: Melt the butter and combine it with the Panko breadcrumbs in a small bowl. Stir until every crumb is glistening with fat.
- Coat It: Place the stuffed chicken in the prepared baking dish. Press the buttered Panko firmly onto the top surface of each breast. You want a thick, visible layer.
Baking Times and Internal Temperature Monitoring
- Bake: Place the dish into the preheated oven. Bake for 30– 35 minutes .
- Check Temp: The only way to guarantee perfectly juicy results is using an instant read thermometer. The internal temperature must reach 165°F (74° C) in the thickest part of the meat, making sure to avoid piercing the creamy filling.
- Rest: Remove the chicken from the oven and let it sit for 5 minutes. You must remove every single toothpick or piece of twine before serving!
Troubleshooting & Advanced Techniques for Home Chefs
Preventing the Filling From Leaking Out During Baking
Leakage happens when the filling is too soft or the pocket isn't sealed properly. If your cream cheese filling feels very soft, pop the bowl into the freezer for 10 minutes before stuffing. A cold, stiff filling is much easier to manage and less likely to ooze.
Also, make sure the chicken is sealed tight with those toothpicks they are doing heavy lifting!
Chef's Note: I once tried to seal these with just gravity, thinking they'd stick together. They did not. The result was a baking dish full of glorious, bubbly, leaked cheese and sad, empty chicken. Secure the seal!
Resting the Meat: Why You Must Wait Post Bake
Resting is key to juicy results. When meat cooks, the muscle fibers contract, forcing the internal juices toward the center. Cutting the chicken immediately lets all those wonderful, flavorful juices flood your cutting board.
Waiting five minutes allows those fibers to relax and redistribute the moisture, keeping the chicken tender and succulent.
Quick Fixes for Under Browned Panko Crusts
If your chicken is cooked through (165°F) but the Panko still looks pale, switch your oven to the high grill or broiler setting. Place the baking dish on the top rack. Watch it like a hawk for 60 to 90 seconds until the Panko is golden brown and irresistibly crunchy.
This saves the texture without drying out the meat.
Can I Prepare the Stuffed Chicken Ahead of Time?
Absolutely, and this is a great strategy for party prep! You can prep the entire stuffed, crusted chicken and place it in the baking dish, covered tightly with plastic wrap. Store it in the fridge for up to 24 hours.
Just add 5- 10 minutes to the total baking time since you are starting from a chilled state.
Best Practices for Freezing Unbaked Portions
This Cheesy Jalapeño Popper Stuffed Chicken freezes beautifully before baking. Wrap each stuffed, uncooked breast tightly in plastic wrap, then place them in a freezer bag or container. They last well for up to three months.
When you're ready to cook, thaw them overnight in the fridge and proceed with the baking instructions.
Reheating Leftovers Without Drying Out the Breast
Leftovers keep well in the fridge for 3 4 days. The worst thing you can do is microwave them, which turns the chicken rubbery and the Panko sad. For reheating, preheat your oven to 325°F (160°C).
Wrap the chicken loosely in foil and bake for 15 minutes, then open the foil for the last five minutes to crisp the Panko again.
Perfect Pairings: What to Serve Alongside the Stuffed Chicken
Because the filling is rich and creamy, you want side dishes that offer contrast or freshness.
For a comforting meal, serve this with a generous helping of creamy mashed potatoes and a simple, lightly dressed side salad. If you’re feeling ambitious, these are phenomenal paired with roasted broccoli tossed with lemon and Parmesan.
I love serving dishes with a little zing alongside this creamy winner. If you want another cheesy, comforting side, try my recipe for Crockpot Stuffed Peppers: The Easy Cheesy Slow Cooker Recipe — it makes great use of that creamy cheese base! If you are hosting, this dish pairs excellently with a starter of Oven Fried Pickles with Herb Ranch Dip Ultra Crispy Baked since they both share that satisfying crunchy, salty texture.

Recipe FAQs
Why is my stuffed chicken breast dry?
Chicken dries out easily if overcooked, especially when baked. Ensure you are using a meat thermometer and pull the chicken immediately when it reaches 165°F (74°C) in the thickest part, avoiding the filling.
Can I prepare the Cheesy Jalapeño Popper Chicken ahead of time?
Yes, you can assemble the chicken completely (including the Panko crust) up to 24 hours in advance. Store the prepared dish tightly covered in the refrigerator and add about 5-10 minutes to the total baking time since you are starting from a chilled state.
How can I make this dish less spicy, or spicier?
To reduce the heat, ensure you completely remove all the white pith and seeds from the jalapeños before mixing, as this is where most of the heat resides. For extra spice, finely mince a few of the jalapeño seeds and stir them directly into the cream cheese filling.
My Panko crust wasn't very crispy. What went wrong?
The crust needs a little fat to crisp up beautifully in the oven. Ensure you lightly spray or drizzle the tops of the crusted chicken breasts with olive oil or melted butter before baking. Also, avoid crowding the baking sheet, as steam released from the chicken can soften the crust if air circulation is poor.
What other cheeses or filling bases can I use if I don't have cream cheese?
If you need a cream cheese substitute, mascarpone works well for its richness, or a mixture of full fat ricotta and softened goat cheese can provide a similar tangy, creamy texture. Whatever you choose, ensure the cheese is soft enough to mix easily with the shredded cheeses and seasonings.
What is the safe internal temperature for the stuffed chicken?
Chicken is safely cooked and ready to eat when a meat thermometer registers 165°F (74°C). Always insert the thermometer into the thickest part of the chicken, making sure not to pierce the filling, which might give a falsely high reading.
Can I freeze the prepared chicken breasts?
It is best to freeze the chicken before baking, as freezing cooked chicken with a crispy crust can result in a soggy texture upon reheating. Wrap the assembled, raw, stuffed chicken tightly in plastic wrap, then foil, and freeze for up to three months; thaw overnight before baking as directed.
Popper Baked Stuffed Chicken Recipe
Ingredients:
Instructions:
Nutrition Facts:
| Calories | 787 kcal |
|---|---|
| Protein | 42.7 g |
| Fat | 44.7 g |
| Carbs | 53.4 g |
