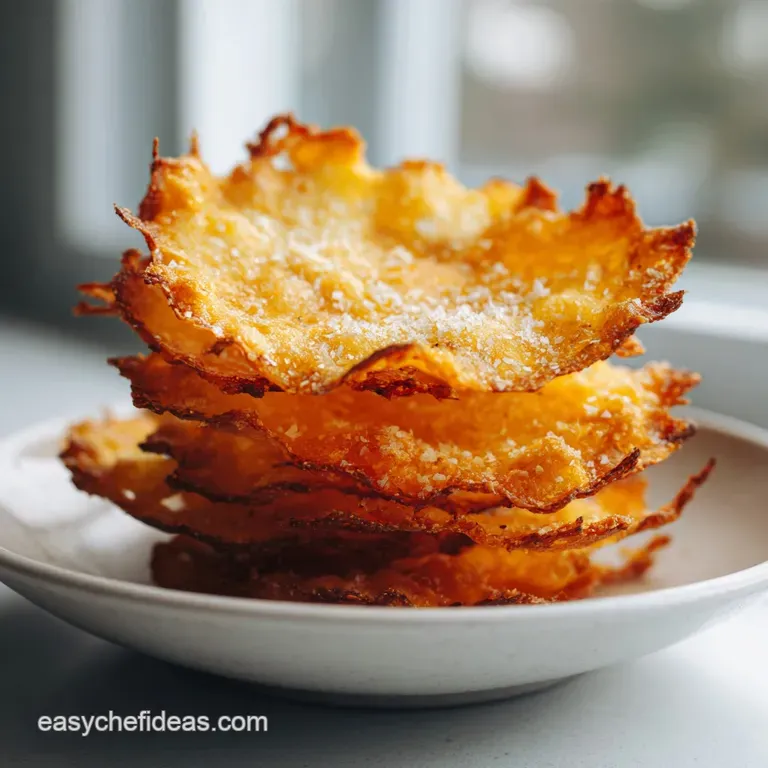
No Carb Snack to Make with Cheese Whole Lotta Yum
- Time: Active 5 minutes, Passive 6 minutes, Total 11 minutes
- Flavor/Texture Hook: A shattering, salty crunch with a smoky, nutty finish.
- Perfect for: High protein meal prep, keto friendly movie nights, or a quick appetizer for a community gathering.
- Create No Carb Snack to Make with Cheese Whole Lotta Yum
- Technical Foundations for Heat Application
- Essential Ingredients for Structural Integrity
- Necessary Kitchen Tools for Success
- Stepwise Method for Crispy Results
- Troubleshooting Common Textural Faults
- Regional Variations and Flavor Swaps
- Preservation Secrets and Zero Waste
- Serving Suggestions and Cultural Pairings
- Recipe FAQs
- 📝 Recipe Card
You know that specific shatter you get from a high end cracker, the one that practically rings in your ears? That is exactly what we are chasing today, but without a single grain of flour in sight.
This recipe shows you how to make a ridiculously easy and delicious no carb cheese snack that actually holds its shape and delivers a massive punch of umami. I remember the first time I tried making these, I used a bag of pre shredded cheese from the back of the fridge and they turned into a greasy, floppy mess on the pan.
It was a total disaster, but it taught me everything about how cheese proteins actually behave under heat.
The beauty of a "Lotta Yum" style snack is in the simplicity and the cultural tradition of crisping cheese, which you see everywhere from Italian frico to Mexican chicharrón de queso.
We are basically taking those global inspirations and turning them into something you can whip up in your own kitchen in about ten minutes flat. It is about more than just avoiding carbs, it is about honoring the diversity of textures that simple dairy can provide when you treat it with a little bit of heat and respect.
We've all been there, standing in front of the pantry at 9:00 PM looking for something crunchy but not wanting to ruin our health goals. This no carb cheese snack is the ultimate solution because it nourishes that deep seated need for salt and texture while keeping things strictly in the high protein, healthy fat camp.
Trust me, once you hear that first crisp snap, you will never look at a box of store-bought crackers the same way again.
Create No Carb Snack to Make with Cheese Whole Lotta Yum
When we talk about making a snack to make with cheese, we are really talking about the architecture of dairy. To get that signature Whole Lotta Yum crunch, you need to understand that not all cheeses are created equal.
This recipe relies on a specific blend because the Parmesan acts like the rebar in a building, providing the stiff structure, while the cheddar brings the flavor and the "give."
Shattering Crust Technique
The secret to a crisp that doesn't just fold over is all about the moisture evaporation. We want the water content to leave the cheese as quickly as possible so the fats and proteins can bond into a solid lattice.
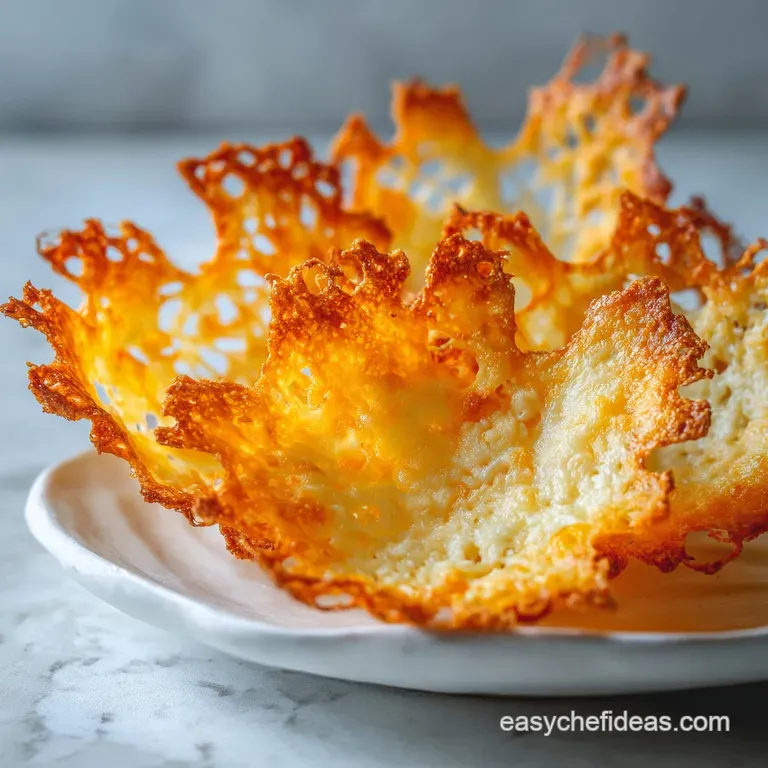
If your oven is too cool, the cheese just melts and pools, but if it is at that sweet spot of 400°F (200°C), the edges lace up and turn into a beautiful golden brown lace.
Even Browning Strategy
Consistency is your best friend here. I always tell people to use a silicone mat because it distributes the heat much more evenly than bare metal. You want the heat to hit every part of that little cheese mound at the same time.
If one side is thicker than the other, you'll end up with a burnt edge and a chewy, greasy center, which is exactly what we want to avoid.
Technical Foundations for Heat Application
The Science of Why it Works: This recipe succeeds through the Maillard reaction, where heat creates a chemical bond between amino acids and reducing sugars to produce complex savory flavors.
Plus,, protein denaturation allows the cheese proteins to uncoil and link together into a firm, crispy structure as moisture evaporates during the short baking window.
- Lipid Separation: As the cheddar heats, the fat separates from the protein solids, essentially frying the cheese in its own oils.
- Structural Curing: The high mineral content in Parmesan helps the protein bonds stay rigid even after the snack cools down.
- Dehydration: The rapid loss of water during the 6 minute bake turns a soft dairy product into a shelf stable, crispy cracker.
| Component | Science Role | Pro Secret |
|---|---|---|
| Parmesan Cheese | Structural Backbone | Use the dusty, fine grated stuff for the best "lace" effect. |
| Aged Cheddar | Flavor & Fat | The older the cheddar, the less moisture it has, leading to a better crunch. |
| Smoked Paprika | Pigment & Aroma | Adds a visual "glow" and fools the brain into thinking the snack is heartier. |
A quick note on the cheese: the age of your cheddar matters more than you think. A young, mild cheddar has too much water and will often result in a rubbery texture. We use extra sharp aged cheddar because the aging process naturally reduces moisture, making it a prime candidate for a carb snack to make with cheese.
Essential Ingredients for Structural Integrity
For this recipe, we are keeping the list tight and focused. Every single item serves a purpose, whether it is for the crunch or the punch of flavor. You'll need 1 cup (100g) of shredded Parmesan cheese and 1 cup (115g) of extra sharp aged cheddar cheese. These are your foundations.
To take it to the next level, we add 1 tsp of everything bagel seasoning and 0.25 tsp of smoked paprika for that subtle warmth.
- 1 cup Parmesan cheese: This provides the "glue" that holds the snack together. Why this? Parmesan has a low moisture content and high protein density for maximum crispness.
- 1 cup Extra sharp cheddar: This is where the soul of the snack lives. Why this? The sharpness cuts through the saltiness of the Parmesan for a balanced profile.
- 1 tsp Everything bagel seasoning: Adds texture and a garlic onion kick. Why this? It introduces seeds and aromatics that mimic a traditional wheat based cracker.
- 0.25 tsp Smoked paprika: Just a hint for color and depth. Why this? It provides a "charred" flavor profile without actually needing a grill.
| Original Ingredient | Substitute | Why It Works |
|---|---|---|
| Parmesan Cheese | Aged Asiago | Similar hardness and low moisture, though the flavor is slightly more floral. |
| Extra Sharp Cheddar | Pepper Jack | Same fat content but adds a spicy kick. Note: Result may be slightly softer. |
| Everything Seasoning | Toasted Sesame Seeds | Provides the same crunch and nutty aroma without the garlic/onion breath. |
If you find yourself out of cheddar, don't panic. You can use any hard or semi hard cheese as a substitute for a snack to make with cheese, but just be aware that the oiliness might change. For example, a young Gouda will be much greasier than an aged cheddar.
It’s all part of the fun of experimenting with what you have in the fridge.
Necessary Kitchen Tools for Success
You don't need a professional kitchen to make a high-quality no carb snack, but a few specific tools make the difference between a "Whole Lotta Yum" success and a sticky mess. I personally swear by a heavy duty rimmed baking sheet.
If the sheet is too thin, it can warp in a 400°F oven, causing your cheese mounds to slide together into one giant "mega crisp."
Chef's Note: If you don't have a silicone baking mat (like a Silpat), use high-quality parchment paper. Never use foil; the cheese will bond to it like superglue, and you'll be peeling metal off your snacks for an hour.
Building the Structural Base
A box grater is actually better than a food processor for this. You want those distinct "shreds" rather than a fine powder. When the shreds overlap on the baking sheet, they create tiny air pockets. These air pockets are what give the final snack its light, airy texture rather than being a dense, hard disk.
Balancing the Flavor Profile
A small mixing bowl is all you need to toss everything together. I like to use my hands to ensure the paprika and bagel seasoning are evenly distributed. If you just sprinkle the seasoning on top of the mounds, it often falls off after baking.
Mixing it into the cheese ensures every bite is seasoned from the inside out.
Stepwise Method for Crispy Results
- Preheat the oven. Set your temperature to 400°F (200°C) and ensure the rack is in the center. Note: This allows for even airflow above and below the pan.
- Grate the cheese. Use the coarse side of a box grater for both the 1 cup Parmesan and 1 cup extra sharp cheddar.
- Combine the elements. In a bowl, toss the shredded cheeses with 1 tsp everything bagel seasoning and 0.25 tsp smoked paprika.
- Prepare the pan. Line a large baking sheet with a silicone mat or parchment paper.
- Portion the mounds. Drop 1 tablespoon of the mixture onto the pan, leaving 2 inches of space between each.
- Flatten slightly. Use the back of the spoon to gently press down on the mounds so they are even in height.
- Bake the snacks. Place in the oven for 6 minutes until the edges are dark golden and the centers are bubbling.
- Monitor the color. Watch for the moment the bubbling slows down; this means the moisture is gone.
- Remove and rest. Take the pan out and let it sit for at least 2 to 3 minutes. Note: The snacks are soft when hot and only become crisp as they cool.
- Transfer to a wire rack. Once firm, move them to a rack to finish cooling completely.
| Method | Texture Result | Flavor Intensity |
|---|---|---|
| Freshly Grated | Shattering and light | High umami and clean finish |
| Pre Shredded Bag | Chewy and dense | Muted by anti caking starches |
Using fresh cheese is the biggest favor you can do for yourself. store-bought shreds are coated in cellulose to keep them from clumping, but that same coating prevents the cheese from melting into a seamless, crispy lattice.
It's one of those little shortcuts that actually ends up making the process harder in the long run.
Troubleshooting Common Textural Faults
Even with a simple recipe, things can go sideways. The most common issue I see is people pulling the snacks out too early because they are afraid of the dark golden color. Remember, color equals flavor and crunch. If they look pale, they will taste like warm cheese instead of a crisp snack.
Greasy Finish Remedies
If your crisps are swimming in a pool of oil, it usually means your oven wasn't hot enough or you used a very young, high fat cheese. You can fix this by dabbing them with a paper towel immediately after taking them out of the oven. Next time, try adding a little more Parmesan to the mix to absorb that excess fat.
Rectifying Bitter Notes
If the snacks taste bitter, they've crossed the line from "caramelized" to "burnt." This usually happens in the last 60 seconds of cooking. Every oven is different, so for your first batch, stay by the oven door and watch them like a hawk. The moment the bubbling stops and the edges are brown, they need to come out.
| Problem | Root Cause | Solution |
|---|---|---|
| Soft/Chewy Center | Too much moisture or mounds were too thick | Flatten the mounds more and bake for 1 extra minute. |
| Stuck to the Pan | Used foil or no liner | Always use a silicone mat or parchment paper. |
| Uneven Browning | Hot spots in the oven | Rotate the baking sheet halfway through the 6 minute timer. |
One mistake I once made was trying to make these in a toaster oven. The heating elements were too close to the cheese, and they burnt on the outside while staying raw in the middle. If you are using a smaller oven, drop the temperature by 25 degrees and keep a very close eye on the progress.
Regional Variations and Flavor Swaps
This basic template is just the beginning. You can take this no carb snack to make with cheese and travel the world with your spice cabinet. For a Mediterranean vibe, swap the bagel seasoning for dried oregano and a pinch of lemon zest. If you're feeling a bit more adventurous, you could even try the technique used in our Creamy Keto Alfredo recipe by incorporating a hint of nutmeg and white pepper into the cheese mix.
Spicy Flavor Adaptations
Add a pinch of cayenne pepper or some finely minced dried chipotle to the mix. The fat in the cheese carries the heat beautifully, making it a "slow burn" rather than an immediate sting. This version is incredible when paired with a cold beverage or a dollop of fresh guacamole.
Handheld Shell Modifications
If you want to get really fancy, take the warm cheese discs immediately out of the oven and drape them over a rolling pin or the handle of a wooden spoon. As they cool, they will harden into a curved shape, perfect for mini taco shells. This is a trick similar to the one we use in our How to Make recipe for getting that perfect crust to melt ratio.
- Italian Style: Add dried basil and a tiny pinch of garlic powder.
- Smoky BBQ: Increase the smoked paprika and add a touch of dry mustard powder.
- Ranch Flavor: Mix in a half teaspoon of dried dill and onion flakes.
When you are scaling this recipe up for a party, remember that the spices should only be increased to 1.5x the original amount, even if you are doubling the cheese. Spices can become overwhelming very quickly in a concentrated, salty environment like baked cheese.
Preservation Secrets and Zero Waste
These snacks are so "Lotta Yum" that they rarely last long enough to store, but if you do have leftovers, you need to keep them away from humidity. Moisture is the enemy of the crisp.
I find that an airtight glass jar or a tin works much better than a plastic bag, which can trap residual steam and turn your crackers into rubber.
- Storage: Keep in an airtight container at room temperature for up to 3 days. For longer storage, the fridge works for up to a week, but you may need to crisp them up again.
- Freezing: You can actually freeze these! Place them in a single layer on a tray to freeze solid, then move to a freezer bag. They stay good for 2 months.
- Reheating: Avoid the microwave at all costs. Put them back in a 350°F oven for 2 minutes to restore the "shatter."
For a zero waste approach, don't throw away those tiny bits of cheese that fall off the grater or the "crumbs" at the bottom of the container. Save them in a small jar in the freezer.
Once you have about a half cup, you can melt them down into a quick cheese sauce for vegetables or sprinkle them over a salad for a boost of salt and fat.
Serving Suggestions and Cultural Pairings
Nourishing your community is about more than just the food; it's about the presentation and the pairings. These cheese crisps are incredibly versatile. They are sturdy enough to act as a vessel for heavy dips, but delicate enough to be crumbled over a bowl of tomato soup like a high protein crouton.
In many cultures, a snack to make with cheese is served alongside fresh fruit to provide a contrast between the salt and the sweetness. Try serving these with some sliced green apples or a few fresh grapes.
The acidity of the fruit cuts through the richness of the aged cheddar, making for a very balanced eating experience.
If you are putting together a full charcuterie board, place these next to the olives and pickles. The vinegary brine of a cornichon is the perfect partner for the smoky paprika notes in the cheese. It is all about that diversity of flavor that keeps people coming back for just one more bite.
FAQ
Can I use low-fat cheese for this recipe? Honestly, don't even bother with low-fat cheese. It lacks the necessary lipid content to fry the proteins properly, and you'll end up with a sticky, rubbery disk that won't crisp. The fat is what makes the magic happen.
Why did my crisps turn out so salty? Cheese is naturally high in sodium, and when you evaporate the water during baking, that salt becomes even more concentrated. If it is too much for you, try a mix of Swiss cheese and Parmesan, as Swiss has a much lower sodium profile.
Is it possible to make these in an air fryer? Yes, but it's tricky. The fan in an air fryer is very powerful and can blow the lightweight cheese shreds all over the basket. If you try it, use a piece of parchment paper weighed down by a small metal rack to keep the cheese in place.
400°F for about 4 to 5 minutes usually does the trick.
What is the best way to get them all the same size? I highly recommend using a small cookie scoop. It ensures every mound has the exact same volume of cheese, which means they will all finish cooking at the exact same time. No more burnt small ones and raw big ones!

Recipe FAQs
What snacks have absolutely zero carbs?
Pure fats and proteins like hard cheeses are zero carb. Many cheese based snacks, like the one we're making, rely on the natural structure of cheese proteins and fats to create a crunchy texture without any carbohydrates. Always check ingredient labels for added starches or sugars.
Can you eat cheese as a zero carb snack?
Yes, most hard and aged cheeses are zero or very low carb. Cheeses like Parmesan, cheddar, Swiss, and Gruyère have minimal to no carbs. This makes them ideal for snacks when you're avoiding carbs, and you can find great variations in recipes like our How to Make Delicious Garlic Parmesan Cheeseburger Bombs at Home.
What are some grab and go low-carb snacks?
Cheese crisps, hard boiled eggs, and nuts are great grab and-go options. The cheese crisps you can make with this recipe are perfect because they're shelf stable and highly portable. Just bake, cool, and pack them for an instant snack.
What to eat with cheese on a low carb diet?
Celery sticks, cucumber slices, and low-carb meats pair well with cheese. For a more substantial snack, consider pairing your cheese crisps with a bit of lean protein or a refreshing vegetable. If you enjoy creative pairings, you might also like Classic Crunchy Tuna Salad The Best Recipe for Proper Sandwiches.
Why do my cheese crisps turn out soft instead of crunchy?
Soft crisps usually mean there's too much moisture left or the oven temperature was too low. Ensure your cheese is fully dehydrated by baking until the edges are deeply golden brown. If you enjoyed mastering the dehydration technique here, apply similar principles to controlling moisture in recipes like How to Bake Mushrooms with Creamy Cheese Filling: A Delicious Twist!.
Can I add other seasonings to my cheese crisps?
Absolutely! Experiment with herbs and spices to customize your cheese crisps. Smoked paprika, garlic powder, onion powder, or even a pinch of cayenne pepper can add fantastic flavor. For a burst of fresh flavor, you could even try incorporating elements similar to those found in Essential Roasted Tomatillo Salsa Verde Deeply Flavourful and Seriously Simple.
How long do these no carb cheese snacks last?
Stored properly in an airtight container at room temperature, they'll last up to 3 days. For longer storage, refrigerate them for up to a week, though you might want to briefly re-crisp them in a low oven before serving to restore that satisfying snap.
No Carb Cheese Snack

Ingredients:
Instructions:
Nutrition Facts:
| Calories | 219 calories |
|---|---|
| Protein | 16.4g |
| Fat | 16.4g |
| Carbs | 2.3g |
| Fiber | 0.3g |
| Sugar | 0.2g |
| Sodium | 663mg |
