Ice Cream in a Bag Recipe: Silky Vanilla Treat
- Time: Active 10 minutes, Passive 5 minutes, Total 15 minutes
- Flavor/Texture Hook: Velvety vanilla with a dense, frosty finish
- Perfect for: Family activities, science experiments, or a solo midnight snack
- Simple Fun With This Ice Cream in a Bag Recipe
- The Magical Five Minute Shaking Science
- Understanding Why This Method Works
- Important Recipe Specifications and Timing
- Sourcing Your Essential Flavor Elements
- Necessary Tools for Success
- Clear Steps for Silky Results
- Solving Common Texture Issues
- Adjusting Your Serving Size
- Flavor Variations and Simple Swaps
- Proper Storage and Keeping Fresh
- Ideal Toppings for Your Treat
- Recipe FAQs
- 📝 Recipe Card
Simple Fun With This Ice Cream in a Bag Recipe
The air in the kitchen always changes the moment that first bag of crushed ice hits the counter. You know that specific, sharp scent of frost hitting metal? It's immediately followed by the warm, floral aroma of pure vanilla extract swirling into cold cream.
I remember the first time I tried a Bag Recipe with my nephew on a sweltering July afternoon; we were skeptical, but the frantic rhythm of shaking those bags became a core memory.
This article shares a simple, delightful "Ice Cream in a Bag Recipe with Vanilla" that anyone can easily make. We are moving away from the heavy, mechanical churners that take up way too much cupboard space. Instead, we're embracing a hands on approach that feels like a celebration of community and simple ingredients.
It’s not just about the food; it’s about that tactile joy of watching liquid transform into a solid, silky mass right between your palms.
You can expect a result that rivals the high end pints from the store, but with a much cleaner finish. There is no waiting for hours for a canister to freeze or dealing with ice crystals that shatter your teeth. We are going for a smooth, melt in-the mouth consistency that nourishes both the soul and the sweet tooth.
Right then, let’s get into the "how" before the ice starts to melt.
The Magical Five Minute Shaking Science
The Physics of the Freeze
Endothermic Transfer: The rock salt forces the ice to melt by absorbing heat from the surrounding environment, which in this case, is your cream mixture. This creates a "super cold" brine that drops well below the freezing point of water, solidifying the fats almost instantly.
| Method | Total Time | Texture | Best For |
|---|---|---|---|
| Hand Shaken Bag | 15 minutes | Soft serve/Silky | Quick cravings |
| Stovetop Custard | 4 hours | Dense/Rich | Dinner parties |
| Standard Churner | 45 minutes | Aerated/Fluffy | Large batches |
Choosing the bag method is all about that immediate gratification. While a stovetop custard is lovely for a formal event, the energy of shaking your own dessert creates a unique bond with the food you're about to enjoy.
Understanding Why This Method Works
- Fat Stabilization: Half and half provides a specific ratio of milk fat that coats the tongue without feeling greasy or heavy.
- Crystal Inhibition: Constant agitation during the "shaking" phase prevents large ice crystals from forming, ensuring a velvety mouthfeel.
- Sugar Depressant: Granulated sugar does more than sweeten; it actually lowers the freezing point of the base, keeping it scoopable rather than a solid block of ice.
- Saline Catalyst: The rock salt is the engine here, driving the temperature down to roughly -10°C, which is the "sweet spot" for rapid solidification.
Important Recipe Specifications and Timing
When we talk about an Ice Cream in a Bag Recipe with Vanilla, precision with your ice to salt ratio is what separates the pros from the slushy messes. You need exactly 3 cups of crushed ice to 0.33 cup of rock salt to achieve the correct thermal reaction.
If you skimp on the salt, you'll be shaking that bag for twenty minutes with nothing but cold milk to show for it.
Trust me, I once tried using table salt because I was too lazy to run to the shop for rock salt. It was a disaster; the fine grains dissolved too quickly and didn't provide the sustained "deep freeze" needed for a Bag Recipe with Vanilla. Stick to the chunky stuff.
You're looking for a 15 minutes total commitment: 5 minutes of prep and 10 minutes of vigorous shaking.
Sourcing Your Essential Flavor Elements
| Ingredient | Science Role | Pro Secret |
|---|---|---|
| Half and half | Lipid Base | Use room temp to help sugar dissolve faster before freezing |
| Rock Salt | Thermal Catalyst | Don't swap for table salt; the large surface area is key |
| Vanilla Extract | Aromatic Depth | Use "Pure" over "Imitation" for a floral, non chemical scent |
The components of this in a Bag Recipe with Vanilla are simple, but quality matters. I always reach for a pinch of sea salt to brighten the creaminess. It’s that tiny hit of sodium that makes the vanilla notes sing.
For the base of the "in a Bag Recipe with Vanilla", you'll need: 1 cup half and half (The perfect fat to liquid balance) 1.5 tbsp granulated sugar Why this? Dissolves cleanly without leaving a gritty texture behind. 0.5 tsp pure vanilla extract 1 pinch sea salt
For the freezing chamber, gather: 3 cups crushed ice Why this? Crushed ice has more surface area than cubes, cooling faster. 0.33 cup rock salt
Necessary Tools for Success
You don't need a fancy lab, but the "bit of kit" you choose determines whether you end up with dessert or a salty mess on your floor. You will need one small, high-quality quart sized freezer bag for the cream and one gallon sized freezer bag for the ice.
Please, don't use the thin "sandwich" bags; they will shatter under the pressure of the ice chunks.
I also highly recommend a pair of winter gloves or a thick kitchen towel. That bag gets painfully cold within the first sixty seconds. If you try to go "bare handed," you'll give up long before the cream sets. A timer is also helpful so you don't over shake and end up with something closer to sweetened butter.
Clear Steps for Silky Results
- Combine the base. Pour your 1 cup of half and half, 1.5 tbsp sugar, and 0.5 tsp vanilla into the small quart bag. Note: Adding a pinch of sea salt now rounds out the sweetness.
- Expel the air. Squeeze as much air out of the small bag as possible before sealing it tightly. Watch for the seal to "click" shut to ensure no salt water gets in.
- Prepare the ice. Fill the gallon sized bag with your 3 cups of crushed ice and 0.33 cup of rock salt.
- Nest the bags. Place the sealed small bag inside the large bag.
- Seal the chamber. Lock the large bag, again removing excess air to prevent it from popping.
- Start the agitation. Wrap the bag in a towel and shake vigorously for 10 minutes. Listen for the "clatter" of ice to change into a "thud" as the liquid hardens.
- Check for doneness. Squeeze the small bag; it should feel firm and hold its shape.
- Rinse the seal. Remove the small bag and smell for any saltiness—rinse the outside under cold water before opening to prevent brine from dripping into your treat.
- Serve immediately. Squeeze the velvety mixture into a chilled bowl.
Solving Common Texture Issues
Why Your Ice Cream Stays Liquid
If after ten minutes of shaking your mixture is still a sad puddle, the brine wasn't cold enough. This usually happens if the ice to salt ratio is off or if you didn't shake hard enough. You need that constant movement to keep the salt and ice reacting.
| Original Ingredient | Substitute | Why It Works |
|---|---|---|
| Half and half | Full fat Coconut Milk | High fat content maintains creaminess. Note: Adds a tropical flavor profile. |
| Granulated Sugar | Maple Syrup | Liquid sweetener blends instantly. Note: Will result in a softer, more "gelato" texture. |
| Rock Salt | Kosher Salt | Larger flakes than table salt. Note: Use 1.5x the amount as it dissolves faster. |
One mistake I once made was forgetting to rinse the bag. I ended up with a salt crusted vanilla mess that was basically inedible. Always, always rinse that small bag before you even think about opening it.
Troubleshooting Your Frozen Treat
| Problem | Root Cause | Solution |
|---|---|---|
| Salty flavor | Brine leaked into the inner bag | Double bag the cream or rinse the seal thoroughly before opening |
| Grainy texture | Sugar didn't dissolve before freezing | Whisk the cream and sugar in a bowl before pouring into the bag |
| Too hard/Icy | Over shaking or low-fat content | Use half and half rather than skim milk and stop once it's firm |
Common Mistakes Checklist ✓ Check the seal on the inner bag twice (prevents a salt water disaster) ✓ Use crushed ice instead of large cubes (speeds up the freezing process) ✓ Wear gloves or use a towel (protects your hands from freezer burn) ✓ Shake for the full
10 minutes (don't stop early or it will stay slushy) ✓ Rinse the bag exterior (ensures a clean, salt free extraction)
Adjusting Your Serving Size
If you're making this for a whole group, it's tempting to throw everyone's cream into one giant bag. Don't do it! The physics works best in small batches because the cold can reach the center of the liquid quickly.
For a party, give everyone their own quart bag but use a larger container (like a plastic tub) for the ice and salt.
When scaling up for 4 people, use 4 cups of half and half but keep them in individual bags. If you're scaling down, you can halve the cream, but keep the ice and salt amounts the same you need that thermal mass to get the job done. For those looking for more variety, check out this Homemade Dog Ice recipe which uses a similar cold set logic for our furry friends.
Flavor Variations and Simple Swaps
To get a decadent chocolate version, whisk in a tablespoon of cocoa powder before freezing. If you're looking for a dairy-free alternative, full fat oat milk works surprisingly well, though it won't be quite as silky as the half and half version.
For a "health nut" boost, a swirl of almond butter adds great protein and a nutty aroma.
Creative Texture Additions
- The Crunch: Add crushed graham crackers or toasted pecans at the very end of shaking.
- The Swirl: Ribbon in some fruit preserves or a bit of honey.
- The Coffee House: Add a teaspoon of instant espresso powder for a sophisticated buzz.
Proper Storage and Keeping Fresh
Honestly, this in a Bag Recipe is best enjoyed the second it's made. Because we aren't using stabilizers like xanthan gum, it will develop a grainy texture if left in the freezer for too long. However, if you have leftovers, store them in an airtight container for up to 2 days.
To revive it, let it sit on the counter for 5 minutes before eating.
For zero waste, don't just dump that salty water down the drain if you have an icy sidewalk in the winter! Otherwise, use the leftover ice water to chill down drinks in a cooler. If you have extra half and half, it's the perfect base for a rich morning coffee or a creamy pasta sauce later in the week.
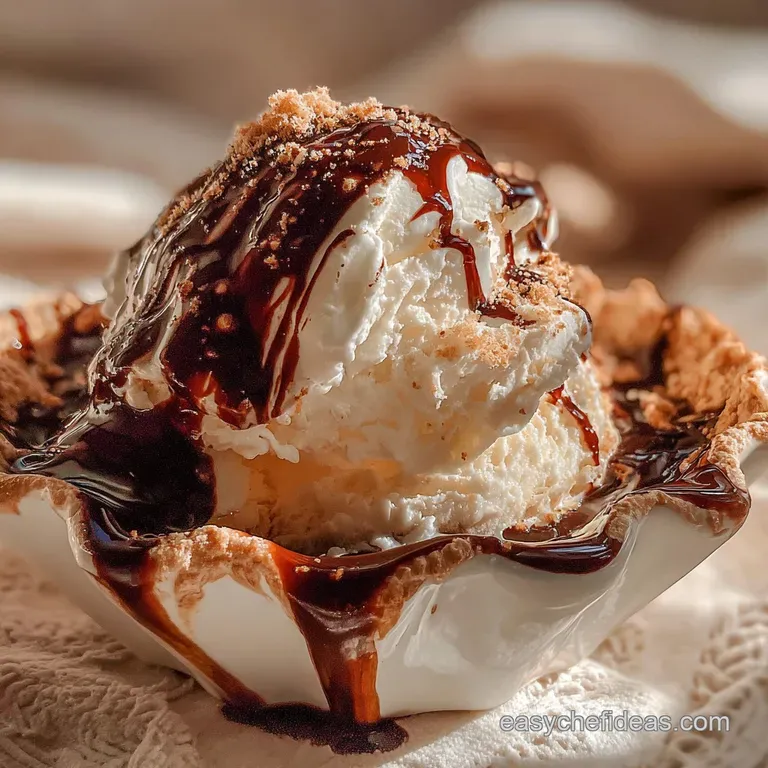
Ideal Toppings for Your Treat
The beauty of this vanilla base is that it acts as a blank canvas for your favorite flavors. A simple drizzle of warm chocolate or caramel can take this from a "science project" to a gourmet dessert. I love using this The Proper Bit recipe to add a rich, dark contrast to the bright vanilla cream.
Top Tier Combinations
- Fresh macerated strawberries with a crack of black pepper.
- A sprinkle of flaky sea salt and a heavy pour of cold brew concentrate.
- Crushed pretzels for that "shatter" texture against the velvety cream.
Myths About Shaking Ice Cream
- Myth: You can use ice cubes from the tray just as effectively. Truth: While they work, the lack of surface area means you'll be shaking for twice as long, and your arms will likely give out first.
- Myth: More salt makes it freeze harder. Truth: There is a saturation point; once the water is fully saturated with salt, adding more won't drop the temperature any further.
- Myth: Shaking harder makes it "better." Truth: You only need enough movement to move the cold brine around the bag. Violent shaking might actually pop the seals.
At the end of the day, this recipe is about the joy of the process. It's a reminder that we don't always need complex machinery to create something that nourishes our community and brings a smile to our faces. Just some ice, some salt, and a little bit of heart. Enjoy every cold, velvety spoonful!

Recipe FAQs
How do you make homemade ice cream in a bag?
Combine base ingredients in a small bag, seal tightly, then place inside a larger bag filled with ice and rock salt. Shake vigorously for about 10 minutes until the mixture freezes. This method uses the salt to lower the freezing point of the ice, creating a super chilled brine that rapidly freezes the cream.
How to make vanilla ice cream in a bag with milk?
Use half and-half for the best creamy texture, not just milk. While milk can be used, half and-half provides the necessary fat content for a silky smooth ice cream, preventing it from becoming too icy. You'll need 1 cup of half and-half, 1.5 tbsp sugar, and 0.5 tsp vanilla extract for the base.
How to make ice cream in a bag with 3 ingredients?
Yes, a basic vanilla ice cream can be made with just three core ingredients: half and-half, sugar, and vanilla extract. You'll also need ice and rock salt for the freezing process, but the ice cream base itself can be as simple as these three. For enhanced flavor, a pinch of sea salt is recommended.
How long will ice cream last in an insulated bag?
For best texture, consume immediately, but it can last 1-2 days when stored properly. Unlike store-bought ice cream, homemade versions made this way lack stabilizers, so the texture can become grainy over time. Ensure it's in an airtight container in the coldest part of your freezer.
What is the ratio of ice to salt for ice cream in a bag?
Use approximately 3 cups of crushed ice to 0.33 cup of rock salt for the freezing chamber. This ratio creates a super chilled brine that efficiently freezes the ice cream base. Too little salt and it won't get cold enough; too much can lead to a salty taste if it leaks into the inner bag.
Why is my ice cream in a bag still liquid?
The brine wasn't cold enough, likely due to an incorrect ice-to-salt ratio or insufficient shaking time. Ensure you are using rock salt, not table salt, and shake vigorously for the full 10 minutes. If you enjoyed mastering the rapid cooling technique here, see how the same principle of temperature control is vital for perfectly cooked The Proper Cuppa Classic Bread Pudding with Rich Vanilla Sauce.
Can I use different liquids for ice cream in a bag?
Yes, you can experiment with other liquids, but they will affect the texture. Full fat coconut milk is a good dairy-free alternative, offering a rich texture, though it may impart a slight tropical flavor. Heavy cream can also be used for an even richer result.
Ice Cream In A Bag

Ingredients:
Instructions:
Nutrition Facts:
| Calories | 398 kcal |
|---|---|
| Protein | 8.0 g |
| Fat | 27.8 g |
| Carbs | 30.7 g |
| Fiber | 0 g |
| Sugar | 30.4 g |
| Sodium | 290 mg |
