How to Make Sourdough Bread: Artisan Loaf
- Time: Active 45 minutes, Passive 45 minutes, Total 90 minutes
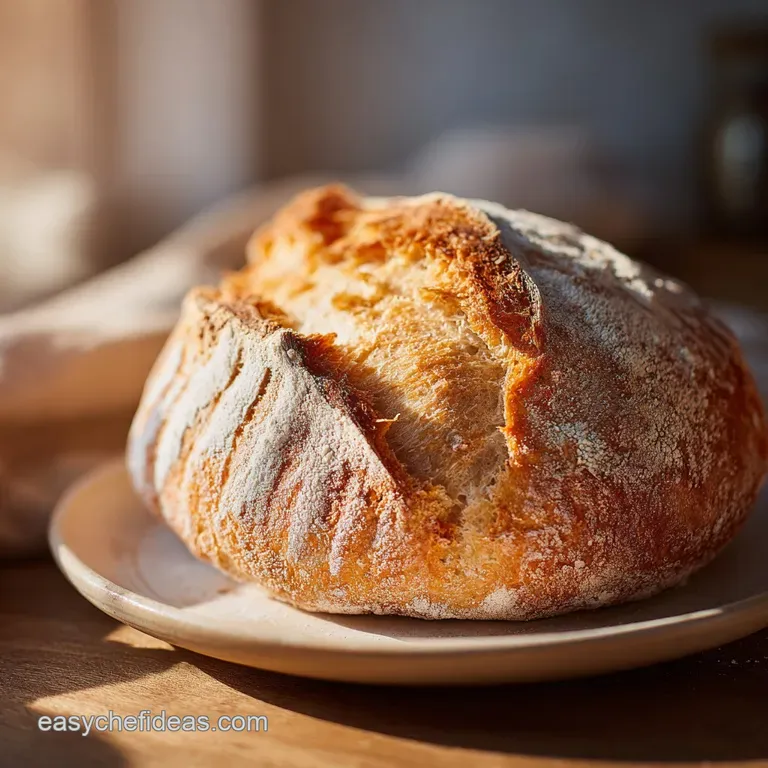
- Flavor/Texture Hook: Shattering mahogany crust with a soft, lacy, open crumb
- Perfect for: Weekend baking projects or showing off at a seasonal brunch
- Understanding How to Make Sourdough Bread Simply
- Science Behind the Rise
- Component Analysis for Success
- Seasonal Ingredients and Substitutes
- Necessary Baking Equipment
- Essential Production Steps
- Troubleshooting Your Loaf
- Easy Scaling Guidelines
- Debunking Sourdough Myths
- Storage and Zero Waste
- Three Levels of Plating
- Recipe FAQs
- 📝 Recipe Card
Understanding How to Make Sourdough Bread Simply
There is a specific, haunting sound that happens about two minutes after you pull a fresh loaf out of the oven. It is a soft, rhythmic crackling, often called the sourdough song, as the cooling crust contracts and shatters against the airy interior.
The first time I heard it, I sat on my kitchen floor just listening, the aroma of toasted wheat and wild yeast filling the room like a warm hug. It was the moment I realized that baking isn't just about following a list of steps; it's about capturing a living process in a beautiful, seasonal photograph.
You don't need a professional bakery or a century old heirloom starter to achieve these results. I remember my first attempt, which looked more like a flattened disc than a rustic boule, but even that "failure" tasted better than anything in a plastic bag.
What I’ve learned since then is that the secret lies in the rhythm of the dough. We aren't forcing the bread to rise; we are inviting it to develop through temperature and time.
This guide is designed to get you that quick win a loaf that looks like it belongs in a high end magazine, even if it's your very first try.
Right then, let's talk about the payoff. When you slice into this loaf, you aren't just getting bread. You're getting a masterpiece of texture. The exterior is a deep, burnished mahogany that provides a satisfying crunch, while the inside remains velvety and moist.
It’s the perfect vessel for seasonal jams or a simple swipe of cultured butter. Whether you are a photography enthusiast looking for that "hero shot" or just a hungry home cook, this recipe is your ticket to artisan success.
Science Behind the Rise
Wild Yeast Activity: The levain utilizes natural microbes to slowly ferment the flour, creating carbon dioxide for lift and organic acids for that signature tang.
Autolyse Efficiency: Mixing flour and water before adding salt allows enzymes to begin breaking down proteins, making the dough easier to handle without aggressive kneading.
Cold Retardation: Refrigerating the shaped dough slows down yeast but allows bacteria to continue producing flavor, resulting in a more complex, seasonal profile.
Steam Expansion: Baking inside a sealed pot traps moisture, keeping the surface supple so the loaf can expand fully before the crust sets.
| Method | Time | Texture | Best For |
|---|---|---|---|
| Dutch Oven | 45 minutes | Shattering, thick crust | Classic artisan boules |
| Pizza Stone | 40 minutes | Thinner, crisp crust | Baguettes or flatbreads |
| Loaf Pan | 50 minutes | Soft, uniform crust | Sandwiches and toasting |
Choosing the right vessel changes the structural outcome of your bread. While a Dutch oven is the gold standard for trapping steam, a loaf pan offers a more practical shape for daily use, though you will lose that iconic rustic aesthetic.
Component Analysis for Success
| Ingredient | Science Role | Pro Secret |
|---|---|---|
| Bread Flour | Provides the structural protein (gluten) | Use flour with at least 12% protein for a tall, airy rise. |
| Sourdough Starter | Acts as the leavening agent | Feed your starter 6 hours before mixing to ensure it is at peak activity. |
| Fine Sea Salt | Regulates yeast and strengthens gluten | Never skip salt; it prevents the dough from becoming a sticky, over fermented mess. |
Seasonal Ingredients and Substitutes
To create this seasonal masterpiece, we focus on high-quality grains that highlight the natural sweetness of the wheat. I always recommend using filtered water if your tap water smells strongly of chlorine, as it can occasionally sluggish the fermentation of your wild yeast.
- 25g active sourdough starter: This is the heart of your bread. Why this? It provides the unique lift and tangy flavor profile.
- Substitute: If you don't have a starter, you can use 2g of commercial dry yeast, though the flavor will be less complex.
- 50g all purpose flour: Used for building the levain. Why this? It's easy for the yeast to break down quickly.
- Substitute: Whole wheat flour works but will ferment much faster.
- 50g warm water: For the levain stage.
- 400g high protein bread flour: The foundation of the loaf's structure. Why this? High protein ensures the bread can hold large air bubbles.
- Substitute: You can use all purpose flour, but the loaf will be slightly denser.
- 50g whole wheat flour: Adds color and a nutty depth. Why this? It provides nutrients for the yeast and better flavor.
- Substitute: Rye flour adds an even deeper, earthier tone.
- 325g warm water (80°F): The main hydration for the dough.
- 10g fine sea salt: For flavor and structural integrity.
| Original Ingredient | Substitute | Why It Works |
|---|---|---|
| Bread Flour | All Purpose Flour | Lower protein but still functional. Note: Reduce water by 20g to avoid stickiness. |
| Whole Wheat Flour | Rye Flour | Adds a sharper, more traditional "sour" flavor and darker crumb. |
| Fine Sea Salt | Kosher Salt | Similar salinity. Note: Use 1.5x the volume if using coarse flakes. |
Necessary Baking Equipment
You don't need a kitchen full of gadgets, but a few specific tools make the process much more rhythmic and enjoyable. A heavy Dutch oven is your best friend here, as it acts like a mini professional steam oven.
- Digital Scale: Sourdough is a game of ratios. Measuring in grams is the only way to ensure consistency across different seasons and humidity levels.
- Dutch Oven: A 5 quart or larger cast iron pot is essential for that crackling crust.
- Bench Scraper: This helps you handle the sticky dough without it clinging to your hands or the counter.
- Banneton (Proofing Basket): This gives the loaf its beautiful shape and wicks away moisture from the surface.
- Lame or Sharp Razor: Essential for "scoring" the dough to control where it expands.
Essential Production Steps
1. Build the Levain and Autolyse
Mix 25g starter, 50g all purpose flour, and 50g warm water. Let sit for 4–6 hours until doubled and bubbly. Two hours before the levain is ready, mix 400g bread flour, 50g whole wheat flour, and 325g water.
Note: This autolyse period allows the flour to fully hydrate, which jumpstarts gluten development without any kneading.
2. Mix and Bulk Fermentation
Add 100g of the active levain to the autolyse mixture. Incorporate 10g fine sea salt and mix thoroughly until the salt is no longer gritty. Perform a series of stretch and folds every 30 minutes for the first 2 hours.
Note: Pulling the dough upwards and folding it over itself creates the "tension" needed for the bread to stand tall.
3. Final Bulk Rise
After the folds, let the dough rest undisturbed at room temperature. Wait until the dough has grown by 50% and looks jiggily. You should see small bubbles forming just beneath the surface, indicating the yeast is happy and active.
4. Shaping and Tension
Gently tip the dough onto a lightly floured surface. Shape into a boule by folding the edges into the center, then flip it over and use your hands to pull the dough toward you. Note: Creating a tight "skin" on the top of the dough is what leads to a beautiful bloom in the oven.
5. The Cold Retard
Place the shaped dough into a floured banneton, seam side up. Refrigerate for 12 to 24 hours. Note: This cold sleep is where the flavor happens; it also makes the dough firmer and easier to score.
6. Preheating the Oven
Place your Dutch oven inside the oven and preheat to 450°F (232°C). Let it sit at this temperature for at least 30 minutes until the pot is radiating intense heat.
7. The Score and Bake
Flip the cold dough onto a piece of parchment paper. Use a razor to make one long, deep cut across the top. Place in the pot and bake covered for 20 minutes. Note: The lid traps the steam escaping from the dough, which is the "magic" behind the crust.
8. The Final Reveal
Remove the lid and bake for another 25 minutes until mahogany brown and hollow sounding. Resist the urge to cut into it immediately; the bread is actually still "cooking" as it cools!
Troubleshooting Your Loaf
When learning how to make sourdough bread, you will likely encounter a few hiccups. Don't worry; even the "ugly" loaves are usually the best for making croutons or French toast. If you're looking for a softer crumb for sandwiches, you might want to try a soft sourdough loaf which uses slightly different hydration levels.
Why Did My Dough Turn Into a Pancake?
If the dough spreads out instead of holding its shape, it’s usually a sign of under developed gluten or over fermentation. If the dough felt like a wet puddle during shaping, try adding one extra set of folds next time.
Also, ensure your flour has enough protein; all purpose flour often lacks the "strength" to hold up a high hydration sourdough.
Why Is My Bread So Dense?
A heavy, gummy interior often means the bread was under baked or the levain wasn't active enough. Make sure your starter is doubling in size within 4-6 hours before you use it. If the starter is sluggish, your bread will be too.
Also, always let the bread cool for at least two hours before slicing, or the steam will turn the starches into a gummy mess.
| Problem | Root Cause | Solution |
|---|---|---|
| Burnt Bottom | Direct heat from the oven floor | Place a baking sheet on the rack below the Dutch oven to deflect heat. |
| No "Ear" (Bloom) | Shallow scoring or weak tension | Score at a 45 degree angle about 1/2 inch deep into the dough. |
| Pale Crust | Oven wasn't hot enough | Verify oven temp with a thermometer and ensure the lid fits tightly. |
Common Mistakes Checklist
- ✓ Using "dead" starter that hasn't bubbled or doubled (the bread won't rise).
- ✓ Skipping the autolyse (makes the dough much harder to work with).
- ✓ Cutting the bread while it's still hot (leads to a gummy, wet texture).
- ✓ Over flouring the surface during shaping (prevents the dough from sealing).
- ✓ Not preheating the Dutch oven for long enough (crust won't be as crispy).
Easy Scaling Guidelines
Sourdough is actually very easy to scale once you understand the "Baker's Percentage" logic. If you want to make two loaves, simply double everything. However, be careful with your fermentation times, as larger masses of dough generate more internal heat and may ferment faster.
- To make a mini loaf (half size): Reduce all ingredients by 50%. Use a smaller 2 quart Dutch oven or a small oven safe bowl. Reduce the covered baking time by 5 minutes, but keep the uncovered time the same to ensure a deep crust color.
- To double the recipe: Double all ingredients. You will need two bannetons and likely two Dutch ovens if you want to bake them at the same time. If you only have one pot, keep the second loaf in the fridge while the first one bakes.
- Baking 2x loaves: If baking two at once in the same oven, increase the preheat time by 15 minutes to account for the extra cold mass entering the oven.
For those looking for a slightly different style, you can compare this method to an artisan sourdough bread approach which might use different fermentation windows to fit a tighter schedule.
Debunking Sourdough Myths
"You need an old starter for good flavor." This is one of the most common misconceptions. While an older starter is more stable, a well maintained "young" starter (even just 2 weeks old) can produce incredible bread.
The flavor mostly comes from the long, cold fermentation in the fridge, not the age of the yeast culture itself.
"Sourdough is too difficult for beginners." People have been making this bread for thousands of years with nothing but flour, water, and air. The "difficulty" often comes from over complicating the process. If you can follow a schedule and handle a bit of sticky dough, you can make world class bread.
"You have to knead the dough for 20 minutes." Actually, the "stretch and fold" method is much more effective for sourdough. It builds strength gradually without knocking out all the air bubbles that the wild yeast worked so hard to create.
Storage and Zero Waste
Best Storage Practices
Sourdough is naturally more resistant to mold than commercial bread due to its acidity. Store it cut side down on a wooden cutting board for the first 24 hours to keep the crust crisp. After that, move it to a paper bag or a linen bread bag.
Avoid plastic bags, as they turn the beautiful crust soft and leathery. If you must keep it longer than 3 days, slice it and freeze it in a sealed bag; it toasts up perfectly directly from the freezer.
Zero Waste Kitchen Tips
Never throw away your "discard" from the starter feeding process! You can use it to make crackers, pancakes, or even pizza dough. If you have a loaf that has gone truly stale, don't toss it. Stale sourdough makes the best croutons in the world just toss with olive oil and herbs and bake until golden.
It's also the secret ingredient for a traditional Panzanella salad or a rich bread pudding. Even the crumbs from the bottom of the bread bag can be saved and toasted as high-quality breadcrumbs for pasta dishes.
Three Levels of Plating
| Level | Presentation Style | Key Tweak |
|---|---|---|
| Simple | Rustic thick slices on a wooden board | Serve with salted butter and a pinch of flaky sea salt. |
| Polished | Neat wedges with a seasonal dip | Add a sprig of fresh rosemary and a bowl of high-quality olive oil. |
| Restaurant | Individual toasted rounds topped with greens | Drizzle with honey and top with whipped ricotta and seasonal fruit. |
For a simple presentation, nothing beats a thick, warm slice. If you want to move toward a restaurant style look, try charring the edges of the bread on a cast iron grill pan before topping it. The contrast between the charred wheat and a creamy topping like burrata is visually stunning and tastes like pure autumn.
When taking your seasonal photographs, look for "the crumb shot." Slice the loaf directly down the middle to show off those beautiful, uneven air pockets. Natural light from a side window will highlight the texture of the crust and the soft shimmer of the interior.
This is the moment where the art of baking meets the art of photography, and it's the most rewarding part of the whole process. Enjoy every bite!

Recipe FAQs
What are the steps of making sourdough?
Follow a precise sequence of fermentation and heat application. Start by building your levain for 4 6 hours, perform a 2-hour autolyse, mix in the salt, conduct bulk fermentation with stretch and folds, cold proof for 12 24 hours, and bake in a 450°F Dutch oven for 45 minutes total.
Is sourdough bread ok for diabetics?
Yes, it is often better tolerated than standard commercial breads. The long fermentation process breaks down starches, which typically results in a lower glycemic response for many individuals.
What is the biggest mistake beginners make with sourdough bread?
Attempting to bake with an inactive or weak starter. If your levain has not doubled and become bubbly after 4 6 hours, your dough will lack the necessary lift, regardless of how well you perform delicate dough handling techniques.
Is sourdough bread good for IBS sufferers?
Yes, the fermentation process makes it easier to digest for many people. By partially breaking down gluten and fructans during the long rest, the final loaf is often significantly gentler on the digestive system than rapid rise bread.
Is it true that adding more flour will fix sticky dough?
No, this is a common misconception. Adding extra flour beyond the recipe ratios will disrupt the hydration balance and density; instead, rely on the prescribed stretch and fold technique to build dough strength naturally.
How to tell if the sourdough is finished baking?
Check for a mahogany brown crust and a hollow sound when tapped. Your loaf requires the full 20 minutes covered and 25 minutes uncovered at 450°F to achieve the proper internal structure and caramelized exterior.
How to store sourdough bread to keep it fresh?
Keep it at room temperature in a paper bag or a bread box for the first two days. Avoid plastic bags, which trap moisture and cause the crisp crust to soften prematurely.
How To Make Sourdough Bread
Ingredients:
Instructions:
Nutrition Facts:
| Calories | 151 kcal |
|---|---|
| Protein | 5.1 g |
| Fat | 0.7 g |
| Carbs | 31.5 g |
| Fiber | 1.5 g |
| Sugar | 0.1 g |
| Sodium | 323 mg |
