Giant Peanut Butter Rice Cakes the Mighty Crunch Slab 20Minute Prep
- Ditching the Oven: Why This No and Bake Method Reigns Supreme
- Satisfying the Craving for Giant Peanut Butter Rice Cakes
- Essential Provisions for Your Crunch Slab Construction
- Ingredient Substitutions and Allergy and Friendly Alternatives
- Layer One: Building the Sturdy Cereal Foundation
- Layer Two: Preparing the Fudgy Peanut Butter Center
- Layer Three: Setting the Chocolate Shell and Finishing Your Giant Peanut Butter Rice Cakes
- The Expert's Guide to Flawless Fridge Cake Slicing
- Next and Level Variations to Customize Your Mighty Crunch Slab
- Recipe FAQs
- 📝 Recipe Card
Ditching the Oven: Why This No and Bake Method Reigns Supreme
Look, I love my oven. I really do. But sometimes, baking feels like pure faffing about when all you really want is a quick hit of sweet, salty crunch that doesn't involve waiting thirty minutes for the house to heat up.
This recipe for Giant Peanut Butter Rice Cakes is pure genius because it relies solely on the chill factor. That means you skip all the potential baking pitfalls (soggy bottoms, dry edges) and land straight on perfectly set, snappy texture every single time.
When you’re making a No and Bake Peanut Butter Dessert , you’re optimizing for density and stability. We don’t want airiness; we want brick and like fudge and chewy base that holds its shape under pressure.
This is a quick and satisfying solution, proving that the freezer drawer is often the best heat source a home cook owns.
Satisfying the Craving for Giant Peanut Butter Rice Cakes
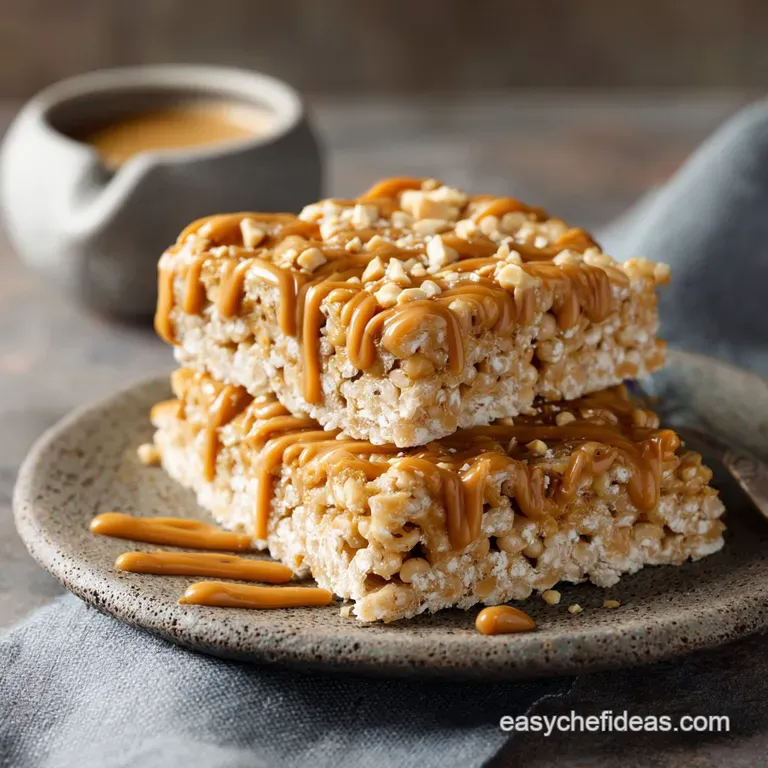
If you’re anything like me, a tiny, two and bite peanut butter cup just isn't going to cut it when the craving hits. It’s madness. We need scale. We need the full, unapologetic commitment of a proper Peanut Butter Crunch Slab Recipe .
This giant treat is fundamentally a sophisticated fridge cake, but we’re treating it like an architectural masterpiece, layering texture on texture. It’s what happens when a Rice Krispie treat and a massive peanut butter cup fall madly in love and have a very large, crunchy baby.
This is truly one of the most satisfying Easy Rice Cake Snacks you can make, because it ticks every box: it’s salty, sweet, chewy, snappy, and unbelievably easy to pull together.
The Anatomy of a Perfect Three and Layer Crunch
The key to these Giant Peanut Butter Rice Cakes isn't the difficulty (it’s easy!), but the distinct contrast between the layers. If they all meld together, you just have a sticky mess. We need defined structure:
- Layer 1: The Base. Sturdy, sweet, and sticky marshmallow and rice. This needs maximum compression so it doesn’t crumble when you cut it.
- Layer 2: The Heart. Thick, dense, and intensely peanut buttery fudge. This is the star of the show; it should be almost like unbaked cookie dough in texture.
- Layer 3: The Shell. Snappy dark chocolate. The slight bitterness balances the overwhelming sweetness perfectly. It’s critical for providing that delightful snap .
Why This Recipe Outperforms Standard Peanut Butter Cups
Why go to all this effort instead of just ripping open a store and bought bag of peanut butter cups? Because those thin foil wrappers hide two major flaws: they are mostly chocolate (often cheap waxy stuff), and the PB filling is usually thin and grainy. This recipe flips the ratio on its head.
We prioritize the massive, creamy, dense No and Bake Peanut Butter Dessert filling. You get maximum peanut butter bang for your buck, plus that gorgeous, buttery crunch underneath that no standard cup can offer. This is texture, flavour, and volume, all achieved with simple pantry staples.
Trust me, you'll never look back.
Essential Provisions for Your Crunch Slab Construction
Listen up, the quality of your ingredients really matters here, especially since we aren't relying on oven heat to transform them.
| Ingredient Type | Why It Matters | My Go and To Suggestion |
|---|---|---|
| Peanut Butter | Must be stabilized (e.g., Skippy, Jif). Natural or oil and separating peanut butter will ruin the structure. | Standard creamy style, high and fat content. |
| Butter | Use real butter. The richness is essential for the base’s chewiness. | Unsalted, as we add salt separately to control the balance. |
| Chocolate | Get the good stuff. It’s the final impression. | 60 70% Dark Chocolate Callets or a high and quality chopped bar. |
Ingredient Substitutions and Allergy and Friendly Alternatives
This is a forgiving recipe, thankfully, but you need to be smart about substitutions.
Choosing the Right Marshmallow and Rice Cereal Combination
I always use mini marshmallows because they melt faster and more evenly than the standard size. That means less time on the heat, which results in a chewier, softer base, not a rock and hard one.
As for the cereal, stick to the plain, crisp rice cereal. I once tried to get fancy and used cocoa and puffed cereal, and it completely overwhelmed the peanut butter layer. Total mistake. Keep the base neutral and let the PB shine.
If you need a gluten and free option (and this is a naturally Gluten and Free No and Bake Bar recipe, provided you check the cereal label), standard crisp rice cereals are usually safe, but check for cross and contamination warnings.
Dark vs. Milk: Selecting Your Optimal Chocolate Topping
This is my hill, and I will die on it: use dark chocolate. I usually go for 65%. The reason is simple: the base and the peanut butter fudge layer are incredibly sweet due to the marshmallows and powdered sugar. If you use milk chocolate, the whole thing becomes cloying, sickly sweet, and heavy.
Dark chocolate gives you that lovely, slightly bitter balance. It truly makes the difference between a kids' treat and an amazing adult Quick Peanut Butter Treat .
If you absolutely must use milk chocolate, reduce the amount of coconut oil or omit it entirely, as milk chocolate is already softer than dark.
Must and Have Kitchen Tools for a Smooth Assembly
You don’t need much, but please, for the love of neat slicing, get yourself a 9x9 inch square baking tin and line it with parchment paper leaving a massive overhang. That overhang is your handle. It’s how you get the slab out intact without having to mangle the edges trying to pry it loose.
Also, a sturdy rubber spatula is better than a spoon for pressing the base.
Related Recipes Worth Trying
- Pumpkin Butter Easy Velvety Homemade Spiced Autumnal Treat — This Spiced Pumpkin Butter recipe is the ultimate autumnal treat Achieve a thick velvety spreadperfect for toast or bakingwith minimum effort Easy homemade...
- Levain Bakery Chocolate Chip Cookies Giant Fudgy Copycat Recipe — Master the perfect Levain Bakery Chocolate Chip Cookies at home This copycat recipe delivers enormous dense cookies with that signature gooey fudgy center A...
- Chicken Francese Recipe Classic Zesty Lemon Butter Chicken Dinner — Chicken Francese is an elegant restaurantquality Italian classic ready in under an hour Learn the secrets to the perfect egg coating and bright lemon butter...
Layer One: Building the Sturdy Cereal Foundation

The base is the structure. It’s the foundation of your Peanut Butter Crunch Slab Recipe . Melt the butter over low heat. Add the marshmallows and a pinch of salt. Stir constantly until they are fully melted and perfectly smooth. Crucially, remove it from the heat immediately .
Cooking them too long makes the base brittle later.
Now, dump in your rice cereal. Mix fast. The mixture will be sticky and hot, but you have to coat every grain quickly before the goo sets up. Transfer it right away to your prepared tin.
Pressing the Base Layer for Maximum Density
This is not a gentle pat and down. This is a serious compression exercise. Put a piece of lightly greased parchment paper over the mixture and press down as hard as you can with the bottom of a measuring cup or your spatula. Really lean into it. A dense base means clean slices later. Trust me on this one.
Chill it while you make the filling.
Layer Two: Preparing the Fudgy Peanut Butter Center
This layer is where the magic happens. We’re making pure, unadulterated peanut butter fudge. Gently melt your cup of peanut butter and the extra butter together until just combined. Don't let it boil.
Once smooth, take it off the heat and stir in the vanilla. Then, the powdered sugar. You must sift the powdered sugar. If you don't, you risk dense, annoying lumps of raw sugar in your fudge, and nobody wants that. Fold the sifted sugar in until you get a stiff, dense mixture.
It should be really thick almost too thick to stir easily.
Troubleshooting a Runny or Too and Stiff Peanut Butter Filling
If your filling seems runny (usually because you used a too and natural peanut butter), add a little more powdered sugar, a tablespoon at a time, until it firms up. If it's too stiff (maybe the peanut butter cooled down too much), pop it in the microwave for five seconds to loosen it slightly.
Spread it evenly over the chilled base, trying not to disturb the cereal layer underneath. Back into the fridge it goes for at least 45 minutes.
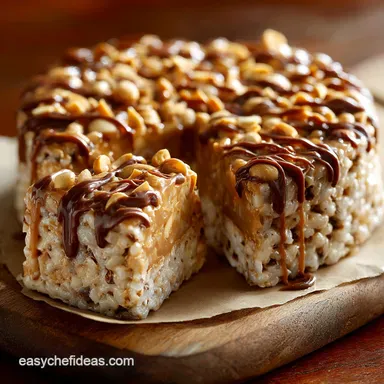
Layer Three: Setting the Chocolate Shell and Finishing Your Giant Peanut Butter Rice Cakes
The grand finale: the chocolate shell. Chop your chocolate finely. This helps it melt faster and more evenly. Add the coconut oil. I use coconut oil because it sets harder and gives the chocolate a lovely sheen and a clean snap when cut.
Melt the mixture gently in 30 second bursts in the microwave, stirring vigorously between each burst. Don't rush it; scorched chocolate is the worst. Once smooth, pour it straight over the chilled peanut butter layer.
Tilt the pan slightly to help it spread, but don't use a spatula unless you absolutely have to, as you risk dragging the peanut butter layer underneath.
The Quick and Chill Method for Rapid Solidification
If you're in a hurry (and let’s be honest, who isn't when a Simple No and Bake Dessert is on the counter?), stick the pan in the freezer for about 30 minutes. It sets the chocolate shell immediately.
Then, transfer it to the fridge to finish chilling completely about another hour before attempting to slice.
The Expert's Guide to Flawless Fridge Cake Slicing
This step separates the amateurs from the pros. When the slab is fully set, lift it out using the parchment paper handles. Get a large, heavy, sharp knife. Now, get a jug of hot, almost boiling water. Dip the knife in the hot water, wipe it completely dry, and make your first cut.
Repeat: dip, wipe dry, cut.
The heat from the knife melts the chocolate shell just enough to prevent it from cracking and dragging through the peanut butter layer. You will get gorgeous, clean slices every single time. Seriously, this technique changes everything.
Next and Level Variations to Customize Your Mighty Crunch Slab
You’ve mastered the classic. Now let's talk customization for your Dessert with Rice Cakes .
Optimizing Texture: Serving Temperature vs. Storage Temperature
Always store these in the fridge, or they will soften too much. However, they taste best when served slightly warmer than cold from the fridge. Pull the slab out 15 minutes before slicing and serving. This softens the peanut butter layer slightly, making it chewier and releasing more flavour.
The chocolate shell will still be snappy, but the interior won't be rock and hard.
How Long Can These Crunch Slabs Last? Proper Storage Techniques
Keep them in an airtight container in the refrigerator. They last easily for 7 to 10 days, though honestly, mine have never lasted past day three. You can also freeze individual slices, wrapped tightly in cling film, for up to two months. Just thaw them overnight in the fridge when the mood strikes.
Adding Texture: Mix and In Ideas for the Peanut Butter Layer
If you want to take your Quick Peanut Butter Treats to the next level, stir in some mix and ins before spreading the fudge layer:
- Pretzels: Crush a cup of mini pretzels and fold them in for incredible salty and sweet contrast.
- Toffee Bits: Heath bar bits or similar toffee pieces add a satisfying chew.
- Flaked Sea Salt: Sprinkle a few flakes over the wet chocolate topping right before chilling for a gourmet look and flavour punch.
- Mini Chocolate Chips: A half cup stirred into the fudge layer adds extra chocolate flavour internally.
Nutritional Overview and Ingredient Scaling Tips
Look, this isn’t health food. It’s glorious, dense comfort food. Be aware of that and enjoy it.
If you decide to scale this recipe up or down, it is absolutely vital to use a kitchen scale and measure ingredients by weight (grams) rather than volume (cups). The consistency of the marshmallow mix and the peanut butter fudge is highly sensitive to small changes, and weighing ensures your ratios are perfect, regardless of humidity or how packed your powdered sugar is.

Recipe FAQs
My rice cake base is a bit of a shambles it’s crumbling when I slice it. What did I do wrong?
This common mishap is usually down to two things: either you didn't press hard enough, or you overheated the marshmallows, making them brittle. For a truly sturdy 'slab,' you need to press the base layer down with real force think of it as building a solid foundation for your mighty crunch slab.
These are massive! How long will this tray bake keep, and should I stick them in the fridge or the cupboard?
These keep beautifully for up to a week in an airtight container at room temperature (around 18-21°C), which is usually preferable for the texture. If your kitchen is particularly warm, however, fridge storage is best, but remember to let them warm up slightly before serving for the chewiest bite.
I have a nut allergy in the family. Can I make these Giant Peanut Butter Rice Cakes with something other than peanuts?
Absolutely! You can substitute the peanut butter for almond butter or cashew butter, or for a strict nut-free option, sunflower seed butter works brilliantly, though you might need to slightly increase the amount of icing sugar to maintain the fudge structure.
My chocolate topping cracked all over the place when I cut it. Is there a trick to getting a neat, snappy slice?
The classic baker’s trick is the hot knife method: dip a large, sharp knife into very hot water, wipe it completely dry, and make your cut. Repeat this process for every single cut, and you’ll achieve sharp, professional edges without the chocolate layer shattering.
Since these are "no-bake," does that make them a healthy option for an afternoon snack?
While wonderfully easy, these are definitely an indulgent treat, high in sugar and fat thanks to the marshmallow and dense fudge layer think of them as a celebratory dessert rather than a daily staple, and perhaps serve a slightly smaller portion with your afternoon cuppa!
Giant Peanut Butter Rice Cake Crunch Slab
Ingredients:
Instructions:
Nutrition Facts:
| Calories | 1322 kcal |
|---|---|
| Protein | 28.7 g |
| Fat | 69.7 g |
| Carbs | 160.0 g |
