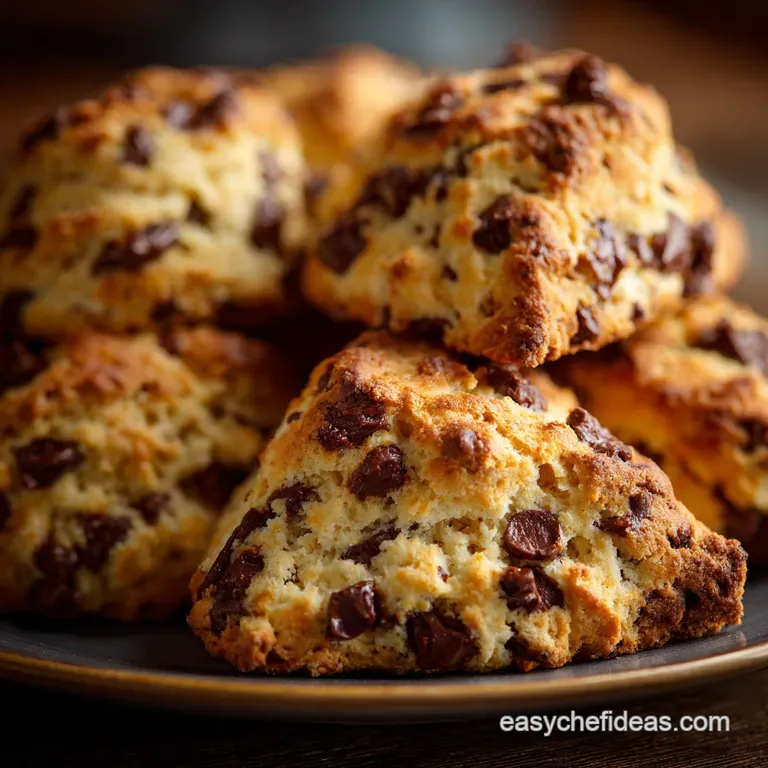
Chocolate Chip Scones the Baker Street Secret to Light and Tender Scones
- Unlocking the Secret to Tender, Tall Scones
- Why These Chocolate Chip Scones Are Different
- Gathering Your High and Quality Baking Components
- Essential Equipment for Perfect Scone Structure
- Mastering the Mix: A Step and by-Step Guide
- Baking Your Fluffy Chocolate Chip Scones to Golden Perfection
- Troubleshooting and Expert Tips for Scone Success
- Recipe FAQs
- 📝 Recipe Card
Unlocking the Secret to Tender, Tall Scones
Okay, let’s talk scones. Not those sad, dry hockey pucks you find sometimes, but proper, light and as-air, genuinely fluffy chocolate chip scones that make you want to stand up and applaud yourself. I spent years making scones that were good, but never great .
They were always slightly dense, a bit crumbly, and definitely required a bucket of jam to make them palatable. I kept reading about 'light handling' and 'cold butter,' but I didn't truly grasp the ruthless execution needed until I stopped trying to treat scone dough like bread dough.
The secret? It's basically a commitment to maximum temperature difference. We’re going to be aggressive about keeping everything chilled, and we’re going to be violently gentle with the mixing.
If you follow this plan, you will end up with light and tender scones that rise straight up instead of spreading into flat, buttery puddles.
Why These Chocolate Chip Scones Are Different
These aren't just a basic quick and bread recipe with chips thrown in. This chocolate chip scones recipe is built on the foundation of richness and minimal moisture content. We lean heavily on heavy cream (35% fat, minimum) instead of milk or buttermilk. Why?
Because the high fat content inhibits gluten development more effectively than lower and fat liquids. Translation: less kneading required, and a ridiculously tender final crumb. If you want a scone that rivals a proper bakery item, you need that fat.
The Essential Difference Between English and American Scones
This is a fun one, because they share a name but are fundamentally different creatures. The traditional English scone (which you'd serve at a cream tea) is usually very lightly sweetened, baked closely together so the sides are soft, and tends to be small. The rise comes mostly from the baking powder.
American scones, however, are usually sweeter, richer (more butter and sugar), and often include add and ins like dried fruit or, in our case, chocolate chips. They’re baked separately so they get crispy edges, and they are usually much taller and heftier.
My recipe is a delicious hybrid; it has the height and sweetness of the American style, but the light, flaky tenderness of the best traditional English versions. It's the best of both worlds.
The Coldest Butter Rule: Achieving Maximum Lift
This is the non and negotiable step. I mean it. If your butter is room temperature, stop what you are doing, go watch Netflix, and try again tomorrow. The point of using ice and cold fat is that when those microscopic pieces of butter hit the 400°F heat, they melt instantly and release steam.
That steam is what creates pockets in the dough, pushing the layers apart. That’s how we get those beautiful, layered, fluffy chocolate chip scones. If the butter is soft, it just blends into the flour, gluten forms, and you get a flat, sad cookie.
What to Serve Alongside Your Warm Scones
I know, chocolate chip scones are great on their own, but if you want to be extra, you have options.
- Clotted cream is the gold standard (seriously, find it if you can).
- A really sharp raspberry jam cuts through the sweetness beautifully.
- Honestly, sometimes I just give them a quick dusting of powdered sugar. That’s enough.
- For a Sunday brunch vibe, serve them warm with a side of strong coffee and maybe some candied bacon (if we’re going totally off the rails).
Gathering Your High and Quality Baking Components
You don't need fancy, niche ingredients here, but quality matters. Since there are so few components in a scone, every single one gets noticed. Think about the vanilla. Use real vanilla extract, not imitation. Think about the fat. It needs to be good butter, and the cream needs to be truly heavy (35% or higher).
This isn't the place to skimp on dairy. That’s my opinion, and I’m sticking to it.
Related Recipes Worth Trying
- Bisquick Scones Fluffy Foolproof Ready in 25 Minutes — Our Bisquick Scones are the ultimate shortcut to light and tender British baking This easy foolproof recipe delivers perfectly risen scones using Scones...
- Safe Ultimate Chocolate Covered Cookie Dough Bites NoBake Truffles — Our foolproof Chocolate Covered Cookie Dough Bites are completely edible and eggfree Enjoy rich buttery dough covered in a crisp chocolate shell Perfect...
- Silky Foolproof Chocolate Covered Strawberries Recipe No Tempering — Master beautiful glossy Chocolate Covered Strawberries for gifting or high tea We share the secret trick for a perfect snap and shine without formal...
Essential Equipment for Perfect Scone Structure

You really only need basic kitchen tools, but there are a couple of things that genuinely improve the result.
| Tool | Why It’s Essential |
|---|---|
| Box Grater | Best way to incorporate cold butter quickly and evenly. |
| Pastry Blender | Keeps your warm hands off the dough during the critical mixing phase. |
| Parchment Paper | Prevents sticking and makes moving the chilled dough easy. |
The Best Flour for Light and Airy Results
All and purpose flour, measured properly, is all you need. Don't try using bread flour; the higher protein content will develop too much gluten and result in a chewy scone (bad). Scone dough should barely be handled, so the lower protein content of AP flour prevents unnecessary toughness.
Make sure you spoon the flour into the measuring cup, then level it off. Scooping directly packs it in, and you’ll end up with too much flour and a dry result.
The Importance of High and Fat Heavy Cream
As I mentioned, we’re using heavy cream specifically for its fat content. Fat coats the flour particles, which inhibits the formation of gluten strands. The less gluten, the more tender your crumb.
If you want to use buttermilk (which creates lovely, light and tender scones with a bit of tang), go for it, but you will need to reduce the amount slightly since buttermilk is much thinner than cream. I personally prefer the pure, rich flavor the cream gives us here.
Selecting the Right Chocolate: Chips vs. Chunks
This is a hot debate in my house. I prefer chopped semisweet chocolate chunks because they melt into glorious puddles that glue the scone together beautifully. My husband prefers classic semisweet chocolate chips because they hold their shape and provide distinct bursts of flavor.
Either way, make sure you toss the chocolate into the dry ingredients before you add the liquid, otherwise, they tend to clump up.
Quick Prep Checklist: What to Chill Before You Start
Do not underestimate the power of chilling.
- Butter (Frozen, if possible)
- Heavy Cream
- Mixing Bowl (If your kitchen is hot, pop the bowl into the fridge for 15 minutes!)
- Your hands (Run them under cold water right before you cut in the butter).
Mastering the Mix: A Step and by-Step Guide
This is where you have to put your speed and restraint skills to the test. Everything happens fast.
Incorporating the Butter Without Overworking the Dough
If you’re using the box grater (you should be!), grating the frozen butter directly into the flour mixture takes about 30 seconds and keeps everything perfectly cold. Once the butter is in, use the pastry cutter or your fingertips to quickly smash the butter into the flour.
You want the mixture to look like coarse sand, but with visible pea and sized (and even slightly larger) clumps of butter still remaining. These pieces are your golden ticket. Work fast; if you see the butter starting to soften and disappear into the flour, stop immediately and chill the bowl.
Hydrating the Dough: The 30 Second Rule
This is critical. Once the butter is cut in and the chocolate is tossed, pour in the cold heavy cream/vanilla mixture. Use a spoon or spatula and mix for exactly as long as it takes the shaggy mass to start holding together. We’re talking 30 to 45 seconds, tops.
There will still be unincorporated dry flour at the bottom of the bowl. That's fine. We will deal with that during the gentle folding. Do not mix until smooth, ever.
Shaping and Cutting: The Straight and Down Method
Turn the shaggy dough out onto a lightly floured surface. Now, we use the magic of compression. Gently pat the dough into a cohesive mass. I like to do a quick letter fold (fold it into thirds like a business letter, then turn 90 degrees and fold again).
This helps incorporate the dry flour and creates those desirable flaky layers, like a rough puff pastry. Pat the dough into a 1 ½ inch thick circle. Use a sharp knife or a round cutter.
Warning: When cutting, whether you choose rounds or wedges, press straight down firmly and pull the knife or cutter straight up. Do not twist! Twisting seals the edges of the scone, preventing that lovely, straight rise.
The Crucial 15 Minute Freezer Chill
Don't skip this. It matters. After shaping and cutting the raw scones, place them on the baking sheet and stick the whole thing in the fridge for 30 minutes, or the freezer for 15.
That burst of cold guarantees the butter is rock hard before it hits the heat, resulting in the maximum possible oven spring (the quick rise when the heat hits). Brush them with the egg wash after they come out of the freezer, right before they go into the oven.
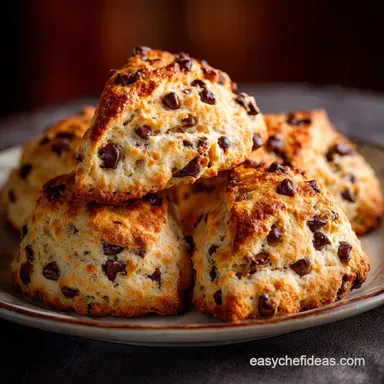
Baking Your Fluffy Chocolate Chip Scones to Golden Perfection
Preheat your oven to 400°F (200°C). This higher temperature is also key to maximizing the rise. Bake them until they are deeply golden brown not pale yellow. The deep golden color equals full flavor development. Mine usually take exactly 19 minutes, but ovens vary.
They should sound hollow when tapped gently on the bottom.
Troubleshooting and Expert Tips for Scone Success
I’ve made every scone mistake in the book. Here is the compiled wisdom from years of slightly rubbery, slightly flat results.
What Went Wrong? Identifying Common Scone Mistakes
| Symptom | Probable Cause | Quick Fix |
|---|---|---|
| Scones are tough/chewy | Overmixing the dough; too much gluten formed. | Handle the dough for under 60 seconds total. |
| Scones spread/are flat | Butter was too soft; dough wasn't chilled enough. | Always use frozen butter and mandatory chilling step. |
| Scones have dry texture | Too much flour added during mixing/shaping. | Measure flour lightly (spoon and level); use minimal bench flour. |
Freezing Raw Dough vs. Baked Scones
You can absolutely freeze these, and it's brilliant for meal prep.
- Freezing Raw Dough: Cut the scones, place them on a parchment and lined tray, and freeze until solid. Transfer the frozen, raw scones to a freezer bag or container. When ready to bake, place them directly on the baking sheet (no thawing!) and add about 5 minutes to the baking time.
- Freezing Baked Scones: Freeze fully cooled scones in an airtight container. To revive them, thaw at room temp and warm in a 300°F oven for about 8 minutes.
Simple Flavor Variations Beyond Chocolate Chips
If you need a change, the base recipe is perfect for tweaks:
- Add 1 tablespoon of finely grated orange zest for a bright counterpoint to the chocolate.
- Swap out the chocolate chips for dried cranberries and a handful of chopped pecans.
- Use cinnamon chips and omit the vanilla extract for a warmer, spicier scone.
Quick Nutritional Snapshot for Home Bakers
Remember, these estimates are highly variable based on your specific ingredients (especially the chocolate brand). Since we are using high and fat dairy and a good amount of butter, these are indulgent, comfort and food baked goods.
They're a treat, not a Tuesday breakfast (unless you live like me, and then maybe they are). They are roughly 420 calories each, which is why they are so satisfying and filling. They are worth every single calorie, trust me. Enjoy!

Recipe FAQs
Why didn't my scones rise properly? They came out flat as a pancake!
Flat scones are usually caused by warm butter or overworking the dough; the cold fat needs to create steam quickly in the oven, and excessive kneading develops tough gluten. Ensure your dough goes into the oven icy cold after the mandatory chill period that’s the key to a proper lift!
Can I use whole milk instead of heavy cream in these Chocolate Chip Scones?
Heavy cream provides the necessary high fat (35%) crucial for tenderness and richness, giving these Chocolate Chip Scones their signature moist crumb. While milk can substitute in a pinch, the resulting scones will be noticeably denser and less luxurious, so stick to high fat cream or cold buttermilk for the best results.
I grated the butter as the recipe suggests is that really necessary, or is cubing it fine?
Grating the frozen butter is an excellent baker’s hack because it ensures the fat is distributed very finely and stays colder for longer, which greatly aids in achieving that lovely, flaky texture.
If you choose to cube, just ensure your pieces are very small (pea-sized) and that you incorporate them quickly so they don't melt on contact.
How long can I keep these scones fresh, and can I prep the dough ahead of time?
Scones are always best eaten the day they are baked, but you can store cooled leftovers in an airtight container at room temperature for up to two days to enjoy with your next cuppa.
For making ahead, cut and shape the raw dough, freeze the wedges on a tray, and then bake them directly from frozen (adding a few extra minutes to the cooking time).
What if I want to make a different flavour? Could I swap the chocolate chips for something else?
Absolutely; this recipe is a brilliant base for other fillings, so feel free to swap the chocolate for 1 cup of sultanas, dried cranberries, or maybe even fresh orange zest for a bright, citrusy flavour.
Remember that savory variations are also superb just omit the sugar and fold in some mature cheddar and chives!
Fluffy Chocolate Chip Scones Recipe
Ingredients:
Instructions:
Nutrition Facts:
| Calories | 420 calories |
|---|---|
| Fat | 23 grams |
| Fiber | 2 grams |
