The Bakers Essential Perfectly Crisp Chewy Unleavened Flatbreads
- The Baker’s Essential: Perfectly Crisp & Chewy Unleavened Flatbreads
- Why Embrace the Simplicity of Yeast-Free Baking?
- Gathering Your Minimalist Pantry: What You Need for True Unleavened Bread
- Step-by-Step Guide to Crafting Your Flatbread Dough
- Achieving Optimal Puff and Char: The Cooking Finale
- Elevating Your Regular Unleavened Baking Experience
- Recipe FAQs
- 📝 Recipe Card
The Baker’s Essential: Perfectly Crisp & Chewy Unleavened Flatbreads
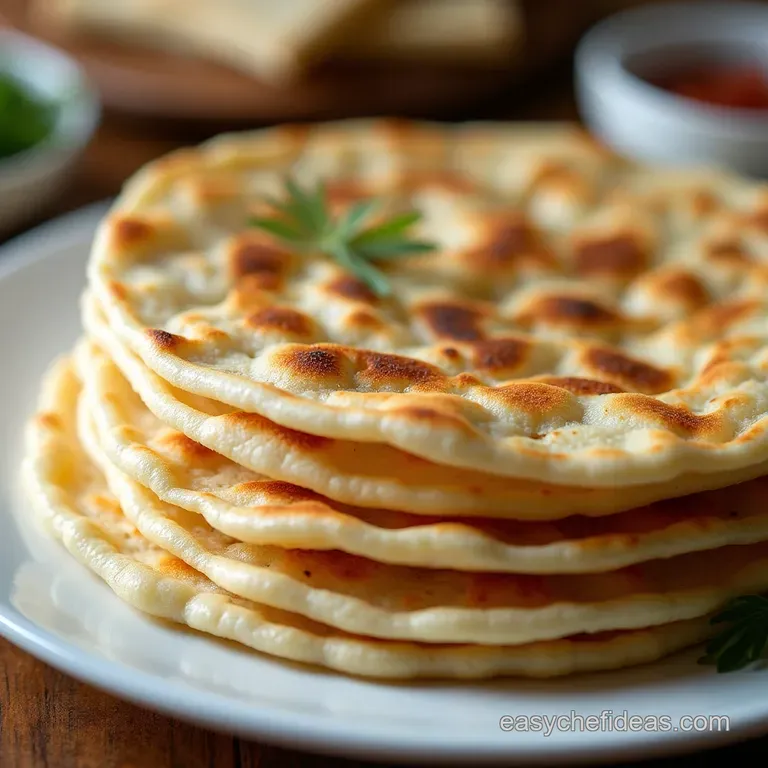
This recipe takes us back to basics, yielding wonderfully simple flatbreads made from just flour and water. Akin to traditional Matzah or Roti, these breads are crisp on the edges and satisfyingly chewy in the centre.
They are incredibly versatile perfect for scooping up curries, dipping into hummus, or simply enjoying as a palate cleanser. The magic here lies in the quick, dry cooking method, ensuring a beautiful texture every time.
This is an easy preparation, requiring minimal ingredients and no waiting for yeast to activate, making it a fantastic go-to for quick meals.
Why Embrace the Simplicity of Yeast Free Baking?
The beauty of Unleavened Bread lies in its purity. In a world saturated with complex additives and long fermentation times, returning to this foundational baking method offers both simplicity and speed.
It’s a testament to how few components are actually needed to create satisfying, edible comfort.
A Return to Fundamental Ingredients: Flour, Water, and Fire
When you ask What breads are unleavened , you are looking at the historical foundation of countless global cuisines. The core requirements flour and water speak to the earliest forms of cooking.
We use two cups of all-purpose flour, spooned and leveled for accuracy, combined with one teaspoon of fine sea salt for flavour enhancement. The critical third element is the water: we incorporate approximately ¾ cup (180ml) of water, which must be freshly boiled.
Using boiling water is essential here, as it gelatinizes the starches immediately, allowing us to develop just enough structure without relying on gluten development through long kneading. This quick hydration process is key to the success of this Easy Unleavened Bread Recipe .
Perfecting Texture: Achieving the Ideal Snap and Chew
The desired texture balances crispness with a satisfying chew, much like a classic cracker or a thin roti. To achieve this in our Best Unleavened Bread Recipe , we must strictly limit the kneading time to about three to four minutes until the shaggy mass forms a smooth ball.
Overworking the dough develops too much gluten, which results in a tough, rubbery flatbread rather than a crisp one. The brief rest period afterward only 10 minutes allows the gluten network to relax, making the dough pliable for rolling out exceptionally thin.
Beyond Matzah: Versatility in Your Modern Kitchen
While this base is often associated with religious practices, such as the Unleavened Bread Recipe For Passover or serving as a Shabbat Bread Recipe , its utility extends far beyond tradition.
This simple base can be adapted for numerous uses, from gluten-free friendly versions (using alternative flours) to an excellent vessel for clean eating plans, such as a Daniel Fast Unleavened Bread Recipe .
On top of that,, these are precisely the type of crisp wafers often used as Unleavened bread for communion , highlighting their fundamental role in sustenance and ceremony.
Gathering Your Minimalist Pantry: What You Need for True Unleavened Bread
To master How To Make Unleavened Bread , focus less on quantity and more on the quality and temperature of your core supplies. Since there are only three ingredients, each component plays a significant role in the final product’s success.
The Core Components: Selecting Quality Flour and Water
We rely on 2 cups of standard all-purpose flour, measured carefully. While whole wheat can substitute partially, pure white flour delivers the most traditional, light texture. The salt, just one teaspoon, is non-negotiable for balancing the flavour profile of the otherwise neutral dough.
Remember, the water must be boiling hot not just warm to properly interact with the flour and eliminate the need for yeast proofing.
Precision Measurements for Perfect Dough Consistency
Though this recipe is simple, precision matters when working without chemical leaveners. The relationship between the flour (240g) and water (around 180ml) must be balanced; too much water yields a sticky mess, and too little results in a dry dough that cracks when rolled.
Aim for a firm, cohesive ball after the brief kneading period.
Crucial Equipment: Rolling Pin and Scorching Hot Surface
You need a reliable rolling pin to achieve the required thinness ideally 1/16th of an inch (about 2mm). Thinness dictates crispness. Equally crucial is your cooking surface. A heavy bottomed, dry cast iron pan or griddle is paramount.
It must be able to retain and transfer high, consistent heat to scorch the surface quickly without requiring added fats.
Related Recipes Worth Trying
- The Best NoKnead Bread Recipe Rustic Hearth Loaf — Meet your new favourite easy bread recipe This rustic loaf uses a slowrise method for incredible flavour and a perfect crust Foolproof baking awaits
- Authentic Crisp Homemade Matzah Recipe Unleavened Bread — Finally master homemade Matzah This easy unleavened bread recipe uses 4 simple ingredients to achieve that perfect brittle crunch for your Seder meal Get baking
- Easy Unleavened Flatbread Recipe Rustic Puffing in 50 Mins — Master this gorgeously simple Unleavened Flatbread Recipe Its the perfect Biblical Bread style ready fast for dipping or scooping See the foolproof tips
step-by-step Guide to Crafting Your Flatbread Dough
The process begins by whisking the 2 cups of flour and 1 teaspoon of salt together thoroughly in a large mixing bowl. Next, form a well in the centre and pour in that freshly boiling water. Using a wooden spoon or sturdy spatula, stir rapidly until a rough, shaggy mass forms.
This immediate mixing technique ensures all the flour is hydrated quickly. Turn this mass onto a lightly floured work surface. Gently knead for only 3 to 4 minutes just until the dough comes together into a smooth ball. Resist the urge to knead longer; we want structure, not elasticity.
Cover the finished dough ball with an overturned bowl or plastic wrap and allow it to rest at room temperature for a brief 10 minutes. This short rest relaxes the gluten strands, making the subsequent rolling much easier.
Divide the rested dough into 8 equal portions, rolling each into a neat ball, keeping the unused portions covered to prevent drying.
Achieving Optimal Puff and Char: The Cooking Finale
This final stage is where technique truly shines. Success hinges on high, dry heat application to mimic the effect of a traditional tandoor or stone oven, even though we are using a humble stovetop pan.
Mixing and Kneading: Developing Just Enough Structure
As mentioned, the mixing phase is fast. We are aiming for a dough that holds its shape but still feels slightly yielding. If you feel significant resistance while kneading, you’ve gone too far. Remember the Unleavened bread bible recipe often emphasizes speed to avoid structure building.
Resting the Dough: A Quick Break for Better Rolling
Ten minutes is the sweet spot for resting. This pause is crucial for maximizing manageability. If you skip this, the dough will fight back when you try to flatten it, leading to uneven thickness.
The Art of the Thin Roll: Uniform Thickness is Key
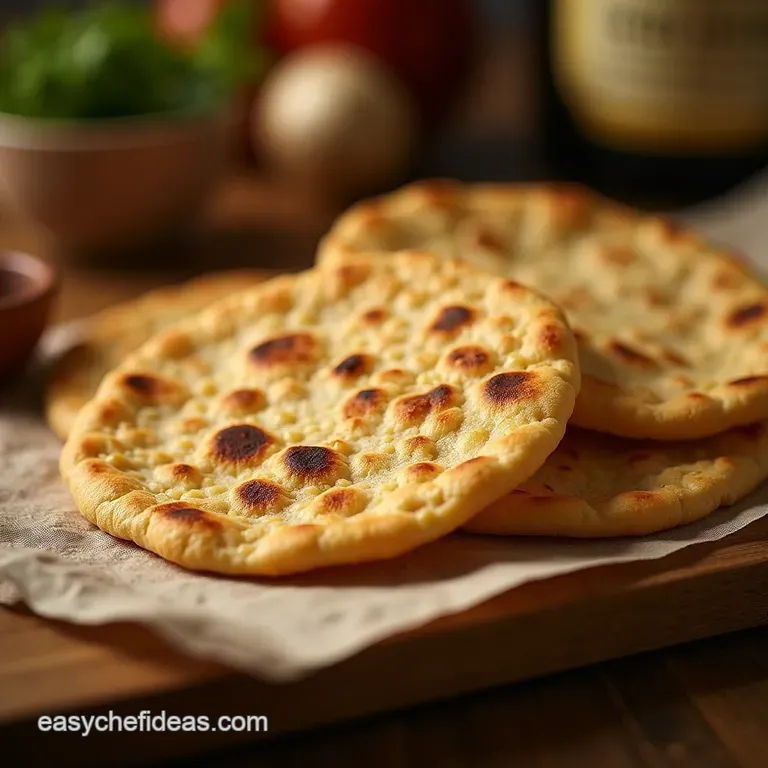
Take one dough ball and begin rolling it out using moderate, even pressure. Work from the centre outwards, rotating the dough frequently to maintain a circular shape. The goal is near translucence about 1/16th of an inch thick.
Any thicker sections will remain doughy when the edges are perfectly charred, compromising the overall textural quality of your flatbreads.
High Heat Application: Creating Those Beautiful Bubbles
Place your cast iron pan over medium high heat until it is very hot a drop of water should sizzle and evaporate immediately. Crucially, add no oil . Place one rolled dough circle onto the dry, scorching surface.
Cook for about 45 to 60 seconds until you see the first signs of bubbling and light brown spots underneath. Flip it over. The second side will cook similarly. If the bread puffs up entirely, you can gently press down on the largest bubbles with a clean, folded tea towel to encourage the bread to lay flat and develop more surface char, though allowing it to puff fully is also acceptable if you prefer a hollow center for stuffing later.
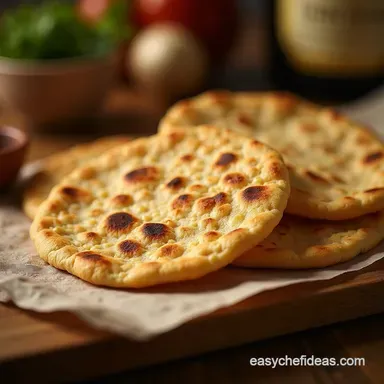
Remove immediately when cooked through and place it on a wire rack, not stacked on other bread, to ensure it cools crisp.
Elevating Your Regular Unleavened Baking Experience
While the base recipe is pure, adapting it slightly can transform these simple flatbreads for varied culinary adventures. This flexibility ensures that this foundational recipe remains relevant in any modern menu planning.
Creative Flavor Infusions: Beyond Plain Water and Flour
To infuse flavour directly into the dough, consider adding one teaspoon of dried oregano or thyme directly into the flour before adding the hot water for a Mediterranean style. For a bolder profile perfect alongside spicy dishes, incorporate half a teaspoon of smoked paprika and a pinch of cayenne pepper into the dry mix.
These additions offer depth without compromising the unleavened structure.
Quick Breakfast or Brunch Adaptations Using This Base
These flatbreads make an excellent base for quick meals. Once cooked, you can use them immediately as a crisp base for avocado and fried eggs, or spread them with soft cheese and sliced tomatoes. They function perfectly as a healthier, homemade alternative to toast points or crackers during brunch gatherings.
How to Keep Your Unleavened Bread Crisp (Not Stale)
The enemy of crispness is moisture. Always cool the freshly cooked bread completely on a wire rack never stack them while warm, as trapped steam softens the crust instantly. Once fully cooled, store them in an airtight container at room temperature.
If they lose a bit of their snap over a day or two, simply place them back in a dry 350° F ( 175° C) oven for two to three minutes to refresh the crispness.
Troubleshooting: Why Did My Flatbread Turn Out Hard?
If your flatbreads turn out excessively hard, like a rigid brick rather than a satisfying crisp, there are usually two culprits. First, you likely kneaded the dough for too long, over developing the gluten. Second, the pan was not hot enough.
If the pan temperature is too low, the dough steams instead of bakes, resulting in a tough, chewy, or hard texture instead of a light snap. Always remember: hot pan, minimal kneading, thin rolling.

Recipe FAQs
Why is my Unleavened Bread tough or chewy instead of crispy?
This usually comes down to two things: over kneading or under heating the pan. If you knead the dough for too long, you develop too much gluten, making it tough. Also, ensure your griddle is absolutely screaming hot before placing the dough on it; if it’s not hot enough, the bread will steam rather than crisp up properly.
Can I use cold water instead of boiling water for the dough?
While technically you can, using boiling water is crucial for this particular recipe; it helps to partially "cook" the starch in the flour immediately, leading to that perfect, crisp texture.
Cold water will require much more kneading and will result in a denser, more pliable bread, so stick to boiling water if you can manage it!
How should I store leftover flatbreads, and how do I reheat them?
Once completely cooled, store them in an airtight container at room temperature for up to three days; stacking them with parchment paper between each one helps prevent sticking. To reheat and bring back that lovely crunch, place them directly onto a hot, dry pan for about 30 seconds per side, or give them a quick blast in a medium hot oven.
I'm making this for a large group; can I prepare the dough ahead of time?
You certainly can prep the dough in advance it keeps beautifully in the fridge for up to 24 hours in an oiled, sealed container. Just be sure to let it sit on the counter for at least 30 minutes to warm up before dividing and rolling, as cold dough is a nightmare to roll thinly.
Is there a healthier alternative to using all-purpose white flour?
Absolutely! For a boost of fibre, you can substitute up to half of the white flour with whole wheat flour just know the resulting bread will be slightly darker and have a nuttier flavour profile.
If you’re feeling adventurous, you could even try oat flour for a softer outcome, though you might need to adjust the water slightly.
Easy Crisp Unleavened Bread
Ingredients:
Instructions:
Nutrition Facts:
| Calories | 56 kcal |
|---|---|
| Protein | 1.6 g |
| Fat | 0.2 g |
| Carbs | 10.1 g |
| Fiber | 0.2 g |
| Sodium | 5045 mg |
