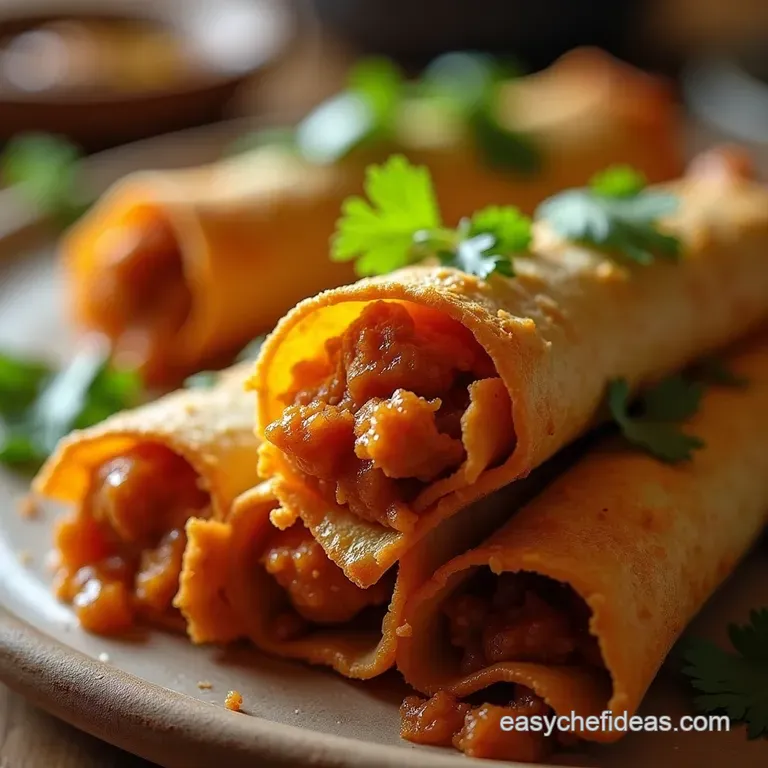
Crunch Time the Ultimate Crispy Chicken Taquitos

- Unlocking the Secret to Authentic Home-Style Crunch
- Why This Recipe Guarantees Superior Crispy Chicken Taquitos
- Assembling Your Culinary Toolkit: What You Need
- Phase One: Crafting the Savoury Chicken Core
- Mastering the Roll: Technique for Tight Taquitos
- Achieving Peak Crispiness: Frying vs. Air Frying Methods
- Pro-Hacks for Perfect Crispy Chicken Taquitos Every Time
- Recipe FAQs
- 📝 Recipe Card
Unlocking the Secret to Authentic Home Style Crunch
There’s something universally satisfying about a perfectly executed crunch, and few dishes deliver that textural explosion quite like a well made taquito. Forget those sometimes soggy, pre-packaged versions that promise authenticity but deliver disappointment.
We are diving deep into creating Crispy Chicken Taquitos that stand up to any taqueria standard, right from your own kitchen. This Crispy Chicken Taquitos Recipe focuses on building maximum flavour into a humble shredded chicken core, ensuring every bite offers that irresistible snap.
Our goal is to master the assembly and cooking method so that whether you choose frying or baking, the result is utterly flawless.
Why This Recipe Guarantees Superior Crispy Chicken Taquitos
What elevates these Homemade Chicken Taquitos above the rest? It’s a combination of smart ingredient choices and a focused technique that prioritizes moisture control in the filling and crispness on the exterior. We aren't just wrapping; we are engineering a textural masterpiece.
The Texture Triumph: Beyond store-bought Disappointment
The primary culprit in sub-par taquitos is often an overly wet filling. If the chicken is swimming in liquid, it steams the tortilla instead of allowing it to crisp up. Our process involves poaching the chicken until tender and then simmering the shredded meat briefly to absorb the flavourful broth, ensuring the filling is savoury yet relatively dry.
This density is crucial for achieving the tight roll necessary for success. On top of that,, using corn tortillas gives a superior structural integrity and flavor profile compared to some softer alternatives, though we will explore Flour Tortilla Taquitos as a variation later.
Flavor Profile Spotlight: Smoked Paprika and Zesty Lime Infusion
To ensure these aren't just crunchy carriers for nothingness, we infuse the poaching liquid with bold, earthy elements. The backbone of this filling features ground cumin, dried oregano, and the secret weapon smoked paprika, which adds a deep, smoky complexity without needing hours of slow cooking.
A final squeeze of fresh lime juice brightens the entire mix, cutting through the richness and making the entire experience zing. This flavour layering is key to making these the Best Chicken Taquitos you’ve ever made.
Setting Expectations: Fast Facts for a Quick Feast
If you’re planning a last minute gathering or simply craving a hearty snack, knowing the timeline helps. This is an Easy Chicken Taquitos recipe that requires about 25 minutes of active preparation for the filling, plus about 10 minutes for assembly.
The total time commitment hovers around 45 to 50 minutes, yielding 12 to 14 satisfying rolls, perfect for serving four hungry people or entertaining a larger crowd as an appetizer.
Assembling Your Culinary Toolkit: What You Need
Gathering your mise en place ensures the rolling process flows smoothly. You’ll need a large skillet or Dutch oven for poaching the chicken, utensils for shredding, and a surface ready for assembly.
For cooking, decide early if you are going for the traditional deep fry route or a slightly lighter, air-fried approach your equipment needs will adjust accordingly.
Essential Pantry Staples for Flawless Rolling
The tortillas are the foundation here. For the most traditional and sturdy taquito, standard 6 inch corn tortillas are recommended. However, if you find corn tortillas too brittle, keep in mind that using a very lightly oiled Flour Tortilla Taquitos style will offer more flexibility during the roll, though the final crunch texture will differ slightly.
You'll also need basic seasonings like salt, pepper, cumin, oregano, and crucially, smoked paprika for that signature depth.
Selecting the Ideal Chicken Cut and Preparation
While boneless, skinless chicken breasts cook quickly, chicken thighs offer superior moisture and flavor, which is fantastic when you are aiming for a rich, savoury filling. You'll start by poaching about 1.5 pounds of your chosen cut in low-sodium chicken broth alongside aromatics like quartered white onion and smashed garlic cloves.
This poaching method infuses flavor from the very beginning, preventing bland meat.
Optional Toppings and Cooling Creams: The Perfect Pairing
No taquito is complete without its cooling counterpart. While not strictly part of the main recipe, having Monterey Jack or Oaxaca cheese added into the filling (about half a cup) provides a desirable, melty creaminess that binds the filling beautifully.
For serving, prepare a tangy side: a simple mixture of sour cream blended with fresh lime juice and finely chopped cilantro makes an excellent accompaniment. This recipe pairs wonderfully with a creamy element, making it an excellent candidate for a Taquitos Recipe with Cream Cheese flair if you decide to mix cream cheese directly into the chicken.
Related Recipes Worth Trying
- The Best Crispy Chicken Taquitos Easy Baked or Fried — Forget soggy snacks This Homemade Chicken Taquitos Recipe gives you tender smoky chicken wrapped tight and cooked until perfectly crisp Easy to mastertry...
- The Weeknight Wonder Oven Baked Chicken Taquitos Recipe — Ditch the deep fryer This easy Oven Baked Chicken Taquitos Recipe delivers perfect crunch with a creamy lime drizzle Ready in 40 minutes
- Easy Crispy Chicken Taquitos Baked or Fried — Learn how to make restaurantquality crispy chicken taquitos This easy recipe features a creamy filling and your choice of baked or fried finish for perfect...
Phase One: Crafting the Savoury Chicken Core
The success of your Crispy Chicken Taquitos Recipe hinges on this stage. We begin by poaching the chicken in that flavour packed broth infused with spices, onion, and garlic for about 15 to 20 minutes, or until the meat shreds easily.
Once cooked, remove the chicken, but do not discard the liquid! This liquid is gold. Shred the chicken finely the finer the shred, the tighter the roll will be.
Return the shredded chicken to the pot, adding back about a quarter cup of the reserved cooking liquid, along with your optional shredded cheese, black pepper, salt, and that essential tablespoon of adobo sauce from a can of chipotles if you desire a gentle background heat.
Stir this over low heat until just combined and heated through. The mixture should be moist enough to hold together but not wet.
Mastering the Roll: Technique for Tight Taquitos
This stage requires focus. Before you even start rolling, you must soften your tortillas. Wrap the 14 corn tortillas in damp paper towels and microwave them for 30 to 45 seconds. They need to be steaming hot and extremely pliable; cold or dry tortillas will crack instantly upon rolling. Lay a warm tortilla flat.
Place about 2 to 3 tablespoons of the flavourful chicken mixture just off-centre toward one edge. Roll it tightly, tucking the ends in slightly if you wish, creating a small, compact cylinder.
If you are planning on baking or air-frying, securing the seam with a toothpick is highly recommended to prevent unraveling during cooking.
Achieving Peak Crispiness: Frying vs. Air Frying Methods
Now it’s time to transform your soft rolls into crunchy delights. You have two excellent paths forward for achieving that coveted crispiness.
Simmering and Shredding: Building the Base Flavor
(This concept was thoroughly covered in the previous section focusing on Phase One; we now pivot to cooking methods.)
Seasoning Adjustments and Flavor Boosting Secrets
(Again, flavor boosting secrets were detailed in the filling section; we focus here exclusively on the cooking dynamics.)
The Art of the Pinwheel Fold: Preventing Unraveling
The key to a non-unraveling taquito, particularly when using the baking method, lies in that initial tight roll and the use of a securely placed toothpick inserted parallel to the seam. This small step prevents the tortilla edges from pulling apart as they heat and contract.
Deep Fry Dynamics vs. Oven Baking Strategies
For ultimate, traditional texture, choose deep frying. Heat about an inch of neutral oil (canola or vegetable) in a heavy skillet to precisely 350° F ( 175° C). Fry the taquitos seam side down first to seal them, turning gently after about a minute.
Cook for a total of 2 to 3 minutes per side until deeply golden brown and crisp. Drain immediately on a wire rack lined with paper towels.
If you are opting for the Baked Chicken Taquitos Recipe or an air-fried approach, lightly brush or spray the assembled taquitos generously with oil. Arrange them in a single layer on a parchment lined baking sheet.
Bake in a preheated 400° F ( 200° C) oven, or air fry at 375° F ( 190° C), for about 10 to 14 minutes total, flipping them halfway through.
While the oil method provides that intense, bubbly crunch, the baked version still yields fantastic results, offering a slightly lighter take on these Chicken Crispitos .
Pro-Hacks for Perfect Crispy Chicken Taquitos Every Time
Troubleshooting Common Folding and Cooking Errors
If your tortillas split during rolling, they weren't warm enough steam them longer next time. If your fried taquitos emerge greasy, your oil temperature was too low; it needs to be hot enough to cook the exterior quickly before the interior can absorb excessive oil.
If your baked taquitos are chewy, they needed another five minutes, or perhaps you didn't oil them thoroughly enough to simulate the deep fry effect.
Creative Flavor Twists: From Salsa Verde to Queso Fresco
While this recipe focuses on a classic preparation, feel free to experiment. For a richer filling, try melting a small amount of cream cheese into the shredded chicken for an extra creamy texture; this is a delicious enhancement to our Taquitos Recipe with Cream Cheese suggestion.
Alternatively, swap the adobo sauce for diced jalapeños or use shredded smoked Gouda instead of Monterey Jack for a completely different flavor profile.
Making Ahead: Preparing the Taquitos Days in Advance
You can absolutely prepare these in advance! Assemble the taquitos completely, securing them with toothpicks if desired. Place them on a parchment lined baking sheet, cover tightly with plastic wrap, and freeze for up to three months.
When ready to cook, you can transfer them directly from the freezer to the air fryer or oven (increase cooking time by about 5– 8 minutes). This makes them an ideal option for stress free entertaining.
Storage Solutions and Reheating for Future Cravings
Leftover cooked taquitos are best stored in an airtight container in the refrigerator for up to four days. The microwave will resurrect them briefly but render them soft. For the best crispness upon reheating, use an oven set to 350° F ( 175° C) for about 8 minutes, or crisp them back up in the air fryer for 3– 4 minutes until hot throughout.
Nutritional Considerations: Lowering the Fat While Keeping the Crunch
As noted, the primary factor affecting nutrition here is the cooking method. If fat content is a major concern, rely exclusively on the air fryer or oven baking method. By foregoing the deep fryer, you significantly reduce the fat absorbed, allowing the delicious flavor of the smoked paprika chicken filling to shine through without the added oil weight, resulting in a leaner, yet equally satisfying, crunchy experience.

Recipe FAQs
Why do my corn tortillas always crack when I try to roll the Crispy Chicken Taquitos?
Ah, the classic taquito tragedy! This happens when the tortillas aren't warm and pliable enough; they behave like dried out parchment. Make sure you wrap them tightly in a damp paper towel and microwave them until they are steaming hot they should be flexible enough to bend easily without snapping.
This step is absolutely non-negotiable for a good roll!
Can I make these Crispy Chicken Taquitos ahead of time, or do they get soggy?
You can certainly prep them ahead, but they are definitely best served immediately after cooking for that satisfying crunch. If you must prepare them early, assemble the rolled taquitos, secure them with toothpicks, and place them on a baking sheet in the fridge, uncovered.
When you're ready to cook, give them an extra generous spray of oil before baking or air-frying to revive that crispiness.
I don't fancy deep frying; what’s the best alternative cooking method?
If deep frying feels like too much hassle (or you’re trying to keep things lighter, like a Sunday morning fry-up!), the air fryer is your best mate here. Brush or spray the taquitos generously with oil and air fry at 375°F (190°C) until golden brown, usually about 12 minutes.
Baking at a high temperature (400°F/200°C) works well too, just ensure you flip them halfway through!
How can I store leftovers, and can they be reheated properly?
Store any leftover taquitos in an airtight container in the fridge for up to three days; they will lose some crunch, mind you. To bring them back to life, avoid the microwave entirely, as it turns them chewy!
Reheat them in a preheated oven or air fryer at 375°F (190°C) for about 5 8 minutes until they sound sufficiently crunchy again.
My filling seems too wet; how can I get the chicken filling right for rolling?
A wet filling is the enemy of a tight roll, often leading to leaks during cooking. After shredding the chicken, make sure you simmer it down with the reserved liquid until it's just moist, not soupy.
If it's still a bit damp, you can stir in a tablespoon of cornstarch or a tiny bit of breadcrumb binder right at the end to soak up excess moisture.
Crispy Chicken Taquitos

Ingredients:
Instructions:
Nutrition Facts:
| Calories | 570 kcal |
|---|---|
| Protein | 5.4 g |
| Fat | 9.5 g |
| Carbs | 21.7 g |
| Fiber | 12.4 g |
| Sodium | 173 mg |
