The Homesteaders Dream Classic Amish White Bread
- The Comfort Baking Legacy: Why This Amish White Bread Reigns Supreme
- Understanding the Purity: What Makes Amish Baking Unique
- Assembling the Foundation: Core Components for Fluffy Results
- Selecting Your Starches: Flour and Liquid Nuances
- The Alchemy of Dough: Mixing and Developing the Structure
- The Patient Wait: Mastering the Proofing Stages
- From Mass to Masterpiece: Forming and Baking Your Loaves
- Troubleshooting Common Home-Baking Hurdles
- Extending the Enjoyment: Storage and Serving Suggestions
- Recipe FAQs
- 📝 Recipe Card
The Comfort Baking Legacy: Why This Amish White Bread Reigns Supreme
There is a certain magic that happens when simple ingredients flour, milk, yeast, and butter are combined with intention and patience. This Amish White Bread embodies that magic perfectly. Transport yourself back to a simpler time with this truly authentic recipe.
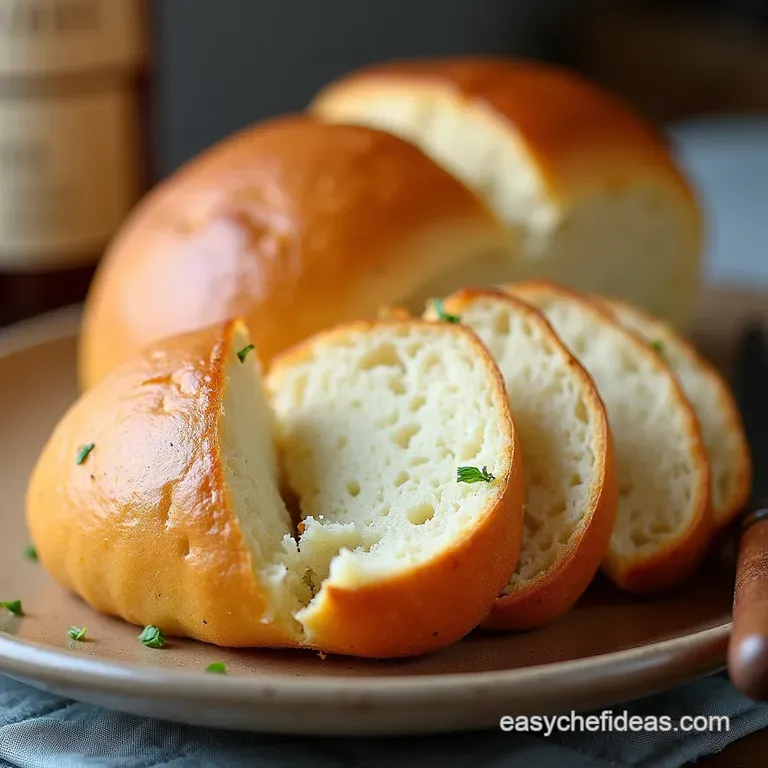
Known for its incredibly soft, pillowy texture and subtle sweetness, this bread relies on high-quality components and a patient rise to achieve perfection. It’s the quintessential sandwich bread sturdy enough for hearty fillings yet tender enough to melt in your mouth.
This Classic Amish White Bread isn't a complex sourdough project; it’s good, honest, wholesome baking, yielding a staple that tastes just like the cherished memories of homemade meals.
Understanding the Purity: What Makes Amish Baking Unique
Amish cooking traditions often emphasize scratch baking using fundamental techniques and readily available pantry items. This approach results in food that is deeply satisfying and pure in flavour.
The baking philosophy centers around wholesome ingredients without artificial enhancements, allowing the natural sweetness of the milk and the richness of the butter to shine through.
A Taste of Tradition: Setting the Scene for Softness
To achieve that iconic, melt-in-your mouth texture, the first step involves activating your yeast correctly. For this Simple Homemade White Bread , we begin by whisking 2 ¼ teaspoons of active dry yeast along with 1 tablespoon of granulated sugar into 1 cup of water heated to between 105° F and 115° F.
This crucial step, which takes about 5 to 10 minutes, ensures the yeast is lively and ready to lift your dough effectively. Watching that mixture bloom into a foamy cap confirms you are on the right track for a successful rise.
The Allure of Simplicity: Core Philosophy of This Recipe
The beauty of this Amish White Bread Recipe lies in its straightforward nature. It yields two medium loaves, perfect for a busy week, and the active preparation time is only about 25 minutes.
Because this recipe is rated as "Easy," it’s a wonderful gateway into the rewarding world of yeast baking, even for those new to the process. Patience during the rising stages is the only demanding part of this otherwise simple undertaking.
Necessary Equipment for Homestyle Loaves
While you can certainly accomplish this by hand, having the right tools makes the process smoother. You will primarily need a large mixing bowl (or the bowl of a stand mixer fitted with a dough hook), standard measuring cups and spoons, and a whisk.
Crucially, ensure you have two standard 9x5-inch loaf pans ready, lightly greased or lined for easy removal later.
Assembling the Foundation: Core Components for Fluffy Results
The structure of this bread its signature softness comes from a careful balance of liquids, fats, and starches. We aim for a moist environment that supports a strong gluten network while keeping the final product tender.
Selecting Your Starches: Flour and Liquid Nuances
The foundation begins with flour. This recipe calls for 5 to 5 ½ cups of all-purpose flour, with the final addition being dependent on humidity and how much you knead. The liquid component relies on whole milk, gently warmed, which contributes significantly to the Soft White Bread Recipe ’s rich flavour profile compared to using plain water.
Measuring for Perfection: Precise Ingredient List
To create two beautifully structured loaves, gather your components. Beyond the yeast activation elements, you'll combine 1 cup of warmed whole milk, 4 tablespoons of softened unsalted butter, ¼ cup of granulated sugar, 1 ½ teaspoons of fine sea salt, and 2 lightly beaten large eggs into the main mixture.
Yeast Activation: Ensuring a Robust Rise
As mentioned, the foam formed by the yeast, sugar, and warm water serves as your immediate verification that the leavening agent is functional. If the mixture fails to froth, discard it and start over with fresh yeast a dead starter guarantees a flat loaf.
Sweeteners and Fats: The Secret to the Pillowy Crumb
The ¼ cup of sugar contributes more than just a hint of sweetness; it provides essential food for the yeast. Paired with the 4 tablespoons of softened butter and the richness of the whole milk, these elements inhibit excessive gluten formation during mixing, leading directly to that desirable pillowy texture characteristic of Homemade Bread with Milk .
Related Recipes Worth Trying
- Best White Bread From Scratch Easy DeliStyle Fluffy Loaf — Ditch the supermarket plastic This easy white bread recipe yields a fluffy delistyle loaf perfect for toasting Learn the secret to a perfect crumb on your...
- Best Unleavened Bread Recipe Crisp Flatbread in 20 Mins — Learn how to make unleavened bread thats perfectly crisp and chewy using only flour and boiling water A truly simple recipe perfect for Passover or scooping...
- The Best NoKnead Bread Recipe Rustic Hearth Loaf — Meet your new favourite easy bread recipe This rustic loaf uses a slowrise method for incredible flavour and a perfect crust Foolproof baking awaits
The Alchemy of Dough: Mixing and Developing the Structure

Once the wet ingredients are combined the warmed milk, butter, sugar, salt, eggs, and activated yeast it’s time to introduce the flour. Start by incorporating about 4 cups of the flour until the mixture forms a shaggy mass.
The Patient Wait: Mastering the Proofing Stages
Yeast baking is a partnership between the baker and time. The dough must proof twice. The first rise, or bulk fermentation, allows the yeast to work hard, creating the gases that give the bread its volume and flavour.
This initial wait typically lasts between 60 to 90 minutes, or until the dough has doubled completely in size in a warm, draft free environment.
From Mass to Masterpiece: Forming and Baking Your Loaves
Once the first proof is complete, the process shifts toward developing the final structure and achieving that perfect golden crust.
step-by-step Mixing Sequence
After the dough has doubled, gently deflate it this is called punching down to redistribute the yeast and release large gas bubbles. Lightly flour your work surface. Divide the dough evenly in half.
Hand Kneading Technique Versus Stand Mixer Tips
If using a stand mixer, continue kneading with the dough hook on medium low speed. If kneading by hand, turn the dough out and knead vigorously for a full 8 to 10 minutes.
You are looking for an elastic, smooth surface that can pass the windowpane test meaning you can stretch a small piece thin enough to see light through it without it tearing immediately.
This robust gluten development is what allows this Amish Bread Recipe with Honey (though we use granulated sugar here, the principle is the same) to hold its shape beautifully.
Achieving Optimal Dough Temperature for the First Rise
For the absolute best results, aim to maintain a consistent temperature between 75° F and 85° F during the initial rise. A slightly warm oven (preheated briefly and then turned off) is an excellent, draft free location to encourage this activity.
Shaping Techniques for Evenly Baked Amish White Bread
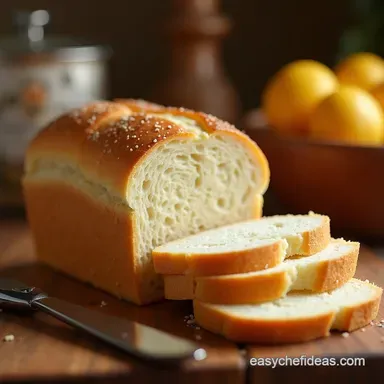
Take each of the two dough portions and gently flatten them into a rough rectangle. Roll the dough tightly from one short end to the other, creating a firm log. Place these logs, seam side down, into your prepared 9x5-inch pans.
This careful shaping ensures your loaves bake evenly, resulting in the classic, tall shape of Amish White Bread Rolls when sliced.
Troubleshooting Common Home Baking Hurdles
If your dough refuses to rise during the first proof, the most likely culprit is temperature either the water was too hot and killed the yeast, or the room is too cold. If your dough is sticky and won't come together during kneading, gradually add the remaining flour until it is tacky but manageable.
Remember, this recipe yields Country Style Homemade Bread , meaning perfection relies more on feel than rigid measurements once you start kneading.
Extending the Enjoyment: Storage and Serving Suggestions
Once baked, the crust should be deep golden brown, and an internal temperature check should read between 200° F and 205° F. Immediately remove the loaves from the pans and place them on a wire rack.
For an extra layer of softness, brush the tops with a touch of melted butter while they are piping hot.
Adjusting for Altitude: High Elevation Baking Notes
Bakers living at higher altitudes (above 3,500 feet) often find that dough rises faster and may collapse during the final proof or baking. In these cases, slightly reduce the yeast by about ¼ teaspoon and consider slightly decreasing the water/milk by 1 to 2 tablespoons, allowing the dough to proof just until it reaches the pan edge, but no further, to prevent over proofing.
The Second Proof: Signs Your Dough is Ready for the Oven
The second rise is shorter, usually 30 to 45 minutes. The dough is ready when it has crested about 1 inch over the rim of the pan. If you gently poke the side, the indentation should slowly spring back about halfway.
This indicates perfect oven readiness for the Best Amish White Bread .
How Long Does Freshly Baked White Bread Stay Soft?
When stored correctly wrapped tightly in plastic wrap or placed in a bread box at room temperature this incredibly soft bread will remain at its peak for 3 to 4 days. Freezing slices works beautifully for long term preservation.
Creative Ways to Utilize Leftover Slices
While this bread is heavenly fresh, any remaining slices are superb when used for thick, satisfying French toast or croutons. Alternatively, use them to make the ultimate hearty base for an open faced tuna melt; the structure holds up wonderfully under moisture.

Recipe FAQs
Why is my Amish White Bread dough so sticky during kneading?
It's a common sticking point, bless it! This soft dough is quite moist by design, aiming for that pillowy texture. If it's sticking terribly, add flour just one tablespoon at a time, rather than dumping it all in at once, until it starts behaving.
Remember, this bread isn't like a tough sourdough; it needs a bit of stickiness to stay tender.
How can I ensure my Amish White Bread has that signature soft, fluffy texture?
The secret lies in two places: the liquid temperature and the kneading time. Ensure your milk is just warm enough to wake up the yeast, not scald it, and dedicate a full 8-10 minutes to kneading until the dough is smooth and elastic.
Over kneading can sometimes toughen it, so stop as soon as it passes the windowpane test!
Can I freeze this bread, and if so, what’s the best way to store leftover Amish White Bread?
Absolutely, it freezes a treat! Once the loaves are completely cooled, wrap them tightly in plastic wrap, followed by a layer of aluminium foil or placed in a freezer bag. It will keep beautifully for up to three months; just thaw it overnight on the counter when you fancy a slice.
My first rise was perfect, but the second rise didn't quite double is my loaf ruined?
Not at all, don't throw the towel in just yet! A sluggish second rise often means your kitchen is a bit nippy yeast hates a draft. If the dough has increased noticeably (even if not quite double), it should still bake up nicely, though perhaps slightly denser than planned.
Just pop it in the oven and enjoy your rustic effort!
Is this recipe suitable for making dinner rolls instead of loaves of Amish White Bread?
Yes, it makes brilliant rolls, perfect for soaking up gravy at Sunday dinner! Simply reduce the final proofing time for the rolls they'll only need about 20 30 minutes after shaping. Since they have more surface area, they bake faster, usually taking only 15 18 minutes in the oven.
Classic Amish White Bread
Ingredients:
Instructions:
Nutrition Facts:
| Calories | 1572 kcal |
|---|---|
| Protein | 42.8 g |
| Fat | 61.7 g |
| Carbs | 180.9 g |
| Fiber | 13.4 g |
| Sodium | 20450 mg |
