Our Ultimate Banana Nut Bread Recipe: Ultra-Moist Easy
- Why Overripe Bananas Are Key to the Best Loaf
- The Science Behind Maximum Moisture and Crumb
- Essential Ingredients for the Ultimate Banana Nut Bread
- Baking Method: Step-by-Step Instructions for Your Perfect Loaf
- Troubleshooting and Chef's Secrets for Banana Nut Bread Success
- Proper Storage and Freezing Your Banana Nut Loaf
- Converting This Recipe to Muffins or a Bundt Cake
- Elevating Your Slice: Perfect Pairings and Toppings
- Recipe FAQs
- 📝 Recipe Card
Why Overripe Bananas Are Key to the Best Loaf
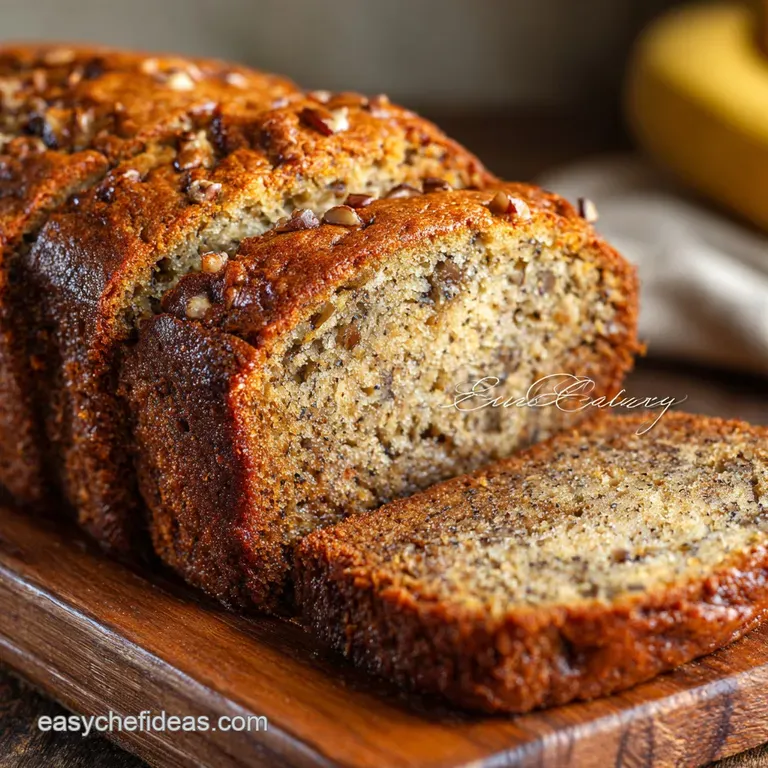
The smell. Seriously, is there anything better than walking into a kitchen where a perfect loaf of banana nut bread is baking? That rich, nutty, caramelized aroma is pure comfort food, and it tells the whole story.
This recipe is the one I always fall back on; it delivers that impossibly moist texture and deep, satisfying banana flavor every single time.
This loaf is truly a lifesaver for two reasons: it’s fast enough for a Sunday morning, and it demands the use of the saddest, blackest bananas lurking on your counter. You should never, ever waste bananas again.
This is cheap, easy baking at its absolute finest, yielding a tender crumb that stands up beautifully to the satisfying crunch of walnuts.
I've made every mistake in the book from loaves that sank like a rock to dry, tough bricks but I finally cracked the code. The secret isn't just the ingredients; it’s the technique, specifically how we handle the sugar and the mixing.
Let's ditch the dry loaves forever and bake the ultimate banana nut bread.
The Science Behind Maximum Moisture and Crumb
This isn't complicated molecular gastronomy, but understanding a few basic steps will instantly make your loaf better than 90% of the competition. We’re aiming for lift, but also intense moisture.
Defining 'Too Ripe': Visual Cues and Flavour Impact
If your banana looks perfect for eating right now, it is absolutely not ready for banana bread. We are looking for bananas that are at least 80% covered in black spots, or even completely black. When the starch in the banana converts entirely into sugar, that fruit is ready for baking.
This concentrated sugar is why this banana nut bread recipe is so intensely flavorful and naturally moist.
Rapid Ripening Methods in a Pinch
Okay, you suddenly need banana bread but only have slightly yellow bananas? Don't stress. Pop them, skins and all, onto a baking sheet. Roast them in a 300°F (150°C) oven for about 15 to 20 minutes until the skins are completely black and the insides are soft and oozing.
Let them cool slightly, then snip off an end and squeeze the caramelized mash right out. It truly works wonders.
The Sugar Starch Transformation
When starch turns into sugar, two great things happen. First, the sugar content means we need slightly less added sugar, which is fantastic. Second, the liquid ratio increases dramatically, meaning your mashed banana is basically serving as a liquid fat substitute, guaranteeing a super moist loaf.
Why We Use Two Types of Sugar
This might seem fussy, but trust me, it’s a game changer. Granulated sugar provides the primary structure and helps the butter cream up to incorporate air, aiding the rise. Brown sugar, conversely, is hygroscopic it holds onto moisture thanks to the molasses content ensuring that the loaf stays wonderfully tender and doesn’t dry out after a day on the counter.
Achieving the Perfect Crumb Through Creaming
Unlike some quick bread recipes that call for melted butter or oil (which result in a fudgier, denser texture), we are creaming the softened butter and sugars until light and fluffy.
This process physically incorporates tiny air bubbles, which expand in the oven and give the finished loaf a lighter, more tender, cake like crumb. Use butter that is truly soft, not melted, for the best results.
The Buttermilk or Sour Cream Factor
While the main recipe doesn't explicitly require buttermilk, if you want an extra layer of richness and an insanely moist texture, adding a small amount of sour cream or Greek yogurt (around 1/4 cup) is brilliant.
The acidity reacts with the baking soda to give a great lift, and the high fat content adds depth.
Essential Ingredients for the Ultimate Banana Nut Bread
I always say: use quality ingredients and they will repay you tenfold.
Choosing the Right Walnuts (Toasting vs. Raw)
Always, always toast your nuts. Raw walnuts taste flat and waxy, but a quick 5 minute roast in the preheating oven releases their oils, intensifying that buttery, nutty flavor exponentially. You want that satisfying crunch and flavor burst in every bite.
Save about a quarter cup for sprinkling on top before baking.
Butter vs. Oil: Impact on Texture
This recipe uses softened butter because it provides superior flavor and allows for the necessary creaming technique. If you swapped to neutral oil (like canola or vegetable oil), your loaf would be slightly moister and denser, which is fine, but it will lack that rich, creamy flavor butter provides.
I prefer the best of both worlds!
Simple Swaps for Dietary Needs (gluten-free, dairy-free)
Need to adjust the recipe? Quick breads are forgiving, which is why I love them.
| Ingredient | Viable Substitute | Notes |
|---|---|---|
| All-Purpose Flour | 1:1 gluten-free Blend | Make sure your GF blend contains xanthan gum for structure. |
| Walnuts | Pecans, Pepitas (Pumpkin Seeds) | Pepitas are a great, crunchy option for nut allergies. |
| Unsalted Butter | Neutral Oil (e.g., Avocado) | Use a full 1/2 cup of oil. The texture will be denser, but still great. |
| Eggs | Flax Egg (2 tbsp flax meal + 6 tbsp water) | Note: This can make the crumb slightly heavier. |
Can I Use Previously Frozen Bananas?
You absolutely can! I often freeze super ripe bananas until I have enough for a loaf. The key is to thaw them first, preferably over a bowl, because they will release a lot of liquid. Do not add this liquid to your batter. You only want the thawed, mushy banana solids.
Baking Method: step-by-step Instructions for Your Perfect Loaf
This is where the magic happens. Don't rush these first steps.
Preparing the Wet and Dry Bases Separately
First, preheat your oven to 350°F (175°C) and get your pan ready. I always use a parchment paper sling it makes lifting the finished loaf out so easy! Whisk your dry ingredients (flour, leavening, spices) in a separate bowl until everything is perfectly combined.
This step prevents pockets of unmixed baking soda, giving you a beautiful, even rise.
Integrating the Mash: Technique for Light Mixing
Now, cream the butter and sugars for a full 3– 5 minutes until they are truly pale and fluffy. Add the eggs, then fold the mashed bananas into this wet mixture. Yes, the batter will look slightly curdled or separated at this stage don't panic!
That’s just the banana moisture conflicting with the fat.
Loading the Pan: The Trick to an Even Rise
Next, add your dry ingredients and mix only until you see no streaks of flour. Stop immediately. Overmixing is the number one cause of tough banana bread. Fold in your chopped walnuts quickly, then scrape the batter into your prepared pan.
Give the pan a couple of gentle taps on the counter to level the batter and pop any large air bubbles. Sprinkle the reserved walnuts on top for presentation and extra crunch.
The Toothpick Test: Ensuring the Center is Done
Bake for 60 minutes, then start checking. If the top is getting too dark, loosely tent it with foil. Your loaf is finished when a wooden skewer or toothpick inserted into the very center comes out clean, or with a few moist crumbs attached but no wet batter.
I’ve found that using an instant read thermometer is the best way to be sure; the internal temperature should be between 200 205°F (93 96°C).
Troubleshooting and Chef's Secrets for Banana Nut Bread Success
Preventing a Sunken Center
This is usually a result of one of two things: either your oven temperature is uneven, or, most commonly, you pulled the loaf out too early. The structure wasn’t set yet. Make sure you are testing the very center of the loaf, not the side.
If the loaf is already browned, but still jiggly, tent it with foil immediately and drop the oven temperature by 15 degrees F (10 C) to finish the interior slowly.
Addressing Dry Edges and Bottoms
If your edges are dry and your center is perfect, your pan might be too dark (dark pans absorb more heat) or your oven temperature is too high. Make sure you use the parchment sling and grease the sides well.
The Best Tool for Mashing Bananas
Do not use a blender or food processor! You want some texture and tiny chunks of banana in the final batter. Using a simple fork or a dedicated potato masher ensures the bananas are broken down but not liquefied.
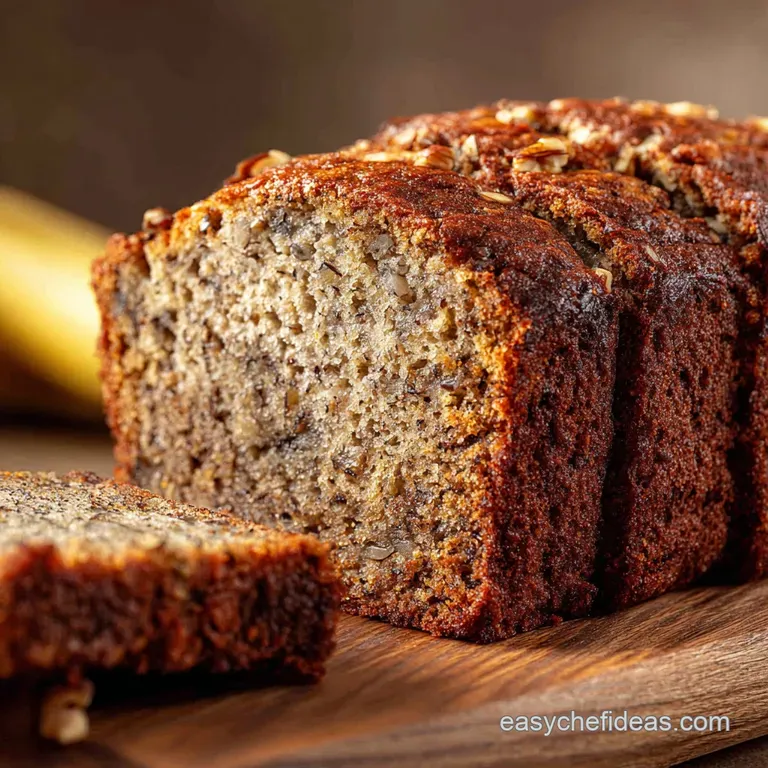
Chef's Note: Remember that beautiful center crack? Don’t mess with it. When you gently scrape the batter into the loaf pan, use a spatula to create a slight ridge down the middle. This encourages the loaf to split perfectly during baking, making that classic, satisfying top crust.
Proper Storage and Freezing Your Banana Nut Loaf
Short Term Counter Storage
If you aren't going to devour the entire loaf in one sitting (which is ambitious, but I respect it), the best place is the counter. Once completely cooled, wrap the loaf tightly in plastic wrap or foil, then place it inside an airtight container.
It will stay wonderfully moist for 3 4 days at room temperature.
How to Flash Freeze Individual Slices
Banana bread freezes like an absolute dream. Slice the cooled loaf completely. Place the slices on a baking sheet and flash freeze them for about an hour until solid. Then transfer the solid slices into a large zip-top freezer bag or container, separating them with small squares of parchment paper.
This prevents sticking and allows you to grab one slice at a time.
Reheating Frozen Loaves Successfully
To reheat a whole loaf, thaw it completely at room temperature (this takes about 3 hours). Then, wrap it snugly in foil and warm it in a 300°F (150°C) oven for about 15 minutes.
For individual slices, microwaving for 20 30 seconds works, but my favorite method is popping a frozen slice right into the toaster oven until the edges are crispy and the center is steamy soft.
Converting This Recipe to Muffins or a Bundt Cake
Need variation? This exact banana nut bread recipe works beautifully as muffins or in a Bundt pan.
For Muffins : Line a 12 cup muffin tin. Fill the cups about two-thirds full. Bake at 375°F (190°C) for 20– 25 minutes.
For a Bundt Cake : This recipe fits perfectly in a small to medium Bundt pan (6 cup capacity). Generously grease and flour the pan. Bake at 350°F (175°C) for 45– 55 minutes.
Elevating Your Slice: Perfect Pairings and Toppings
Banana nut bread doesn't need anything, but sometimes you just want that extra oomph, right?
- Maple Cream Cheese Frosting: Whisk together 4 oz softened cream cheese, 2 tbsp softened butter, 1 cup powdered sugar, and 1 tbsp maple syrup. It's truly decadent.
- The Salted Butter Toast: Simply slice the loaf thick and toast it lightly until the edges are golden. Spread with high-quality, cold, salted butter . The contrast between the warm, sweet bread and the salty fat is heavenly.
While this loaf is the perfect sweet treat, sometimes you need a quick, savory meal later in the day. If you’re looking for something fresh and fast to balance out all the baked goods, I highly recommend making a batch of [Quick and Easy Black Beans Recipe: Max Flavor in 25 Minutes] they are great for meal prep.
Or, if I am feeling particularly ambitious, my bright, herby [Lightened Up Homemade Basil Pesto: Bright, Low-Oil Ready in 10 Minutes] makes any dinner instantly better.

Recipe FAQs
Why is my Banana Nut Loaf dry or gummy?
A dry texture is usually caused by over baking or inaccurate measurements, so ensure you use the toothpick test accurately before removing it from the oven. Gummy bread often results from overmixing the batter once the flour is added, which overdevelops the gluten, making the texture dense and heavy.
Can I use less ripe bananas, or is "too ripe" essential?
The "too ripe" (heavily spotted or black) bananas are essential because they provide the maximum natural sugar and moisture necessary for the loaf's structure and deep flavor. If you use firm, yellow bananas, the bread will be less sweet, lack the pronounced banana essence, and may turn out significantly drier.
My loaf sunk in the middle after cooling. What went wrong?
Sinking often happens if the bread is underbaked, if your oven temperature is inaccurate, or if the leavening agent (baking soda/powder) is expired. Ensure your leavener is fresh and always test doneness deep in the center of the loaf with a long skewer before declaring it finished.
How should I store the leftover banana bread, and how long does it last?
Store the completely cooled loaf tightly wrapped in plastic wrap or foil, or in an airtight container, at room temperature for up to three days. For extended freshness, wrapping and refrigerating the loaf will allow it to last for up to one week, though it may become slightly firmer.
Can I freeze the Banana Nut Loaf?
Banana bread freezes exceptionally well. Once the loaf is fully cooled, wrap it first in plastic wrap and then in a layer of heavy duty aluminum foil or a freezer bag to prevent freezer burn. It will maintain peak quality for 2 to 3 months; thaw it wrapped overnight at room temperature before slicing.
I don't have walnuts. Can I use a substitute or make this nut-free?
Absolutely; you can easily substitute walnuts with pecans, hazelnuts, or even toasted shredded coconut for a different flavor profile. For a nut-free variation, try substituting the walnuts with an equal amount of dark or semi sweet chocolate chips, which adds moisture and texture contrast.
Can this recipe be adapted to be vegan or dairy-free?
Yes, this recipe adapts very easily to be dairy-free by swapping the butter for a plant based stick margarine or refined coconut oil. To make it fully vegan, replace the eggs with commercial egg replacer, or use flax eggs (1 tablespoon ground flaxseed mixed with 3 tablespoons water per egg).
Ultimate Moist Banana Nut Loaf Recipe

Ingredients:
Instructions:
Nutrition Facts:
| Calories | 350 kcal |
|---|---|
| Protein | 5.0 g |
| Fat | 18.0 g |
| Carbs | 45.0 g |
