The Great British Flaky Allbutter Homemade Pie Crust

Mastering the Art of the Perfect Homemade Pie Crust
A truly magnificent pie, whether a sweet harvest offering or a deeply satisfying savoury main, is built upon a glorious foundation. While store-bought crusts offer convenience, nothing compares to the tender, shattering flakiness of a true Homemade Pie Crust .
This is not just a base; it’s an architectural triumph that elevates simple ingredients into Perfect Pies . By focusing on precision and temperature control, we unlock the secret to creating a stunning crust every time.
The Magic of Pâte Brisée: Why All-Butter Wins
Our recipe centers around Pâte Brisée , the classic French short pastry. While many recipes advocate for shortening or lard, this particular formula is dedicated to a superior all-butter rendition, delivering an unparalleled richness and complexity.
This Buttery Pie Crust ensures that the finished product has a beautiful golden hue and a flavour profile that sings of high-quality, pure dairy fat. While shortening provides maximum structure, butter contributes the most exquisite taste, making the extra care required for chilling entirely worth the effort.
For those committed to flavour, this method of homemade pie crust with butter is the undisputed champion.
Dispelling the Myths: Pie Crust Isn’t Scary Anymore
The reputation of pie crust being notoriously difficult often deters home bakers from attempting a Pie Crust From Scratch . We are here to dismantle that myth. The complexity lies not in the ingredients which are simple flour, fat, and water but in the technique.
The required time commitment is mostly passive, with active preparation taking only about 15 minutes. Success hinges entirely on respect for temperature and understanding the precise moment to stop mixing.
Once you master the method of keeping the butter solid, you realize that producing a phenomenal homemade pie crust easy is entirely within your grasp.
Achieving the Ideal Texture: Flaky vs. Sandy
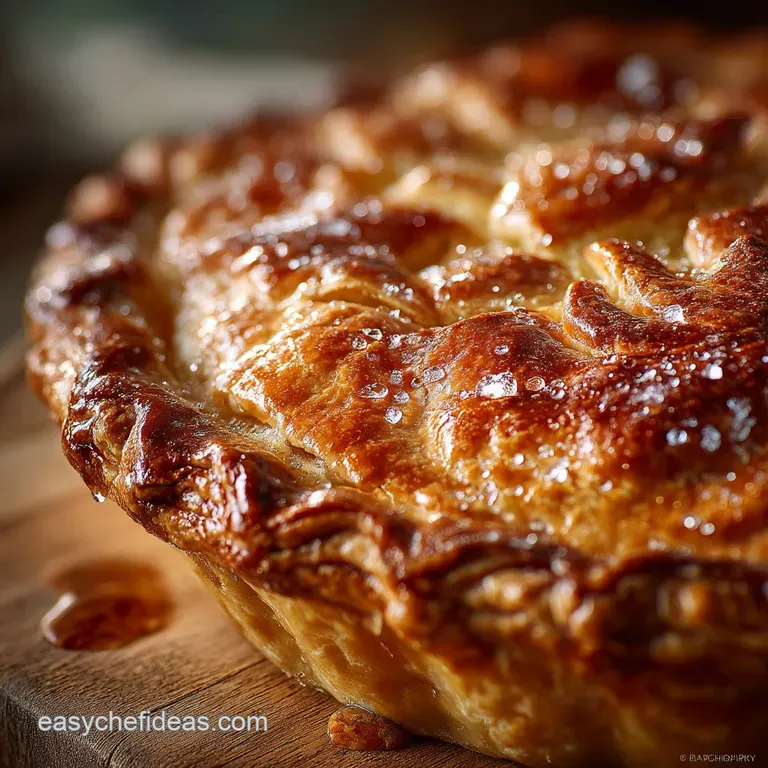
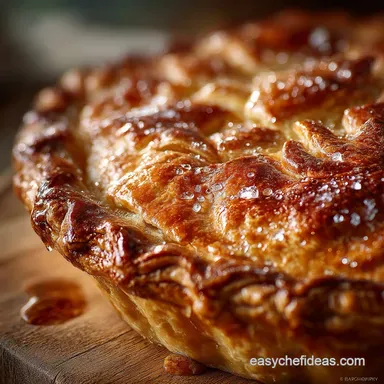
The ideal texture for this crust is distinctly flaky, characterized by defined, airy layers that shatter when sliced. This flakiness is achieved by integrating cold butter chunks that are slightly larger than coarse breadcrumbs, roughly the size of small peas.
When these butter pieces hit the hot oven, the water trapped inside them turns instantly to steam, pushing apart the layers of dough. If the dough is over mixed and the fat is fully incorporated into the flour, you end up with a denser, more crumbly or "sandy" texture, which, while useful for certain tarts, lacks the satisfying lift and delicate structure we seek for traditional pies.
Essential Gear and Premium Ingredients for Your Dough
Preparation begins long before the mixing bowl comes out. The key to this process lies in meticulous temperature control and careful selection of your minimal ingredients.
The Temperature Tactic: Why Cold Butter is Non-Negotiable
As noted previously, the steam created by melting butter is responsible for the crucial flakiness. Therefore, your unsalted butter must be kept very cold cut into 1-centimetre cubes and returned to the freezer for a few minutes before starting. Similarly, the water you introduce must be ice-cold.
For those who prioritize texture above all else, mastering the homemade pie crust without shortening technique requires this strict adherence to chilling; heat is the enemy of the flaky layer. If your kitchen is warm, consider chilling your mixing bowl as well.
Flour Selection: Hard Wheat vs. Soft Wheat Considerations
Standard all-purpose (plain) flour is the perfect choice for this dough. It offers a moderate protein content, balancing structure with tenderness. While flours with higher protein (hard wheat) are excellent for bread, they encourage excessive gluten development, which leads to a tough crust.
The goal is a delicate, easy-to-bite result, so spooning and leveling your two cups (250g) of all-purpose flour ensures the measurement is accurate and light.
Required Tools: Stand Mixer vs. Pastry Blender vs. Hands
While a stand mixer can certainly be used, the risk of overworking the dough or generating too much heat is high. The safest and most traditional approach utilizes a large mixing bowl and a sturdy pastry blender.
This tool allows you to slice the cold fat into the flour efficiently, maintaining those crucial pea-sized butter pieces. Alternatively, a food processor used only with short, sharp pulse bursts can speed up the process significantly.
If you opt to use your hands, work extremely quickly, using only the fingertips, as the heat from your palms can prematurely melt the butter.
Related Recipes Worth Trying
- The Best Flaky AllButter Pie Crust Never Get a Soggy Bottom — Learn the secret to a truly flaky AllButter Pie Crust This easy recipe guarantees a rich buttery pastry that practically shatters when sliced Say cheerio to...
- The Proper Bit of Kit Rich and Smooth Homemade Chocolate Syrup Recipe — Forget the supermarket muck This deeply rich velvety Homemade Chocolate Syrup is ready in minutes using simple cocoa powder Perfect for ice cream coffee or...
- The Best Homemade Chocolate Sauce Recipe Ready in 10 Minutes — Forget the jar This rich glossy quick and easy chocolate sauce uses cocoa powder for a deep fudgy flavour Perfect for ice cream coffee or sticky toffee pudding
The Four Stages of Building a Brilliant Homemade Pie Crust
Building the dough is a methodical process. This recipe yields enough for one double crust pie or two single shells, perfect for holiday Fall Baking .
The Blitz and Blend: Integrating Fat Without Overworking
Start by combining the two cups of flour with a teaspoon of fine sea salt (and a tablespoon of sugar if making a sweet pie). Scatter your pre-cubed, cold butter over the dry mixture. Using your pastry blender, quickly cut the butter into the flour.
The target consistency is a heterogeneous mix resembling coarse breadcrumbs, punctuated by those larger, visible chunks of butter. This variation in fat size guarantees the spectacular lift we are looking for.
Hydrating Gently: Adding Water Drop by Chilly Drop
This is the most critical stage, where gluten begins to form. We hydrate using 8 to 12 tablespoons of ice water. A clever trick many professionals utilize is substituting half the water measurement with cold vodka.
Since alcohol does not contribute to gluten formation, this substitution provides the necessary liquid to bind the dough while ensuring maximum tenderness. Toss the liquid gently with a fork. You must stop adding water the moment the dough holds together when squeezed; excess moisture instantly leads to toughness.
The Critical Chill: Resting Time for Maximum Flakiness
Once the dough has just come together, divide it in half and quickly shape each portion into a flat, one-inch thick disc. Tightly wrap these discs in plastic wrap. The initial refrigeration period a minimum of 30 minutes, ideally an hour serves two vital purposes: it allows the gluten strands, which tightened during mixing, to relax, and it gives the butter time to re-firm completely.
Rushing this stage will result in shrinking and cracking during rolling.
Rolling Out the Foundation: Keeping Edges Crack Free
When you remove the dough from the refrigerator, it should be firm. Lightly flour your surface and rolling pin. Start rolling from the center outward, lifting and rotating the disc frequently to maintain a circular shape and prevent sticking. Aim for a 12 inch diameter.
Once rolled, gently drape the dough over the rolling pin to transfer it to your 9 inch pie plate. Settle it loosely into the plate corners, avoiding stretching. Trim the edges, leaving a generous one-inch overhang, which you will then fold under and flute decoratively.
The shell must then undergo a final chill of at least 30 minutes this step prevents edge collapse upon baking.
Troubleshooting and Storage Secrets of Great Pie Dough
Addressing potential pitfalls proactively ensures your final result is professional quality.
Solving the Cracking Dough Crisis: When Your Crust Fights Back
If you attempt to roll out your dough immediately after the initial hour long chill and find it cracking aggressively at the edges, it is either too cold or too dry. If dryness is the issue, lightly spritz the edge with water and work it in gently.
More often, the solution is simply to leave the wrapped dough on the counter for five to ten minutes to allow the butter to soften marginally, making it more pliable. Conversely, if the dough starts to feel sticky or oily during rolling, return it to the fridge immediately for 15 minutes before proceeding.
Pre-Baking Perfection: The Art of Blind Baking (Pondering Pie Weights)
Blind baking or pre-baking is essential for any pie featuring a wet filling, such as quiches, lemon curd tarts, or indeed, homemade pie crust for pumpkin pie . This process ensures a crisp, non-soggy bottom crust. Preheat your oven to 400°F (200°C).
After the final chill, line the docked crust with parchment paper and fill it fully with pie weights, dried beans, or rice. Bake for 15 minutes, which sets the sides.
Remove the weights and paper, reduce the heat if necessary, and bake for another 5– 10 minutes until the base looks dry and lightly golden.
Freezing the Future: Long Term Storage of Raw Pie Dough
The beauty of making dough from scratch is the ability to prepare ahead. Raw pie dough keeps exceptionally well in the freezer. Tightly wrapped discs (ensure the plastic wrap is airtight to prevent freezer burn) can be stored for up to three months. When ready to use, simply thaw the disc overnight in the refrigerator.
This advance preparation makes holiday baking significantly less stressful.
Savory Twists: Customizing This Recipe for Quiches and Pot Pies
This classic all-butter recipe is incredibly versatile. To adapt the foundation for savory mains, such as homemade pie crust for chicken pot pie or a deep dish quiche, simply omit the tablespoon of granulated sugar.
For enhanced flavour, you can integrate two tablespoons of finely grated hard cheese, like mature Cheddar or Parmesan, and a teaspoon of dried herbs, such as thyme or sage, into the dry ingredients before adding the butter. For a heartier profile, consider substituting up to 50% of the plain flour with wholemeal flour.

Recipe FAQs
Why is temperature so crucial for making a truly flaky Homemade Pie Crust?
Cold fat is the key to achieving flaky perfection, much like a good cuppa needs a specific brewing time. If the butter melts before it hits the oven, it incorporates fully into the flour, resulting in a tough, biscuit like dough a tragedy, frankly.
Keeping the butter in distinct, cold pieces ensures steam pockets form during baking, which lifts the layers and gives you that glorious, crisp shatter.
My pie crust always seems to shrink down the sides during baking. What gives?
Ah, the curse of the receding crust! Shrinkage usually happens if the gluten hasn't relaxed enough or if the crust wasn't cold enough before baking. Make sure you give the rolled and fitted crust a solid 30-60 minute final chill; this sets the butter and ensures the dough is too rigid to collapse when hit by the oven heat.
Don't rush the chill time!
I haven't got time today. Can I make this dough ahead and store it, like a proper meal prepper?
Absolutely! This dough is brilliant for making ahead. Wrap the discs tightly in cling film (the enemy of air) and store them in the fridge for up to 3 days, or freeze them for up to 3 months.
Just remember to allow frozen dough to thaw overnight in the fridge before attempting to roll it, as working with rock hard dough is simply impossible.
Should I bother with blind baking for every pie, or is it just a massive faff?
For fillings that are particularly wet (like custard, key lime, or fruit fillings high in juice), blind baking is essential unless you fancy a soggy bottom and nobody wants that! Blind baking ensures the base is firm and fully cooked before the wet filling is added.
If you are making a fully enclosed, long cooked pie (like a hearty steak and ale), you can often skip the full blind bake.
My filling is vegan/dairy-free. Can I swap the butter for something else and still get that perfect shatter?
You certainly can, though you might lose a touch of that rich, pure butter flavour. For guaranteed flakiness in a dairy-free crust, many home bakers swear by swapping 50% of the butter for chilled vegetable shortening (such as Trex or Crisco).
These fats have a higher melting point than butter, making them easier to handle and resulting in an exceptionally light, high rising crust that's fit for a king.
The Great Allbutter Homemade Pie Crust
Ingredients:
Instructions:
Nutrition Facts:
| Calories | 385 kcal |
|---|---|
| Protein | 13.5 g |
| Fat | 83.2 g |
| Carbs | 80.4 g |
| Fiber | 2.1 g |
| Sodium | 40125 mg |
