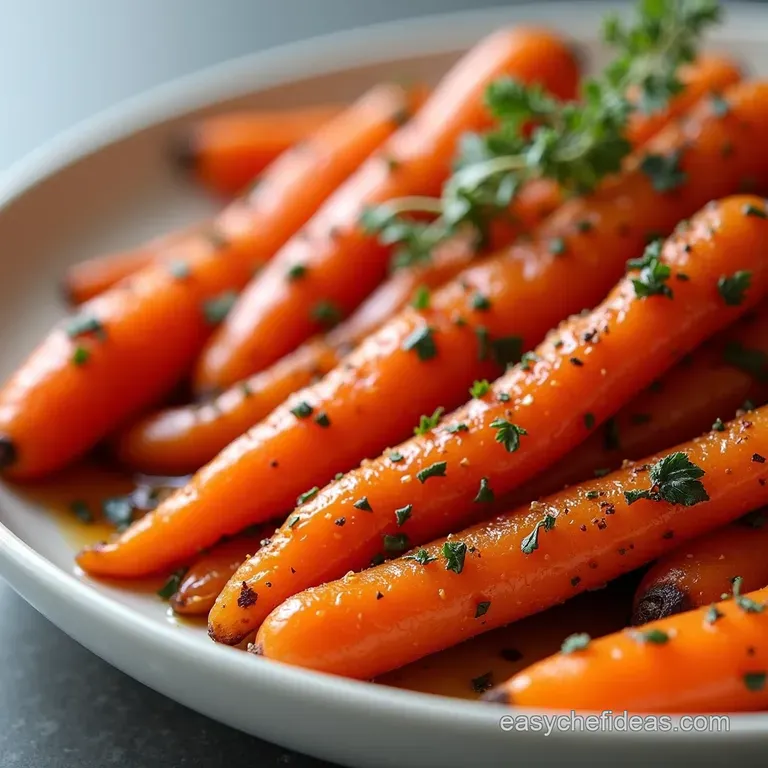
Sticky Toffeestyle Brown Sugar Glazed Carrots the Ultimate Sweet Savoury Side
- Why These Brown Sugar Glazed Carrots Deserve Center Stage
- The Secret to Achieving That Irresistible Sticky Coating
- The Essential Components for Rich Flavor Development
- Assembling Your Glazed Carrot Masterpiece Ingredients
- The Definitive Walkthrough for Perfect Glazing
- Achieving the Ideal Al Dente Carrot Finish
- Troubleshooting and Making Ahead with These Brown Sugar Glazed Carrots
- Beyond the Basic Recipe: Creative Twists
- Ingredient Spotlight: Why Brown Sugar Rules the Roost
- Prep Hacks: Peeling and Cutting Carrots
- Getting the Glaze Just Right: Consistency is King
- Frequently Asked Questions
- 📝 Recipe Card
Why These Brown Sugar Glazed Carrots Deserve Center Stage
Right then, let’s talk about the proper glow-up for your veg drawer. You know those carrots lurking about? We're giving them the posh treatment. If you think carrots are boring, you haven't tried these Brown Sugar Glazed Carrots . Seriously.
They smell absolutely incredible when they’re bubbling away, all sweet and buttery.
A Side Dish That Commands Attention
I remember serving these for the first time. My Uncle Barry, who usually only talks about the weather or football, actually stopped mid-chew and asked, "What sorcery is this?" That’s how good they are. These aren't just filler for the plate.
They are what you call a "scene stealer." They are brilliant for Fall Sides , instantly making any meal feel a bit more special, even if you’ve just chucked a frozen bird in the oven. They are surprisingly quick too.
Prep takes barely ten minutes, which is less time than it takes to argue about what to watch on telly.
Elevating the Humble Root Vegetable
People often ask if they need to use baby carrots. Honestly? No need to splash out. Two pounds of regular old carrots, peeled and chunked up, work a treat. The trick here is consistency. Chop them roughly the same size, about an inch thick, so they all get tender at the same time.
Trust me, I learned the hard way cutting some huge and some tiny; the little ones dissolved into the glaze, which was a sticky mess. We want tender crisp, not mushy! If you’re worried about the oven versus stovetop debate, these work fantastically as Brown Sugar Glazed Carrots Stovetop , giving you full control over that crucial reduction.
The Secret to Achieving That Irresistible Sticky Coating
The magic happens when the sugar hits the heat. We’re aiming for a beautiful, thick syrup. Forget watery sauce; we want proper stickiness think of it like a simple, savoury caramel.
Setting the Stage for Sweet Success
We start by steaming the carrots just a touch this softens them up for the glaze later. Then comes the good stuff: butter, dark brown sugar (use the dark stuff, it’s got more backbone!), and a splash of orange juice for brightness. A tiny pinch of salt isn't optional; it’s vital.
It stops the sweetness from becoming cloying. Many recipes online just throw everything in at once, but if you add the butter and sugar before the carrots have started softening, you risk scorching the sugar before the carrots are cooked through.
It's a fine balance, but we get there by simmering gently, stirring every minute like you mean it. These Brown Sugar Glazed Carrots Recipe jewels are naturally Naturally gluten-free Carrots , too, which is a bonus if you’re catering for different folks.
You can even adapt this for an Glazed Carrots Air Fryer if you fancy, though the stovetop method gives the best fond development at the bottom of the pan.
Related Recipes Worth Trying
- Sticky Honey Garlic Butter Roasted Carrots Recipe — Transform humble carrots into the best honey garlic butter carrots This easy oven recipe yields perfectly tender sides with a sticky caramelized glaze
- Sticky Honey Roasted Carrots with Thyme Ready in 50 Mins — Ditch the sad veg These Honey Roasted Carrots are crispy caramelised and tender making them the perfect roast side dish Easy prep and foolproof roasting...
- My Secret for the Best Most Moist Banana Bread Brown Butter — Forget boring loaves This is the ultimate Moist Banana Bread Our brown butter secret adds deep caramel flavour Perfect for a proper afternoon tea
The Essential Components for Rich Flavor Development
Right then, let’s talk ingredients for these smashing Brown Sugar Glazed Carrots . This isn’t just about boiling some veg; we’re building layers of flavour here. We want that beautiful, sticky finish you get when you make proper Glazed Carrots .
We need about 2 lbs (or 900g) of carrots. Chop them up nice and chunky about an inch thick on the diagonal, yeah? Consistency is key, trust me. If they’re all different sizes, some will be mush while others are still crunchy.
Core Produce and Sweeteners Required
The star, obviously, is the carrot. They are naturally gluten-free too, making this a brilliant Naturally gluten-free Carrots side dish, perfect for autumn tables think of them as one of the best Fall Sides going.
For sweetness, we’re leaning heavily on dark brown sugar half a cup (100g) packed tight. Dark sugar is vital; it’s got that lovely molasses note that makes these taste almost like the filling of a sticky toffee pudding.
A little splash of fresh orange juice (2 tablespoons or 30ml) is non-negotiable, though. It cuts through the richness brilliantly. If you can't find oranges, a teaspoon of apple cider vinegar works in a pinch, but orange is top-tier.
Liquid Gold: Fats and Acids for Balance
Butter is your friend here. Four tablespoons (56g) of good quality unsalted butter melts down with the sugar to form the base of our Brown Sugar Glaze . It creates that irresistible, glossy sheen.
We also need a little liquid, about 1/4 cup (60ml) of water or vegetable broth, just to get the sugar moving before it scorches. Don't forget your salt half a teaspoon. I learned the hard way years ago when making my first batch of Candied Carrots that if you skip the salt, it just tastes like sweet mush.
The salt wakes everything up.
Assembling Your Glazed Carrot Masterpiece Ingredients
We’ve got the core stuff; now, let’s make sure you have the right tools ready. You don't need a whole professional kitchen for this Brown Sugar Glazed Carrots Recipe , honestly.
Whether you're making Brown Sugar Glazed Carrots Oven style or keeping it simple on the Brown Sugar Glazed Carrots Stovetop , the prep is the same.
Essential Equipment Check Before Starting
The most important bit of kit is a large, heavy bottomed skillet or a decent Dutch oven with a lid. You need the lid for the initial softening phase. If you’re feeling modern, you can do a version in the Glazed Carrots Air Fryer , but I prefer the stovetop for the glaze reduction.
You also need a standard peeler and a good sharp knife for chopping. That’s it, boss. Once you’ve got those carrots softening, you’re basically just stirring until they look stunningly sticky.
The Definitive Walkthrough for Perfect Glazing
Right, we're past the chopping board stage. Now it’s time to treat these humble carrots to the experience they deserve. We are aiming for fork tender roots encased in a thick, syrupy blanket. This isn't hard, honest, but you must respect the heat control.
Phase 1: Tenderizing the Carrots to Perfection
This first step is vital if you want your Brown Sugar Glazed Carrots to have that lovely bite, not be soggy. I learned the hard way years ago that just dumping raw carrots into sugar water results in a mess.
- Pop your cut carrots into a wide, heavy bottomed pan (a decent skillet works a treat). Add about a quarter cup of water or broth.
- Slap the lid on tight. Get the heat up to medium. We're steaming them, see? Let them steam for about 5 to 7 minutes .
- The check-in point here is sensory: take the lid off. Poke a carrot with a fork. It should give slightly but still have a bit of backbone. If they are already soft, you’ve gone too far! We want them almost done.
Constructing the Velvety Brown Sugar Glaze
This is where the magic really starts to smell good. We’re building flavour quickly here, so have your butter ready to go.
- Take the lid off completely. Turn the heat down just a smidge, then drop in your cold butter, the dark brown sugar, that splash of orange juice (it’s the secret weapon, trust me), salt, pepper, and cinnamon if you’re using it.
- Stir this lovely lot continuously. You need to watch the sugar melt and combine with the butter. It’ll look a bit sloppy at first that’s fine. We are waiting for that moment when it’s smooth, liquid, and coats the back of a spoon.
The Critical Reduction Step: Developing Stickiness
This bit takes patience, but it’s what separates these from watery supermarket mash. We want that thick, clingy coating, the kind that makes you want to lick the plate clean.
- Once everything is liquid, bring the heat up slightly to a gentle simmer not a raging boil. Let it bubble away gently.
- Keep stirring every minute or so. You are actively evaporating that initial water content. This process should take about 8 to 10 minutes . Watch the liquid level drop.
- If you see the bottom of the pan for more than a second when you stir, you are close. If it seems to be thickening up too fast and the carrots aren't quite tender, splash in a tiny bit more water just a tablespoon at a time. This prevents burning and keeps the glaze going.
Achieving the Ideal Al Dente Carrot Finish

We’re nearly there, mate. This final integration step is about ensuring every single piece of root veg gets its sweet coating.
Final Toss: Integrating Carrots with the Brown Sugar Glaze
- Test the carrots one last time. They need to be tender right through. If they pass the fork test nicely, take the pan right off the heat.
- Gently toss the carrots in the glaze you’ve created. If you’re making these Brown Sugar Glazed Carrots Oven style or Stovetop, the goal is the same: full coverage.
- Serve them straight away. They look incredible glistening on a platter, topped with fresh parsley. These are proper Fall Sides material. If you need to store leftovers (which, let's be honest, rarely happens in my house), just pop them in an airtight tub in the fridge for up to three days. Reheat them gently in a saucepan; avoid the microwave if you can, as it can sometimes make the glaze seize up weirdly. These are certainly better than any Glazed Carrots Air Fryer attempt I’ve made! This Brown Sugar Glazed Carrots Recipe really sings when served fresh.
Troubleshooting and Making Ahead with These Brown Sugar Glazed Carrots
Right, we’ve all been there, haven't we? You’re mid-cook, the kitchen smells absolutely brilliant, and suddenly, something isn’t quite hitting the mark. Dealing with a glaze can be tricky, but don't you worry.
These Brown Sugar Glazed Carrots are robust, but a few hiccups pop up now and then.
Optimal Storage and Reheating Procedures
If you’re anything like me, you’ll have leftovers because this recipe is dangerously addictive. For the best results, store any remaining Glazed Carrots in an airtight container in the fridge. They’ll keep grandly for about three to four days.
Now, reheating is where you need to be careful. Microwaving works in a pinch, but it can steam the carrots too much, making them soft.
My top tip? If you’re reheating a smaller portion, use a non-stick frying pan over a low heat. Add a tiny splash of water (just a teaspoon!) to prevent the sugar from catching, and let them warm through gently. This keeps the glaze looking glossy, not broken.
If you’re reheating a large batch, the oven works well. Spread them on a baking tray maybe even try them as Brown Sugar Glazed Carrots Oven style next time at about 160° C ( 320° F) for about ten minutes.
They'll perk right up.
Ingredient Swaps for Dietary Needs or Preference
One of the best things about simple vegetable sides is how adaptable they are. These are naturally gluten-free Carrots , which is brilliant news for those avoiding wheat.
If you’re watching your refined sugar, you can swap out some of that brown sugar for pure maple syrup, although I mentioned that earlier. Just remember, maple syrup is thinner, so you might need to cook the glaze for a minute or two longer to get that perfect coating thickness we’re after.
If you’re dairy-free, ditch the butter for a good quality vegan block or olive oil. It won’t have that classic creamy mouthfeel, but it still carries the spice and sugar beautifully.
For a richer flavour profile next time, you could even look into making these as Glazed Carrots Air Fryer style, perhaps adding a pinch of smoked paprika to compliment the sweetness.
Serving Suggestions for a Complete Meal
These Brown Sugar Glazed Carrots Recipe additions are fantastic for almost any spread, especially as the weather turns cooler and we start leaning into those cozy Fall Sides .
They absolutely shine next to a big joint of roasted meat, like a leg of lamb or that classic Sunday roast chicken. The sweetness cuts through the richness of the meat so well.
However, don’t limit yourself! They are surprisingly good with fish. Try them alongside baked salmon the sweet and slightly acidic orange juice in the glaze pairs wonderfully with the oily fish. Honestly, sometimes I just have them with some crusty bread and cheese for a quick lunch. They are that good.
They make any plate look instantly more appealing, turning humble veg into something that looks like it took hours.
Beyond the Basic Recipe: Creative Twists
Once you’ve mastered the core technique for these Candied Carrots , you realise the possibilities are endless. Why stop at cinnamon when you can start experimenting? I learned early on that even a slight tweak can turn a familiar side into a showstopper.
Ingredient Swaps for Dietary Needs or Preference
Remember that touch of orange juice we used? That's your gateway! If you want to lean into an autumnal, spicy vibe, swap the orange for lemon juice and add a tiny pinch of ground star anise. It gives the Brown Sugar Glaze a much more sophisticated, almost festive feel.
For a bit of texture, try adding toasted sesame seeds right at the end when you sprinkle on the parsley. They pop beautifully against the deep orange colour.
Serving Suggestions for a Complete Meal
If you’re serving these up for a special occasion think Christmas or a big family gathering think about presentation. Instead of just tossing them in a bowl, arrange them neatly on a long platter and sprinkle them with a little bit of very finely chopped fresh rosemary or thyme instead of just parsley.
The slight herbaceous note cuts right through the intense sweetness of the Brown Sugar Glazed Carrots . It makes them taste almost savoury again, which is a lovely surprise for guests. It transforms them from a simple side dish to a real feature on the table.
Ingredient Spotlight: Why Brown Sugar Rules the Roost
Right then, let's get these humble root vegetables dressed up for a proper night out! Brown Sugar Glazed Carrots are the sort of dish that takes a simple side and makes everyone at the table say, "Ooh, what's this then?" They're brilliant for Sunday lunch or any time you need a bit of sweet, sticky sunshine on your plate.
Now, you could try making Glazed Carrots with plain white sugar, sure. You absolutely could. But honestly? It would be a bit of a wasted opportunity, wouldn't it? That’s like wearing your best suit but forgetting your shoes. We need depth here.
And that depth comes straight from that lovely, moist mound of brown sugar.
The Magic of Molasses: More Than Just Sweetness
Why do I insist on brown sugar for my Brown Sugar Glazed Carrots Recipe ? It boils down to one little word: molasses. White sugar is just pure sweetness, nice enough, but a bit flat.
Brown sugar, whether light or dark, retains that sticky, slightly bitter, almost smoky syrup that was boiled off to make the white stuff.
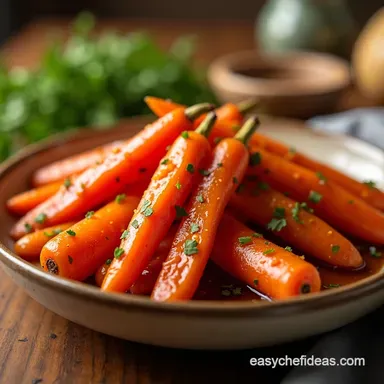
When we’re aiming for those truly impressive Candied Carrots , that molasses is your secret weapon. It caramelises beautifully when heated, creating that deep, burnished colour you see in the best photos. It also introduces complexity.
Think of it it’s the backbone of a good sticky toffee pudding, isn't it? We are essentially giving our carrots a tiny, savoury toffee bath.
When I first started making this, I tried white sugar just to see. The glaze was fine, but it lacked that rich 'oomph'. It was thin. Using dark brown sugar means the glaze reduces down into something thick and luscious that truly clings to every single carrot piece.
Trust me on this one; the dark stuff is worth the extra penny.
Building the Perfect Glaze Consistency
The real trick with any glazed vegetable whether you are aiming for Brown Sugar Glazed Carrots Oven style or using the Brown Sugar Glazed Carrots Stovetop method we’re using here is managing the liquid content.
Brown sugar is hygroscopic, meaning it likes to suck up moisture.
When you combine the butter, the sugar, and that splash of orange juice, you create a molten candy mixture. If you add too much liquid at the start, you end up with sweet, watery syrup instead of a proper Brown Sugar Glaze .
If you add too little, the sugar crystallises before the carrots are even tender.
My personal lesson learned? That initial steaming step is vital. By giving the carrots a five minute head start in plain water, they soften just enough so that when they hit the sugar mixture, they absorb the flavour without needing to boil in the glaze for an hour.
This keeps them perfectly tender crisp tender all the way through, but with a slight bite, not a floppy mess. This control is what separates a decent side from something worthy of a massive Christmas spread.
Seasonal Appeal and Dietary Notes
These carrots are brilliant any time, but they really sing when paired with Fall Sides . That deep, warm sweetness just feels right when the evenings draw in. They pair beautifully with roast game or simply served alongside a hearty shepherd's pie.
And here's a nice bit of bonus info: naturally, these Naturally gluten-free Carrots are a super easy winner for anyone managing gluten intolerance at the table. Just double check your butter and any broth you might use (though we are keeping the liquid simple here!).
If you fancy a quick batch for a smaller crowd, they work a treat in the Glazed Carrots Air Fryer too just watch the sugar doesn't burn on the element; keep the heat moderate!
Prep Hacks: Peeling and Cutting Carrots
Right then, let's get these humble root vegetables dressed up for a proper night out! Brown Sugar Glazed Carrots are the sort of dish that takes a simple side and makes everyone at the table say, "Ooh, what's this then?" They're brilliant for Sunday lunch or any time you need a bit of sweet, sticky sunshine on your plate.
Before we even think about butter and that glorious brown sugar glaze, we have to sort out the carrots themselves. Trust me on this one; treating your veg right at the start saves a massive headache later on.
If you’re aiming for those perfect Glazed Carrots , presentation and uniform cooking are half the battle won.
Choosing and Peeling Your Roots
First things first: choose your carrots wisely. You want ones that are firm, straight, and bright orange. None of those floppy, sad-looking things that have been lurking in the bottom drawer since Tuesday.
For the best flavour in this Brown Sugar Glazed Carrots Recipe , I always recommend using medium to large carrots. Baby carrots are fine if you’re in a rush, but they often lack the deep sweetness we’re trying to build.
Now, the peel. Some folks swear blind you should never peel carrots, saying all the flavour is just under the skin. And usually, they’re spot on. However, if you’re making something elegant like these Brown Sugar Glazed Carrots Oven style, you do want a clean slate.
A good, sharp peeler is your best mate here. Zip that skin off quickly. If you see any little green bits near the top (that bitter bit), make sure they go. It’s a quick job, honestly.
The Art of the Diagonal Chop
This bit is where many people go wrong, bless their cotton socks. They chop the carrots into little coins or clumsy chunks. Bad idea! If your carrots are all different shapes and sizes, some will turn to mush while others are still hard as old boots when you serve them up. We want consistency.
For this recipe, I always go for a diagonal chop, sometimes called a bias cut. It sounds posh, but it’s dead easy. Take your peeled carrot and slice it on a steep angle say, about 45 degrees. Then, turn the carrot slightly and slice again. What you end up with are lovely, oval shaped pieces.
They look brilliant on the plate, giving you that restaurant vibe, and more importantly, they expose more surface area to the developing Brown Sugar Glaze .
My rule of thumb is to make the pieces about an inch thick on their longest side. This size holds up perfectly during the initial steaming phase (which is vital, see below) and then absorbs that sweet stickiness without collapsing into oblivion.
This careful preparation is what separates your standard carrots from genuine Candied Carrots .
A Quick Note on Uniform Cooking
Remember, we’re cooking these carrots twice, in a way first to soften them slightly, and then simmering them in the glaze. If you don’t cut them uniformly, you’ll either have watery carrots or a burnt glaze trying to save the undercooked ones.
It’s worth taking an extra two minutes here to get the cuts right. If you are thinking about trying the Glazed Carrots Air Fryer method later, uniform shapes are even more critical for even crisping! This groundwork ensures your Fall Sides are always a triumph.
Honestly, learning to cut your veg consistently is the first real step towards cooking like a seasoned pro.
Getting the Glaze Just Right: Consistency is King
Right then, let's get these humble root vegetables dressed up for a proper night out! Brown Sugar Glazed Carrots are the sort of dish that takes a simple side and makes everyone at the table say, "Ooh, what's this then?" They're brilliant for Sunday lunch or any time you need a bit of sweet, sticky sunshine on your plate.
But here’s the rub, isn’t it? The magic of this dish whether you’re making Brown Sugar Glazed Carrots Oven style or bubbling away on the hob is all down to that sticky coating.
Get the Brown Sugar Glaze wrong, and you’ve got either watery carrots or burnt sugar rubble. Nobody wants that mess, do they?
The Art of the Simmer: Avoiding a Soggy Bottom
When you first combine the butter and brown sugar with your pre-steamed carrots, it looks like a beautiful, promising puddle. But you have to be patient. This stage isn't about boiling; it’s about gentle reduction.
If your pan is too hot, that sugar and liquid will seize up or, worse, start spitting and burning before the carrots are even soft. I learned this the hard way making my first batch of what I thought would be Candied Carrots . I rushed it. Ended up scrubbing burnt molasses off my best skillet!
The key is to keep the heat at a steady medium low once everything melts. You want a gentle, burbling simmer. You are looking for the liquid to thicken enough that when you pull your spoon through it, it takes a second or two for the line to fill back in.
This usually takes about 8 to 10 minutes after the initial melt. This careful simmering ensures the carrots absorb the flavour while the sauce concentrates into a proper sticky coat.
Troubleshooting: Too Thin or Too Thick?
This is where you need to trust your senses more than the clock. We are aiming for a beautiful, glossy sheen, not thick sludge or clear water.
If your carrots are perfectly tender but the glaze is still thin like sweet tea don't panic. Just remove the lid (if you haven't already) and turn the heat up just a smidge, perhaps to medium. Keep stirring constantly. This allows the water content to evaporate quickly.
This is often the final step needed when making Glazed Carrots Air Fryer leftovers, as they sometimes release steam that thins the residual sauce.
Conversely, if you look down and the glaze has turned thick and gluey, and it’s hugging the bottom of the pan too hard? That means you’ve reduced it too much, or perhaps you didn't add quite enough liquid at the start.
My old Nan taught me the fix: add just a tablespoon of hot water or broth at a time, stirring vigorously off the heat for a moment to loosen it up before putting it back on low. A splash of fresh orange juice also helps thin and brighten the flavour profile if it’s tasting too heavy.
Why Dark Brown Sugar Makes the Difference
Honestly, you can use light brown sugar in this Brown Sugar Glazed Carrots Recipe , but you’ll miss out on something truly special. Dark brown sugar has more molasses in it.
That molasses is what gives these Glazed Carrots their deep colour and that beautiful, almost rum-like depth of flavour a lovely contrast to the bright carrot sweetness.
This richness is why these are such popular Fall Sides . They carry that comforting, slow cooked flavour that pairs so well with heavier meals. Remember, whether you’re perfecting the Brown Sugar Glazed Carrots Stovetop method or baking them low and slow, texture matters.
You want fork tender vegetables coated in that syrupy, glistening hug. Do that right, and you’ve got a guaranteed winner on your hands. These naturally gluten-free carrots are always the first thing to disappear, mark my words.
If you're craving more ideas, explore My 5Min microwave brownie mug cake in Cravings Crusher , Felixs Fudgy Brownies Babish Inspired Best Brownie Recipe and Felixs Updated Brownie Recipe Double Chocolate Fudge Heaven .

Frequently Asked Questions
Why are my Brown Sugar Glazed Carrots coming out watery instead of sticky?
This usually happens if you haven't allowed enough time for the liquid to reduce, or if your heat was too low. After adding the butter and sugar, turn the heat up to medium high briefly until it bubbles vigorously, then drop it to medium low.
Stir frequently during the final 8 10 minutes until the mixture coats the back of a spoon nicely; that's when you know the glaze has properly thickened.
Can I make these Brown Sugar Glazed Carrots ahead of time, or how should I store leftovers?
They are definitely best served immediately when the glaze is fresh and piping hot, but leftovers keep beautifully. Store them in an airtight container in the fridge for up to three days.
To reheat, the best method is low and slow in a covered pan with a splash of water to loosen the glaze, preventing the sugar from burning on the bottom.
My carrots aren't tender, but the glaze is starting to burn what do I do? Panic stations!
Don't fret, it’s a common hitch! The initial steam/simmer (Step 2) is crucial for cooking the core of the carrot. If the glaze reduces too quickly, immediately take the pan off the heat and add a tablespoon or two of hot water or broth.
This cools things down instantly and gives the carrots another few minutes to cook through without scorching the sugar.
I want to make this dish healthier can I use less sugar or swap the butter?
Absolutely! For a healthier tilt, you can substitute half the brown sugar with pure maple syrup, which provides natural sweetness, though the consistency will be slightly thinner. For the fat, high-quality olive oil works well as a substitute for butter, although you'll lose that rich, creamy flavour that pairs so well with the toffee notes.
What's the best way to cut the carrots so they cook evenly in the glaze?
Consistency is key, much like cutting vegetables for a proper mirepoix! Aim to cut your carrots into uniform, diagonal chunks, about one inch thick. If you have very thick carrots, slice them lengthwise in half first, then chop them across. This ensures they all hit that perfect 'fork tender' stage at the same time.
Sticky Toffeestyle Brown Sugar Glazed Carrots Th
Ingredients:
Instructions:
Nutrition Facts:
| Calories | 467 kcal |
|---|---|
| Protein | 3.4 g |
| Fat | 11.2 g |
| Carbs | 43.8 g |
| Fiber | 13.7 g |
| Sodium | 156 mg |
