The Weekend Wonder Loaf an Accessible Rustic Sourdough Boule
- Unlocking the Secret to Superior Sourdough Bread at Home
- Why This Boule Recipe Replaces Bakery Runs
- Mastering the Measured Components for Perfect Sourdough
- The Minimalist Ingredient List: Flour, Water, Salt, and Time
- The Step-by-Step Crafting of Your Sourdough Masterpiece
- Developing Strength and Air Through Fermentation Stages
- Troubleshooting Common Hurdles in Sourdough Baking
- Elevating Your Final Loaf: Scoring and Baking Secrets
- Recipe FAQs
- 📝 Recipe Card
Unlocking the Secret to Superior Sourdough Bread at Home
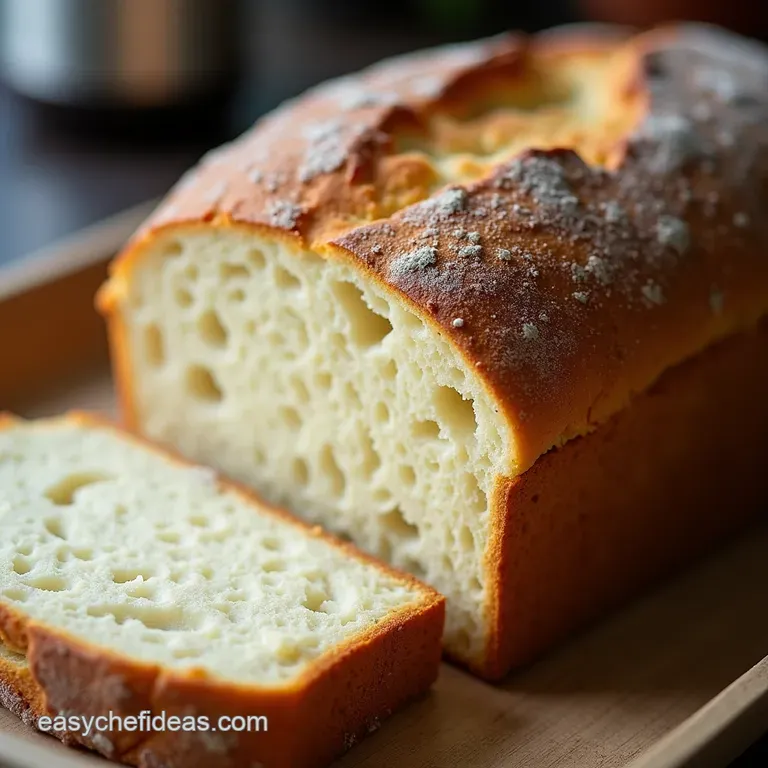
There is a unique magic to slicing into a loaf of truly exceptional bread the sound of the crackling crust, the aroma of fermentation, and the soft, pillowy interior. This isn’t just food; it's a connection to ancient baking traditions.
Creating Artisan Sourdough Bread at home might sound intimidating, conjuring images of professional bakers hunched over steaming ovens, but I’m here to tell you that mastery is within reach.
This comprehensive guide breaks down the process for baking "The Weekend Wonder Loaf," a rustic boule designed to deliver that coveted tangy flavor and magnificent oven spring, proving that Homemade Bread superiority starts right on your kitchen counter.
Why This Boule Recipe Replaces Bakery Runs
The primary reason this Easy Sourdough Bread Recipe stands out is its purity and depth of flavor. Unlike commercial yeast breads, which rush the process, this method relies on long, slow fermentation, which allows complex organic acids to develop, lending that signature pleasant sourness and significantly improving digestibility.
We are aiming for a loaf that is structurally perfect: capable of supporting substantial fillings yet light enough to practically melt in your mouth.
Demystifying the Sourdough Journey for New Bakers
Many home bakers shy away from sourdough because they feel they lack the necessary scientific background. While precision helps, the true secret lies in observation, not calculus. For the Beginner Sourdough Bread enthusiast, the key takeaway is this: learn to read your dough. Is it sticky?
Does it feel alive and bubbly? Does it hold its shape after a fold? These tactile cues are far more important than a rigid timer, though this guide provides a solid structure to build your instincts upon.
Our Promise: Tangy Flavor, Impressive Crust
This blueprint yields a loaf that maximizes both flavor and appearance. We achieve the impressive crust through high heat and steam, provided by baking inside a preheated Dutch oven, which traps the dough's initial moisture release.
The tanginess isn't accidental; it’s cultivated through the long cold proofing stage, which slows down yeast activity while allowing the acetic acid producing bacteria to flourish, leading to the complex flavor profile associated with the Best Sourdough Bread Recipe .
The Essential Role of Your Mature Starter Culture
You cannot discuss Sourdough Bread Recipe with Starter without emphasizing the culture itself. Your Sourdough Bread Starter —or levain is the engine of this entire operation.
It must be active, vibrant, and peaked (having at least doubled in size) before you mix your dough. A sluggish starter equals a flat loaf. Ensure you feed it 4– 6 hours before you plan to mix your dough so that it is robust and ready to lift the heavy flour and water mixture.
Mastering the Measured Components for Perfect Sourdough
Sourdough is a high hydration bake, meaning the ratio of water to flour is significant. Achieving the perfect balance requires meticulous attention to detail, which is why we move away from guesswork.
The Minimalist Ingredient List: Flour, Water, Salt, and Time

Our ingredient list is refreshingly simple, proving that superior quality requires minimal intervention. For this recipe, we call for 100g of active, mature starter, 350g of filtered, lukewarm water, 450g of high protein bread flour, 50g of whole wheat flour for depth, and 10g of fine sea salt.
Notice the combination of flours the whole wheat adds crucial nutrients for the yeast and bacteria, while the bread flour provides the gluten strength necessary for a tall loaf.
Precision Weighing: Why Scales Trump Measuring Cups
When working with sourdough, accuracy isn't a suggestion; it's mandatory. A cup of flour can vary wildly in weight depending on how it’s packed. Using a digital kitchen scale to measure all components to the gram ensures consistent hydration levels every single time.
This reliability is the foundation for successful Sourdough Bread baking.
Essential Equipment: Tools to Guarantee Success
While you can certainly manage with less, certain tools elevate the experience significantly. The absolute must have is a digital scale. Following that, a Dutch oven is your best friend for home baking, acting as a portable steam oven.
A good dough scraper is invaluable for handling the sticky dough, and a sharp razor blade or dedicated lame is essential for controlled scoring, which directs the final expansion of the loaf.
Sourcing the Right Flour for Optimal Crumb Structure
The quality of your flour directly dictates the final crumb. Look for unbleached bread flour with a protein content around 12 14%. This high protein content translates to strong gluten networks that can trap the gases produced during fermentation, resulting in the beautiful, airy structure so desired in Artisan Sourdough Bread .
Related Recipes Worth Trying
- The CloudLike Chew Sourdough Bread Recipe — Stop wrestling with hard crusts This simple sourdough bread recipe guarantees a soft and chewy interior crumb every time Find out the key to the perfect texture
- The Best Old Fashioned Bread Pudding Recipe with Vanilla Sauce — Learn how to make bread pudding thats custardy inside with a crisp top This old fashioned recipe is easy and perfect for using up stale bread
- Truly Speedy OneHour Rustic Bread Recipe No Long Proofing — Need fresh yeast bread fast This One Hour Bread Recipe delivers a rustic chewy loaf in under 60 minutes Perfect for that sudden toast craving
The step-by-step Crafting of Your Sourdough Masterpiece
The entire process, from the first mix to the final cooling, follows a specific rhythm. We begin with steps designed to maximize hydration before the gluten network is fully established.
Developing Strength and Air Through Fermentation Stages
Fermentation is where the dough transforms from a shaggy mass into a structured, living entity. This is the most crucial window in the Sourdough Bread Recipe Steps .
Phase One: The Gentle Autolyse and Initial Mixing
We start with the autolyse: mixing just the flours and the 350g of water until no dry streaks remain. Cover this mixture and allow it to rest for 30 to 60 minutes. This hydration period allows the flour to fully absorb the water, kickstarting gluten development passively.
Once rested, we incorporate the 100g starter and the 10g salt. Mixing thoroughly I prefer using the "pincer" method where you pinch the dough between your thumb and forefinger ensures the salt and starter are evenly distributed before bulk fermentation begins.
The Bulk Fermentation Choreography: Folding Techniques Explained
Bulk fermentation typically lasts 4 to 6 hours, depending entirely on your ambient temperature. During the first half of this period, we perform strength building maneuvers. Initiate four sets of stretch and folds, spaced 30 to 45 minutes apart.
To perform a stretch and fold, gently grab one side of the dough, stretch it upward without tearing, and fold it over the center. Rotate the bowl and repeat three more times. After the final fold, let the dough rest undisturbed until it looks visibly puffy, airy, and has increased in volume by about 30 50%.
Shaping for Tension: Achieving Maximum Oven Spring
Once bulk fermentation is complete, we transition to shaping. First, gently turn the dough onto a lightly floured surface for a 20-minute "bench rest" this allows the gluten to relax. Then comes the final shaping into a tight round (boule).
The goal here is to build significant surface tension, wrapping the dough around itself to create a taught "skin." This tension is what helps the loaf resist gravity and spring upward in the oven. Place the tightly shaped dough, seam side up, into a generously floured banneton.
The Cold Proof: Maximizing Flavor Before the Bake
The final proof is executed in the refrigerator, usually for 12 to 16 hours. This cold environment drastically slows yeast activity but keeps the bacteria working, deepening the sour flavor profile.
This overnight rest is often what separates a good loaf from truly exceptional Sourdough Bread Benefits in terms of taste complexity.
Troubleshooting Common Hurdles in Sourdough Baking
If your dough feels overly wet during shaping, it might mean your bulk fermentation went too long, or your starter wasn't quite strong enough. If the loaf spreads into a pancake shape (lacks oven spring), the shaping likely didn't create enough surface tension, or the cold proof was too short.
Learning to adjust based on your kitchen environment is the hallmark of an experienced baker.
Elevating Your Final Loaf: Scoring and Baking Secrets
The moment of truth arrives when the dough meets the heat. Proper scoring dictates where the loaf will tear, and correct thermal management ensures a crisp crust.
What to Do When Your Dough Won't Rise (Troubleshooting)
If your dough seems sluggish during bulk fermentation, move it to a warmer spot perhaps near a pilot light or inside an oven that has been turned off but with the light left on. Warmth is the best natural accelerator for your Sourdough Bread Starter .
Temperature Control: The Baker's Hidden Advantage
Preheating your oven and Dutch oven for a full hour at 500° F ( 260° C) is non-negotiable. This intense initial heat shock is what causes the rapid expansion known as oven spring.
Perfecting the Bake: Steam, Heat, and Crust Development
Once the dough is scored a deep, decisive cut to guide the spring it goes immediately into the blazing hot Dutch oven, lid on, for the first 20 minutes. This trapped steam keeps the exterior pliable, allowing the loaf to expand fully.
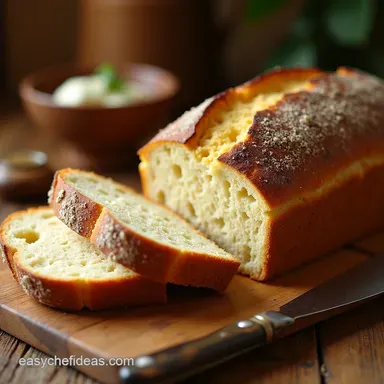
After 20 minutes, remove the lid and drop the temperature to 450° F ( 230° C). Continue baking for another 25– 30 minutes until the crust achieves a deep, mahogany brown hue this color holds the best flavor.
Storing Your Freshly Baked Sourdough for Peak Enjoyment
The hardest part is waiting. Do not slice your beautiful creation for at least two hours. The internal starches are still setting, and cutting too soon releases steam, leading to a gummy texture inside.
Once fully cooled on a wire rack, store your loaf at room temperature in a breathable paper bag for up to three days to maintain that crisp crust.

Recipe FAQs
My Sourdough Bread starter isn't doubling can I still bake?
If your starter hasn't properly peaked (doubled in size and looking bubbly), it lacks the necessary power for a good rise. It's best to wait another feeding cycle; don't rush it! Baking with a sluggish starter often results in a flat, dense loaf, which is the bane of every baker’s existence.
Why is my dough so sticky during the bulk fermentation stage?
High hydration doughs like this rustic Sourdough Bread recipe are naturally sticky that’s where the open crumb comes from! Use wet hands or a dough scraper when performing your folds, and don't be tempted to add too much extra flour, as this will tighten the dough too much.
Trust the process and let the subsequent folds build structure.
How important is the cold proofing stage in the fridge?
The overnight cold proof is crucial for flavour development and handling; it allows the lactic acids to build up, giving you that lovely tangy taste. It also firms the dough up beautifully, making the final shaping and scoring much cleaner, resulting in better oven spring.
My loaf didn't spring well and looks flat what went wrong?
A flat loaf is usually down to one of two things: under proofing during bulk fermentation (it didn't develop enough gas) or over proofing during the final proof (the structure collapsed).
Temperature plays a massive role; aim for that sweet spot of 75°F during the first rise, and watch your dough volume, not just the clock.
Can I bake this Sourdough Bread without a Dutch oven?
While a Dutch oven is highly recommended for trapping the steam needed for that magnificent crust, you can improvise. Try placing a metal tray on the bottom rack to generate steam by pouring boiling water onto it (carefully!) while baking your loaf on a preheated baking stone or heavy baking sheet.
How should I store my finished sourdough to keep the crust crispy?
Once completely cool (and I mean fully cool, give it at least two hours!), the best way to store it is cut-side down on a wooden cutting board, loosely covered with a tea towel. Avoid plastic bags, as they trap moisture and turn that glorious crust soggy faster than you can say "Fancy a cuppa?"
Rustic Sourdough Boule Recipe
Ingredients:
Instructions:
Nutrition Facts:
| Calories | 2910 kcal |
|---|---|
| Protein | 55.5 g |
| Fat | 10.3 g |
| Carbs | 112.4 g |
| Fiber | 37.5 g |
| Sodium | 40054 mg |
