The Twominute Prep Chewy Butter Cookies Perfect for Beginners

- Unlocking the Secret to Effortless Baking: Your New Go-To Easy Cookies
- Why This Recipe Beats All Others for Speed and Simplicity
- Gathering Your Essential, Pantry-Staple Components
- The Step-by-Step Blueprint for Foolproof Dough Creation
- From Mixing Bowl to Cooling Rack: Baking Like a Pro
- Next-Level Flavor Twists: Customizing Your Basic Butter Base
- Troubleshooting and Long-Term Preservation Strategies
- Recipe FAQs
- 📝 Recipe Card
Unlocking the Secret to Effortless Baking: Your New Go-To Easy Cookies
There’s a certain magic that happens when flour, sugar, and butter unite in the oven, transforming simple staples into golden rounds of comfort. But sometimes, the craving hits, and you need that magic now .
Forget recipes that demand chilling the dough for hours or requiring specialized ingredients you don't have on hand. We are diving deep into what truly makes a successful bake accessible to everyone.
This particular Easy Cookies Recipe strips away the complexity, focusing purely on flavour and speed. If you’ve ever thought baking was too intimidating, I promise you, this batch of Easy Cookies From Scratch will redefine your limits and become your definitive staple for satisfying those sudden sugar pangs.
Why This Recipe Beats All Others for Speed and Simplicity
What sets these biscuits apart is their commitment to immediacy. We are eliminating every unnecessary pause in the process. This is baking designed for the real world busy evenings, rainy afternoons, and spontaneous tea parties.
The 'Emergency Cuppa' Cookie Philosophy
We’ve engineered this batch to be what I affectionately call the 'Emergency Cuppa' cookie. When the doorbell rings unexpectedly, or you realize you’ve run out of store-bought snacks, you need results fast.
This recipe intentionally uses Easy Cookies With Few Ingredients found in almost every pantry. The resulting flavour profile is rich, buttery, and perfectly balanced with a hint of salt, making them the ultimate companion to a strong brew.
They deliver that deeply satisfying crunch and chew without requiring fussy flavour extracts or expensive additions.
Zero Chill Time: Instant Gratification Baking
The most time consuming, and often most forgotten, step in many cookie recipes is the chilling period. While chilling solidifies the fat, which prevents excessive spreading, we can compensate for this lack of chill time with precise technique during mixing.
By ensuring our butter is perfectly softened (not melted!) and by incorporating the dry ingredients just enough to bind them, we achieve a texture that is structurally sound enough for immediate scooping and baking. This is the essence of a truly Quick Cookies Recipe .
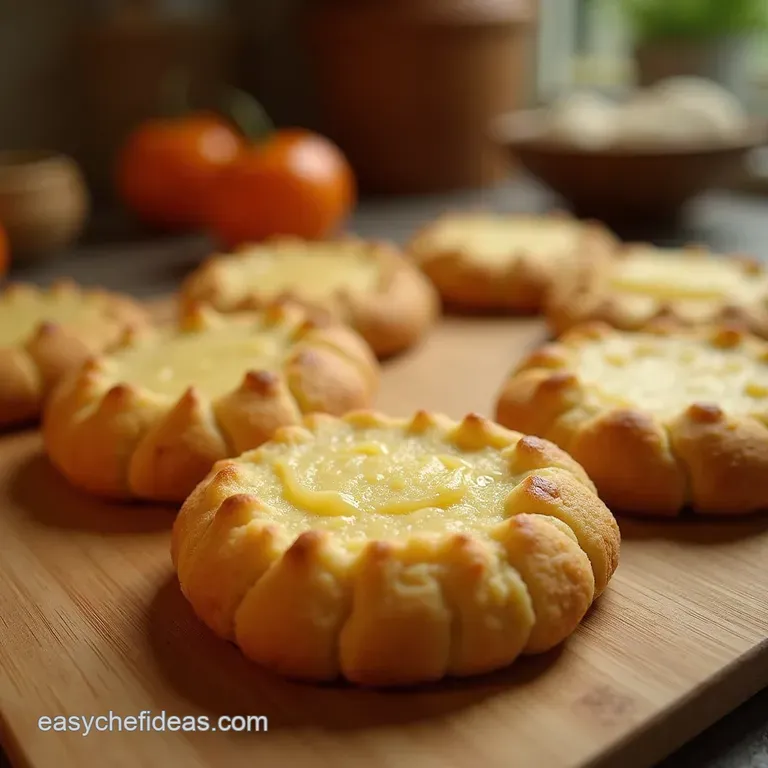
Perfecting the Golden Brown Edge on Your First Try
Achieving that perfect visual cue the lightly browned edge contrasting with a soft centre is crucial. Because we aren't chilling, the dough might spread slightly more than a refrigerated dough, but this results in beautifully textured edges.
To manage this, we rely on a moderate oven temperature of 350° F ( 175° C) and a keen eye on the 10 to 12-minute bake time. They should look slightly underdone when you pull them out; this is the key to retaining chewiness and avoiding brittle biscuits.
If you can use a wooden spoon, you can master this texture.
Gathering Your Essential, Pantry Staple Components
Success in Cheap Baking Recipes hinges on using what you already possess. Thankfully, the ingredient list for these foundations is minimal. You’ll need the basics: softened butter, sugar, an egg, vanilla, flour, a leavening agent, and salt.
This straightforward approach ensures that you can embark on baking these Easy Cookies To Bake at a moment’s notice, without a trip to the store.
The Butter Quality Matters: Selecting Your Fat Source
While we are aiming for simplicity, the quality of your fat source makes a measurable difference. Use one cup (two sticks) of unsalted butter, ensuring it is thoroughly softened to room temperature. It should yield easily when pressed but should not look shiny or melted.
If your butter is too cold, you won't properly 'cream' the air in; if it's melted, the structure of your final cookie will collapse, leading to a greasy result. For those looking for an alternative, these work wonderfully as No Butter Cookies Easy conversions if you use a high-quality, firm vegan block substitute instead.
Mastering Sweetness: Sugar Ratios Explained
We call for ¾ cup of standard granulated sugar. This recipe relies heavily on white sugar for that classic crispy edge and structure. If you were aiming for a much chewier, molasses rich flavour like in Easy Chocolate Chip Cookies —you would substitute some of this granulated sugar with brown sugar.
However, for this pure butter foundation, granulated sugar keeps the process quick and the texture consistent across batches.
Essential Toolkit: Minimum Equipment for Maximum Yield
You don’t need a fancy stand mixer, though it certainly helps speed things up. The absolute essentials include a large mixing bowl, measuring tools, a reliable spatula for scraping down the sides, baking sheets, and parchment paper.
If you have a cookie scoop, use it for uniformity, but two spoons will serve just as well when portioning out the dough for shaping.
Related Recipes Worth Trying
- Easy Kirby Strawberry Mochi Recipe Soft Squishy Homemade Mochi — Make these adorable Kirby Strawberry Mochi at home Learn the simple microwave technique for perfectly soft chewy gyūhi dough and a sweet strawberry dessert...
- The Best Easy Carrot Sheet Cake with Tangy Cream Cheese Frosting — Bake this gloriously moist Carrot Sheet Cake Recipeno tricky layers Its simple comfort food topped with a beautiful tangy cream cheese whip Get the easy...
- Easy 4 Ingredient Shortbread Cookies Buttery Egg Free — Discover the quintessential 4 Ingredient Shortbread Cookies recipesimple buttery shortbread biscuits that melt in your mouth Foolproof and perfect for your...
The step-by-step Blueprint for Foolproof Dough Creation
Creating this dough is a straightforward, three part process: creaming, moistening, and binding.
Creaming Technique: Beating Air Into Your Butter Base
Start by combining your softened butter and granulated sugar in your mixing bowl. Whether you are using a hand mixer or a strong arm and a wooden spoon, beat these together vigorously for about three minutes until the mixture becomes noticeably lighter in colour and fluffy in texture.
This process, known as creaming, physically incorporates tiny air bubbles into the fat these bubbles are vital; they expand during baking, giving your cookies lift and tenderness.
Incorporating Dry Goods Without Overdeveloping Gluten
Once the butter and sugar are adequately creamed, beat in one large, room temperature egg until it’s fully incorporated, followed by a teaspoon of vanilla extract. Now, move to the dry components: in a separate bowl, whisk together 2 ¼ cups of all-purpose flour, ½ teaspoon of baking soda, and ½ teaspoon of fine sea salt.
Add these dry ingredients to the wet mixture gradually in two or three additions mixing only until the last streaks of flour have just disappeared. Stop immediately! Overmixing at this stage activates gluten in the flour, which results in tough, dense cookies rather than delightfully tender ones.
The Quick Roll Method: Shaping These Easy Cookies Fast
Since we skipped the chilling phase, our dough will be soft. The fastest way to shape is by using a cookie scoop or two spoons to drop rounded tablespoonfuls directly onto baking sheets lined with parchment paper. Ensure there are about two inches between each mound, as they will spread slightly.
For an extra professional touch and to ensure they bake evenly without puffing too much gently press the top of each dough ball down slightly with the bottom of a drinking glass or the palm of your hand.
From Mixing Bowl to Cooling Rack: Baking Like a Pro
The short trip to the oven requires attention to detail to secure that perfect, rustic finish.
Preheat your oven to 350° F ( 175° C) and ensure your racks are centred. Place the prepared sheets inside and set a timer for 10 minutes. Watch closely.
The cookies are done when the edges are turning a delicate golden brown, but the very centre still looks slightly pale and puffy. If you wait until the entire surface is uniformly golden, you’ve waited too long, and the centre will be hard rather than chewy.
When the timer sounds, carefully slide the parchment paper containing the cookies onto a cooling rack, but crucially, leave the cookies on the hot baking sheet for a full five minutes.
This residual heat firms up the delicate centers, allowing them to solidify enough to be moved without breaking apart. After five minutes, gently transfer them to the wire rack to cool completely.
Next Level Flavor Twists: Customizing Your Basic Butter Base
The beauty of this foundational Easy Cookies Recipe is its adaptability. Once you master the timing and creaming technique, you have a blank canvas.
Beyond Vanilla: Introducing Unexpected Spice Enhancements
While the vanilla base is lovely, consider this opportunity to experiment with inexpensive spices. Swapping out just a quarter teaspoon of the flour for ground cinnamon or adding a tiny pinch of ground cardamom can transform the profile entirely.
For a deeper, warming note, stir in ¼ teaspoon of instant espresso powder along with the dry ingredients. These small additions add complexity without increasing prep time significantly.
Troubleshooting and Long Term Preservation Strategies
Even the simplest recipes sometimes throw a curveball. Knowing how to fix minor mishaps ensures your baking streak continues uninterrupted.
Fixing Sticky Dough: Emergency Adjustments Mid-Prep
If your dough feels too slack or sticky to scoop properly perhaps your kitchen is particularly warm resist the urge to add more flour immediately, as this toughens the texture. Instead, lightly dust your hands, scoop, and immediately place the dough balls onto the tray.
If you absolutely must adjust the remaining dough in the bowl, mix in just one tablespoon of flour at a time until it feels manageable enough to scoop.
How to Store Your Batch for Peak Freshness (Weeks Later!)
These Easy Cookies To Make With Kids are best eaten the day they are made, but they store surprisingly well due to their lower moisture content. Once completely cooled, store them in an airtight container at room temperature.
Layer them with sheets of parchment paper between layers to prevent sticking. Stored correctly, they will maintain excellent texture for up to a week, making them perfect for batch preparation.
Beyond Vanilla: Introducing Unexpected Spice Enhancements
The core method we’ve outlined yields magnificent, pure butter cookies, but don't stop there! If you find yourself with half a bar of chocolate or a stray bag of nuts, this is the moment to incorporate them. Fold in ½ cup of chopped nuts or mini chips during the final stage of mixing the dough.
These additions make the recipe feel more substantial while still remaining incredibly fast to execute, proving that simple foundations yield the most rewarding results.

Recipe FAQs
Why are my Easy Cookies turning out flat as a pancake?
This usually happens for one of two reasons: either your butter was too warm verging on melted or you overmixed the dough after adding the flour. Make sure your butter is just softened, and stop stirring the moment you see the last flour streaks disappear; the dough shouldn't be overworked!
Can I make these cookies ahead of time, or do they need chilling?
The beauty of this specific recipe is that it requires no chilling time, perfect for when you need a quick bake! However, if you do chill the scooped dough balls for 30 minutes, they will spread less and give you a slightly thicker cookie, though this step is entirely optional.
How should I store these Easy Cookies so they stay chewy?
Once completely cool, store them in an airtight container at room temperature, perhaps with a slice of white bread or a half an apple placed inside. The moisture from the bread/apple will transfer to the cookies, keeping them soft and chewy for up to five days, much like grandma used to do!
I don't have baking soda; can I use baking powder instead in this recipe?
You certainly can make a substitution in a pinch! Since baking soda is stronger, you’ll need to use about one and a half teaspoons of baking powder for every half teaspoon of soda called for.
Be aware that this may result in a slightly lighter, puffier cookie texture, but they will still taste delicious with your cuppa.
Can I add things to this base recipe, like chocolate chips or nuts?
Absolutely, this recipe is brilliant for throwing in extras! If you add chunky mix-ins like nuts or chocolate chips (about ¾ cup is a good amount), fold them in right at the very end after the flour is incorporated. Adding too much can affect the spread, so don't go overboard.
Quick Butter Cookies

Ingredients:
Instructions:
Nutrition Facts:
| Calories | 81 kcal |
|---|---|
| Protein | 1.5 g |
| Fat | 5.4 g |
| Carbs | 12.8 g |
| Fiber | 0.2 g |
| Sodium | 3384 mg |
