Ovenbaked Ribs: Properly Sticky Tender Recipe
- The Secret to Fall-Off-The-Bone Ribs: Oven Control
- Mastering Tenderness: The Science of Low and Slow Ribs
- Essential Components: Rib Rack, Rub, and Sticky Glaze
- Step-by-Step Guide: Crafting the Perfect Rack of Oven Ribs
- Expert Secrets for Truly Tender Ribs
- Preparing Ahead and Storing Leftover Sticky Ribs
- Storage, Freezing, and Reheating
- Recipe FAQs
- 📝 Recipe Card
The Secret to Fall Off-The-Bone Ribs: Oven Control
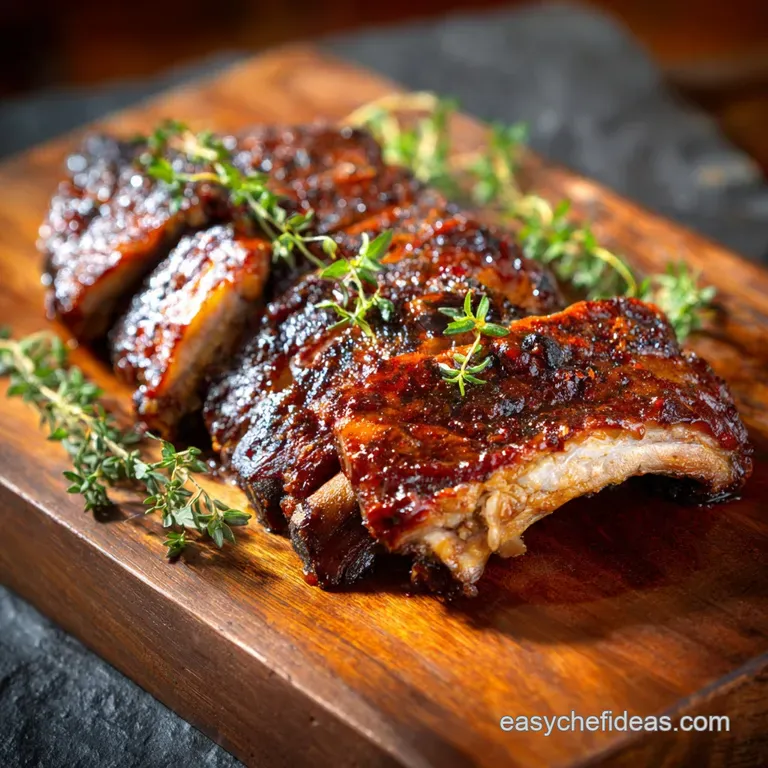
That smell. It’s the smell of summer comfort, even when it’s raining outside that sticky, smoky, sweet aroma of properly cooked pork ribs that makes your stomach rumble before you’ve even opened the oven door.
We are not messing around; we are achieving fall apart greatness with these OvenBaked Ribs .
I used to think true barbecue needed a complex smoker, but honestly, the oven is your secret weapon. It offers consistent, low heat, which is absolutely vital for breaking down tough connective tissue.
This specific method for OvenBaked Ribs is a lifesaver, delivering results that are ten times better than anything rushed on a hot grill. You get tenderness every single time, which is the whole point, right?
Stop worrying about flare ups and inconsistent temperatures. This tried and tested recipe relies on simple science, letting the oven do the heavy lifting while you sip a cold drink. Get ready to ditch the takeout menus, because the best rack of OvenBaked Ribs starts right here.
Mastering Tenderness: The Science of Low and Slow Ribs
The difference between merely "cooked" ribs and absolutely glorious ribs is moisture and time. We are aiming for that perfect balance where the meat clings just slightly to the bone but requires zero effort to pull off.
Why We Ditch the Grill (The British Barbecue Advantage)
Grilling is wonderful for flavour, but it's terrible for consistent moisture retention over several hours. When you're making incredible OvenBaked Ribs , you need a controlled environment.
The beauty of the oven is that we can tightly control the temperature, ensuring the fat renders slowly and the collagen converts into delicious gelatin. That’s what makes the meat so succulent. Plus, you don’t have to stand outside in a coat, pretending to enjoy the rain.
Achieving the Perfect Rib Rack (What to look for at the butcher)
Choosing the right rack makes a massive difference in the final quality of your slow baked ribs in oven. Look for pork ribs that have a good amount of meat coverage not too thick, but not scrawny either. Avoid racks with large, visible chunks of surface fat; trimming that down is fiddly later.
The 'Low and Slow' Philosophy Explained
We cook our ribs for a long time at a very low temperature think 250°F (120°C). Why? Because muscle fibres contract and squeeze out moisture rapidly at high temperatures.
To get truly fork tender OvenBaked Ribs , we need to keep the heat gentle so the moisture stays put, creating juicy meat instead of tough chewiness.
The Magic of Moisture: Wrapping for Steam Baking
The wrapping stage is non-negotiable for tender, easy Oven Baked Ribs. We use heavy duty foil sealed tight, often adding a splash of liquid like cider vinegar or water. This creates a miniature steamer inside your oven, guaranteeing that even after three hours, your pork is still hydrated.
Without this foil cocoon, you're essentially roasting the ribs, and you'll end up with dry, tough results that defeat the entire purpose of making OvenBaked Ribs .
Collagen Conversion: Breaking Down Tough Connective Tissue
Ribs are full of connective tissue, which is tough stuff. When collagen reaches about 160°F (71°C), it starts dissolving into gelatin. However, the ideal temperature range for this process is 185°F to 205°F (85°C to 96°C).
By cooking the rack of ribs in oven at 250°F, we hit that sweet spot perfectly, giving the collagen hours to melt, which is the actual secret behind the fall off-the-bone texture of the best OvenBaked Ribs Recipe .
The Crucial Role of the Dry Rub: Building the Flavour Foundation
Before the oven even switches on, the dry rub sets the flavour stage. Salt is the star here; it penetrates the meat overnight (or even just for 30 minutes), essentially pre-seasoning it deep down.
The sugar in the dry rub helps create a beautiful bark on the exterior of your slow baked ribs in oven before we apply the sticky glaze. This deep seasoning is what separates amazing BBQ from standard OvenBaked Ribs .
Essential Components: Rib Rack, Rub, and Sticky Glaze
Let’s talk specifics. You can't fake flavour, and you can't fake tenderness. Getting these three elements right is the foundation of any great barbecue experience.
Why This Recipe Works
This recipe works because we treat the cooking process in two distinct phases: Phase one is the low, slow steam baking for texture, and Phase two is the over high heat blast for setting the bark and caramelising the glaze. Most people skip the crucial steam step, resulting in dry ribs.
We maximize flavour absorption via the dry rub, and lock in moisture through the foil simple but effective science for perfect OvenBaked Ribs .
step-by-step Guide: Crafting the Perfect Rack of Oven Ribs
Ready to get messy? Trust me, the minimal effort required here yields maximum payoff. Preparing these authentic, tender OvenBaked Ribs is simpler than ordering a pizza, especially when you follow these steps closely.
Selecting Your Cut: Choosing Between St. Louis and Baby Back Ribs
| Rib Cut | Description | Cooking Note |
|---|---|---|
| St. Louis Style | Spare ribs, trimmed into a neat rectangle. Meaty, more fat marble, intense flavour. | Requires the full 3 hours slow bake time. |
| Baby Back Ribs | Shorter, leaner, curved cut from near the loin. Often more tender inherently. | Reduce slow bake time to 2 hours 15 mins to avoid drying. |
I always recommend St. Louis style if you can find them; they handle the long cook time brilliantly, yielding deeply flavorful slow baked ribs in oven.
Detailed Recipe Prep: Removing the Silver Skin Membrane
This step is non-negotiable if you want genuinely tender OvenBaked Ribs . Flip the rack over so the bone side is facing up. You'll see a thin, white, opaque membrane.
Slip a butter knife under this membrane near a corner bone, then grasp it tightly with a paper towel or kitchen cloth (it’s slippery!) and peel it straight off. If you leave it on, the ribs will curl, the rub won't penetrate, and the texture will be chewy.
I once skipped this step thinking, How bad could it be? Very bad. Learn from my mistake!
Dry Rub Deep Dive: Balancing Sweet, Heat, and Smoke
The perfect dry rub for baked ribs dry rub needs balance. Brown sugar is your primary sweetener, balancing the salt and aiding caramelisation. Smoked paprika gives you that essential barbecue flavour without needing actual smoke.
Ingredient Substitutions for the Dry Rub
- Smoked Paprika: Substitute with standard sweet paprika plus ½ tsp of liquid smoke (mix liquid smoke into the glaze, not the rub).
- Brown Sugar: Use coconut sugar or turbinado sugar, though the caramelisation will be slightly less intense.
- Mustard Powder: Use 1 Tbsp of prepared yellow mustard to coat the ribs before applying the rub, skipping the dry powder.
Sauce Swaps: Creating the Ultimate Sticky Glaze
While I encourage mixing your own glaze (it’s so easy!), you absolutely can use store-bought BBQ sauce. Just make sure it’s one you genuinely love, as that flavour is what defines the final bite of your OvenBaked Ribs .
My recipe calls for adding vinegar and molasses to thin out the sauce slightly and deepen the colour, making it genuinely sticky and complex, not just sweet.
Stage One: Rubbing and Pre-Baking for Maximum Flavour Absorption
Once the membrane is gone and the rub is pressed firmly into every crevice, you must let it rest. If you can, leave those ribs in the fridge overnight. The salt draws moisture out, which then mixes with the rub ingredients, forming a concentrated marinade that is reabsorbed by the meat.
This deep, internal seasoning is the true foundation of flavour for your best Oven Baked Ribs Recipe .
Stage Two: The Crucial Three Hour Tenderizing Period
Preheat the oven to a steady 250°F (120°C). Wrap the ribs tightly in heavy duty foil (or double wrap the standard stuff). Place them on a baking tray. Pour the vinegar (or water) in before sealing the foil packet; this moisture is your insurance policy against dry, tough results.
Set a timer for three hours and walk away. That’s it. You are now making flawless OvenBaked Ribs using the power of steam and time.
Chef’s Note: Do NOT be tempted to peek during the three hour period! Every time you open the foil, you release precious steam, reducing the moisture content and increasing the risk of dry edges. Patience, my friend.
Expert Secrets for Truly Tender Ribs
If you’re serious about making the most tender OvenBaked Ribs , these little secrets are game changers. I’ve learned these tips the hard way, usually by ruining an entire rack the first time I tried.
Troubleshooting Dry Ribs: Ensuring Enough Moisture
Dry ribs happen when the foil seal breaks or you didn't add enough liquid. Make sure your foil wrap is airtight; literally, crimp the edges like you’re sealing a Cornish pasty. If you suspect your ribs are still tough after 3 hours, check the temperature.
They need to hit that 195°F mark internally. If they haven't, seal the packet and return them to the oven for another 30 minutes. The simple secret to moist OvenBaked Ribs is steam, steam, steam.
The Glaze Mistake: When to Apply the Sauce
Never, ever put the BBQ sauce on before the slow bake phase. The sugars in the sauce will burn and create a tough, bitter crust long before the meat inside is tender. The sauce is only applied after the meat is fully tender (after the 3 hour low and slow cook).
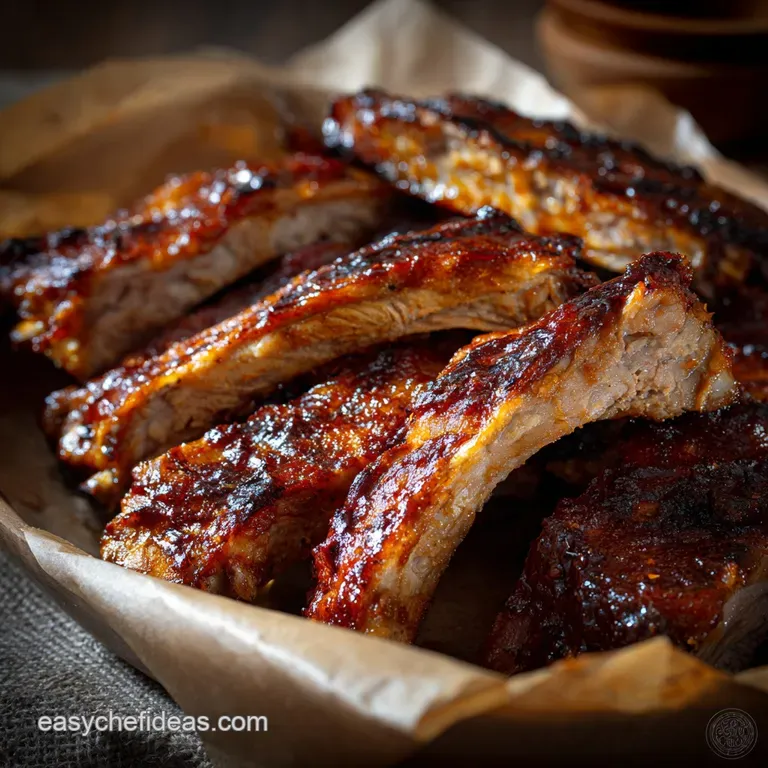
We only use the last 15- 20 minutes of high heat (400°F) to set the sauce, creating that beautiful, sticky finish on the rack of ribs in oven. This two-stage approach defines the success of perfect OvenBaked Ribs .
Ensuring Even Cooking: Temperature Zones in Your Oven
Most ovens have hotspots. If you notice one end of your rack of ribs in oven is cooking faster than the other, simply rotate the baking tray halfway through the low and slow period (around 1 hour 30 minutes in).
This ensures all the bones are exposed to the same amount of heat, resulting in evenly cooked, moist, and tender OvenBaked Ribs .
Adjusting Flavour Profiles: Making the Glaze Spicier or Tangier
Don't be afraid to customize! If you want a spicier glaze, add 1 2 teaspoons of sriracha or hot sauce when simmering the glaze. For tangier Oven Baked Baby Back Ribs (or St. Louis), increase the apple cider vinegar by a tablespoon. You can also swap the vinegar entirely for dark coffee or even a few tablespoons of stout beer to add a deep, malty complexity to the finished sauce. For an entirely different route, you could look at savory ribs, much like the slow cooking technique used in Foolproof Crockpot Beef Short Ribs with Red Wine Sauce , though that is a richer, braising approach.
Preparing Ahead and Storing Leftover Sticky Ribs
Can you make amazing OvenBaked Ribs ahead of time? Absolutely! The best part of this low and slow method is that it lends itself perfectly to meal prep, provided you store and reheat them correctly.
Safe Storage Guidelines for Cooked Ribs (Refrigeration)
Once the ribs are fully cooled, wrap them tightly in foil or place them in an airtight container. Cooked ribs will last safely in the refrigerator for 3 to 4 days. If you haven't glazed them yet, that's even better, as you can glaze them fresh when you reheat them, maximizing the stickiness.
Best Practices for Freezing and Thawing Ribs
If you’re making a huge batch of OvenBaked Ribs (say, for a party), freezing is a smart move. Always freeze them before the final glaze stage. Wrap the fully cooked and cooled ribs first in plastic wrap, then tightly in foil to prevent freezer burn.
They will keep for up to 3 months. Thaw them overnight in the refrigerator before reheating.
Storage, Freezing, and Reheating
How to Store Leftovers
Leftovers are brilliant for sandwiches! Store sliced ribs in a sealed container in the fridge for up to four days.
Freezing Instructions
Make sure the ribs are cool before wrapping. Wrap them securely in two layers of material (plastic wrap followed by foil) to protect against oxidation and ice crystals. This method helps preserve the tenderness of your frozen OvenBaked Ribs when reheated later.
Best Reheating Methods
The Foil Method: Preheat your oven to 300°F (150°C). Place the ribs (glazed or unglazed) in a foil packet with a tablespoon of water or broth. Seal tightly and bake for 20- 25 minutes until steaming hot throughout.
This retains moisture and keeps them beautifully tender. Do not microwave them unless you enjoy chewy food.
What to Serve With This Dish
These sticky, tender OvenBaked Ribs are the star, but they deserve an equally impressive supporting cast. Pair them with sides that offer texture and acidity to cut through the richness of the pork and the sticky glaze.
- Creamy Coleslaw: Essential for that crunch and cooling contrast.
- Cornbread: Serve warm with honey butter. If you want a great side dish that uses the same oven time, try my recipe for The Best OvenBaked Southern Candied Yams Recipe — they pair surprisingly well!
- Classic Wedges: Thick cut, oven baked potato wedges dusted with more smoked paprika.
- Beans: Proper baked beans, slow cooked with some molasses and bacon bits.
If you liked the low and slow method here, you might also want to try my recipe for Best Oven Baked Beef Ribs Tender Smoky Homemade BBQ , which uses similar techniques but for a heartier cut of meat. Mastering these OvenBaked Ribs means you never have to fear tough pork again. It’s all about the low temperature and the secure foil wrap. Enjoy every messy, finger licking bite! This recipe for OvenBaked Ribs truly works, proving that the best BBQ often comes from your own kitchen.

Recipe FAQs
Why are my ribs tough or dry, even after 3 hours in the oven?
Rib toughness usually results from insufficient moisture or inadequate cooking time to break down the tough collagen. Ensure the ribs are tightly wrapped in heavy duty foil during the initial low-and-slow phase to essentially steam them gently.
If they remain tough after the suggested time, they simply need more time; low-and-slow means cooking until the internal collagen melts, which can sometimes take 3.5 to 4 hours depending on the cut’s thickness.
How do I know when the ribs are perfectly tender and safe to eat?
While pork should reach an internal temperature of 145°F (63°C), the best indicator for ribs is texture rather than temperature alone. The ribs are ready when the meat has pulled back from the bone tips by about a quarter of an inch.
A true test of doneness is the "tear test": if you lift one end of the rack with tongs, the meat should start to crack and tear easily right down the middle.
Should I glaze the ribs for the entire cooking process?
No, applying the barbecue sauce or glaze too early will result in a burnt, bitter crust because the sugar content in the sauce caramelizes and blackens easily at low temperatures. Apply the glaze only during the final 30 45 minutes of cooking, after the ribs have already become tender.
For an extra sticky finish, apply a second layer of sauce and briefly place the ribs under a high broiler (grill) for 2 3 minutes, keeping a close eye on them to prevent burning.
I want a smokier flavor without using liquid smoke. Is there an alternative?
A simple and authentic way to introduce depth is by heavily incorporating high-quality smoked paprika (Pimentón de la Vera) into your dry rub mixture. This adds a lovely, earthy smokiness without the intensity of artificial flavorings.
Alternatively, a splash of Worcestershire sauce or a teaspoon of dark molasses added to your finishing glaze can introduce complex, savory notes that hint at a smoke profile.
Can I prepare the ribs ahead of time and bake them later?
Yes, prepping ahead is highly recommended. You can apply the dry rub up to 24 hours in advance and store the ribs wrapped in the refrigerator; this significantly enhances flavor penetration.
For major time savings, complete the initial low-and-slow foil wrapped cooking stage, cool the ribs completely, and then refrigerate for 2 3 days. Finish them off in the oven with the glaze right before serving.
Can I use baby back ribs instead of spare ribs for this recipe?
Certainly, baby back ribs are an excellent, leaner alternative to spareribs and are typically easier to handle. However, they cook much faster due to their smaller size and reduced fat content.
When using baby back ribs, begin checking for tenderness around the 2-hour mark during the initial low-and-slow phase, reducing the overall cooking time by about 30 60 minutes to prevent them from drying out.
How should I store leftover ribs, and can they be frozen?
Store leftover cooked ribs tightly wrapped in aluminum foil or in an airtight container in the refrigerator for up to 4 days. To reheat, wrap them again in foil with a tablespoon of sauce and heat gently in a 300°F (150°C) oven until warmed through.
Ribs freeze well; wrap individual portions without excessive sauce and they will keep for up to 3 months. Thaw overnight in the fridge before reheating.
Low Slow Oven Baked Ribs

Ingredients:
Instructions:
Nutrition Facts:
| Calories | 457 kcal |
|---|---|
| Protein | 30.4 g |
| Fat | 18.2 g |
| Carbs | 46.8 g |
