Easy Hershey's Red Velvet Blossom Cookies
- Time: Active 15 minutes, Passive 10 minutes, Total 25 minutes
- Flavor/Texture Hook: Velvety crumb with a soft chocolate snap
- Perfect for: Seasonal gatherings, holiday gift boxes, or artistic dessert photography
- The Molecular Magic of Velvet Textures
- Curating the Vibrant Red Velvet Components
- The Essential Tools for Artistic Baking
- Timing and Temperature for the Ideal Bloom
- Step-by-Step Guide to the Perfect Blossom
- Fixing Common Cookie Spreading and Color Issues
- Seasonal Adaptations for Every Occasion
- Preserving Freshness and Zero Waste Tips
- Plating Levels for Visual Impact
- Culinary Myths Debunked
- Perfect Beverage Pairings
- Recipe FAQs
- 📝 Recipe Card
Close your eyes and imagine the aroma of warm, toasted cocoa swirling through your kitchen as the oven timer dings. There is something deeply nostalgic about the sight of a vibrant crimson cookie, still radiating heat, waiting for that final touch of a chilled chocolate kiss.
I remember the first time I attempted these, I didn't chill my chocolate, and the result was a messy, melted puddle rather than a crisp blossom.
Indulge in the delightful simplicity of this Easy Hershey's Red Velvet Blossom Cookie with Chocolate Kisses recipe. It is a masterclass in visual contrast, where the deep red of the dough meets the sharp, iconic silhouette of the chocolate topping.
We are moving beyond the standard sugar cookie to create something that feels intentional, artistic, and utterly seasonal.
But achieving that velvety texture without making the cookie too cakey or too dry requires a bit of finesse. We are looking for a specific "shatter" in the sugar coating that gives way to a moist, supple interior.
I have spent years tweaking this specific dough to ensure it doesn't lose its color or its shape under the pressure of the chocolate press.
The Molecular Magic of Velvet Textures
The science behind this dough is what separates a dry, crumbly cookie from one that feels like silk on the tongue. By understanding how the ingredients interact at a microscopic level, we can ensure a mouthwatering result every single time.
- Fat Suspension: The softened butter traps air during the creaming process, creating tiny pockets that expand in the heat, resulting in a tender, aerated crumb.
- Leavening Neutralization: Baking soda reacts with the acidic components of the cocoa powder, producing carbon dioxide bubbles that lift the dense dough.
- Color Stability: The use of gel based coloring prevents the water heavy liquids from diluting the protein structure of the flour, keeping the hue vibrant.
The Acid Cocoa Synergy
Traditional red velvet relied on the reaction between non alkalized cocoa and buttermilk to produce a reddish tint. In this modern version, we use unsweetened cocoa powder for its deep flavor profile, while the baking soda ensures the pH level allows the added red coloring to remain bright rather than turning a dull brick brown.
The Granulated Shield
Rolling the dough in granulated sugar before baking creates a physical barrier. This shield not only adds a delightful crunch but also slows down the evaporation of moisture from the dough's surface, contributing to that signature "cracked" appearance we love in blossom cookies.
The Kinetic Kiss Placement
The timing of adding the chocolate kiss is a lesson in thermodynamics. We want the cookie to be hot enough to slightly melt the very bottom of the chocolate to "glue" it in place, but not so hot that the entire kiss loses its structural integrity and collapses into a pool.
| Component | Science Role | Pro Secret |
|---|---|---|
| Unsalted Butter | Provides lipid structure and mouthfeel. | Use European style butter for higher fat and less water. |
| Red Food Coloring | Provides the signature aesthetic. | Use gel color to avoid altering the hydration ratio of the dough. |
| Light Brown Sugar | Adds hygroscopic moisture and molasses notes. | Pack it tightly to ensure consistent sugar to fat ratios. |
The interaction between the cocoa powder and the flour is also vital. Cocoa is naturally more drying than flour, so our ratio of 1.5 cups of flour to 3 tablespoons of cocoa is carefully balanced to provide flavor without turning the cookie into a "sandstone" texture.
Curating the Vibrant Red Velvet Components
Selecting high-quality ingredients is the first step in any baking project that aims for visual excellence. For this Easy Hershey's Red Velvet Blossom Cookie with Chocolate Kisses, the quality of your cocoa and the freshness of your egg will significantly impact the final "blossom" effect.
- 1/2 cup (115g) unsalted butter, softened Why this? Allows for better aeration during creaming.
- 1/2 cup (100g) granulated sugar
- 1/4 cup (50g) light brown sugar, packed
- 1 large egg, room temperature Why this? Emulsifies more easily into the fat.
- 1 tsp vanilla extract
- 1 tbsp red food coloring (gel based)
- 1.5 cups (190g) all purpose flour
- 3 tbsp (22g) unsweetened cocoa powder Why this? Provides the chocolate base without excessive sweetness.
- 1/2 tsp baking soda
- 1/4 tsp salt
- 1/3 cup granulated sugar (for rolling)
- 24 Hershey’s Kisses, unwrapped and chilled
| Original Ingredient | Substitute | Why It Works |
|---|---|---|
| Unsalted Butter | Vegan Butter Sticks | Similar fat to water ratio; choose high fat brands for best texture. |
| Red Gel Color | Beet Powder (2 tbsp) | Natural alternative; Note: Result will be more earthy and less "neon." |
| AP Flour | gluten-free 1:1 Blend | Works well but may result in a slightly grittier mouthfeel. |
If you find yourself enjoying the process of crafting these vibrant treats, you might also find the technique of balancing cocoa and color useful in a Red Velvet Cupcakes recipe. The principles of moisture retention in red velvet dough are quite similar across different formats.
The Essential Tools for Artistic Baking
While you don't need a professional patisserie setup, a few specific tools will help you achieve that "polished" look we are aiming for in our photography worthy cookies. Consistency in size is the secret to a professional looking batch.
- Stand Mixer: A KitchenAid or similar mixer with a paddle attachment is best for creaming the butter and sugar until light and fluffy.
- Cookie Scoop: A 1 tablespoon scoop ensures every cookie is exactly the same size, which means they all finish baking at the exact same moment.
- Baking Sheets: Heavy duty, light colored aluminum sheets prevent the bottoms of the cookies from browning too quickly.
- Silicone Mats: These provide a non stick surface and help distribute heat evenly across the base of the dough.
- Wire Cooling Rack: Essential for stopping the cooking process and preventing "soggy" bottoms caused by steam.
Timing and Temperature for the Ideal Bloom
Success in baking is often a matter of precision. Before we start mixing, let's look at the specific benchmarks that ensure these cookies turn out perfectly. The difference between a "fast" cookie and a "classic" artisan approach often comes down to the quality of the emulsion and the chilling time of the components.
| Feature | Fast Method | Classic Artisan Method |
|---|---|---|
| Butter State | Melted (Microwaved) | Softened (Room Temp) |
| Texture Result | Chewy and Flat | Soft, Pillowy, and Structured |
| Flavor Depth | Sweet/Simple | Nuanced Cocoa and Vanilla |
Many people try to rush the butter softening process, but trust me on this, using melted butter will cause your cookies to spread into thin pancakes that cannot support the weight of a chocolate kiss.
Precision Checkpoints
- Butter Temp: Should be 65°F (18°C). It should indent when pressed but not be oily.
- Bake Time: Exactly 10 minutes. The edges should be set, but the center must look slightly underbaked.
- Weight: Each dough ball should weigh approximately 22-25 grams for a total of 24 cookies.
step-by-step Guide to the Perfect Blossom
Follow these steps with care, focusing on the sensory cues. We want to see the dough transform from a pale red to a deep, lustrous crimson as the cocoa fully hydrates.
1. Aerating the Foundation
Cream the 1/2 cup softened butter, 1/2 cup granulated sugar, and 1/4 cup brown sugar in your stand mixer. Beat for 3 minutes until the mixture looks pale and significantly increased in volume.
2. Emulsifying the Liquids
Add the large egg, 1 tsp vanilla, and 1 tbsp red food coloring. Mix until the color is uniform and vibrant.Note: Scraping the sides of the bowl ensures no streaks of uncolored butter remain.
3. Sifting and Folding
Whisk together the 1.5 cups flour, 3 tbsp cocoa powder, 1/2 tsp baking soda, and 1/4 tsp salt. Gradually add to the wet ingredients, mixing on low until just combined.Note: Overmixing at this stage develops gluten, making the cookies tough.
4. Rolling and The Crystal Coating
Scoop 1 tablespoon portions of dough and roll into smooth spheres. Roll each ball in the 1/3 cup of granulated sugar until fully coated in a shimmering layer.
5. The Precision Bake
Place the spheres 2 inches apart on a prepared baking sheet. Bake 10 minutes at 350°F until the surfaces show slight cracks.
6. The Final Blossom Press
Remove from the oven and immediately press a chilled Hershey’s Kiss into the center of each cookie. Press until the cookie edges crack slightly, but do not push all the way to the bottom.
Chef's Tip: Place your unwrapped Hershey's Kisses in the freezer for 20 minutes before baking. This prevents them from melting into a shapeless blob when they hit the hot cookie.
If you are a fan of the "press and bloom" technique, you might also enjoy making these Safe Chocolate Covered recipe truffles, which use a similar "dip and set" logic for a different texture profile.
Fixing Common Cookie Spreading and Color Issues
Even the most seasoned bakers run into trouble. If your cookies don't look like the photos, it is usually a simple fix related to temperature or ingredient measurement.
Why Your Cookies Spread Too Much
This is almost always a temperature issue. If the butter was too warm or the oven wasn't fully preheated, the fat melts before the flour structure can set.
Solving the "Dull Brown" Color
If your cookies look brown rather than red, you likely used a Dutch processed cocoa powder. Dutch processed cocoa is neutralized and won't react with the coloring the same way. Stick to standard unsweetened cocoa for that bright "Red Velvet" pop.
| Problem | Root Cause | Solution |
|---|---|---|
| Kisses Melted | Cookies too hot/Kisses warm | Freeze Kisses; wait 2 mins before pressing. |
| Dry/Crumbly Texture | Too much flour | Use a scale (190g) instead of measuring cups. |
| No "Crackle" Look | Not enough sugar coating | Double roll the dough balls in sugar for a thicker coat. |
Fixing Flattened Cookies
If your batch is coming out flat, try chilling the rolled dough balls for 15 minutes before they hit the oven. This firms up the butter and ensures the cookie stays tall and proud, providing a better "throne" for your chocolate kiss.
Seasonal Adaptations for Every Occasion
While the classic Red Velvet is a showstopper, you can adapt this Easy Hershey's Red Velvet Blossom Cookie with Chocolate Kisses to suit different themes or dietary needs.
- If you want a Minty Twist: Use peppermint striped Kisses instead of plain chocolate for a festive holiday vibe.
- If you want a Darker Profile: Use dark chocolate cocoa powder and top with a 60% cacao dark chocolate heart.
- If you want a Nutty Crunch: Add 1/4 cup of finely crushed pecans to the dough for an authentic Southern Red Velvet feel.
2 Smart Dietary Alternatives
- dairy-free: Swap the butter for a high-quality plant based stick and use dairy-free chocolate stars or chunks in place of the kisses.
- Reduced Sugar: You can reduce the granulated sugar in the dough by 2 tablespoons without losing structural integrity, though the rolling sugar is essential for the texture.
Preserving Freshness and Zero Waste Tips
These cookies are best when the chocolate has just set but the cookie is still soft. However, they store surprisingly well if handled with care.
- Storage: Keep in an airtight container at room temperature for up to 5 days. Place a piece of parchment paper between layers to prevent the Kisses from scuffing.
- Freezing: You can freeze the unbaked dough balls (without the sugar coating) for up to 3 months. Thaw in the fridge, roll in sugar, and bake as directed.
- Zero Waste: If you have leftover dough, crumble it over vanilla bean ice cream. If you have broken chocolate Kisses, chop them up and fold them into your next batch of brownie batter.
Don't ever throw away the "crumbs" at the bottom of the sugar bowl used for rolling. That cocoa tinted sugar is mouthwatering when sprinkled over morning oatmeal or stirred into a latte.
Plating Levels for Visual Impact
Since we are focusing on the "artful seasonal capture," how you present these cookies matters just as much as how they taste. Here are three ways to level up your presentation.
| Level | Plating Tweak | Visual Vibe |
|---|---|---|
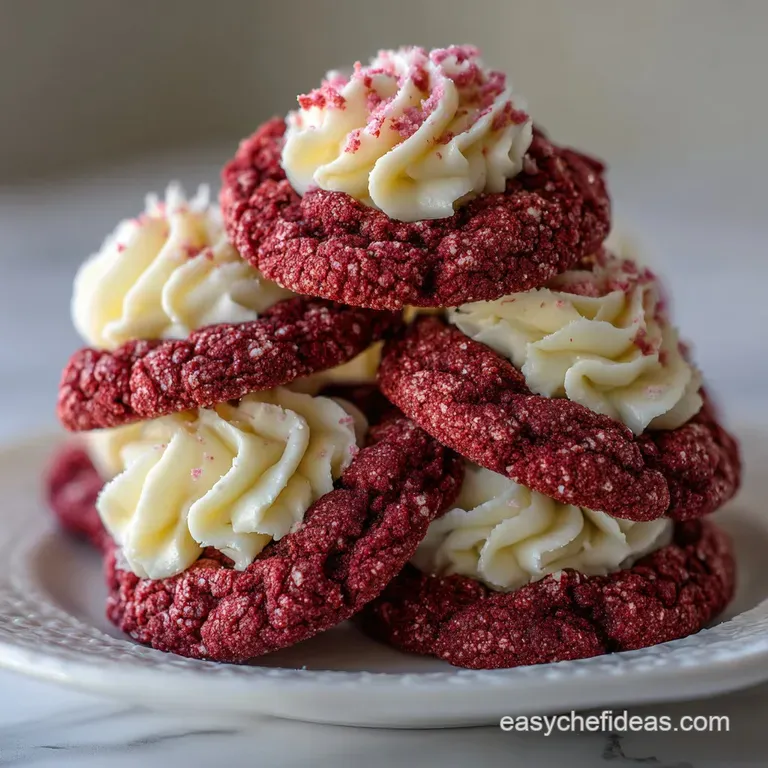
| Simple | Stacked in a glass mason jar with a ribbon. | Rustic, homemade charm. |
| Polished | Arranged in a circular pattern on a white marble slab. | Clean, modern, and professional. |
| Restaurant | Single cookie on a dark plate with a dusting of cocoa powder and a raspberry. | High end, dramatic contrast. |
Simple Presentation
For a casual gathering, simply pile the cookies on a wooden cutting board. The contrast between the natural wood and the bright red cookies creates a warm, inviting atmosphere. This is perfect for a "help yourself" style dessert table.
Polished Presentation
Use a tiered dessert stand. Place the Red Velvet blossoms on the middle tier, perhaps flanked by white powdered sugar cookies on the top tier. The color blocking will draw the eye and make the red pop. Add a few sprigs of fresh mint or holly (non edible, for decoration only) for a seasonal touch.
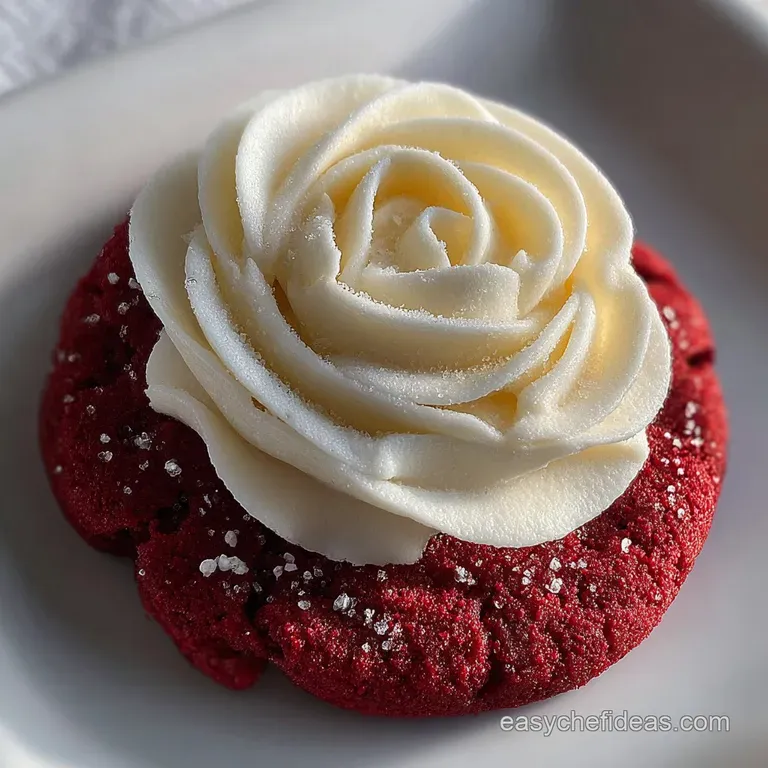
Restaurant Style
Place one cookie in the center of a large, dark toned plate. Use a small sifter to create a "snowfall" of powdered sugar over half the plate. Add three small dots of raspberry coulis nearby to echo the red color of the dough. This turns a simple cookie into a plated dessert that feels truly special.
Culinary Myths Debunked
Many people believe that Red Velvet is just chocolate cake with red dye. This is a misconception. Authentic red velvet has a tangier, more nuanced flavor profile due to the reaction of acidic components, though in cookie form, we emphasize the cocoa and vanilla balance more heavily.
Another myth is that you must use buttermilk in every red velvet recipe. While buttermilk is classic for cakes, in a blossom cookie, it would make the dough too wet to hold its shape. We achieve the same "tender" result through the specific ratio of brown sugar and creamed butter.
Finally, some say you should press the kiss into the cookie while it is still in the oven. Please, don't do this. The direct heat of the oven will melt the kiss instantly, causing it to lose its shape and potentially burn the chocolate. Always add the kiss after the tray is out of the oven.
Perfect Beverage Pairings
The rich cocoa and buttery crumb of these cookies call for a drink that can either cut through the sweetness or complement the chocolate notes.
- Cold Milk: The classic choice. The creaminess of the milk highlights the velvety texture of the cookie.
- Earl Grey Tea: The bergamot notes in the tea provide a sophisticated citrus contrast to the deep cocoa.
- Espresso: A sharp, bitter shot of espresso balances the sugary coating and brings out the darker notes of the chocolate kiss.
- Champagne: If you are serving these at a holiday party, the bubbles and acidity of a Brut Champagne provide a delightful "palate cleanser" between bites of rich chocolate.
By focusing on these small details the temperature of the butter, the chill of the chocolate, and the artistry of the plating you turn a simple baking project into a seasonal masterpiece.
Whether you are gifting these in a tin or serving them on a marble slab, the Easy Hershey's Red Velvet Blossom Cookie with Chocolate Kisses is a recipe that never fails to impress.

Recipe FAQs
What is the ideal butter temperature for these cookies?
Use softened butter, around 65°F (18°C). It should indent when pressed but not be oily. Using melted butter will cause the cookies to spread too much and become flat.
Why are my cookies spreading too much?
This is typically due to butter temperature or oven not being fully preheated. Ensure your butter is softened, not melted, and that your oven has reached the correct temperature before baking.
Can I use Dutch processed cocoa powder instead of unsweetened?
No, stick with standard unsweetened cocoa powder. Dutch processed cocoa is neutralized and will not contribute to the vibrant "Red Velvet" color; it will result in dull brown cookies.
How do I prevent the chocolate kisses from melting into a mess?
Freeze your unwrapped Hershey's Kisses for at least 20 minutes before pressing them into the cookies. This helps them maintain their shape and prevents them from melting completely into the hot cookie.
How long should I bake the cookies?
Bake for exactly 10 minutes at 350°F (175°C). The edges should appear set, but the center must still look slightly underbaked for a soft, chewy texture.
What is the secret to the signature "crackle" look on the cookie surface?
Rolling the dough balls in granulated sugar is key. For an even thicker coat that enhances the crackle effect, you can double roll the dough balls in sugar before baking.
Can I make these cookies dairy-free?
Yes, you can make them dairy-free with a few substitutions. Swap the unsalted butter for high-quality plant based sticks and use dairy-free chocolate stars or chunks in place of the Hershey's Kisses.
Hershey Red Velvet Cookie

Ingredients:
Instructions:
Nutrition Facts:
| Calories | 121 kcal |
|---|---|
| Protein | 1.4 g |
| Fat | 5.4 g |
| Carbs | 17.1 g |
| Fiber | 0.4 g |
| Sugar | 11.8 g |
| Sodium | 62 mg |
