Shell Shockers Authentic Fluffy Conchas Bread with a Perfect Crumbly Topping
- The Allure of Authentic Panadería: Why These Conchas Beat the Bakery Aisle
- Demystifying the Signature Shell: What Makes Conchas Bread So Iconic?
- Assembling Your Baker’s Arsenal: Essential Components for Rich Conchas
- The Secrets to the Perfect Topping: Achieving That Distinctive 'Shell'
- Crafting the Dough: The Art of Kneading Enriched Conchas Bread
- Proofing Perfection: Patience for Maximum Volume and Fluffiness
- Shaping and Topping: Creating the Signature Look Before the Oven
- Troubleshooting Common Conchas Conundrums
- Variations on the Classic: Flavor Twists for Your Sweet Bread
- Storage Strategies: Keeping Your Conchas Fresh for Days
- Recipe FAQs
- 📝 Recipe Card
The Allure of Authentic Panadería: Why These Conchas Beat the Bakery Aisle
There is a unique comfort found in the sweet aroma wafting from a traditional Mexican bakery, or panadería . At the heart of that comforting scent lies the concha , arguably the most beloved of all postres mexicanos .
Translating literally to "shells," these iconic Mexican sweet breads are not just a treat; they are a cultural touchstone, often enjoyed for breakfast or a late afternoon merienda .
While grabbing a store-bought version is convenient, nothing and I mean nothing —compares to the yielding tenderness and perfectly patterned, crumbly sugar topping of a homemade batch.
This Conchas Bread Recipe is designed to bridge the gap between the bakery case and your kitchen, ensuring you achieve that magical balance of soft, enriched dough and a crisp, sweet crust every time. Forget generic sweet bread rolls ; we are aiming for perfection today.
Demystifying the Signature Shell: What Makes Conchas Bread So Iconic?
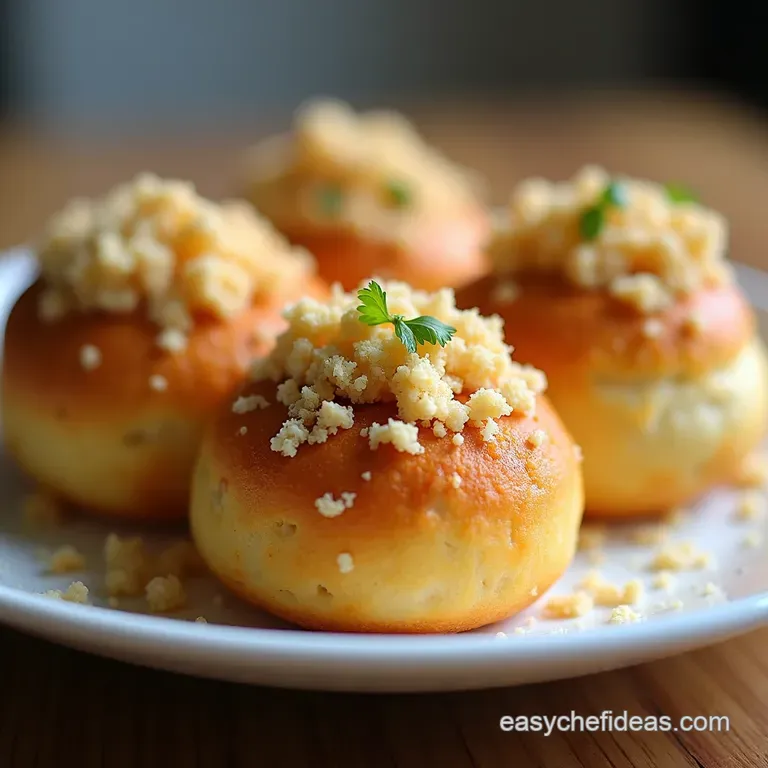
The defining feature of the concha is undeniably its topping. This sugary layer, often vanilla or chocolate flavored, is pressed onto the dough before the final rise, creating deep grooves that bake into a shell like pattern.
The name isn't arbitrary; the visual similarity to a seashell is what gives the Conchas Bread its charm. When you ask someone how to Conchas Pronounce , they often emphasize the soft 'o' sounds: KOHN chas .
Beyond the look, the texture profile is crucial: the bread underneath must be pillowy soft and slightly enriched with eggs and butter, providing a perfect cushion for the contrasting crispness of the shell.
This textural interplay is what elevates these Mexican pastries from simple buns to true culinary delights.
A Beginner's Guide to Mastering Mexican Sweet Rolls
While the concept of an enriched dough might intimidate newer bakers, making these Conchas Recipe in English is highly achievable. The key lies in patience during the kneading and rising phases.
Because the dough contains a higher quantity of fat (butter) and eggs, it takes longer to develop the gluten structure necessary for that classic springy texture. We need to teach the yeast how to work around that richness.
We will be using a stand mixer with a dough hook, which drastically simplifies the rigorous kneading required for this type of dough, making it accessible even if you’ve never tackled an enriched bread before.
The Texture Triumph: Achieving Fluffy Dough and Crumbly Topping
The success of this bake hinges on two distinct textures working in harmony. First, the dough itself requires substantial kneading about 8 to 10 minutes after the butter is incorporated to achieve the 'windowpane' elasticity needed to trap the gases produced by the yeast.
This elasticity guarantees a light, fluffy interior. Second, the topping must be handled with cold ingredients and minimal handling. The topping ingredients flour, sugar, and very cold butter are mixed just until they resemble coarse meal.
Overworking this topping mixture warms the butter, resulting in a flat, greasy layer rather than the desired crisp, crumbly shell.
Beyond Breakfast: When to Serve Your Homemade Conchas
While they are a staple for the morning meal alongside a strong coffee or café de olla, conchas are incredibly versatile. They shine during an afternoon merienda —a light, late afternoon snack often shared among family.
Their mild sweetness also pairs beautifully as an accompaniment to richer, more complex beverages like Mexican hot chocolate or even a smooth, spiced cider. They work equally well as a simple dessert, requiring nothing more than a dusting of powdered sugar to feel truly special.
Assembling Your Baker’s Arsenal: Essential Components for Rich Conchas
To produce 12 beautiful Conchas Bread , we need a focus on quality ingredients that lend themselves to a rich crumb. The foundation of the dough relies on Active Dry Yeast proofed in warm Whole Milk (around 105– 115° F) to ensure lively activation.
For richness, we use Large Eggs and a substantial amount of high-quality Unsalted Butter , cut into cubes, added slowly to the mix. These components enrich the dough, slowing down the fermentation slightly but delivering unparalleled softness.
The Secrets to the Perfect Topping: Achieving That Distinctive 'Shell'
The topping is where most novice bakers stumble, but with precise measurement and temperature control, you’ll master the signature look. For the topping, we keep the texture loose.
We use All-Purpose Flour and Granulated Sugar combined with cold, cubed Unsalted Butter . If you desire the classic dual tone look, you will divide this mixture in half; one half remains white, and the other is enhanced with Cocoa Powder for a chocolate variation, giving you fantastic Conchas Bread Flavors .
Flour, Yeast, and Enrichment: Sourcing Superior Dough Ingredients
When measuring flour for the dough and we need about 4 ½ cups always spoon it lightly into your measuring cup and level it off; scooping directly compresses the flour, leading to a heavy dough.
The richness of the dough comes from the temperature of your additions; ensure your eggs are at room temperature so they integrate smoothly without chilling the dough mixture prematurely, which can hinder the yeast's initial activity.
Measuring Matters: Precision Tips for Sugar and Butter Ratios
Sugar plays two roles here: sweetness and food for the yeast. We incorporate about ½ cup into the dough itself. The butter, amounting to ½ cup (one full stick), must be soft enough to knead in but not melted, lest you break the developing gluten strands.
In the topping, the ratio of flour to butter is paramount it needs enough fat to hold together loosely when chilled but enough flour to remain structurally sound when baked atop the rising bread.
Tool Checklist: Essential Equipment for Shaping and Baking
While a stand mixer makes the arduous kneading process simple, achieving the final look relies on manual dexterity. You will need parchment paper to line your baking sheets, as the buttery dough can stick.
A bench scraper is invaluable for dividing the dough into 12 equal portions (roughly 85 grams each) and for working with the slightly crumbly topping mixture. A rolling pin is necessary to flatten the topping into a thin sheet before cutting out the circles.
Crafting the Dough: The Art of Kneading Enriched Conchas Bread
Begin by activating your yeast in the warm milk and a tablespoon of sugar. Once foamy, combine the remaining dry ingredients in your mixer bowl. Once combined, we knead the dough until smooth.
This is crucial: after the initial 5 minutes of kneading, begin adding the softened butter cubes one at a time, allowing each piece to fully incorporate before adding the next. This slow introduction prevents the dough from seizing up.
The Windowpane Test: Knowing When Your Dough is Ready
The kneading stage is complete only when the dough passes the windowpane test. Pinch off a small piece of dough and gently stretch it between your fingers. If you can stretch it thin enough to see light pass through it without tearing immediately, the gluten network is sufficiently developed.
For this Conchas Bread Recipe , this usually takes 8 to 10 minutes after the butter addition. A strong, elastic dough is your best defense against dense final rolls.
Related Recipes Worth Trying
- Seriously Moist Banana Bread The Foolproof Recipe — Tired of dry loaves This easy Banana Bread Recipe guarantees an incredibly moist crumb bursting with flavour Perfect for those spotty bananas
- My BestEver Banana Bread Recipe The Secret to an Unbelievably Moist Loaf — Forget dry bakes Get the Chefs banana loaf recipe for the most unbelievably moist Banana Bread Uses overripe bananas and brown sugar for the perfect...
- My Secret for the Best Most Moist Banana Bread Brown Butter — Forget boring loaves This is the ultimate Moist Banana Bread Our brown butter secret adds deep caramel flavour Perfect for a proper afternoon tea
Proofing Perfection: Patience for Maximum Volume and Fluffiness
Once kneaded, the dough requires its first proof in a lightly oiled bowl, covered securely, allowing it to double in size, which can take anywhere from 1.5 to 2 hours, depending on the warmth of your kitchen. This first rise builds the majority of the bread's internal structure.
Do not rush this step; sufficient gas development is what ensures your finished Sweet Bread Rolls aren't hockey pucks.
Shaping and Topping: Creating the Signature Look Before the Oven
After the initial rise, gently deflate the dough and divide it into 12 equal pieces. Roll each piece into a taut ball the tighter the ball, the better the oven spring will be. Place these balls on your prepared baking sheets, leaving ample space between them. While they rest briefly, prepare your topping.
Mixing Wet and Dry: Initiating the Flavor Base
For the topping, combine the flour and sugar. If you are aiming for a vanilla shell, add a touch of vanilla extract to the topping mixture if you wish, though often the flavor comes only from the butter. For the chocolate portion, mix the cocoa powder in thoroughly with the dry ingredients until evenly distributed.
Next, "cut in" the cold butter using a pastry blender or your fingertips until the mixture resembles coarse sand with pea-sized crumbles of butter remaining. Chill this until needed.
Scoring the Shell: Technique for the Best Visual Appeal
Take your topping mixture and roll it thinly between two sheets of parchment paper about 1/8 inch thick. Cut out 12 circles slightly wider than your dough balls. Place one topping circle gently over each dough ball, pressing very lightly so it adheres.
Now for the visual magic: using a sharp knife or a bench scraper held at a slight angle, lightly score the topping in a spiral or crosshatch pattern. Be careful not to cut all the way through to the dough beneath, as this scoring helps the topping crack beautifully rather than simply melting flat.
After scoring, cover the shaped rolls for their second, shorter proof (about 45– 60 minutes) until they look noticeably puffy.
Baking Temperatures and Times for a Golden Finish
Preheat your oven to 375° F ( 190° C). Bake these Mexican Sweet Breads for 18 to 22 minutes. You are looking for the bread peeking out from under the topping to achieve a light golden brown hue.
If the topping browns too quickly before the bread is cooked, reduce the oven temperature slightly for the last five minutes.
Troubleshooting Common Conchas Conundrums
The most frequent issue encountered when mastering the Conchas Recipe in English is an overly flat final product. This usually stems from two main culprits: under kneading the dough (weak gluten structure) or over proofing the shaped rolls (the structure collapses in the oven).
If your dough seems sluggish during the first rise, ensure your milk temperature was correct and that your yeast was fresh.
Fixing Flat Dough: Troubleshooting Proofing Issues
If the shaped rolls deflate when you try to score them, they were over proofed. To prevent this, monitor the second proof closely. They should feel light and airy, but still have structure; if they jiggle excessively when you gently tap the tray, pull them out immediately to bake.
From Vanilla to Cinnamon: Exploring Alternative Topping Flavors
While the classic Conchas Bread Flavors lean towards vanilla or chocolate, feel free to experiment with the topping base. Adding a teaspoon of ground cinnamon to the vanilla topping mixture infuses it with warmth.
Another delicious variation involves replacing 1 tablespoon of the sugar with finely grated piloncillo (Mexican brown sugar) for a deeper, molasses like sweetness in the shell.
Variations on the Classic: Flavor Twists for Your Sweet Bread
Beyond topping flavors, you can enrich the dough itself. Adding a teaspoon of orange zest to the dough mixture brightens the whole roll considerably. For a truly authentic taste, substitute some of the granulated sugar in the dough with piloncillo dissolved in the warm milk, giving the crumb a slight caramel undertone that complements the sweetness of the shell beautifully.
Storage Strategies: Keeping Your Conchas Fresh for Days
These Mexican Pastries are best eaten the day they are made, but thanks to the enrichment in the dough, they remain remarkably soft for several days. Store them in an airtight container at room temperature. Avoid refrigerating, as this dries out sweet breads very quickly.
Optimal Freezing Techniques for Long Term Enjoyment
If you’ve baked a large batch and want to save some for later, freezing is ideal. Allow the Conchas Bread to cool completely. Wrap them tightly first in plastic wrap, then in aluminum foil to prevent freezer burn.
When ready to enjoy, unwrap them slightly and reheat them in a warm oven (around 300° F/ 150° C) for about 10 minutes until the topping is crisp and the interior is warm and tender again.
Pairing Suggestions: What Drinks Go Best with Sweet Conchas?
The ideal accompaniment to your homemade Conchas Bread is something robust enough to balance the sweetness. A steaming mug of Mexican hot chocolate, spiced with cinnamon and perhaps a hint of chili, is the ultimate traditional pairing.
Alternatively, a very strong, slightly bitter black coffee cuts through the sugar perfectly, turning your simple snack into a rich, satisfying experience.

Recipe FAQs
What makes the topping on Conchas Bread so crumbly and why does it crack?
The crumbly texture comes entirely from the topping mixture it’s basically a sweet shortcrust or streusel made from cold butter, flour, and sugar, mixed minimally. Crucially, the butter must be cold so it doesn't fully incorporate into the flour mixture, creating those signature pockets of fat.
The pattern cracks during baking as the topping expands faster than the dough beneath it, giving it that classic shell appearance.
My Conchas Bread dough is too sticky to handle after adding the butter; what should I do?
Don't panic, that stickiness is normal for an enriched dough like this! Resist the urge to dump in loads of extra flour, which will result in tough bread. Instead, keep kneading on a low to medium speed, allowing the dough hook to work the fat in properly; it will eventually come together.
If you must add flour, do it one tablespoon at a time, waiting a minute between additions to let the mixer work its magic.
How long will these Conchas Bread rolls stay fresh, and what's the best way to store them?
These are best eaten within 2-3 days, as they are meant to be wonderfully soft. Store them loosely covered at room temperature never in the fridge, as that dries them out faster than you can say 'bolillo'!
If you have a surplus, they freeze beautifully once fully cooled; wrap them tightly in plastic wrap and foil, and they’ll keep for a couple of months.
Can I make these without a stand mixer, or is that essential for the perfect texture?
While a stand mixer is highly recommended for incorporating that large amount of softened butter, it's not strictly impossible to do by hand. You’ll need to use the windowpane method for kneading, which will take significantly longer and require a strong arm!
If mixing by hand, make sure your dough is slightly firmer before the butter goes in to avoid a truly wrist breaking session.
I want to try a different flavour what's a good variation besides the standard vanilla topping?
The classic chocolate topping is always a winner just swap a couple of tablespoons of flour in the topping mix for good quality cocoa powder! If you fancy something brighter, try grating a bit of orange or lemon zest into the topping mixture, which gives the sweet crust a lovely citrus lift.
It’s a real change-up from the usual, but pairs wonderfully with coffee.
Fluffy Conchas Bread Recipe
Instructions:
Nutrition Facts:
| Calories | 360 Cal |
|---|---|
| Fat | 14g |
| Fiber | 1.5g |
