The Quintessential Crumblytop Apple Pie a Proper British Classic
- Why This Apple Pie Recipe Conquers All Others
- Setting the Stage: Achieving Pastry Perfection
- Assembling the Components for Supreme Flavor
- Selecting the Superior Fruit for Your Filling
- Method Mastery: Building the Ultimate Apple Pie
- The Critical Assembly Phase
- Troubleshooting and Next-Level Variations
- Serving Suggestions and Shelf Life
- Recipe FAQs
- 📝 Recipe Card
Why This Apple Pie Recipe Conquers All Others
There are countless versions of this beloved dessert floating around, but achieving that elusive trifecta a shatteringly flaky pastry apple pie , a filling that sings with balanced spice, and a bottom crust miraculously free of sogginess is a true culinary victory.
This Apple Pie Recipe Homemade isn't just about following steps; it’s about mastering technique to capture the essence of comfort. We are aiming for Grandmas Apple Pie perfection here, a deep dish spectacle built on a foundation of rich, all-butter pastry.
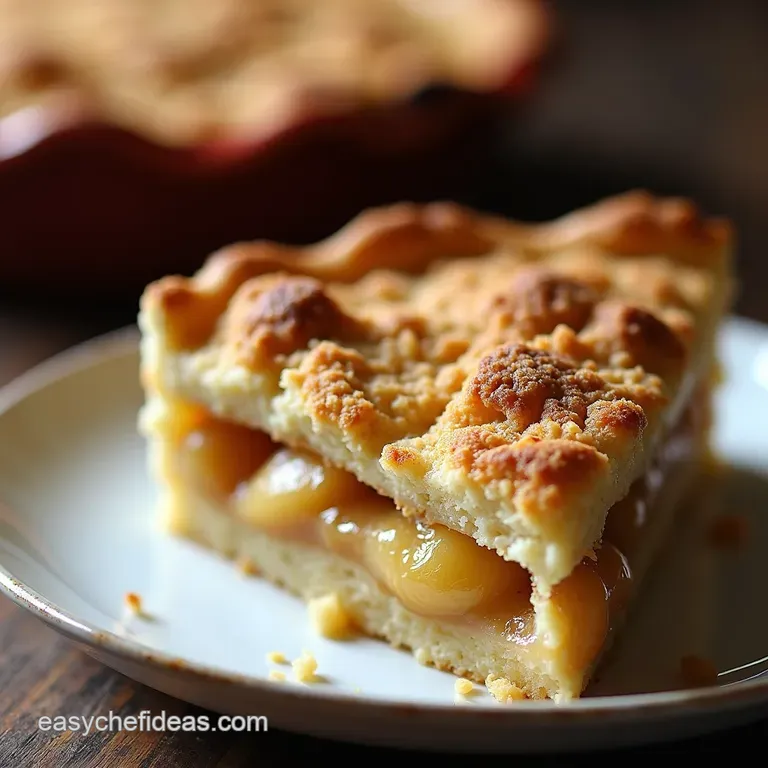
This recipe delivers the ultimate comfort food experience: a double crust masterpiece featuring apples that are tender but retain their shape, encased in a crust that breaks beautifully upon cutting.
Forget store-bought shortcuts; the journey to this stellar dessert is worth every moment, yielding a result far superior to anything pre-made.
Setting the Stage: Achieving Pastry Perfection
The soul of any exceptional pie lies in its casing. For this Best Apple Pie Recipe , we insist on an all-butter crust. Butter provides unparalleled flavour and, critically, creates those steam pockets during baking that result in that sought after flaky texture.
Working quickly and ensuring everything stays profoundly cold are the non-negotiables that separate merely adequate pastry from truly superior results.
The Secret to Non-Soggy Bottoms: A Baker's Promise
The bane of every pie maker’s existence is the limp, undercooked base. To combat this, we employ a few strategic moves. First, using flour or cornflour in the Apple Pie Filling Recipe helps absorb excess moisture released by the apples during cooking.
Second, and perhaps most crucial, is ensuring the base crust meets intense, direct heat right away. We will place the assembled pie onto a pre-heated baking sheet, guaranteeing a firm set on the underside before the liquid starts working its magic too far down the dough.
Defining the Ideal Apple Pie Experience
When we talk about the ideal Apple Pie , we are discussing texture and flavour harmony. The apples should yield easily under the fork but should not collapse into mush. Our filling blends tartness (essential for cutting through the richness of the pastry) with deep, warm sweetness.
This structure means that when you slice into the finished product, you get defined layers of golden pastry embracing a thick, fragrant mound of fruit. This step-by-step Apple Pie Recipe is designed specifically to maintain that structure.
Essential Gear for Your Baking Adventure
While you can certainly achieve greatness with just your hands and a bowl, a few tools make the process smoother. You’ll need a deep dish 9 inch (23cm) pie plate ceramic or glass works wonderfully as they conduct heat evenly. A reliable rolling pin is mandatory for achieving that thin, even base.
For the pastry, a food processor can be a time saver, but remember, speed is key; if using one, pulse only until coarse crumbs form. Finally, a sharp paring knife is essential for coring and slicing your fruit precisely.
Assembling the Components for Supreme Flavor
To construct this masterpiece, we need two distinct preparations: the sturdy, cool structure of the pastry, and the aromatic, spiced interior. Getting the ratios right in both sections is what distinguishes an Easy Apple Pie Recipe from one that merits applause.
Selecting the Superior Fruit for Your Filling

The quality of your apples dictates the character of the final bake. A mix often yields the best result, balancing softness with structure.
The All-Butter Pastry Component List
For the dough, we rely on 350g of plain flour, balanced perfectly with 225g of very cold, cubed unsalted butter that’s a high ratio of fat to flour, which guarantees flakiness.
We introduce just a touch of sweetness 1 tablespoon of granulated sugar along with 1 teaspoon of fine sea salt for flavour depth. The binding agent must be ice-cold water, added gradually, as it’s the chilling of this water that creates the layers during baking.
Spice Ratios: Crafting the Aromatic Core
The heart of our Apple Pie Spice Filling relies on classic warmth. We use 1 ½ teaspoons of ground cinnamon and ½ teaspoon of ground nutmeg. This blend is robust without overpowering the fruit.
To brighten the overall flavour profile and prevent the final product from tasting flat, a full tablespoon of freshly squeezed lemon juice is incorporated into the fruit mixture.
Choosing Apples: Tart vs. Sweet Balance
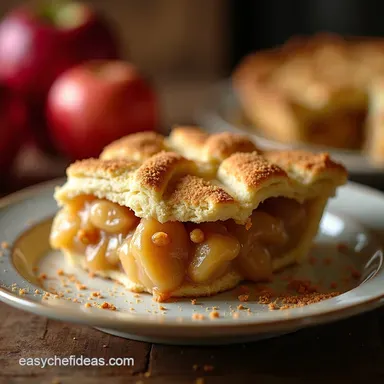
For the filling, we require approximately 1.4 kg of fruit, which translates to about 6 to 8 medium apples. The best choices are those that hold their shape well. Sharp, cooking apples like Bramley or Granny Smith provide the necessary acidic counterpoint.
If you prefer a milder flavour, a combination of one tart apple and one slightly sweeter variety, like Braeburn, works brilliantly. Ensure they are sliced thickly about ¼ inch (6mm) to prevent them from dissolving during the long bake time.
Related Recipes Worth Trying
- Foolproof NoRoll Pie Crust Recipe PressIn Pastry — Ditch the rolling pin This easy NoRoll Pie Crust uses a pressin method for a perfectly tender flaky base for quiches or desserts Get the recipe
- Foolproof Flaky Pie Dough Recipe Butter Pastry From Scratch — Master homemade pie dough with this classic Pâte Brisée that guarantees shatteringly crisp pastry Learn how to make pie dough simple even with butter
- The Best AllButter Foolproof Flaky Pie Dough Recipe — Master the art of homemade pie crust with this allbutter recipe Achieve perfectly flaky layers for any sweet or savoury filling Get the technique tips now
Method Mastery: Building the Ultimate Apple Pie
This is where precision meets patience. We must execute the pastry making flawlessly before moving on to the delicate act of assembly.
The Critical Assembly Phase
Preparing the Flaky Dough Foundation
First, pulse the flour, sugar, and salt together. Next, introduce the cold butter cubes. Work quickly, using fingertips or a processor, until the mixture resembles coarse breadcrumbs peppered with pea-sized chunks of butter. These larger pieces are the key to flakiness.
Slowly stream in the ice water perhaps 100-120ml total mixing just until the dough reluctantly comes together. Divide this into two discs, one slightly larger for the base, wrap them tightly, and mandate a minimum one-hour chill in the refrigerator.
This resting period allows the gluten to relax, preventing a tough crust later.
Simmering Down the Apple Filling
While the dough chills, prepare your filling. In a large bowl, combine the thickly sliced apples with 150g of packed light brown sugar and 50g of granulated sugar. Whisk your thickener 3 tablespoons of flour or cornflour with the cinnamon and nutmeg, then toss this spice blend thoroughly with the apples until every slice is coated.
Don't forget the lemon juice!
Layering and Sealing Your Masterpiece
Retrieve the larger dough disc and roll it out to a 12 inch circle on a lightly floured surface. Carefully drape this into your pie dish, trimming the edges but leaving a generous 1 inch overhang. Spoon the apple mixture into this base, mounding it slightly in the centre.
Dot the top surface of the apples with the final tablespoon of cubed butter; this enriches the juices as they bubble. Roll out the second dough disc this can be a solid top or cut into strips for a traditional lattice weave. Crimp the top and bottom edges together with satisfying pressure to seal completely.
If using a solid top, create 4 5 strategic steam vents; if you skip this, the internal pressure can cause catastrophic pastry failure. Finally, brush the entire surface with an egg wash made from one beaten egg mixed with a splash of milk, and sprinkle liberally with coarse turbinado sugar for that signature sparkle and crunch.
Baking Temperatures for Golden Glory
To achieve that perfectly cooked bottom, we start hot. Preheat your oven to 400° F ( 200° C). Place the assembled pie onto a preheated baking sheet placed on the lower middle rack. Bake at this high temperature for the first 20 minutes.
This heat blast helps set the bottom crust immediately. Then, reduce the temperature significantly to 375° F ( 190° C) and continue baking for another 45 to 55 minutes.
The pie is done when the juices are thick and visibly bubbling vigorously through the vents, and the crust is a deep, burnished gold.
Troubleshooting and Next Level Variations
Even expert bakers face challenges, but knowing how to pivot ensures your dessert survives the oven.
Preventative Measures Against Common Pie Pitfalls
If you notice the crust edges browning too quickly during the long bake, the easiest fix is to fashion a ring of aluminium foil and gently place it over the perimeter of the pie to shield it, allowing the centre to finish cooking.
If your filling seems to have separated from the top crust (creating a large air gap), it generally means the apples released more liquid than anticipated. Next time, consider slightly pre-cooking the filling as mentioned previously to reduce volume before baking.
Elevating Your Classic Apple Pie with Glazes
While our basic egg wash provides shine, you can add a further dimension. For a deeper, mahogany glaze, consider mixing the egg wash with a teaspoon of molasses or maple syrup. Alternatively, once the pie is removed from the oven and is still piping hot, you can gently brush the top with a simple glaze made from melted butter mixed with brown sugar; this melts slightly into the warm crust, adding shine and richness.
Storage Guidelines: Keeping Freshness Intact
Once cooled and remember, cooling for at least three hours is vital for the filling to set properly this Apple Pie can be stored quite well. Keep it loosely covered at cool room temperature for up to two days.
If you need longer storage (up to four days), refrigerate it, but always allow it to come back to room temperature or warm gently before serving to restore that beautiful pastry texture.
Nutritional Snapshot of Your Homemade Dessert
Be aware that this rich dessert, built on high volumes of butter and sugar, is an indulgence. Expect approximately 450 500 calories per generous slice, with a substantial amount of fat derived from the delicious all-butter crust. It is best enjoyed in moderation, perhaps with a lighter main course!
Serving Suggestions and Shelf Life
No masterpiece is complete without the perfect accompaniment. A slice of this deeply satisfying dessert benefits immensely from a partner that complements its warmth.
The absolute gold standard pairing is, without question, a proper, thick, homemade vanilla custard, poured generously over a slice that has been gently warmed. For a different kind of richness, serve it alongside a heavy dollop of clotted cream the texture contrast is divine.
If you prefer a beverage pairing, a strong, hot cup of black tea or a glass of medium dry hard cider cuts through the sweetness beautifully, completing the quintessentially comforting experience that only a genuine, homemade Apple Pie can provide.

Recipe FAQs
Crumble Apple crisp Apple cake Pumpkin pie
For that quintessential flaky pastry, ensure your butter and water are ice cold and handle the dough as little as possible to prevent gluten development. If you find yourself short on time, using a high-quality, all-butter store-bought pastry is a perfectly acceptable shortcut for the base, focusing your fresh effort on the spiced apple filling.
Leftovers keep beautifully covered in the refrigerator for up to three days, though reheating gently in a moderate oven restores the pastry's crispness best.
Simple apple pie recipe
For the flakiest crust on this quintessential Apple Pie, ensure your butter and water are ice cold when making the pastry; this prevents gluten overdevelopment. When assembling, slice your apples about a quarter inch thick to ensure they soften beautifully without turning to mush during the 65-75 minute bake time.
Store cooled leftovers tightly wrapped at room temperature for up to two days, or refrigerate for up to four.
Traditional apple pie recipe
For that perfectly flaky crust, ensure your butter and water are ice cold when mixing the pastry; overworking the dough is the enemy of tenderness. Use a mixture of tart and sweet apples for the best flavor depth in your filling.
Once baked, allow your finished pie to cool for at least three hours before slicing to let the juices fully set.
Apple pie crust recipe
For that perfect flaky crust, ensure your butter and water are ice cold and handle the pastry as little as possible to avoid melting the fat. If you find your bottom crust seems underdone after baking, place the pie on a lower rack for the last 15 minutes of cooking time.
Store the finished pie, well covered, at cool room temperature for up to two days or chilled for up to four.
Apple pie near me
For a truly quintessential Apple Pie, ensure your butter is ice cold when making the pastry to guarantee that beautiful, flaky crust. When selecting apples, a mix of tart varieties like Granny Smith with a sweeter one provides the best depth of flavour for the filling.
Store any leftover pie, tightly covered, at cool room temperature for up to two days or chilled for up to four days.
Best apple pie recipe
For that truly quintessential Apple Pie, ensure your butter for the pastry is kept impeccably cold and work it minimally to achieve the perfect flaky texture. When cooking the filling, using a mix of tart and slightly sweeter apples, like Granny Smith and Honeycrisp, offers the best flavour balance, and remember to let the finished pie cool completely before slicing to set the juices.
This magnificent pie will keep well under a cake dome at cool room temperature for up to two days, or refrigerated for four.
Flaky Apple Pie Recipe
Ingredients:
Instructions:
Nutrition Facts:
| Calories | 968 kcal |
|---|---|
| Protein | 5.6 g |
| Fat | 5.8 g |
| Carbs | 89.4 g |
| Fiber | 9.2 g |
| Sodium | 5071 mg |
