The Bank Holiday Bake Effortless Cherry Cobbler with a Creamy Biscuit Topping
- The Charm of Rustic Baking: Why This Easy Cherry Cobbler Reigns Supreme
- A Sweet-Tart Delight Without the Fuss: Setting Expectations
- Gathering Your Cherry Cobbler Components: The Essential List
- Step-by-Step Mastery: Crafting Your Effortless Cherry Cobbler
- Elevating Your Easy Cherry Cobbler Experience
- Storage Secrets and Serving Suggestions Beyond the Basics
- Recipe FAQs
- 📝 Recipe Card
The Charm of Rustic Baking: Why This Easy Cherry Cobbler Reigns Supreme
There is something inherently comforting about rustic baking, the kind of dessert that doesn't require rolling pins, perfect latticework, or an intimidating level of precision. This Easy Cherry Cobbler embodies that philosophy perfectly.
It’s a celebration of simple ingredients transformed into a warm, bubbling delight, ideal for ending any meal on a high note. Forget the fuss of traditional pastry; this recipe delivers deep, sweet tart cherry flavour enveloped by a tender, slightly sweet biscuit topping.
If you’re looking for a genuinely satisfying dessert that tastes like it took hours but actually took less than an hour of active time, you’ve landed in the right place.
This approach moves us swiftly toward that quintessential homemade taste we all crave, making it an instant favourite for any baker, whether you’re a seasoned professional or tackling your very first fruit dessert.
A Sweet Tart Delight Without the Fuss: Setting Expectations
When we talk about this Easy Cherry Cobbler Recipe , we are talking about true indulgence made simple. We are aiming for a dessert where the fruit filling is thick, luscious, and perfectly balanced between sweetness and the natural tang of the cherries.
The time commitment is pleasingly short just about 20 minutes of preparation will have this beauty ready for the oven. The final result is a heartwarming dessert, sometimes referred to as a Southern Cherry Cobbler Recipe variant due to its hearty topping, that satisfies deeply without draining your afternoon.
Forgiving Failsafe: Perfect for Beginner Bakers
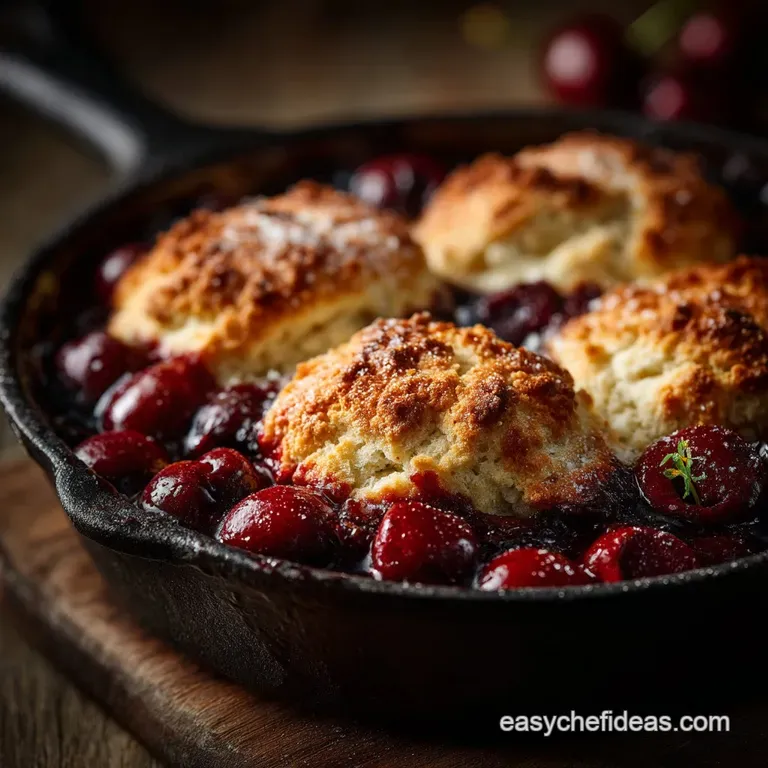
This cobbler truly lives up to its easy billing. The beauty lies in the preparation of the topping: we are not rolling out dough or worrying about temperature control for flaky layers. Instead, we create a quick, shaggy dough that is simply dropped onto the fruit.
This randomness is actually intentional, leading to those delightfully uneven golden mounds interspersed with bursts of hot, saucy fruit underneath. This forgiving nature makes it an excellent choice for anyone new to baking or for those days when time is of the essence but the craving for homemade dessert is strong.
The Creamy Biscuit Topping Secret Unveiled
The key differentiator in this particular Easy Cherry Cobbler with Cake Mix -adjacent simplicity (though we use flour here for better texture) is the topping’s structure. We create a very basic biscuit dough, relying on cold butter cut into flour and leavened with baking powder.
When this mixture hits the heat, the trapped butter melts, creating steam that lifts the dough into light, fluffy pockets. Using whole milk or buttermilk ensures a rich mouthfeel, resulting in a topping that is slightly crisp on top and wonderfully soft underneath, steaming beautifully over the hot fruit.
Why We Choose This Over Traditional Pie Crust
Traditional pie crust requires careful chilling, precise rolling, and often blind baking steps that slow down the process considerably. By opting for a drop biscuit style, we bypass all that potential frustration. This topping achieves that desired rustic look instantly.
On top of that,, because the topping is lighter and more scone like than a dense pastry, it complements the rich, saucy filling perfectly, preventing the final dessert from feeling too heavy. It’s an efficient trade off that prioritizes speed and delightful texture.
Gathering Your Cherry Cobbler Components: The Essential List
To ensure a seamless assembly, it is wise to organize your components before starting. Whether you plan to use the Cherry Cobbler with Canned Cherries shortcut or prefer the vibrant flavour of fresh fruit, having your measurements ready is crucial.
We are preparing a standard 9 inch pie dish serving about 6 to 8 people, a generous size for sharing.
Selecting the Best Cherries (Fresh vs. Frozen)
For the absolute best flavour in this Cherry Cobbler Fresh Cherries are wonderful, provided they are pitted and in season. However, this recipe is explicitly designed to accommodate convenience.
If fresh isn't available, this recipe works beautifully as a Cherry Cobbler with Frozen Cherries option; simply toss the frozen fruit directly into the mixing bowl without thawing them first.
For those seeking maximum speed, you can certainly use Easy Cherry Cobbler with Cherry Pie Filling , but if you do, remember to significantly reduce the added sugar, as the canned filling is usually quite sweet already.
Mastering the Biscuit Topping Dough Mix
The topping requires the best of your dry ingredients: 1 ¾ cups of all-purpose flour, 1 tablespoon of baking powder for lift, ¼ cup of sugar for subtle sweetness, and ½ teaspoon of salt to balance the fruit. The crucial element here is the fat: ½ cup of very cold, cubed unsalted butter.
Keeping that butter cold is non-negotiable for the best texture. The liquid binder is ¾ cup of whole milk, though buttermilk adds a wonderful subtle tang that really enhances the cherry flavour.
Essential Kitchen Tools for Rapid Assembly
Thankfully, you don't need specialty equipment for this Simple Cherry Cobbler . The primary tools include a large mixing bowl for the fruit, a medium bowl for the topping dry ingredients, a pastry blender (or two knives) for incorporating the butter, and your trusty 9 inch pie dish.
A rubber spatula helps ensure everything is scraped out efficiently, minimizing cleanup.
Related Recipes Worth Trying
- SunDrenched Peach Cherry Cobbler with Buttermilk Biscuit Topping — Forget the crumble This Easy Peach and Cherry Cobbler features a tender juicy filling under a golden buttermilk biscuit Its proper comfort foodfind out how...
- The Best OldFashioned Cherry Crumble Pie Recipe — Forget fussy lattices This OldFashioned Cherry Dish features a flaky crust and a crisp oat topping Taste pure nostalgia today
- Easy Homemade Kesar Peda Recipe Ready in 30 Mins — Make the most luxurious meltinyourmouth Kesar Peda using milk powderno endless simmering required This easy Indian dessert tastes just like the classic...
step-by-step Mastery: Crafting Your Effortless Cherry Cobbler
The process moves quickly from sweet filling to fluffy topping, all wrapped up in about 20 minutes of active work before it heads into the oven.
Preparing the Lush Cherry Filling Base
Begin by setting your oven to 400° F ( 200° C) and lightly greasing your baking dish. In the largest bowl, combine the 4 cups of cherries (pitted, regardless of whether they were fresh or frozen).
Next, introduce the thickener and flavour agents: ¾ cup of granulated sugar, 3 tablespoons of cornstarch, 1 tablespoon of fresh lemon juice to brighten the flavour, a careful ½ teaspoon of almond extract (if using it pairs magically with cherry), and just a whisper of ¼ teaspoon of ground cinnamon.
Gently fold these ingredients together until the cornstarch is evenly distributed and clings to the fruit. Pour this mixture evenly into your prepared dish.
Dropping the Dough: Techniques for a Rustic Top
Move to your dry ingredients for the topping. Whisk the flour, baking powder, ¼ cup of sugar, and salt together in the medium bowl. Now, integrate the cold butter cubes. Work quickly, using the pastry blender or your fingertips to cut the butter into the flour until the mix resembles coarse crumbs, ensuring some pieces remain pea-sized these pockets are what create the fluffy texture.
Next, pour in the ¾ cup of milk and stir just until a shaggy dough forms. Overmixing develops gluten and results in tough biscuits, which we want to avoid. Using two spoons, dollop spoonfuls of this dough randomly over the cherry filling.
Don't worry about perfect coverage; gaps are essential for seeing that glorious bubbling fruit beneath. Finally, brush the tops of these mounds with a quick egg wash (1 egg beaten with 1 teaspoon of water) for that desirable golden sheen.
Baking Times and Temperature Checks for Success
Place the assembled cobbler on the lower middle rack of your preheated 400° F ( 200° C) oven. Bake for 35 to 40 minutes.
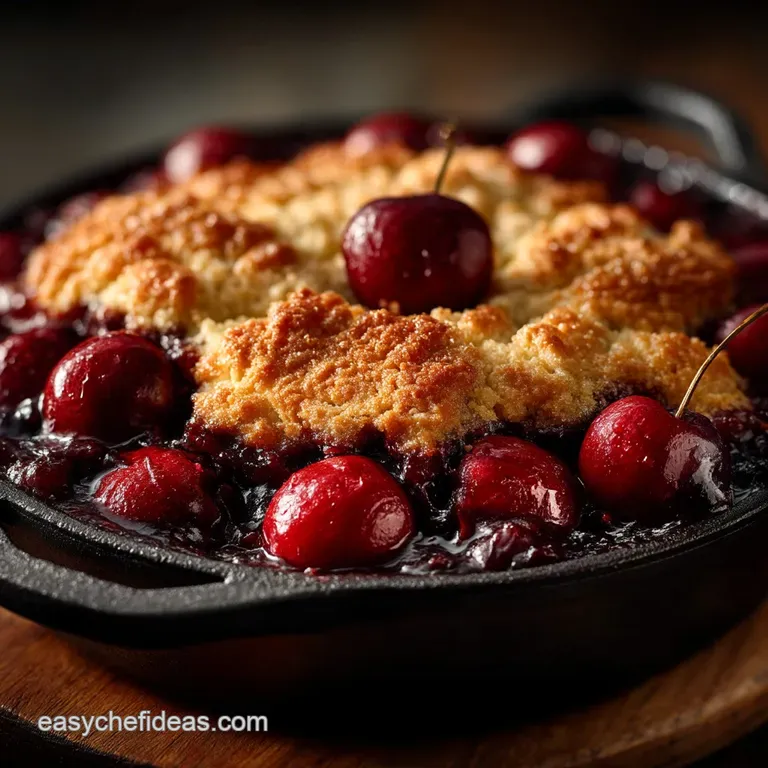
You’ll know it is finished when the biscuit topping is a rich, deep golden brown, and critically, the cherry filling is vigorously bubbling all the way around the edges of the dish. This bubbling indicates that the cornstarch has fully activated and thickened the sauce.
Elevating Your Easy Cherry Cobbler Experience
While this Easy Cherry Cobbler with Cake Mix -like simplicity stands perfectly on its own, a few minor additions can truly elevate it from great to unforgettable. Consider this a foundation upon which you can build bolder flavour profiles.
If you love a bit more depth, think about incorporating warming spices that naturally pair well with cherry and almond.
Storage Secrets and Serving Suggestions Beyond the Basics
Serving this warm, shortly after it has rested for 15– 20 minutes, is non-negotiable for the best experience. Resting allows the filling to set up slightly so it holds its shape better when scooped.
Flavour Twists: Adding Spices and Zests
If you found the basic cinnamon too mild, consider swapping it out entirely. A ¼ teaspoon of ground cardamom brings an almost floral complexity that complements the tartness beautifully.
Another popular addition is to add a teaspoon of fresh orange zest into the cherry filling the citrus brightness cuts through the sweetness and richness of the biscuit topping, adding a lovely zing.
If you’re feeling adventurous, some bakers even fold in ½ cup of toasted, slivered almonds directly into the fruit mixture for added crunch, making it feel more akin to a substantial baked fruit crumble.
Calculating the Nutritional Snapshot (Approximate Values)
For those tracking intake, estimating based on 8 generous servings, this dessert hovers around 380 to 420 calories per slice. The majority of the fat content comes from the butter in the rich topping, balanced by the natural sugars and fiber from the fruit.
Please remember this is an estimate; the final count depends heavily on the type of sugar and milk used.
Keeping Leftovers Fresh: The Next Day Cobbler Test
Cobbler keeps surprisingly well. Once completely cooled, cover the dish tightly with plastic wrap or transfer leftovers to an airtight container. It will remain fresh at room temperature for about a day, but refrigeration is best for longer storage, up to three days.
To revive that wonderful texture, reheat individual servings briefly in a microwave or, even better, in a toaster oven this crisps the topping back up beautifully.
Troubleshooting Common Cobbler Concerns
The most common issue is a runny filling. If your filling is thin after baking, it usually means the cornstarch wasn't completely incorporated or the oven temperature wasn't high enough to activate it fully. Always stir the filling ingredients thoroughly before baking.
If your topping browns too fast, shield the edges of the dish loosely with foil halfway through the baking process. If the dough seems tough, you likely overworked it when mixing in the milk; remember, shaggy and barely combined is the goal for a tender biscuit.

Recipe FAQs
Can I use other fruits instead of cherries in this Easy Cherry Cobbler recipe?
Absolutely! This recipe is very flexible, which is half the fun. Feel free to swap the cherries for blueberries, blackberries, or even sliced peaches; just make sure to toss them with the sugar and cornstarch mixture as directed.
My biscuit topping always comes out too dense. What's the secret to fluffy topping?
The trick is handling the dough as little as possible think of it like making scones!
Make sure your butter is absolutely freezing cold and work quickly when cutting it into the flour; overworking develops the gluten, making the topping tough rather than light and crumbly.
I only have fresh cherries, but they are a bit tart. Do I need to pit and pit them first?
Yes, you must always pit cherries before baking them into a cobbler, unless you want an unpleasant surprise! For tart cherries, you might want to increase the granulated sugar in the filling by one or two tablespoons to balance the acidity, as the recipe suggests adjusting to taste.
How should I store leftovers of this delicious cobbler? Will it keep until the next day?
Yes, leftovers are brilliant for breakfast the next day, honestly! Store the cobbler tightly covered at room temperature for up to two days, or pop it in the fridge for up to four days.
When reheating, give it a good 10 minutes in a moderate oven (350°F/175°C) to crisp the topping back up again.
Can I make the filling ahead of time to save time on baking day?
You certainly can prepare the fruit filling the day before; just keep it covered in the fridge.
However, keep the biscuit topping dough separate and make it fresh just before baking, as the leavening agents start to lose their kick if left sitting too long in the milk.
Effortless Cherry Cobbler Bake
Ingredients:
Instructions:
Nutrition Facts:
| Calories | 449 kcal |
|---|---|
| Protein | 5.1 g |
| Fat | 14.8 g |
| Carbs | 90.7 g |
| Fiber | 10.3 g |
| Sodium | 139 mg |
