Oreo Fudge: Silky and Crunchy
- Time: Active 15 minutes, Passive 3 hours, Total 3 hours 20 mins
- Flavor/Texture Hook: Velvety white chocolate base with a crunchy cookie shatter
- Perfect for: Holiday gifting, bake sales, or a quick weekend project
- Mastering a Creamy Oreo Fudge Recipe
- Why This Technique Works
- Essential Recipe Specifications
- Ingredients and Smart Substitutions
- Necessary Kitchen Equipment
- Detailed Preparation Steps
- Troubleshooting and Easy Fixes
- Creative Flavor Variations
- Scaling and Batch Adjustments
- Myths About Homemade Fudge
- Storage and Keeping Fresh
- Serving and Enjoying Tips
- Recipe FAQs
- 📝 Recipe Card
Mastering a Creamy Oreo Fudge Recipe
Forget everything you know about candy making. You've probably heard that fudge is a temperamental beast that requires a chemistry degree and a digital thermometer. Honestly, that's just not true with this specific method.
I remember the first time I tried making a traditional fudge; I was hovering over a bubbling pot of sugar, terrified it would grain up the second I looked away. It was stressful, messy, and frankly, not worth the headache.
Then I discovered this shortcut. The magic happens because we aren't actually "making" candy in the traditional sense of crystalline structures. We are creating a stable emulsion. The smell that fills your kitchen when that vanilla hits the warm milk is genuinely intoxicating, and watching the white chocolate chips lose their shape into a glossy, pearlescent pool is one of the most satisfying things you'll see all week.
It’s thick, it’s rich, and it has that unmistakable cookie and cream profile that everyone fights over at parties.
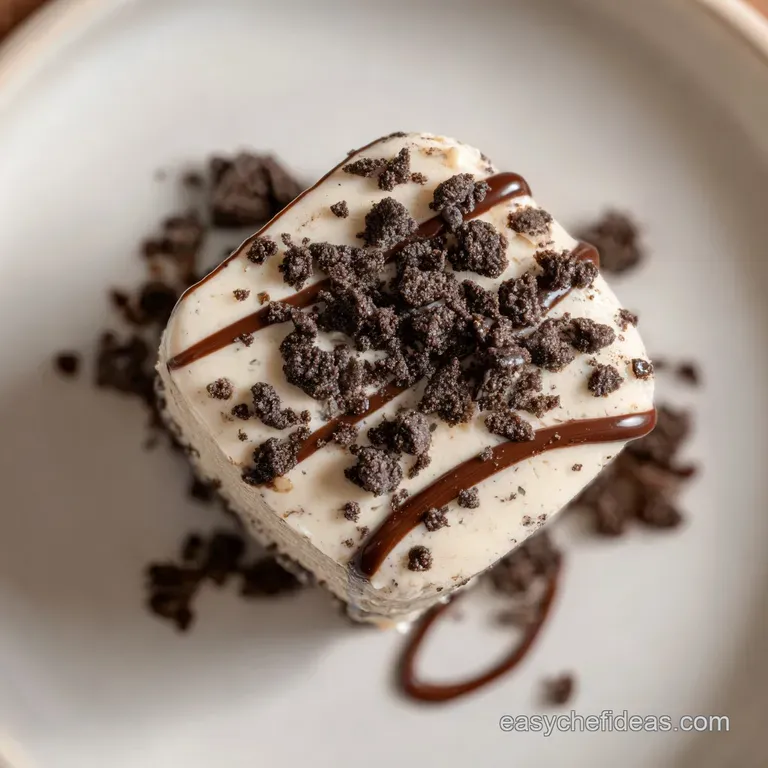
We are going for a specific visual balance here too. I love seeing the contrast between the stark, pearl white fudge and the deep obsidian chunks of cookie. It shouldn't just be a grey blob. We want distinct layers of color and texture that make people stop and stare before they take a bite.
This is about as foolproof as dessert gets, but it tastes like you spent hours weighing sugar and monitoring temperatures.
Why This Technique Works
- Fat Stabilization: The sweetened condensed milk acts as a heavy duty stabilizer, providing enough liquid to keep the white chocolate from seizing while contributing a massive hit of dairy fat for that velvety mouthfeel.
- Residual Heat Control: By removing the pan from the flame before adding the chocolate, we ensure the cocoa butter melts gently without breaking or becoming oily, which is the main cause of "sweaty" fudge.
- Cookie Suspension: Roughly chopping the cookies creates different sized "islands" of starch that prevent the fudge from feeling too cloying or one dimensional in its sweetness.
- Salt Calibration: Adding kosher salt directly to the milk before the chocolate goes in ensures it dissolves completely, cutting through the sugar and making the vanilla notes pop.
| Method | Total Time | Texture | Best For |
|---|---|---|---|
| Stovetop | 5 minutes | Ultra smooth and glossy | Professional presentation and gifting |
| Oven (Gentle Melt) | 12 minutes | Denser and slightly toasted | A deeper, caramelized white chocolate flavor |
| Microwave | 3 minutes | Quick and convenient | Last minute cravings or kids' projects |
Using the stovetop method gives you much more control over the emulsion process compared to the microwave. When you work over a low flame, you can actually see the moment the milk and chocolate become one, ensuring a silky finish that doesn't feel grainy on the tongue. If you're curious about other ways to use chocolate as a base, you might find this 10 minute dark chocolate sauce useful for your next ice cream night.
Essential Recipe Specifications
When you are planning your prep, keep these numbers in mind. This isn't a recipe where you want to wing the ratios. White chocolate is significantly more delicate than dark chocolate because it contains more cocoa butter and milk solids, so keeping the balance of 18 oz of chocolate to 14 oz of condensed milk is the "golden ratio" for a firm set that still yields to the tooth.
| Component | Science Role | Pro Secret |
|---|---|---|
| White Chocolate | Structural backbone | Use baking bars for a cleaner, snappier set than standard chips |
| Condensed Milk | Moisture and sweetness | Never use evaporated milk; the sugar content here is vital for the set |
| Kosher Salt | Flavor balancer | Stir it into the milk early to avoid salt "hot spots" in the final fudge |
I’ve found that the brand of white chocolate actually matters quite a bit here. If you use something like Ghirardelli or a high-quality baking bar, you'll notice the fudge has a much more ivory, natural look. Cheaper chips often contain stabilizers that can make the fudge feel a bit waxy.
It’s worth the extra couple of dollars for the texture alone.
Ingredients and Smart Substitutions
- White Chocolate Chips (18 oz): These provide the structure. Why this? High cocoa butter content ensures the fudge sets firm at room temperature.
- Sub: 18 oz chopped white chocolate baking bars. Same fat content, often melts smoother.
- Sweetened Condensed Milk (14 oz): The glue that holds it all together. Why this? The reduced water content prevents the chocolate from seizing.
- Sub: Coconut based condensed milk for a dairy-free alternative (though it adds a nutty note).
- Kosher Salt (0.5 tsp): To balance the sugar. Why this? Coarse grains dissolve evenly without being harsh.
- Sub: 0.25 tsp fine table salt. Use less as it's more concentrated.
- Pure Vanilla Extract (1 tbsp): For aromatic depth. Why this? Pure extract has alcohol which helps carry the floral scents through the fat.
- Sub: Vanilla bean paste for those beautiful black specks.
- Oreo Cookies (250g roughly chopped): The texture provider. Why this? The dark cocoa contrast is visually striking against white chocolate.
- Sub: Any chocolate sandwich cookie or even chocolate covered pretzels for a salty twist.
- Oreo Cookies (45g finely crushed): The garnish. Why this? Provides a professional "finished" look and immediate flavor signal.
- Sub: A dusting of dark cocoa powder or flaky sea salt.
Necessary Kitchen Equipment
You don't need a lot of gear for this, but the quality of your pan is non negotiable. A heavy bottomed saucepan is your best friend because it distributes heat evenly. Thinner pans have hot spots that will scorch the condensed milk before it even gets warm, and once milk sugar burns, it's game over for the flavor.
I usually reach for my stainless steel saucier because the rounded bottom makes it impossible for the chocolate to get stuck in the corners.
A silicone spatula is also essential. Unlike wooden spoons, silicone won't hold onto moisture or old flavors, and it allows you to scrape every last bit of that liquid gold out of the pan and into your 8x8 inch square baking pan. Make sure you use parchment paper with a good overhang.
Trying to dig fudge out of a pan without a "sling" is a recipe for heartbreak and broken cookie pieces. Trust me, the 2 inch overhang is a life saver.
Detailed Preparation Steps
- Line an 8x8 inch square baking pan with parchment paper, ensuring a 2 inch overhang on the sides for easy removal. Note: This acts as a sling to lift the chilled fudge out without cracking it.
- Roughly chop 250g of Oreo cookies into a mix of large and small chunks until you see various sizes. Note: Big chunks provide crunch, while small crumbs color the fudge.
- In a heavy bottomed saucepan over low heat, combine the sweetened condensed milk and kosher salt until the mixture is warm but not boiling.
- Remove the saucepan from the heat immediately. Note: This prevents the chocolate from overheating and separating.
- Add the 18 oz of white chocolate chips and let sit for 1 minute until the edges start to soften.
- Gently stir the mixture with a silicone spatula until completely smooth and emulsified.
- Fold in the 1 tbsp of vanilla extract and the 250g of chopped Oreo cookies until they are evenly distributed throughout the white base.
- Pour the mixture into the prepared pan, smoothing the top with your spatula until even and level.
- Sprinkle with the 45g of finely crushed cookie garnish until the surface is beautifully speckled.
- Refrigerate for at least 3 hours until the fudge feels firm and cold to the touch.
Troubleshooting and Easy Fixes
Why Your Fudge Is Grainy
If your fudge feels gritty on the tongue, it’s usually because the chocolate was overheated or the condensed milk started to crystallize. White chocolate is notoriously sensitive to high temperatures.
If you see it starting to look "chunky" rather than smooth during the stir, you’ve likely gone too far with the heat. You can sometimes save this by adding a teaspoon of warm condensed milk and whisking vigorously, but the best cure is prevention.
Why Your Fudge Is Soft
A fudge that stays "goopy" even after three hours in the fridge usually points to a ratio issue. If you accidentally used more milk or less chocolate, it won't have the structural integrity to hold a square shape. Another culprit is humidity. On very rainy days, the sugar can pull moisture from the air.
In this case, pop it into the freezer for 30 minutes before slicing to give it that extra boost of firmness.
| Problem | Root Cause | Solution |
|---|---|---|
| Oily Surface | Chocolate overheated and fat separated | Stir in 1 tbsp of room temp milk to re emulsify |
| Crumbly Texture | Too many cookies, not enough binder | Reduce cookie count next time or press firmly into pan |
| Stuck to Pan | Forgot the parchment paper | Dip the bottom of the pan in warm water for 10 seconds |
Common Mistakes Checklist
- ✓ Never boil the condensed milk; it only needs to be warm to the touch.
- ✓ Don't skip the salt - it's the only thing stopping the fudge from being too sweet.
- ✓ Use a "folding" motion for the cookies so you don't turn the whole batch grey.
- ✓ Let the chocolate sit in the warm milk for a full minute before stirring.
- ✓ Always use full fat condensed milk for the best structural set.
Creative Flavor Variations
If you want to move beyond the classic cookies and cream, this base is incredibly versatile. You can swap the vanilla for peppermint extract and add crushed candy canes for a winter holiday version. The white chocolate acts as a blank canvas for almost any flavor you can imagine.
I’ve even seen people stir in a tablespoon of instant espresso powder to the milk to create a "Latte Fudge" that is absolutely brilliant with the Oreo chunks.
Another favorite of mine is the "Birthday Cake" twist. Just swap half of the Oreos for colorful sprinkles and add a drop of almond extract along with the vanilla. If you're looking for a different kind of decadence to pair with this, I often serve these squares alongside a bowl of velvety hot fudge sauce for the ultimate dessert platter. It provides a nice temperature and texture contrast to the cold, firm fudge.
| Goal | Temperature | Setting Time | Texture |
|---|---|---|---|
| Soft Fudge | Room Temp (21°C) | 4 hours | Melts immediately, very creamy |
| Standard Square | Fridge (4°C) | 3 hours | Snappy bite, clean edges |
| Fudge "Bark" | Freezer (-18°C) | 1.5 hours | Hard shatter, great for snacking |
Scaling and Batch Adjustments
Scaling this recipe is fairly straightforward because the ingredients come in standard sizes. To double the batch, you'll need two 14 oz cans of milk and 36 oz of chocolate. However, I highly recommend using two separate 8x8 pans rather than one giant 9x13 pan.
Fudge is heavy, and it sets better when it isn't too thick. If the center is too far from the cooling edges of the pan, it might take much longer to set properly.
When halving the recipe, it gets a bit tricky because half a can of condensed milk is about 7 oz. You'll need to use a smaller loaf pan to maintain the height of the fudge. If you use a pan that's too big for a half batch, you'll end up with "fudge shingles" rather than thick, satisfying squares.
Always keep your salt and vanilla ratios proportional don't just eye it, or the flavor balance will be off.
Myths About Homemade Fudge
A huge misconception is that you need a "soft ball stage" for all fudge. That only applies to old-fashioned recipes made from scratch with sugar, butter, and milk. Since we are using white chocolate, which is already a stabilized fat and sugar product, we are simply melting and re setting.
There is no need to worry about sugar crystals or humidity as much as you would with a traditional recipe.
Another myth is that you can’t use white chocolate chips. Some purists say you must use expensive couverture chocolate. While couverture melts beautifully, standard high-quality chips (like those with real cocoa butter) work perfectly fine for this "oreo fudge recipe".
The secret isn't the price of the chocolate, but the temperature control. As long as you don't burn it, those chips will yield a fantastic result.
Storage and Keeping Fresh
Keep your fudge in an airtight container in the refrigerator. Because of the high milk and fat content, it can pick up odors from other foods (like onions or garlic) very easily. It will stay fresh and delicious for up to 1 week in the fridge.
If you're planning on keeping it longer, you can wrap individual squares in parchment paper and then place them in a freezer safe bag. It freezes beautifully for up to 2 months; just let it thaw in the fridge for an hour before eating so you don't chip a tooth on a frozen cookie!
For a zero waste tip, don't throw away those tiny cookie crumbs at the bottom of the bag. They make an excellent topping for yogurt or oatmeal, or you can stir them into a batch of brownies. If you end up with "ugly" end pieces of fudge after slicing, chop them up and use them as a mix in for vanilla ice cream.
It's basically a homemade version of "Cookies and Cream Extreme" and it's better than anything you'll find in the grocery store aisle.
Serving and Enjoying Tips
- 1. Obsidian Black
- These are the large chunks mixed inside. Add these at the very end of the folding stage so they don't bleed into the white base.
- 2. Pearl White
- This is the fudge itself. Keep your heat low so it stays bright white and doesn't turn yellow or tan.
- 3. Smoke Grey
- This comes from the fine dust of the crushed garnish. Sprinkle this on the very top while the fudge is still "tacky" so it sticks.
When it comes to slicing, use a long, sharp knife dipped in hot water and wiped dry between every single cut. This is the secret to getting those perfectly clean, professional edges you see in candy shops.
If the knife is cold or dirty, it will drag the cookie crumbs through the white fudge and make the sides look messy. Serve these at a slightly cool room temperature for the best flavor release, as cold fat can mask some of the subtle vanilla notes.
For an extra touch of "seasonal" flair, you can add a single edible gold leaf flake to the center of each square if you're feeling fancy. It looks stunning against the dark cookie garnish!

Recipe FAQs
What do you need to make Oreo fudge?
Gather 18 oz of white chocolate, 14 oz of full fat sweetened condensed milk, 0.5 tsp kosher salt, 1 tbsp pure vanilla extract, 250g of chopped Oreos, and 45g of finely crushed Oreos. These specific ingredients create the precise texture required for this fudge to set properly.
What are some tips for perfect Oreo fudge?
Use a heavy bottomed saucepan to prevent scorching the condensed milk and always remove the pan from heat before adding the white chocolate. Allowing the chocolate to sit for one minute before stirring ensures a smooth, stable emulsion, much like how you would achieve a tangy dressing consistency through careful, controlled mixing.
What are the common mistakes when making fudge?
Boiling the condensed milk or stirring the white chocolate too aggressively are the most frequent errors. Overheating causes the chocolate fats to separate, leading to an oily, grainy texture that cannot be fixed once it occurs.
Does Oreo fudge need to be refrigerated?
Yes, refrigeration is mandatory for this recipe to set correctly. The fudge requires at least 3 hours in the cold to become firm enough to slice into clean, 24-square portions.
Is it true I must stir the mixture over a high flame for a faster result?
No, this is a common misconception. You must keep the heat on low at all times; high heat will cause the sugars in the condensed milk to caramelize or burn, ruining the flavor and smooth mouthfeel of the white chocolate.
How to store leftover fudge to keep it fresh?
Place the squares in an airtight container within the refrigerator to prevent the fudge from absorbing other food odors. Properly stored, it will remain fresh for up to one week, or you can freeze it for two months if wrapped individually in parchment.
How to ensure the cookies stay crunchy inside the fudge?
Fold the chopped cookies in at the very last second before pouring the mixture into the prepared pan. If you stir too long or too vigorously, the cookies will soften and lose their signature snap against the creamy chocolate base.
Easy Oreo Fudge

Ingredients:
Instructions:
Nutrition Facts:
| Calories | 227 kcal |
|---|---|
| Protein | 3.1 g |
| Fat | 10.8 g |
| Carbs | 30 g |
| Fiber | 0.4 g |
| Sugar | 26.5 g |
| Sodium | 113 mg |
