The Neverending Copycat Authentic Fluffy Garlic Herb Breadsticks
- Unlock the Secret to Restaurant-Quality Italian Bakery Treats at Home
- Why This Copycat Recipe Captures the Iconic Olive Garden Breadsticks Magic
- Assembling Your Arsenal: Essential Components for Dough Perfection
- The Dough Development Phase: Kneading to Near Perfection
- Baking Mastery: Achieving Golden Edges and Soft Centers
- The Grand Finale: Applying the Famous Butter Glaze
- Mastering Storage and Reheating for Lasting Freshness
- Recipe FAQs
- 📝 Recipe Card
Unlock the Secret to Restaurant Quality Italian Bakery Treats at Home
There are few things more comforting than walking into a bustling Italian American restaurant and being presented with a basket of warm, garlicky breadsticks. They are the appetizer that initiates the feast, the perfect vehicle for dipping into rich marinara, and the treat that makes you wish they truly were never ending.
For years, those iconic, slightly sweet, yet deeply savoury breadsticks have been a culinary mystery reserved for dining out. However, I’m thrilled to share that mastering the Olive Garden Breadsticks Recipe is entirely within your reach.
Forget the dense, pre-packaged versions; we are diving deep into the process required to produce fluffy breadsticks that capture that unmistakable flavour profile, all in your own kitchen.
Why This Copycat Recipe Captures the Iconic Olive Garden Breadsticks Magic
Replicating a beloved chain favourite requires more than just combining flour and butter; it demands attention to the small details that elevate a simple dough into a signature experience. Our goal is to achieve that perfect exterior texture a slight crispness that yields immediately to a tender, airy crumb.
This specific copycat Olive Garden breadsticks formula leans heavily on utilizing both milk and a touch of sugar within the dough matrix, secrets that differentiate these from standard Italian bread sticks recipe attempts.
Your Kitchen's New Signature Scent: Beyond the Freezer Aisle
The moment you begin melting the butter for the final glaze, your home transforms. That powerful aroma of toasted garlic mingling with dried herbs is proof that you are on the right track.
This Olive Garden breadstick seasoning brush is non-negotiable; it’s what delivers that deep, satisfying savoury punch that makes these sticks so craveable. Achieving this level of fragrance and flavour locally ensures you never have to settle for freezer aisle mediocrity again.
The Quest for the Perfect Light and Fluffy Texture
The structural integrity of these breadsticks hinges on proper yeast management and minimal kneading. We want gluten developed just enough to hold its shape but not so much that the final product is chewy or tough.
By incorporating softened butter directly into the dough mixture, we slightly inhibit extensive gluten development, resulting in a wonderfully soft interior. This attention to dough handling is key to making these the best breadsticks recipe you’ll ever try.
What Makes These Breadsticks Unforgettably Addictive?
It boils down to a beautiful balance: a slightly sweet, pliable dough base, proofed just right to achieve maximum height, which is then drenched in the intensely flavourful garlic butter immediately after baking.
This recipe is surprisingly easy breadsticks recipe when you understand the yeast activation, leading to a very rewarding experience, especially when factoring in the relatively short bake time.
You'll find that our process allows for one hour breadsticks of proofing time before the final bake, making the total time manageable for a weeknight treat.
Assembling Your Arsenal: Essential Components for Dough Perfection
To begin crafting these glorious homemade Olive Garden breadsticks , preparation is crucial. We need to gather ingredients that support a soft, rich crumb structure.
For the dough itself, you will rely on active dry yeast, granulated sugar to feed that yeast, all-purpose flour, salt for flavour balance, whole milk at room temperature to enrich the dough, and softened unsalted butter cubes which will integrate seamlessly during the mixing stage.
Dry Goods & Leavening Agents: The Foundation of Fluff
Start with about three cups of all-purpose flour, reserving the remaining half cup for dusting and adjusting stickiness. The required teaspoon of salt is vital for tempering the slight sweetness from the sugar.
The yeast a standard 2 1/4 teaspoon packet is our engine, needing warmth and sustenance to work its magic.
The Liquid Gold: Water Temperature and Yeast Activation Secrets
The activation of your yeast is perhaps the most critical starting point. You must combine the yeast with warm water, ideally hovering between 105° F and 115° F ( 40° C– 46° C).
If the water is too hot, you kill the microorganisms; too cold, and they sleep in. After adding the tablespoon of sugar to encourage activity, wait patiently for 5 to 10 minutes until the surface of the water foams up, confirming your yeast is alive and ready to inflate your dough.
Immediately after the bloom, incorporate the room temperature milk for a smooth, rich final rise.
Tools of the Trade: Equipment Needed for Success
While a stand mixer with a dough hook can certainly speed up the process, this dough is manageable by hand. You will require a large mixing bowl, a rolling pin to achieve the correct thickness before cutting, and two sturdy baking sheets lined with parchment paper to prevent sticking and ensure even browning.
A reliable pastry brush is essential for the final, flavour drenching step.
Sourcing the Herbs: Fresh vs. Dried for Maximum Flavor
For the signature garlic herb brush, dried herbs are actually preferred here to achieve that classic, slightly muted herbaceous note found in the restaurant version. We use a mix of dried Italian seasoning, garlic powder, and dried parsley.
Keep the fresh herbs aside for garnish if you desire, but the dried varieties integrate better into the melted butter glaze without burning during the final application.
Related Recipes Worth Trying
- Easy Olive Garden Breadsticks Copycat Recipe Garlic Butter Soft Dough — Skip the restaurant This easy Olive Garden Breadsticks Copycat Recipe delivers pillowy garlicky perfection at home Nail the signature butter bath
- The Best Soft Homemade Breadsticks with Garlic Butter — Stop buying those dry sticks This Easy Homemade Breadsticks recipe delivers soft chewy perfection coated in garlic butter Ready in under two hours
- The Ultimate Fluffy Garlic Butter Breadsticks Recipe — Stop ordering takeaway sticks Make these easy homemade Garlic Butter Breadsticks fluffy inside and drenched in Parmesan crunch Perfect side dish
The Dough Development Phase: Kneading to Near Perfection
Once the yeast has bloomed and you have whisked the dry ingredients together, it's time to combine. Pour the yeast mixture and the milk into the dry ingredients. Mix until you achieve a shaggy mass. The secret ingredient the softened butter cubes goes in next.
Mix until those cubes are incorporated, then turn the dough out onto a lightly floured surface. Knead for only about 5 to 7 minutes. The goal is a dough that is smooth to the touch but remains relatively soft; over kneading is the enemy of a light texture.
Baking Mastery: Achieving Golden Edges and Soft Centers
Once the dough has undergone its initial, hour long proof in a warm spot, it should be nicely doubled in size. Gently punch it down and divide it into two equal portions. Roll each portion out to roughly a quarter inch thickness. Consistency here ensures that all your sticks bake evenly.
You will then cut these sheets into 8 or 9 strips each, resulting in 16 to 18 perfect breadsticks ready for their final rest.
Proofing Protocol: Ensuring Maximum Volume Rise
After shaping, allow the cut breadsticks a short 10-minute rest while your oven approaches temperature. This short relaxation period allows the yeast activity to resume post shaping, ensuring the sticks puff up beautifully during the bake rather than remaining flat or dense.
Shaping Tactics: How to Achieve Uniform Breadstick Lengths
When rolling and cutting, aim for strips about 6 to 7 inches long and roughly uniform in width. This uniformity is critical for ensuring that every single one of your Easy Breadsticks Recipe creations finishes baking at the same moment, preventing some from burning while others remain doughy in the centre.
Oven Calibration: Temperature Settings for That Signature Crust
Set your oven to a solid 400° F ( 200° C). This slightly higher temperature helps create that satisfyingly golden exterior crust quickly while the interior steam keeps the centre soft and pillowy.
Bake time should hover between 12 and 15 minutes, depending on your oven’s quirks. Watch the edges; they should just begin to show a lovely light brown hue.
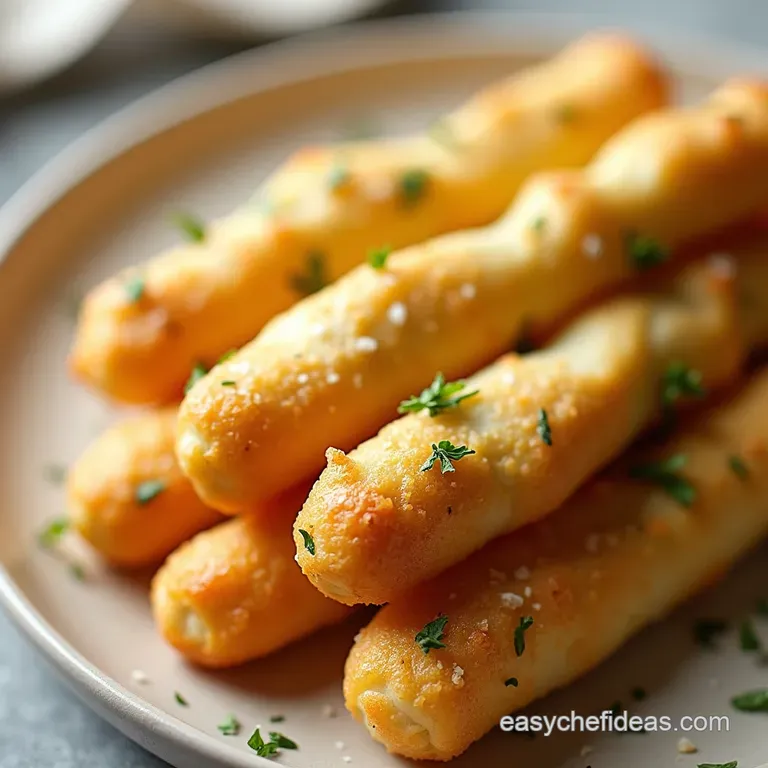
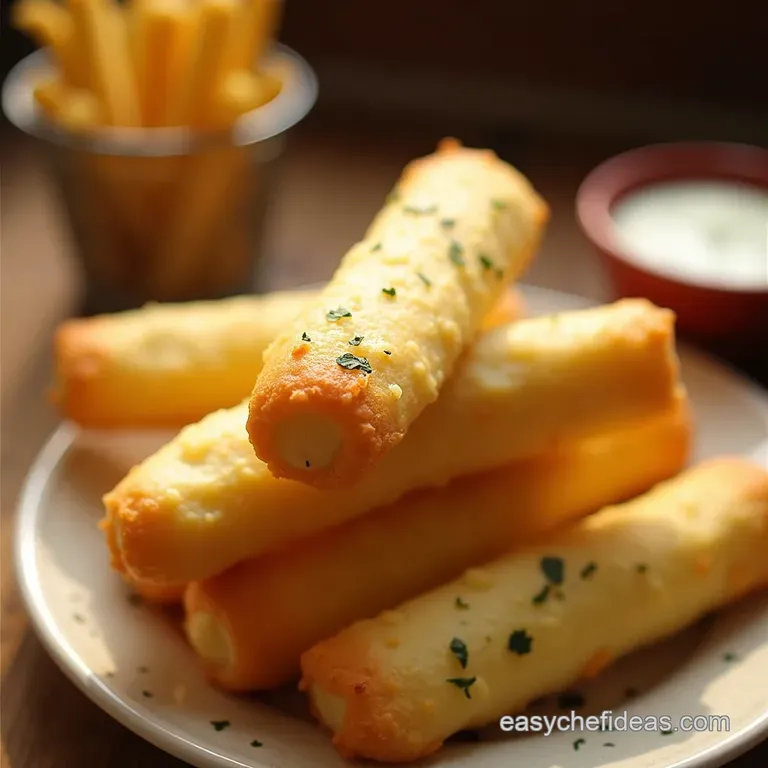
The Grand Finale: Applying the Famous Butter Glaze
This final step dictates whether you have merely good breadsticks or truly exceptional Olive Garden Breadsticks . Timing is everything here.
Butter Application Timing: Maximizing Herb Saturation
As soon as the baking sheet slides out of the oven, you must work quickly. While the sticks are piping hot, generously brush them with the prepared garlic herb butter. The residual heat melts the butter instantly, allowing it to soak deeply into the crust and crevices, delivering maximum flavour saturation before the sticks have a chance to cool down and seal their surface.
To prepare the glaze, simply melt half a cup of unsalted butter. Whisk in 1 1/2 teaspoons of garlic powder, 1 teaspoon of dried Italian seasoning, 1/2 teaspoon of dried parsley, and a pinch of fine sea salt. Heat gently just until the butter is melted and the aromas bloom avoid letting the garlic brown.
Brush liberally and serve immediately for the very best texture.
Mastering Storage and Reheating for Lasting Freshness
If, by some miracle, you have leftovers, these Homemade Olive Garden Breadsticks store surprisingly well. Once completely cooled, place them in an airtight container at room temperature for up to two days.
Freezing Instructions: Preserving the Freshness of Your Olive Garden Breadsticks
For longer preservation, these freeze beautifully. Bake them completely, let them cool, and then place them in a freezer safe, airtight bag or container. They can remain frozen for up to three months.
To reheat, unwrap them slightly and place them directly into a 350° F ( 175° C) oven for about 8– 10 minutes until heated through. You can re-brush with a little fresh melted garlic butter just before serving for a revitalizing boost.
Troubleshooting Common Dough Defeats
If your dough didn't rise, the primary culprit is usually the water temperature killing the yeast, or the yeast itself being expired. If the final breadsticks are too dense, it means you likely added too much flour during the kneading process or didn't allow adequate time for the first proofing stage.
Remember, for these Olive Garden Breadsticks , slightly sticky dough yields fluffier results!
Pairing Suggestions: What Italian Dishes Complement These Sticks Best?
While they are fantastic solo, these sticks shine alongside classic Italian fare. They are the perfect companion for a rich Lasagna, a comforting bowl of Chicken and Gnocchi soup, or even as an accompaniment to a bright, simple Spaghetti with Meat Sauce.
Herbaceous Enhancements: Adding a Kick of Red Pepper Flakes
If you enjoy a little warmth with your warmth, consider adding a quarter teaspoon of red pepper flakes directly into your melted garlic butter glaze. This small adjustment introduces a subtle heat that cuts through the richness of the butter beautifully without overpowering the classic herb profile, offering a delightful variation on the standard Italian Bread Sticks Recipe .

Recipe FAQs
How do I get the texture of the Olive Garden Breadsticks just right soft on the inside but not doughy?
The secret lies in the dough's fat and liquid content, much like a decent Victoria Sponge cake. Make sure your butter is properly softened and fully incorporated, and don't skimp on the milk.
Also, be careful not to add too much extra flour during kneading; if the dough is too stiff, the resulting breadsticks will be dense bricks, not fluffy pillows.
My yeast isn't bubbling up after I added the water; are my Olive Garden Breadsticks doomed?
Don’t panic just yet it’s usually a temperature issue. Yeast is quite fussy; if your water was too hot (over 130°F), it’s likely dead and you’ll need to start that step again with water around 105°F.
If the water was too cold, just give it a little more time in a warm spot, but if it's completely flat after 15 minutes, you'll need fresh yeast.
Can I bake these ahead of time, or should they be served fresh out of the oven?
Ideally, you want to serve them right away, as the garlic butter glaze is spectacular when hot and fresh. However, they store reasonably well for a day or two in an airtight container at room temperature.
To reheat, pop them in a 350°F oven for about 5 7 minutes until they are soft again; microwaving tends to make them rubbery, which is a culinary travesty!
What is the best dipping sauce to serve with these copycat breadsticks?
While they are fantastic on their own, nothing beats a hearty dipping sauce. The classic choice is a rich marinara or cheese sauce think of it like a grown-up version of cheese and toast soldiers!
If you’re feeling ambitious, a simple roasted red pepper dip also cuts through the richness of the garlic butter beautifully.
Can I freeze the breadstick dough before baking?
Yes, absolutely! Dough freezes like a charm, making it brilliant for future cravings. After the first rise (Step 7), lightly shape the dough into a log, wrap it tightly in plastic wrap and then foil, and pop it in the freezer for up to three months.
When you’re ready, thaw it in the fridge overnight, let it come to room temperature, then proceed with shaping and baking as normal.
Copycat Olive Garden Breadsticks

Ingredients:
Instructions:
Nutrition Facts:
| Calories | 327 kcal |
|---|---|
| Protein | 8.9 g |
| Fat | 13.1 g |
| Carbs | 26.2 g |
| Fiber | 4.6 g |
| Sodium | 5112 mg |
