Artisan Sourdough Bread: Airy and Crusty
- Time: Active 930 minutes, Passive 45 minutes, Total 975 minutes
- Flavor/Texture Hook: Shattering crust with a silky, custard like interior crumb.
- Perfect for: Weekend slow living, artisan level baking, and photography worthy kitchen projects.
- Achieving the Ultimate Crusty Sourdough Bread Recipe
- Mastering Success with Long Fermented Dough
- Timing and Weight Based Recipe Specs
- Necessary Ingredients and Shopping List Breakdown
- Essential Equipment for Professional Artisan Results
- Critical Key Steps for Perfect Strength
- Troubleshooting Sourdough Mistakes and Common Issues
- Adaptations for Dietary Needs and Flour
- Storing Bread to Maintain Shattering Crust
- Visual Garnish Strategy and Serving Suggestions
- Recipe FAQs
- 📝 Recipe Card
Achieving the Ultimate Crusty Sourdough Bread Recipe
The kitchen is quiet, save for the distinct, rhythmic crackling of a loaf cooling on the wire rack. It is a sound we bakers call the "bread song," a series of tiny snaps and pops as the scorching crust meets the cool morning air.
I remember standing by the window during the first frost of November, watching the steam rise from a fresh boule, the light catching the translucent, blistered skin of the dough. That specific aroma part roasted nut, part bright citrus tang is something that lingers in your memory long after the last slice is gone.
This sourdough bread recipe isn't just about making food; it is about capturing a moment of transformation. We start with simple flour and water, but through the alchemy of time and temperature, we create something structural and magnificent.
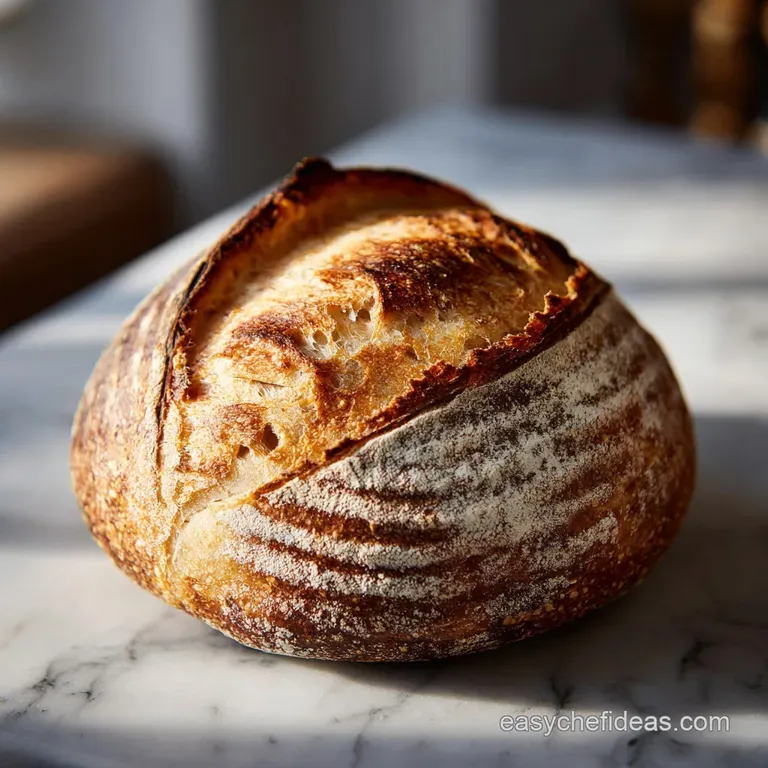
I have spent many mornings photographing these loaves, obsessed with the way the sunlight hits the "ear" of the crust. There is a deep satisfaction in seeing those wild, jagged edges bloom in the heat of the oven, revealing the pale, airy crumb hidden beneath a dark, caramelized exterior.
When you tear into this loaf, the crust should offer a substantial crunch before giving way to a center that is almost velvety. It is not just about the flavor, though the complexity of a 12 hour cold ferment is unmatched.
It is about the visual balance the stark contrast between the white flour dusting and the deep, scorched browns of the bake. We are going to walk through this together, focusing on the sensory cues that tell you exactly when the dough is ready to move from the bowl to the fire.
Why the Cold Ferment Works
Texture Refinement: The cold temperature slows down yeast but allows bacteria to continue producing organic acids, which strengthens the gluten and creates a more delicate, silky crumb. It also dehydrates the surface slightly, ensuring the crust will shatter like glass when sliced.
Mastering Success with Long Fermented Dough
Success in baking often comes down to how we handle the invisible life within the dough. I once thought that more heat meant faster bread, but I soon realized that patience is the most important ingredient in any artisan bake. By letting the dough rest in the refrigerator, we are allowing the enzymes to break down starches into simple sugars. This not only feeds the wild yeast but also provides the fuel for that stunning mahogany color we see after the bake. If you find yourself wanting a different texture for daily use, you might enjoy experimenting with a soft sourdough sandwich loaf which uses similar fermentation principles but focuses on a tighter, pillowy crumb.
The "stretch and fold" method is another secret that changed everything for me. Instead of aggressive kneading, which can tear the delicate gluten strands, we gently pull and fold the dough. This builds tension and strength while keeping those beautiful air bubbles intact.
You can feel the dough change from a shaggy, weak mass into a smooth, elastic ball that holds its shape. It is a tactile experience that connects you to the rhythm of the fermentation.
| Method | Time | Texture | Best For |
|---|---|---|---|
| Dutch Oven | 45 minutes | Shattering, thick crust | Classic artisan boules |
| Baking Stone | 40 minutes | Thinner, crisp crust | Baguettes or batards |
| Loaf Pan | 50 minutes | Soft sides, even crumb | Sandwiches and toasting |
Choosing the right method depends on what you want for your morning toast. The Dutch oven is my go to because it traps the moisture escaping from the dough, creating a mini steam chamber. This steam keeps the surface of the loaf supple for longer, allowing it to expand fully before the crust finally sets and browns.
Without steam, the crust hardens too quickly, leading to a dense, restricted loaf that cannot reach its full potential.
Timing and Weight Based Recipe Specs
When we look at the numbers, sourdough can seem intimidating, but think of it as a roadmap. Accuracy is our best friend here. I always use a digital scale because even a few grams of extra water can change the dough from "supple" to "impossible to handle." We are aiming for a specific hydration level that allows for a light crumb without making the shaping process a nightmare.
Component Deep Dive
| Ingredient | Science Role | Pro Secret |
|---|---|---|
| Active Starter | Natural leavening | Use it at its peak for the best rise. |
| Bread Flour | Gluten structure | High protein content (12%) ensures a tall loaf. |
| Whole Wheat | Flavor & nutrition | Adds a nutty depth and speeds up fermentation. |
The whole wheat flour isn't just there for health; it provides essential minerals that act like a booster for the wild yeast. It brings a gorgeous speckled appearance to the crumb, making each slice a work of art.
I love how the dark flecks of grain contrast with the creamy white of the bread flour, especially when viewed under a macro lens for photography.
Between our ingredient choices and the timing, every detail matters. For example, if you are looking for a quicker project that still uses these artisan techniques, you might try these sourdough demi baguettes which offer a similar flavor profile but in a smaller, faster baking format.
Necessary Ingredients and Shopping List Breakdown
Your pantry is the foundation of this bake. I recommend seeking out the highest quality stone ground flours you can find. The difference in aroma when you open a bag of fresh, locally milled whole wheat is staggering. It smells like a sun drenched field, and that scent carries all the way through to the finished bread.
- 35g active sourdough starter: This should be bubbly and smelling like sweet yogurt. Why this? It provides the wild yeast and beneficial bacteria needed for rise.
- 35g all purpose flour: Used specifically for the levain build. Why this? It offers a neutral base for the starter to feast upon.
- 35g filtered water (warm, 80°F): For the levain. Why this? Warmth accelerates the initial microbial activity.
- 400g bread flour (12% protein): The "skeleton" of your loaf. Why this? High protein creates the strength needed to trap gas.
- 100g whole wheat flour: For complexity. Why this? Adds fiber and a rustic, earthy flavor profile.
- 325g filtered water (room temperature): For the main dough. Why this? Hydration is key for an open, airy crumb.
- 10g fine sea salt: To season and control fermentation. Why this? Salt tightens the gluten and prevents over proofing.
| Original Ingredient | Substitute | Why It Works |
|---|---|---|
| Bread Flour | All Purpose Flour | Lower protein means a softer, less chewy crumb. |
| Fine Sea Salt | Kosher Salt | Same salty punch, but use slightly more by volume. |
| Filtered Water | Tap Water | Works fine if your water isn't heavily chlorinated. |
If you decide to use all purpose flour instead of bread flour, just be aware that the dough will feel a bit more slack. It might not get that dramatic "ear" or height in the oven, but it will still be silky and delicious.
I often use all purpose when I want a loaf that is easier for kids to chew, as it lacks the intense "snap" of high protein bread flour.
Essential Equipment for Professional Artisan Results
You don't need a professional bakery to get these results, but a few specific tools make the process much more consistent. I remember the days when I tried to score my bread with a kitchen knife it was a disaster. The blade dragged through the dough, tearing the surface instead of slicing it.
Investing in a simple lame changed my life.
- Digital Scale: This is non negotiable for consistent sourdough results.
- Dutch Oven: A heavy cast iron pot (like Lodge or Le Creuset) is the best way to bake at home.
- Banneton (Proofing Basket): This helps the dough maintain its shape and provides those iconic flour rings.
- Bread Lame: A very sharp razor blade for precise scoring.
- Bench Scraper: Essential for shaping and cleaning your workspace.
Having a heavy Dutch oven is like having a professional steam oven in your kitchen. It holds heat so well that when you drop the cold dough into the hot pot, you get an immediate burst of energy called "oven spring." This is where the magic happens.
The gases inside the dough expand rapidly, pushing the loaf upward before the crust sets. If you don't have a Dutch oven, you can use a preheated baking stone and a tray of boiling water on the bottom rack, though the results are often less dramatic.
Critical Key Steps for Perfect Strength
Building the levain is your first step. Mix your 35g starter, 35g all purpose flour, and 35g warm water. I usually do this in a small glass jar so I can see the bubbles forming along the sides. You want it to double in size and pass the "float test" if a small spoonful floats in water, it's ready to bake.
- Build the levain. Combine 35g starter, 35g all purpose flour, and 35g warm water (80°F). Note: This creates a concentrated "preferment" for the dough.
- Whisk flours. Combine 400g bread flour and 100g whole wheat in a large glass bowl. Note: Mixing them dry ensures even distribution of the grains.
- Combine ingredients. Add 325g water and the active levain to the flour mixture.
- Form shaggy mass. Mix by hand until no dry flour remains. Let rest for 30 minutes.
- Add salt. Sprinkle 10g sea salt over the dough and dimple it in with wet fingers.
- Stretch and fold. Perform folds every 30 minutes for 2-3 hours. until the dough feels smooth and strong.
- Bulk fermentation. Let sit at room temperature until the volume increases by 50%.
- Shape the loaf. Gently fold the dough onto itself to create a tight surface tension.
- Cold ferment. Place in a banneton and refrigerate for 12-18 hours. Note: This step is crucial for flavor development.
- Bake the bread. Preheat Dutch oven to 450°F. Score and bake 20 minutes covered, then 25 minutes uncovered until mahogany colored.
Chef's Tip: Use wet hands instead of floured hands when doing your stretches and folds. This prevents you from accidentally adding too much flour to the dough, which can make the final bread dense and dry.
The autolyse that 30 minute rest after the initial mix is a quiet but powerful step. It allows the flour to fully hydrate and the gluten to begin forming on its own. It makes the dough much easier to handle when you finally add the salt and start your folds.
I always notice that the dough goes from a lumpy mess to something that feels significantly more cohesive just from that short break.
Troubleshooting Sourdough Mistakes and Common Issues
Even after years of baking, I still have the occasional "pancake" loaf. It usually happens when I get distracted and let the dough ferment for too long at room temperature. The gluten structure essentially collapses, and the bread spreads out instead of rising up.
It still tastes great, but it doesn't have that visual "wow" factor we are looking for.
Why Your Loaf Turned Out Flat
A flat loaf is often the result of under shaping or over proofing. If the dough doesn't have enough surface tension, it won't have the strength to hold its shape against the heat of the oven. Think of shaping like wrapping a present you want the "skin" of the dough to be taut.
| Problem | Root Cause | Solution |
|---|---|---|
| Burnt Bottom | Heat transfer from rack | Place a baking sheet on the rack below the Dutch oven. |
| Sticky Dough | High hydration/Low strength | Add an extra set of folds or use slightly less water next time. |
| Gummy Crumb | Slicing too early | Wait at least 2 hours before cutting into the loaf. |
Don't be discouraged if your first few loaves aren't "picture perfect." Every kitchen has a different climate, and your starter will behave differently in summer than it does in winter. I've found that in the humid months, I need to reduce my water by about 10g to keep the dough manageable.
Common Mistakes Checklist
- ✓ Using a starter that hasn't reached its peak (it should be bubbly and active).
- ✓ Skipping the preheat your Dutch oven must be screaming hot (450°F) before the dough goes in.
- ✓ Scoring too shallow you need a deep cut (about 1/2 inch) to allow the bread to expand.
- ✓ Cutting the bread while it's still hot this ruins the internal texture and makes it gummy.
- ✓ Not using enough flour in the banneton, leading to the dough sticking and tearing.
Decision Shortcut
- If you want a tarter flavor, leave the dough in the fridge for the full 18 hours.
- If you want a milder flavor, bake the loaf after only 12 hours of cold fermentation.
- If you want a tighter crumb, increase the number of stretches and folds during the first 2 hours.
Adaptations for Dietary Needs and Flour
Sourdough is naturally more digestible than commercial bread because the long fermentation process breaks down much of the gluten and phytic acid. However, you can still customize this recipe to fit your specific needs.
I often add seeds or grains to my loaves to increase the fiber and add a crunchy texture to the crumb.
Can I make this a 100% Whole Wheat Sourdough?
You certainly can, but you will need to increase the water significantly. Whole wheat flour acts like a sponge, absorbing much more liquid than white bread flour. A 100% whole wheat loaf will be much denser and have a more intense, cereal like flavor.
I find that a 20% whole wheat blend (like the one in this recipe) is the "sweet spot" for most people, offering flavor without sacrificing the airy texture.
How do I make an "Inclusions" loaf?
Adding things like roasted garlic, rosemary, or even dried fruit is a wonderful way to play with seasonal flavors. I like to add my inclusions during the second or third set of stretches and folds. This ensures they are evenly distributed throughout the dough without being crushed.
Imagine a loaf filled with toasted walnuts and honey it is the ultimate autumn treat.
Storing Bread to Maintain Shattering Crust
Storing sourdough is always a bit of a tragedy because nothing beats that first day crunch. However, you can keep it fresh for several days if you avoid the refrigerator. The fridge actually accelerates the staling process (retrogradation of starch), making your bread tough and dry.
- Countertop: Keep the loaf cut side down on a wooden cutting board for up to 24 hours.
- Paper Bag: This allows the bread to breathe while protecting it from drying out too quickly.
- Freezer: Slice the bread first, then freeze in a sealed bag. You can toast individual slices directly from the freezer.
- Zero Waste Tip: If your bread does go stale, don't toss it! Cut it into cubes, toss with olive oil and herbs, and bake at 350°F until crispy. Homemade sourdough croutons are a revelation in soups and salads.
To reheat a whole loaf, splash the crust with a little bit of water and pop it into a 350°F oven for 10 minutes. The moisture will turn to steam, reviving the interior softness while crisping up the exterior once again. It is as close to "freshly baked" as you can get.
Visual Garnish Strategy and Serving Suggestions
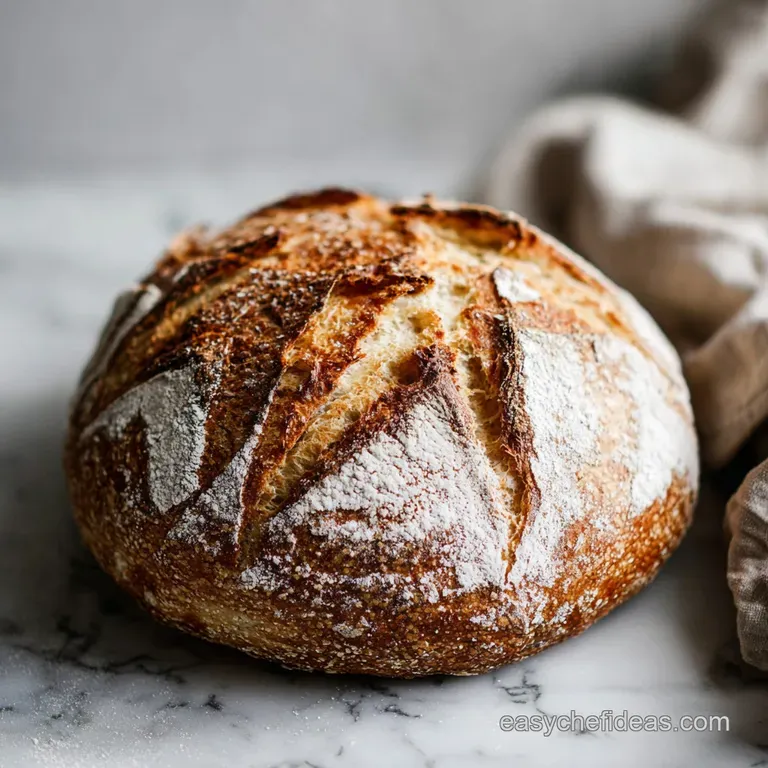
As someone who loves the visual appeal of food, I think the way you present your bread is just as important as how you bake it. This sourdough bread recipe creates a loaf that is naturally beautiful, but we can enhance it with a few artful touches. Think of the crust as a canvas for seasonal expression.
Color Balance Accents
- Emerald Green: Before baking, press a few sprigs of fresh rosemary or sage into the top of the dough. The heat will crisp them into the crust, adding a vibrant herbal note and a pop of deep green against the mahogany.
- Inky Black: Sprinkle nigella seeds or black sesame seeds into the bottom of your banneton. They will stick to the top of the loaf, creating a graphic, modern contrast against the white flour dusting.
- Golden Dust: Use a small sieve to dust the loaf with a mixture of flour and a pinch of turmeric before scoring. This creates a soft, golden glow that highlights the jagged edges of your cuts.
When serving, I love to pair this bread with a high fat cultured butter and a sprinkle of flaky sea salt. The richness of the butter cuts through the lactic tang of the sourdough perfectly. For a seasonal touch, serve slices alongside a bowl of roasted pumpkin soup or a bright, citrusy salad.
The visual of a thick, rustic slice resting next to colorful seasonal produce is exactly why I love food photography it tells a story of the season on a single plate.
| Feature | Fresh Sourdough | Grocery Store Bread |
|---|---|---|
| Ingredients | Flour, Water, Salt | Preservatives, Sugar, Yeast |
| Fermentation | 16+ Hours | 1-2 Hours |
| Digestion | High (prebiotics) | Low |
The difference is clear. When you put in the time, you aren't just making a loaf of bread; you are creating a masterpiece that nourishes the body and delights the eyes. So, grab your scale, feed your starter, and let's get baking. Your kitchen is about to smell like the best bakery in town.

Recipe FAQs
What's the secret to good sourdough bread?
Patience during the fermentation stage is the real secret. Giving the dough enough time to build strength through the 30-minute stretch and-fold intervals ensures a structure capable of holding a great rise.
What is the biggest mistake beginners make with sourdough bread?
Over fermenting the dough at room temperature is the most common error. This causes the gluten structure to collapse, resulting in a flat, dense loaf that spreads outward instead of rising upward.
Is sourdough bread really healthier than regular bread?
Yes, the long fermentation process improves digestibility. The extended time the wild yeast and bacteria spend breaking down the flour makes nutrients more bioavailable than in standard quick leavened breads.
Is sourdough bread low in histamine?
No, sourdough is generally considered high in histamine. The prolonged fermentation process that gives the bread its distinct tangy flavor also facilitates histamine production, which can be problematic for sensitive individuals.
How to keep the crust crispy after baking?
Store the loaf cut-side down on a wooden cutting board or inside a paper bag. Avoid the refrigerator at all costs, as the cold environment triggers starch retrogradation, which makes the crumb tough and ruins that initial shattered glass crust.
How to achieve a deep, mahogany colored crust?
Bake your loaf uncovered for the final 25 minutes at 450°F. If you enjoyed mastering this high heat crust development, you can apply similar principles for achieving a crisp texture in other flatbreads.
How to know when the levain is ready to use?
Look for the levain to double in volume and float in a glass of water. This 4-6 hour window ensures your starter is at its peak microbial activity, which is essential for a proper rise during the main bake.
Artisan Sourdough Bread

Ingredients:
Instructions:
Nutrition Facts:
| Calories | 141 kcal |
|---|---|
| Protein | 5.1g |
| Fat | 0.6g |
| Carbs | 28.8g |
| Fiber | 1.5g |
| Sugar | 0.4g |
| Sodium | 276mg |
