The Secret to Supper Success My Allbutter Truly Flaky Pie Dough
- Elevating Baking: Why This All-Butter Pie Dough Sets the Standard
- The Foundation of Flakiness: Understanding Our Dough Philosophy
- Assembling Your Butter-Rich Components for Perfect Pie Dough
- The Technique: Crafting Superior Flaky Texture Step-by-Step
- Chilling Commandments: Ensuring Dough Integrity Before Rolling
- Extending Shelf Life and Future Proofing Your Perfect Crust
- Recipe FAQs
- 📝 Recipe Card
Elevating Baking: Why This All-Butter Pie Dough Sets the Standard
Right then, let's get this pie dough sorted. Anyone can muck up a simple sponge cake, but a truly brilliant, flaky pie crust? That’s the mark of a decent cook, isn't it?
Think of this as our cornerstone recipe the foundation upon which all your future triumphs (apple, steak and ale, perhaps even a proper mince pie come Christmas) will rest. We’re aiming for that beautiful, buttery texture that melts in your mouth, not the sort that could double as roofing slate.
This isn't just any pastry; this is the backbone of a magnificent bake. We’re ditching the lard (unless you’re feeling particularly traditional, see substitutions!) for pure, cold butter to ensure maximum flavour and that irresistible layering.
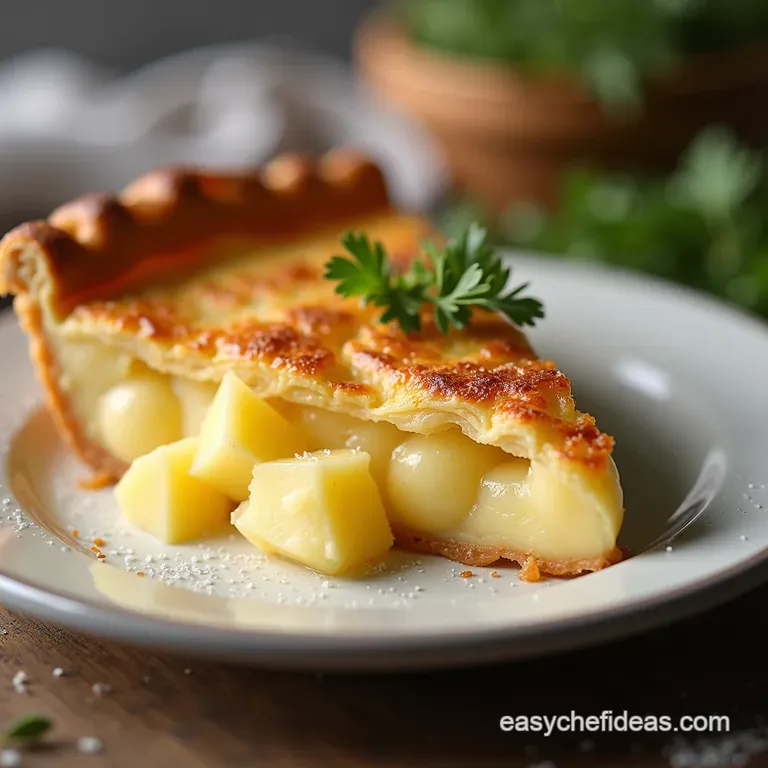
This dough is versatile enough for sweet fillings think summer strawberries or robust savoury offerings like a classic Chicken and Mushroom. It’s rich, tender, and shatteringly crisp when baked correctly. It’s the proper British way, darling!
The Foundation of Flakiness: Understanding Our Dough Philosophy
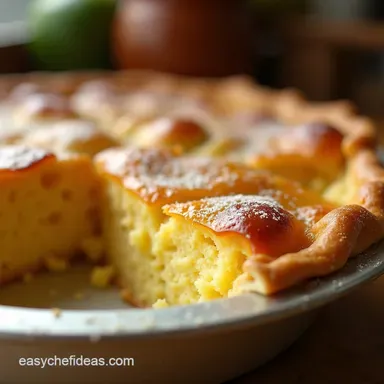
Creating superior pastry hinges on understanding what happens when fat meets heat. The goal is to create distinct layers of dough separated by pockets of fat. When that fat melts in the oven, it creates steam, which puffs up the surrounding dough, resulting in that shatteringly crisp, layered texture we adore.
Achieving this requires precision, particularly regarding temperature and mixing time. This pie dough recipe is designed to maximize this effect, making it the best pie dough you’ll attempt.
Ditching Slate: The Pursuit of a Truly Tender Bite
We are committed to tenderness here. A tough, chewy crust ruins the experience of even the finest filling. The reason this particular iteration leans heavily on butter using 1 cup (226 grams) for 2 ½ cups of flour is twofold: flavour, naturally, but also texture.
Butter has a higher water content than shortening, which, when kept fiercely cold, contributes directly to steam production and lift. We are aiming for the coveted "melt-in-your mouth" sensation, avoiding that rubbery texture associated with overdeveloped gluten.
Our Go-To Recipe for Every Seasonal Pie Filling
This foundational pie dough recipe with butter truly shines across the board. It’s sturdy enough to hold a hefty savoury filling, yet tender enough to complement delicate lemon curds or fresh summer berries.
This recipe yields enough dough for one double crust 9 inch (23cm) pie or two single 9 inch shells. While the ingredients are simple, this recipe falls into the 'Medium' difficulty level because success relies entirely on mastering the technique specifically, temperature control and minimal handling.
Expect about 20 minutes of active prep time, though the total time will easily stretch past an hour due to necessary chilling.
Mastering the Crucial First Step in Pastry Craft
The first rule in creating excellent pie dough from scratch is preparation. Before you even look at the flour, ensure every single component destined for mixing the butter, the water, and even the mixing bowl itself is as cold as physically possible.
This foundational step dictates whether you achieve flakiness or a heavy, homogenous texture.
Assembling Your Butter Rich Components for Perfect Pie Dough

For this ultimate flaky crust, you will need 2 ½ cups (300 grams) of all-purpose flour, 1 teaspoon of fine sea salt, 1 teaspoon of granulated sugar (which aids in browning), 1 cup (227 grams) of very cold unsalted butter, and 6 to 8 tablespoons of ice water.
Keep that water ready with a few ice cubes floating in it until the moment you need it.
Precision Matters: Selecting and Prepping Your Core Elements
When measuring your flour, ensure you spoon it lightly into the measuring cup and level it off; packing it down will introduce too much flour, leading to a dry, crumbly result. The sugar isn’t just for taste; it plays a minor but helpful role in achieving a beautiful golden hue on your finished crust.
Why Only Ice-Cold Butter Achieves Maximum Lift
The butter must be unsalted, firm, and cut into neat ½-inch cubes. Do not soften the butter under any circumstances! These distinct, cold cubes of fat are the secret weapon. As they bake, the water inside the butter turns to steam, forcing the surrounding dough layers apart.
If the butter is warm or partially incorporated, you simply end up with a greasy, dense crust rather than a light, layered one.
Tool Showcase: Essential Gear for Seamless Dough Integration
While some prefer the speed of a pie dough in food processor , I strongly advocate for cutting the butter in by hand for this flaky pie crust recipe . Using a pastry blender or even two dinner knives allows you to feel exactly how the fat is integrating.
If using a food processor, pulse very briefly no more than 10 to 12 short bursts to avoid over mixing the butter chunks into the flour.
Hydration Control: The Art of Adding Ice Water Gradually
This is where many bakers falter. Begin by drizzling 6 tablespoons of the ice water over your flour and-butter mixture. Use a fork to gently toss the ingredients together. You are looking for the mixture to just begin clinging together when squeezed.
Only add the remaining water, one tablespoon at a time, if the mixture remains too shaggy and dry to form a cohesive mass. We want minimal hydration here; too much water activates gluten prematurely.
Related Recipes Worth Trying
- The Ultimate Laminated Flaky Croissant Dough Recipe for Home Bakers — Demystifying the lamination process Learn how to make the perfect homemade flaky croissant dough with this stepbystep guide for shatteringly crisp layers
- The Best French Silk Pie Recipe MeltinYourMouth Heaven — Discover how to make the most decadent French Silk Pie with a crisp chocolate crust This recipe delivers that perfect meltinyourmouth texture Get baking
- The Best French Silk Pie Recipe Rich Creamy Foolproof — Forget complicated This easy French Silk Pie recipe delivers a rich unbelievably smooth chocolate silk filling Its the classic chocolate silk pie youve...
The Technique: Crafting Superior Flaky Texture step-by-step
Once the water is added, quickly gather the shaggy dough until it forms a rough mass. Resist the urge to knead it into a smooth ball! Divide this mass into two equal portions. Flatten each portion firmly into a thick disc, roughly 1 inch thick.
This flattening step is crucial as it begins to organize the gluten structure slightly without excessive manipulation. Wrap each disc tightly in plastic wrap.
Chilling Commandments: Ensuring Dough Integrity Before Rolling
These wrapped discs must now rest. This chilling phase is non-negotiable for any easy pie dough attempt. The refrigeration allows the flour to fully hydrate and, most importantly, allows the fat (butter) to firm up again.
This resting period must be at least one hour, though two hours is better, and up to two days is perfectly fine.
The Pulse Method: Cutting Fat into Flour Without Overworking
If you are feeling the dough heat up during the cutting-in stage perhaps your kitchen is warm it's better to stop, chill the flour and butter mixture for 15 minutes, and then resume.
The texture you are aiming for is coarse crumbs with several visible, pea-sized pieces of butter scattered throughout.
Forming the Discs: Gentle Handling for Optimal Layers
When you remove the chilled dough to roll it out, work quickly. Lightly flour your work surface. Take one disc and begin rolling from the centre outwards, rotating the dough every few turns to ensure even thickness and prevent sticking. Aim for a circle about 12 to 13 inches in diameter.
The key pie dough tips here are gentle pressure and frequent rotation.
The Essential Rest: Why Time in the Fridge is Non-Negotiable
That required rest period prevents shrinkage. Dough that hasn't rested has internal tension from mixing. If you roll it out immediately, that tension causes the dough to spring back as you try to fit it into the pie plate. Chilling releases that tension, resulting in a crust that sits perfectly against the pan walls.
Troubleshooting Flat Spots: Quick Fixes Before Baking
If you notice the dough cracking or developing flat spots while rolling, don't panic. Dust the area with a touch more flour and gently warm your hands slightly, pressing the crack together with your fingertips.
If the whole sheet feels too soft, simply return it to the fridge for 10 minutes before continuing.
Extending Shelf Life and Future Proofing Your Perfect Crust
One of the greatest advantages of mastering this homemade pie crust is the ability to prepare ahead. This dough freezes beautifully, meaning you can have perfect pastry ready for unexpected baking cravings.
Freezing Mastery: Storing Unbaked Pie Dough for Later Use
After you have formed the two discs and wrapped them tightly in plastic wrap, you can place them inside a freezer safe zip-top bag or airtight container. Label the package clearly with the date. This dough will keep perfectly for up to three months.
Thawing Safely: Bringing Frozen Dough Back to Rolling Temp
When you’re ready to use your frozen dough, transfer it to the refrigerator the night before you plan to bake. Allow it to thaw slowly and thoroughly in the fridge for 12 to 24 hours.
Never attempt to thaw pastry dough at room temperature, as this will compromise the crucial cold temperature of the butter pieces.
The Substitution Game: When to Swap Butter for a Different Fat
While this is an all-butter recipe celebrated for its flavour, you can certainly modify it. If you desire an exceptionally crisp, sturdy crust perhaps for a deep dish quiche you can substitute 1/4 of the all-purpose flour with finely ground almond flour.
For a different texture profile, some traditionalists prefer using vegetable shortening for half the fat content, though the rich flavour will be slightly diminished.
Baking Blind Secrets: Achieving Golden Bottoms Every Time
If your recipe requires blind baking, ensure your chilled dough is fitted into the pie plate, crimped, and then returned to the freezer for a final 20-minute chill before baking. Line the frozen shell with parchment paper and fill it with pie weights or dried beans.
Bake at 400° F ( 200° C) for about 15 minutes, then remove the weights and parchment to allow the bottom to dry out and brown further for another 5 to 10 minutes.
This rigorous chilling and baking process ensures a fully baked base that resists soggy bottoms.

Recipe FAQs
My Pie Dough keeps shrinking back when I roll it out what am I doing wrong?
Ah, that classic snap back! That's a telltale sign of too much gluten development, usually caused by either over handling the dough or using butter that wasn't quite cold enough. The dough is tense, so as soon as you release the pressure, it tries to return to its original size.
To fix this, give the dough a good 15-20 minute nap in the fridge before trying to roll again. And remember, don't knead it like bread; treat it gently, like you’re handling a valuable piece of lace!
Can I make this Pie Dough ahead of time, and how should I store it properly?
Absolutely, making it ahead is the savvy way to go! You can keep the wrapped discs in the refrigerator for up to two days it actually improves the texture slightly by allowing the flour to fully hydrate.
For longer storage, wrap the discs tightly in cling film, pop them in a freezer safe bag, and freeze for up to three months. When ready to use, thaw overnight in the fridge rather than on the counter, which keeps the butter solid.
I want a really flaky crust; should I use my food processor or stick to cutting the butter in by hand?
For truly magnificent flakiness, I always recommend cutting the butter in by hand using a pastry blender or two knives. This gives you much better control over keeping those crucial pea-sized chunks of butter intact.
While a food processor is quicker, it tends to over blend the mixture, incorporating too much flour with the fat, which results in a more mealy, shortbread like texture instead of those delightful, airy flakes.
Do I absolutely need sugar in my savoury Pie Dough, like for a steak and ale pie?
That’s a fair question! While the recipe includes a teaspoon of sugar, it’s not there to make the crust sweet; it’s actually for achieving a deep, golden brown colour during baking.
For savoury pies, you can safely omit the sugar entirely without compromising the structure, although you might miss that gorgeous deep tan colour unless you use an egg wash.
My crust always seems too soft to transfer to the pie dish what's the trick for moving the rolled Pie Dough?
This is where rolling technique really matters. Always roll your dough between two sheets of lightly floured parchment paper; this prevents sticking to the counter and makes transfer a doddle.
Once rolled, you can gently peel off the top sheet of paper, then carefully invert the dough (still attached to the bottom paper) directly over your pie dish, peel off the remaining paper, and settle it in. Rolling it loosely around your rolling pin also works in a pinch!
Allbutter Flaky Pie Dough
Ingredients:
Instructions:
Nutrition Facts:
| Calories | 86 kcal |
|---|---|
| Protein | 1.5 g |
| Fat | 9.3 g |
| Carbs | 20.0 g |
| Fiber | 0.2 g |
| Sodium | 4458 mg |
