No-Cook Chocolate Pudding Fruit Worm Delight
- look into Into the Whimsy: No-Cook Chocolate Pudding Fruit Worm Delight
- A Sweet Adventure Through Time
- Chocolate, Health, and Fun, Oh My!
- Essential Ingredients Guide
- Mastering the Art of Professional Cooking: Essential Steps to Success
- Step-by-Step Process: A Foolproof Guide
- Expert Techniques: Take It Up a Notch
- Success Strategies: Ensure You Shine
- Wrap Up: Where to Go Next
- Additional Recipe Information
- Frequently Asked Questions
- 📝 Recipe Card
look into Into the Whimsy: No-Cook Chocolate Pudding Fruit Worm Delight
Oh my gosh, remember those childhood days when dessert was the highlight of the week? if you were anything like me, the mere mention of chocolate brought the biggest smile to your face.
That’s exactly how i felt when i first whipped up this no-cook chocolate pudding fruit worm delight . it’s like a trip down memory lane mixed with a sweet adventure that’s just begging to be devoured!
Imagine this: you’re gathering around the table with your kids, and you ask them what dessert they’d love. “worms!” they scream in glee.
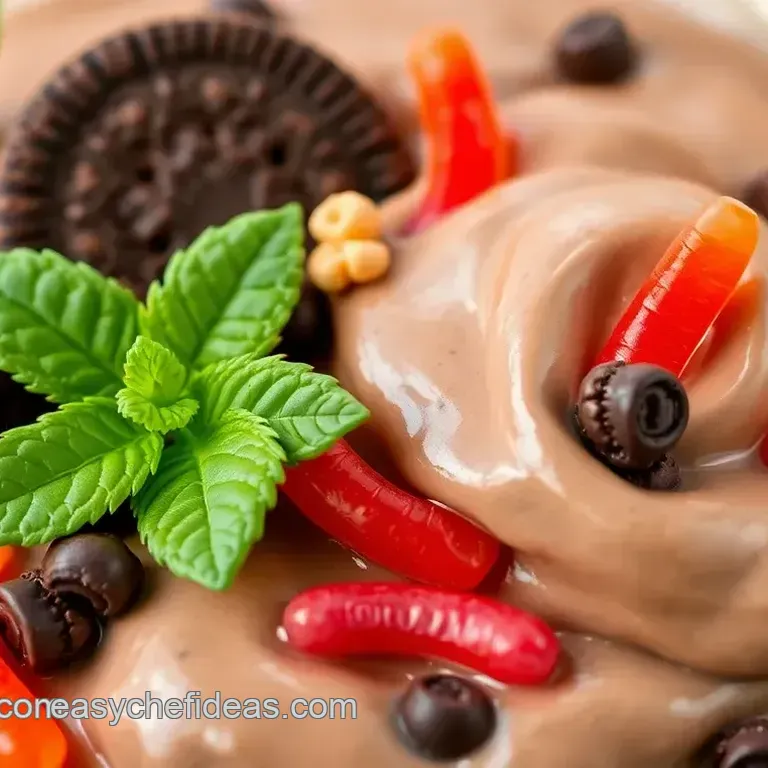
You see where i’m going with this? this dessert, with its silky chocolate pudding layered with fruity goodness and topped with gummy worms, is not just food.
It’s a playful moment that’ll make their eyes light up. it’s all about turning a simple recipe into a fun memory.
A Sweet Adventure Through Time
Now, let’s talk a little about where this dessert comes from. the dirt cup idea has been around for ages.
Parents have been delighting their kids with this playful concept as a celebration of whimsy. fast forward to today, and it’s still a hit! with no cooking required, it’s become a beloved staple for many families.
Plus, it’s a great no-bake option , perfect for those warm summer days when the last thing you want to do is turn on the stove.
Now, i get it you might be thinking, “this sounds fun but is it hard?” nope! this recipe is as easy as pie err, chocolate pudding.
It takes about 15 minutes to prep and a quick 30 minutes in the fridge. plus, it’ll yield four servings , making it great for a small gathering or a fun family dessert night.
And rest assured, you won’t break the bank on ingredients.
Chocolate, Health, and Fun, Oh My!
Let me spill the beans on the benefits of this delightful treat. first off, chocolate and fruit are a match made in heaven! the richness of the chocolate pudding is complemented beautifully by the freshness of mixed berries and bananas.
This combo isn’t just tasty; it’s a sneaky way to get in some healthy fruit, so you can feel a tad better about indulging in dessert!
What’s even cooler? it’s perfect for all those special occasions , whether it’s a birthday party, family game night, or just a warm summer evening.
Kids love the fun factor , while adults can appreciate the chocolate lover’s indulgence. you're getting a dessert that is not just about flavors, but about an experience it’s one of those fun desserts for kids that parents can appreciate too.
When you lay out all those layers in clear cups, you’re creating a feast for the eyes. it's real visual dessert layering ! each time you snag a spoonful, you’re in for a surprise with the gummy worms peeking through.
It’s all about a little creativity in the kitchen and making simple family desserts a special event.
So, are you ready to embark on this sweet adventure? let’s start with the ingredients needed for this playful dessert.
You’ll definitely want to check ahead and, trust me, you won’t regret it!
Ingredients Overview
For the Chocolate Pudding:
- 2 cups of whole milk
- 1 cup heavy cream
- 1/2 cup of granulated sugar
- 1/4 cup of cocoa powder
- 1 tsp vanilla extract
- 2 tbsp cornstarch
- A pinch of salt
For the Fruit Layer:
- 1 cup of mixed fresh berries
- 1 sliced banana
For the “Worms”:
- 1 cup of gummy worms
Gather these goodies, and we’ll dive right into creating a masterpiece of dessert together! trust me, your kids will be buzzing with excitement and you’ll have a new go-to for creative dessert presentation .
Let’s keep that kitchen magic alive!
Essential Ingredients Guide
When diving into the world of no-cook desserts , it’s all about having your essentials lined up. trust me, you don't want to be rummaging through your pantry while your dessert dreams are waiting, right? so let’s break down those premium core components you need.
Premium Core Components
Detailed measurements
alright, so first things first: knowing what and how much to use. for our no-cook chocolate pudding fruit worm delight , you’ll want 2 cups (480 ml) of whole milk and 1 cup (240 ml) of heavy cream.
This combo really gives that pudding a rich, creamy feel. the sugar? a smooth 1/2 cup (100 g) brings sweetness, while 1/4 cup (30 g) of cocoa powder offers that deep chocolate flavor.
If you’re like me and love a touch of vanilla in everything, you’ll want 1 tsp of vanilla extract . trust me; it makes a difference!
Quality indicators
want to know how to pick the best ingredients? look for milk that’s been stored properly no funny smells! for cream, it should be thick and luscious, and the cocoa? it should be dark and smell like pure chocolate goodness.
If your sugar is clumping, it might be time to toss it.
Storage guidelines
keep your ingredients safe! milk and cream get stinky if not chilled. use them within a week of opening, and always check that expiry date.
As for cocoa powder? that can last ages, but keep it in a cool, dry place. freshness is what we’re going for!
Signature Seasoning Blend
Now, onto the fun stuff: signature seasoning blends ! a little sprinkle here, a dash there...there's nothing like perfecting flavors.
For our dessert, it's pretty straightforward since we're using chocolate! but feel free to get creative: mix some cinnamon or even a touch of espresso powder for a kick if you’re feeling adventurous.
Essential Spice Combinations
Love a little spice? Think about adding a pinch of nutmeg or a dash of chili for an unexpected twist. Chocolate and heat can work wonders, y’all!
Herb Selections and Pairings
I know, herbs in chocolate? Sounds wild, but try mint or basil if you’re ready to mix it up!
Smart Substitutions
Sometimes, you just don’t have what you need on hand, right? Here are some smart substitutions that can save the day.
Common Alternatives
Out of milk? No problem! Sub in almond or coconut milk for a dairy-free version. Want it sweeter? Maple syrup is a lovely switch for sugar.
Dietary Modifications
For gluten-free fans, all components of the pudding are naturally free from gluten which is a win! Just make sure any add-ins or toppings are good to go!
Kitchen Equipment Essentials
Now, before we whip up this delightful treat, let’s talk about kitchen equipment essentials . You’ll need some basic gear to pull off this easy dessert recipe .
Must have tools
grab yourself a mixing bowl, whisk, measuring cups, and clear serving cups . i’ve found that clear cups are just so much fun for layering.
You get to see all those beautiful fruity chocolate treats !
Storage solutions
once you’ve made your pudding, make sure it’s stored properly in the fridge. a good airtight container goes a long way in keeping everything fresh and ready for you to dig into later.
That’s it! You’ve got the essentials to create your very own No-Cook Chocolate Pudding Fruit Worm Delight . This dessert isn’t just quick and whimsical; it’s an adventure waiting to happen in every bite!
Stay tuned for step-by-step instructions, because trust me, you’ll want to make this fun treat for the kids (and yourself, of course!).
Mastering the Art of Professional Cooking: Essential Steps to Success
Cooking professionally or just for fun? Either way, starting off right is key! Let's dive into some essential prep steps that’ll help you nail your dishes like a pro.
Mise en Place: The Secret to Success
First up, let’s chat about mise en place . fancy term, huh? but it just means having everything ready and organized before cooking.
Measure out all your ingredients and have them within reach. this saves you from scrambling during that crucial moment. imagine tracking down your cocoa powder while your chocolate's already melting! no bueno.
Time Management Tips: Be the Boss of Your Kitchen
Next, time management is crucial. create a schedule! if a recipe says you need 30 minutes to prep and 45 for cooking, break down these times.
Set timers on your phone. seriously, it’ll help you stay focused. and let’s be real there's nothing worse than overcooking your food because you got distracted scrolling through tiktok.
Organization Strategies: Keep It Clean
Now, let’s talk organization . clean as you go! it’s simple; if you keep your workspace tidy, you won’t feel overwhelmed.
I used to let my kitchen turn into a disaster zone, and believe me it wasn't charming. also, group similar items together.
Grains here, spices there. easy peasy. a little organization can keep chaos at bay!
Safety Considerations: Stay Sharp and Safe
Last but not least, let’s touch on safety . always use separate cutting boards for meat and veggies to avoid cross contamination.
Keep hot items away from the edges of the counters. that’s a recipe for disaster, trust me. and please, watch those knife skills keep those fingers out of the way!
step-by-step Process: A Foolproof Guide
Ready for a detailed guide? Here we go.
Prepare Your Ingredients:
- Gather everything.
- Measure, chop, and mix.
Control Your Temperature:
- Keep your oven at 350° F for baking.
- If frying, ensure that your oil’s at 375° F for crispy goodness.
Precision Timing:
- Follow specific timings strictly. A few extra minutes in the oven can mean burnt edges.
Visual Cues for Doneness:
- Trust your eyes! Look for golden brown on baked goods, or clear juices for meats.
Expert Techniques: Take It Up a Notch
Now, let’s sprinkle in some expert techniques .
Professional Cooking Methods
Use techniques like sous vide for meats to achieve perfect doneness. it might sound complicated, but it’s all about temperature and time.
Seriously, if you can control those, you’ll have the best steak of your life.
Critical Steps Explained
Don't underestimate marinating your proteins. This isn’t just about flavor; it tenderizes, too!
Quality Checkpoints
Always taste your food! It’s basic advice, but some rich sauces need a splash of acidity. A squeeze of lemon? Genius.
Troubleshooting Tips
If things don’t go as planned, don’t panic. Fix over seasoned dishes with sugar, or dilute a too-salty sauce with more liquid. Remember, every mistake is a lesson learned!
Success Strategies: Ensure You Shine
Avoid common pitfalls.
Mistakes to Sidestep
Don’t skip preheating your oven. I did that once trust me, the cake I made didn’t rise.
Quality Assurance Tips
Taste as you go! Ensuring flavor at each stage makes all the difference.
Perfect Results Guide
And remember, practice makes perfect. If you want to whip up something fun, try my No-Cook Chocolate Pudding Fruit Worm Delight ! It’s a playful treat that kids absolutely adore.
And let me tell you, it’s not just about taste. The layered dessert cups with chocolate and fruit pairing are a feast for the eyes.
make-ahead Options
Some dishes are perfect for prepping in advance. Soups and stews taste better the next day! Just don’t forget to store them properly.
Wrap Up: Where to Go Next
Cooking can sometimes feel like a mount everest climb, but arm yourself with these strategies, and you’ll be cooking like a pro in no time.
If you find yourself craving something sweet after all this discussion, you might want to try out that no-cook chocolate pudding fruit worm delight .
It’s an effortless treat that brings joy to the table without the hassle of cooking.
So go ahead, challenge yourself with that whimsical dessert idea. You won't be disappointed! Happy cooking, and don’t forget to check out more tips and tricks in the upcoming section: Additional Information.
Additional Recipe Information
Creating an enjoyable meal is more than just mixing ingredients; it’s about honing those secrets that make a dish truly sing.
Let’s dive into some pro tips and ideas that take your no-cook chocolate pudding fruit worm delight to the next level.
Seriously, who doesn’t want to impress their friends and family with an easy dessert that looks like a million bucks?
Pro Tips & Secrets
First off, let’s talk about the time saving techniques ! when whipping up your no-cook chocolate pudding, consider making the pudding the night before.
This way, it chills and thickens beautifully by the time you're ready for dessert. you can kick back, relax, and enjoy a well deserved break.
For that extra layer of flavor , try adding a dash of espresso or coffee granules to your chocolate pudding mix.
It’s a game changer! trust me; the rich, chocolatey goodness will knock your socks off. and don’t forget about presentation layering is key! use clear cups to show off those beautiful fruity colors nestled between smooth chocolate pudding.
Perfect Presentation
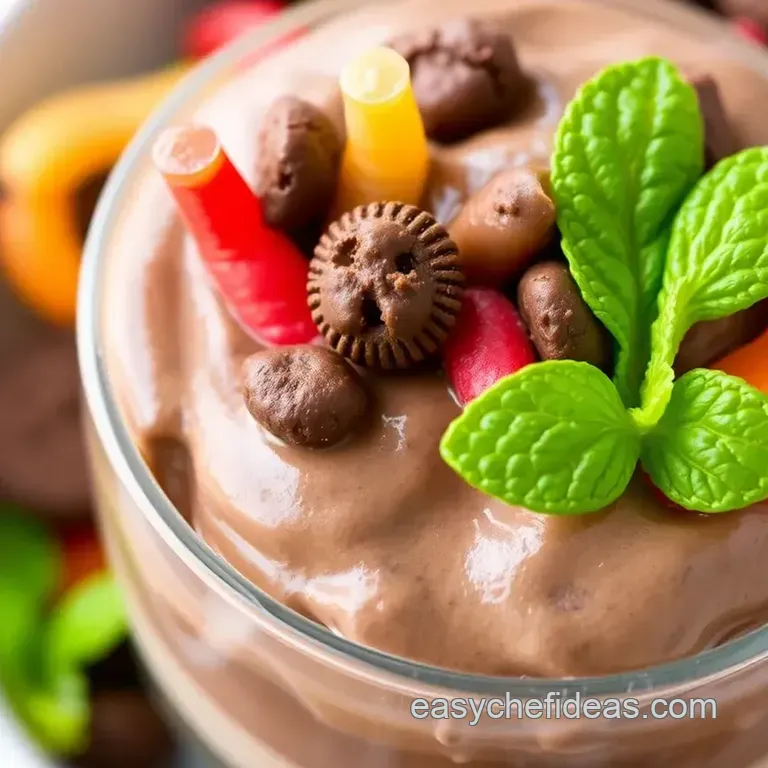
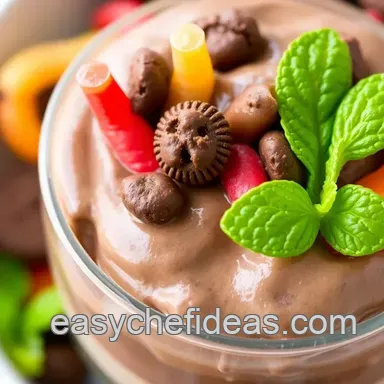
Okay, let’s get real about plating techniques . stack those layers high! start with a vibrant fruit layer like berries at the bottom it's like a party for the eyes.
Then, add that silky chocolate pudding , and top with sliced bananas. the gummy worms on top? they’re the cherry on the cake, or should i say, the “worm” on the pudding!
Garnish ideas are also a fun way to jazz things up. how about a sprig of mint or a dusting of powdered sugar on top for a pop of color? it’s all about making it look as good as it tastes.
Remember, visual appeal is everything. a colorful dessert gets everyone excited to dig in!
Storage & make-ahead
Now, if you have any of this delightful goodness left (and that’s a big if!), you’ll want to store it right.
Keep these pudding dessert cups covered in the fridge they’ll stay fresh for about 3 days. honestly, i’ve kept mine longer and still enjoyed it, but who’s counting?
If you're planning to enjoy this treat later, consider using glass jars with tight fitting lids. they not only look fabulous but also keep your dessert from absorbing unwanted flavors.
Just make sure to reheat carefully if you’re warming the pudding again nuking it in the microwave for short bursts works best.
Creative Variations
Let’s chat about creative variations ! feeling adventurous? try swapping out the fruit for seasonal picks. peaches in summer? yes, please! a tropical twist with pineapple and mango could totally transport you to the beach.
And for those with dietary needs, you can make this dessert dairy-free by using almond or oat milk instead.
Flavor adaptations are super fun too; add spices like cinnamon or a splash of vanilla for a unique touch. and don’t shy away from regional variations mix it up with some local fruits that are in season! trust me, the creativity in your kitchen will pay off in the tastiest ways.
Complete Nutrition Guide
Let’s not forget about health! the nutritional breakdown for your no-cook chocolate pudding fruit worm delight has a little bit of everything think protein from the milk and healthy carbs from the fruit.
It’s all about balance, right? finding healthy dessert options makes that sweet tooth a bit less guilty.
When it comes to portion guidance, keep it simple; a serving size of about one cup should do. if you're making this dessert for a crowd, consider doubling the recipe.
Guests will adore these pudding dessert cups as a whimsical end to any meal. plus, they’re fantastic fun desserts for kids , so you might find some little helpers wanting to join in on the dessert assembly activities!
Conclusion
This no-cook chocolate pudding fruit worm delight is more than just a dessert it's an experience! your family and friends will feel like kids again, digging into those layers of chocolatey goodness.
So, dive in, get creative, and make your own homemade dessert inspiration . whether you're enjoying it at a summer gathering or for just a cozy night in, i promise, this is one recipe you'll want to revisit over and over again! happy cooking, my friends!
Frequently Asked Questions
What is the best way to store leftover No-Cook Chocolate Pudding Fruit Worm Delight?
To store leftovers, keep them in an airtight container in the refrigerator for up to 2 days. If you have already added gummy worms, it's best to eat them within a day for optimal texture, as they can become soggy after sitting in the pudding too long.
Can I make No-Cook Chocolate Pudding Fruit Worm Delight ahead of time?
Absolutely! You can prepare the chocolate pudding and layer the fruits in advance. Just keep the pudding refrigerated and assemble the dessert with gummy worms just before serving for maximum freshness and crunch.
What fruits can I use in the No-Cook Chocolate Pudding Fruit Worm Delight?
You can use a variety of fruits! While strawberries, blueberries, and bananas are great options, feel free to experiment with raspberries, kiwi, or even tropical fruits like mango or pineapple to add a unique twist to your dessert.
How can I make a dairy-free version of No-Cook Chocolate Pudding Fruit Worm Delight?
To create a dairy-free version, substitute whole milk and heavy cream with almond milk, coconut milk, or any other non-dairy milk of your choice. Ensure that the cornstarch and sugar remain the same, and you'll enjoy a delicious alternative without the dairy.
What are some variations I can try with this dessert?
You can switch up flavors by creating a Chocolate Banana Pudding Delight using only bananas, or consider a Tropical Twist featuring pineapple and mango. For a crunchy texture, topping with crushed nuts can elevate the experience!
Why is chilling the pudding important in the No-Cook Chocolate Pudding Fruit Worm Delight?
Chilling the pudding allows it to set properly, giving it a thicker and creamier texture, which enhances the overall dessert experience. A minimum of 30 minutes is recommended, but chilling for up to an hour can yield even better results.
No Cook Chocolate Pudding Fruit Worm Delight
Ingredients:
Instructions:
Nutrition Facts:
| Calories | 300 |
|---|---|
| Protein | 4 g |
| Fat | 15 g |
| Carbs | 40 g |
| Fiber | 3 g |
| Sugar | 22 g |
| Sodium | 80 mg |
